[Update: Daz3D released the “Daz to Unity Bridge” here which we explain in our detailed Daz to Unity Bridge Tutorial].
In this article we are going to learn how to export Daz3d to Unity without using the Bridge add-on. In quick simple steps we will go over three main cases: Assets, such as inanimate objects; characters without riggings or morphs and last but not least, characters with applied riggings and morphs for more dynamic purposes. At the end of this tutorial you will have a general good knowledge to be able to export any type of project to your Unity software platform.
Exporting Inanimate Objects
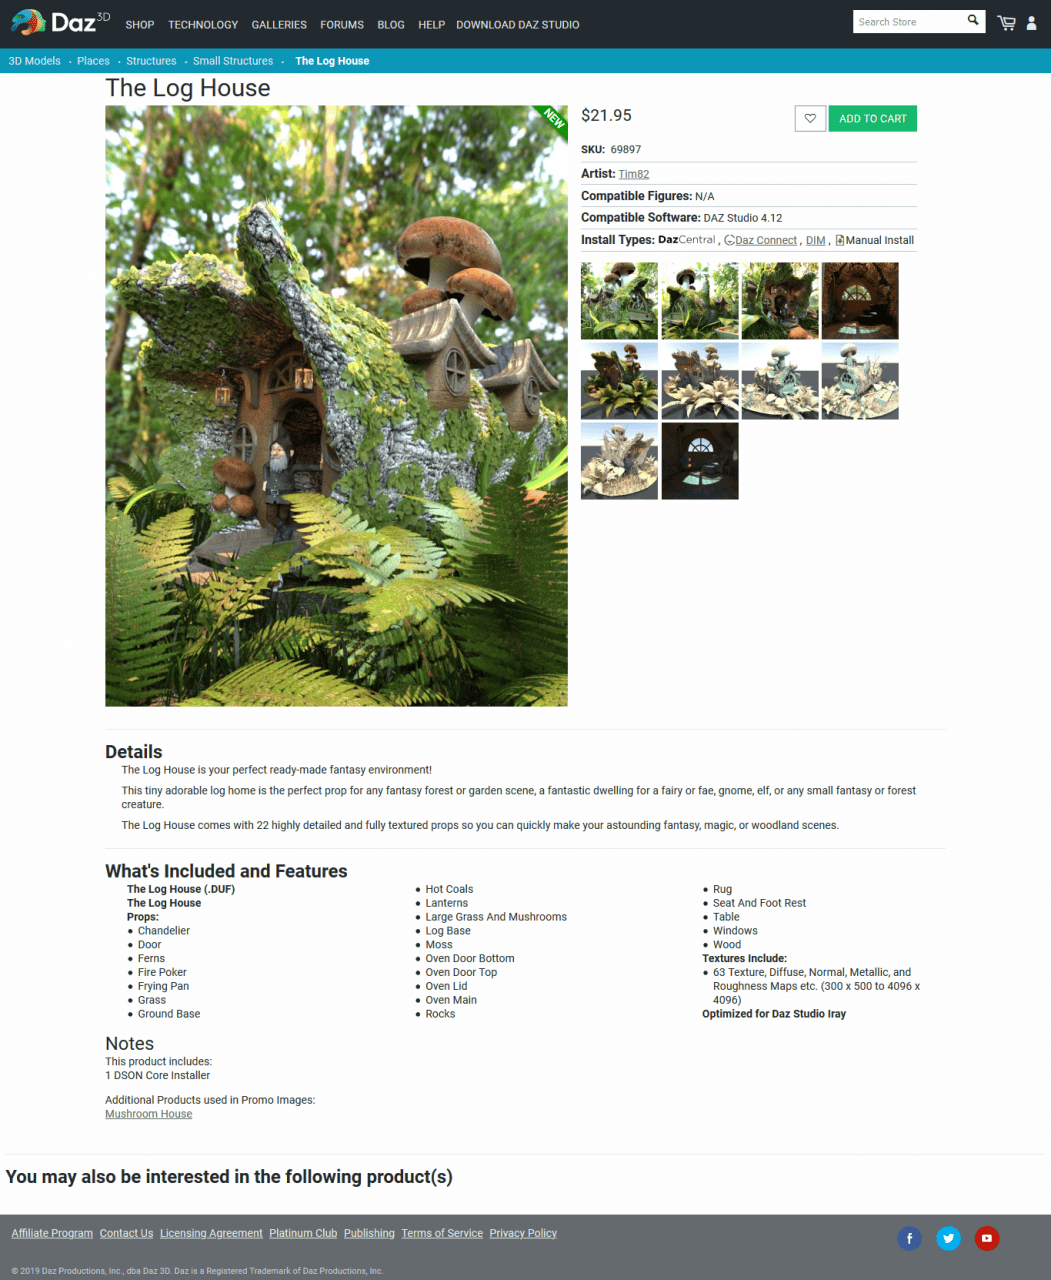
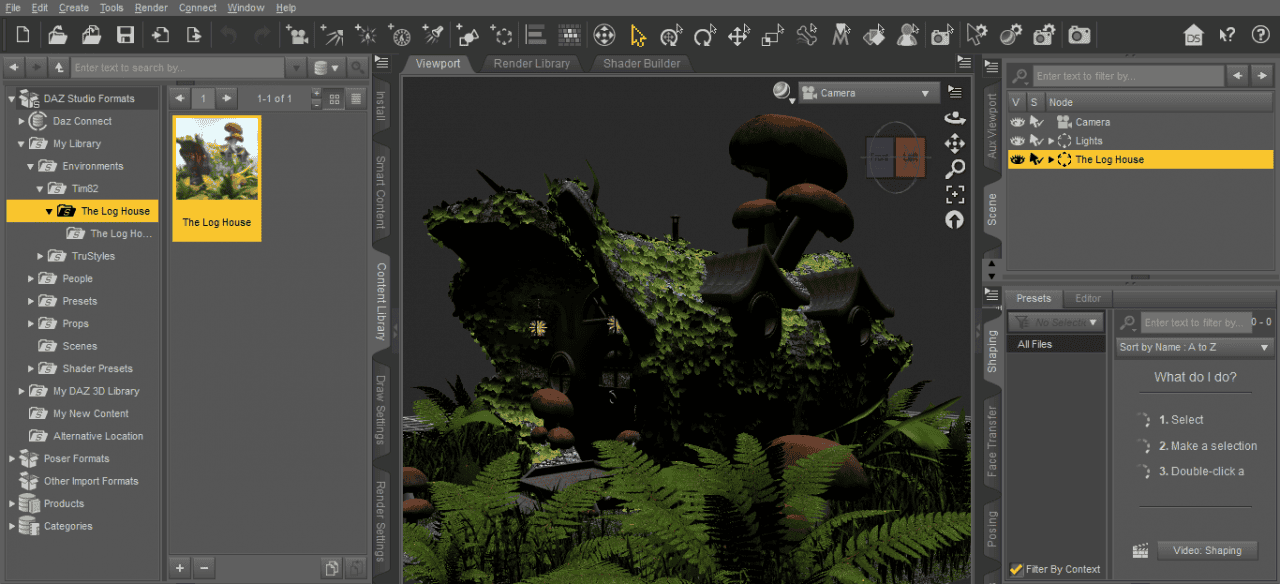
For our first case, I have decided to work with The Log House that you can download from the Daz Marketplace.
As we can see in the picture, we will be exporting the asset as well as some lighting settings that come by default with the house.
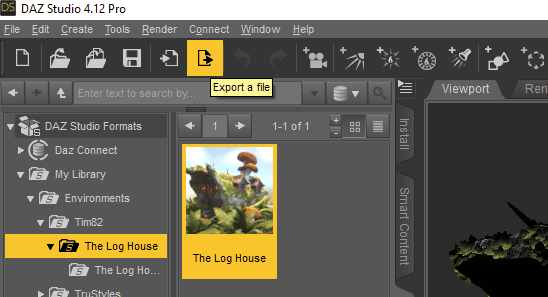
We will click on Export and save our file in .fbx format file.
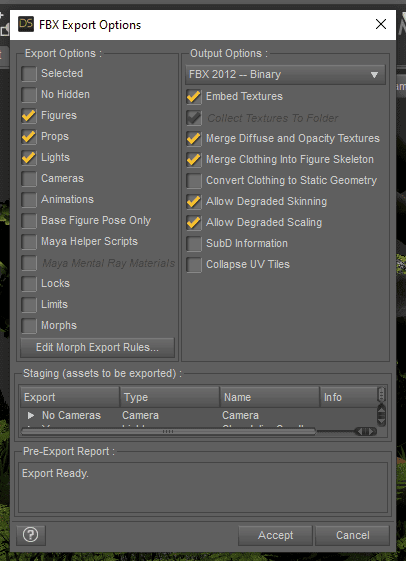
As we can see, the Export Options Window will appear. Just as shown we need to have these boxes tickled. I also included the Lights checkbox because it comes by default with the scene but is it not necessary. Click on Accept to finish.
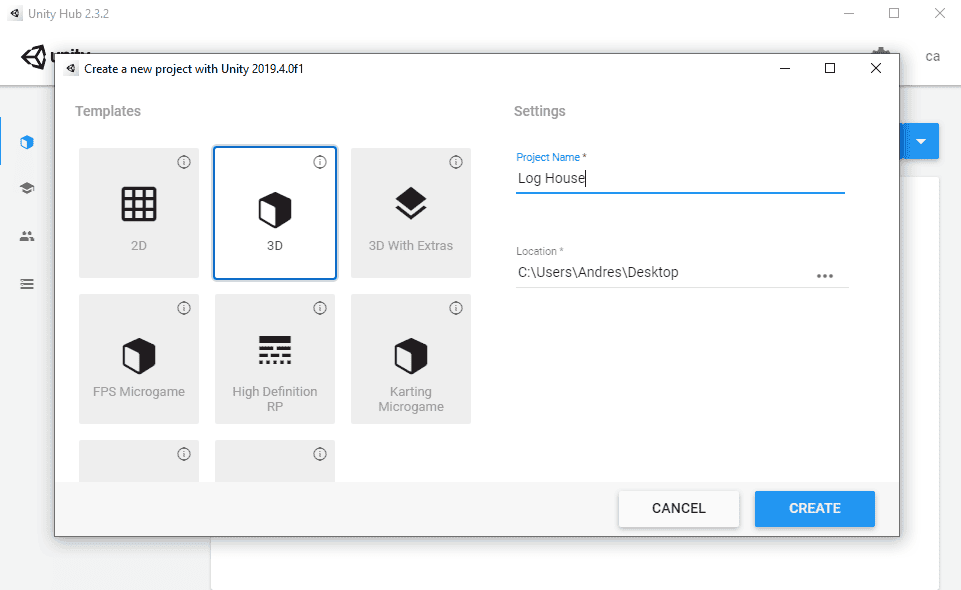
All done with Daz Studio, we will proceed to create our new Unity project. We will choose a new 3D template.
We will drag and drop our .fbx file to our assets tab. After that, click on the object and a new set of options should appear under the name of Inspector tab.
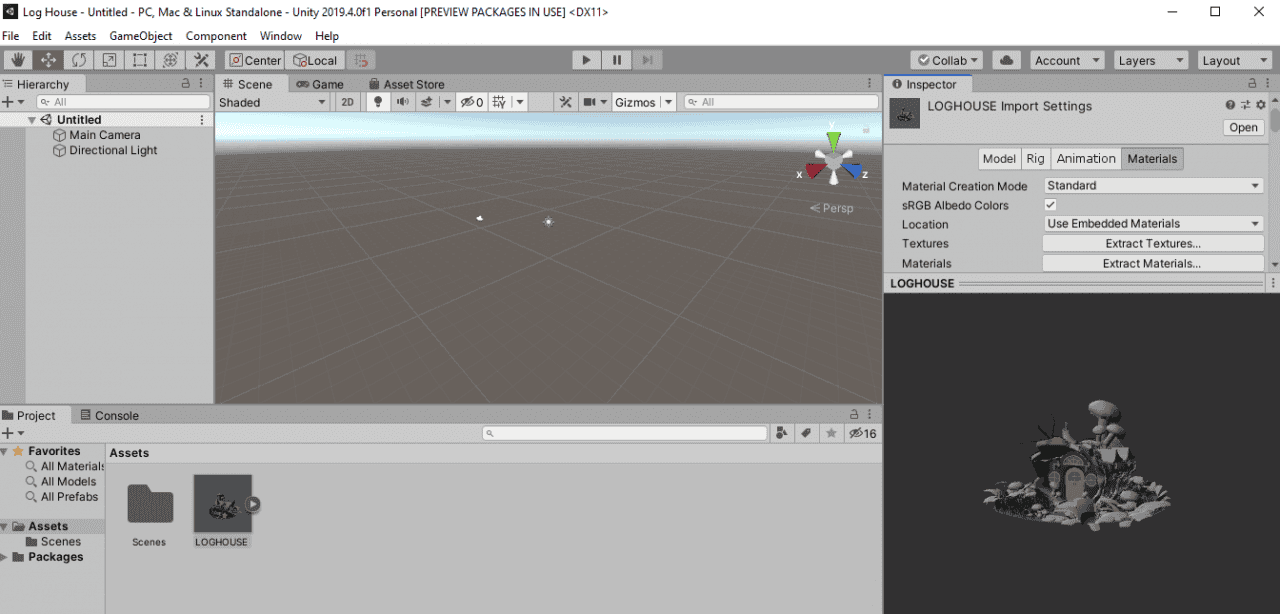
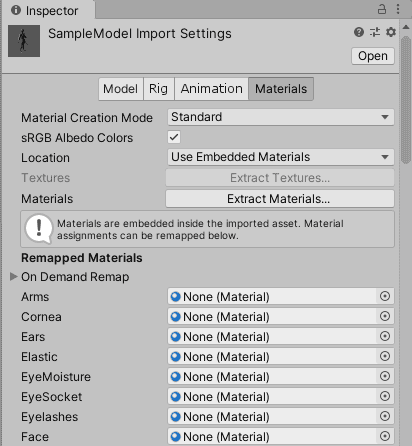
Now we need to import our textures and materials to embed in the object geometry. Click on Extract Textures first.
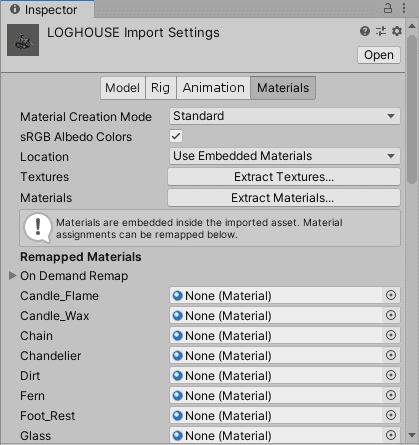
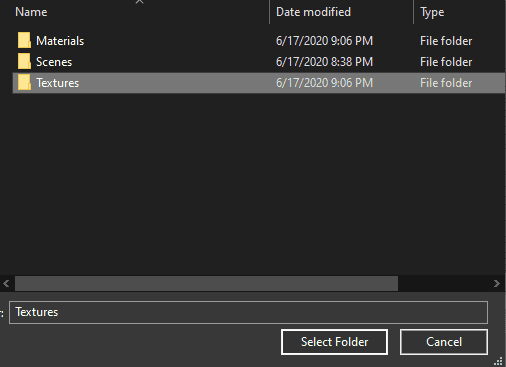
We will create a new folder where all the content will be located. After creating the folder click on Select Folder. The import process should start. We will do the same for our materials. Select on Extract Materials, create a new folder, and we save our content there.
In my case there are tons of textures and materials, so it took a few minutes to load. You can click on any tab afterwards in case it did not refresh. Once in the preview window we see all components applied we can proceed to place our object in our 3D viewport.
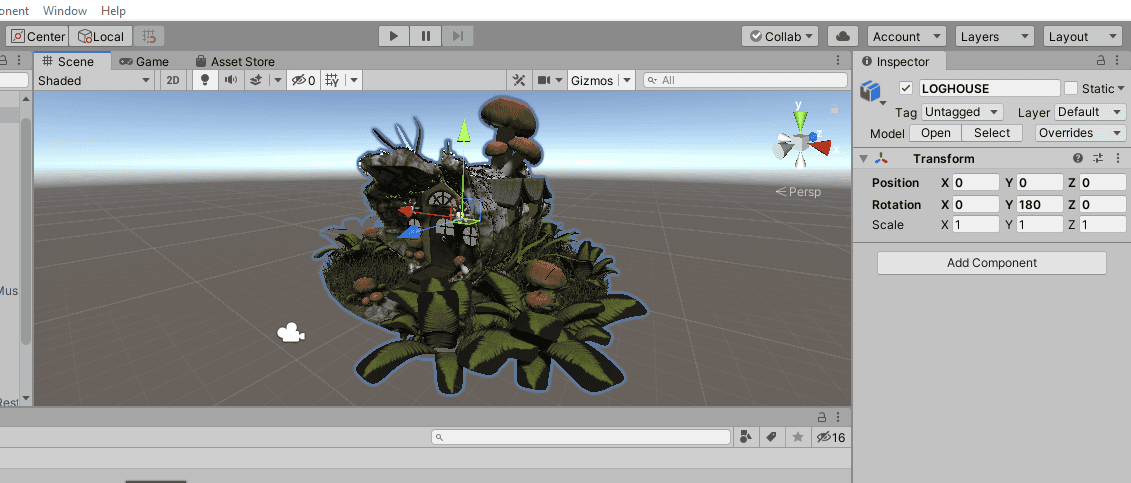
In the Inspector tab I changed a few parameters to center and rotate the object as seen in the picture.
From here on, you can also manage the lighting settings by clicking on Window >Rendering > Lighting Settings to find the proper environment lighting and temperature.
We are almost finished, but we will make a few more adjustments to the scene. Can you see the problem here? Yes, the plant textures were not properly loaded, and that’s because we need to indicate to remove the black background.
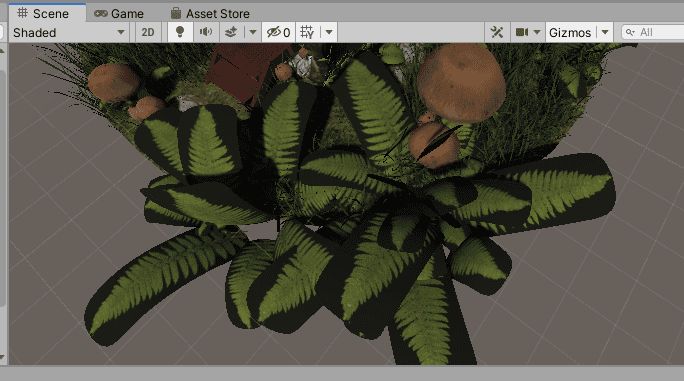
We will head to the plant texture and check the box “Alpha Is Transparency”. Alpha Source: Input Texture Alpha selected.
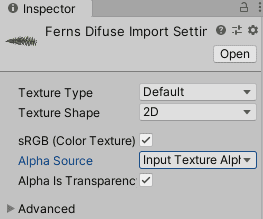
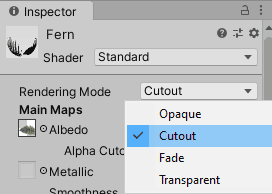
Next, go to its matching material and set the rendering mode to Cutout. Always apply changes before you are done.

Now yes, the plant textures look as intended and the object has been correctly loaded. This is how you can export a static model from Daz3d to Unity,
Exporting Inanimate Characters Daz3d to Unity
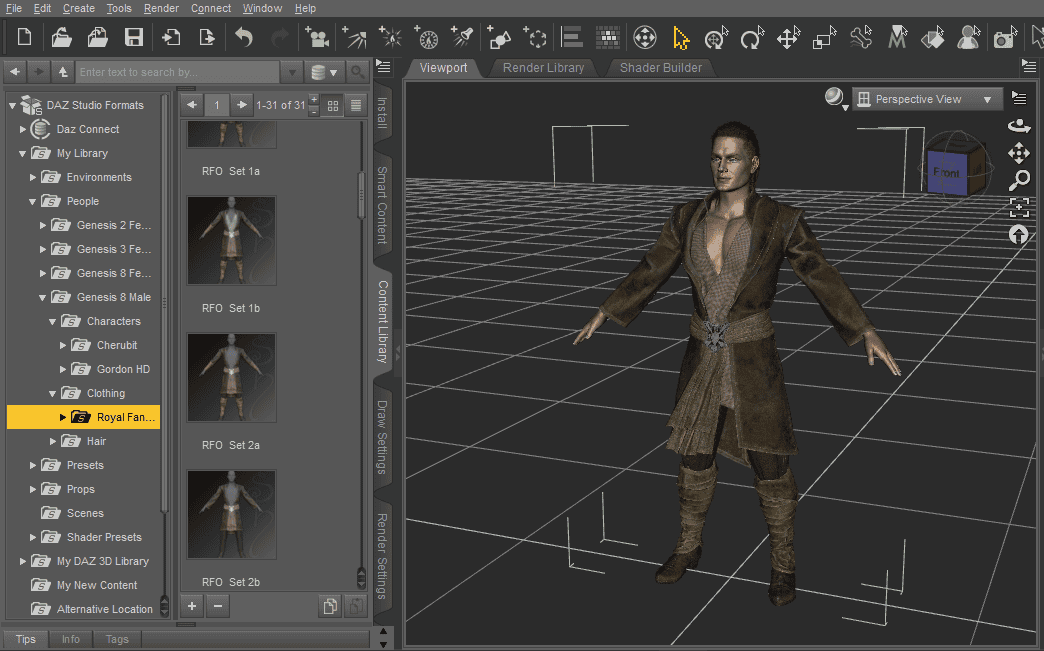
For our next case, I will be using the following products that you can also download from the Daz Marketplace. These are dForce Fantasy Outfit for Genesis 8 Male and Allen Hair for Genesis 8.
Before we go and export the file, we will create our folder named “Assets” and inside we want to save the export file with the textures.

After we have created our character head to export the file to save it as a .fbx format file inside the “Assets” folder.
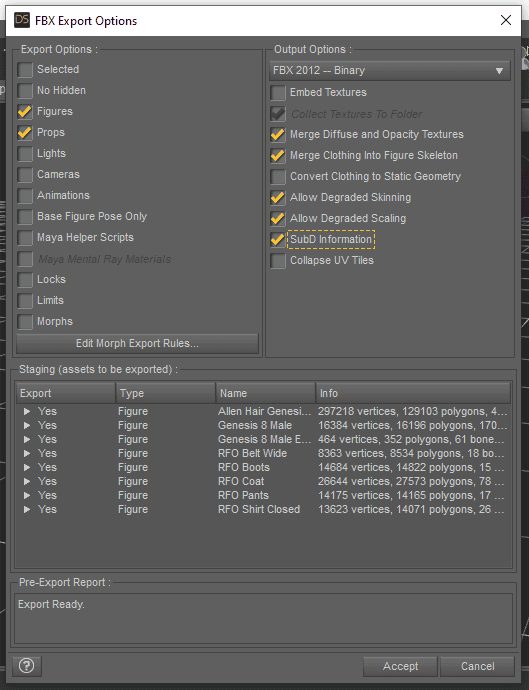
We want to keep the figure, our model in this case and props which are basically clothing and wearables (hair). The rest of the options in this particular case are not worth checking. Click “Accept”.
Now, one more step before we jump to Unity. When we export our texture pack to Unity it generally happens that it only exports some of them and other important maps such as normal and roughness maps are not copied. How to solve it? Very simply.
We are going to copy all the texture images from each product set. Head to the Surface tab and find an image that has been linked to our character, as seen in the example.
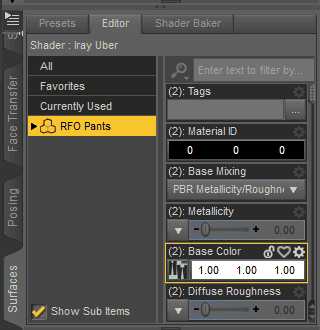
In the example is shown the parameters for our RFO Pants. In our Base Color option we can click to see the directory of our texture maps.
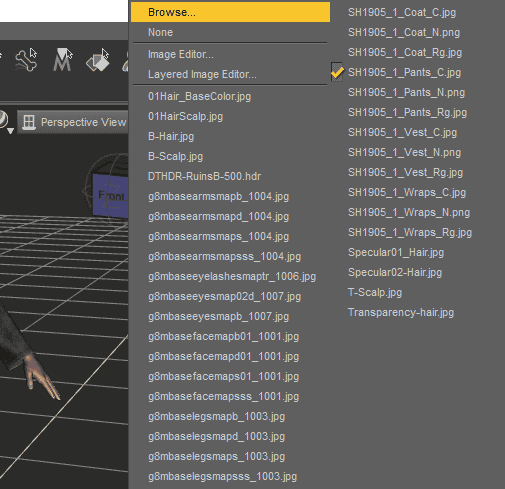
Now click on Browse to find the folder and copy all the content to our newly created folder with the textures. You can right click in the directory to copy the address.
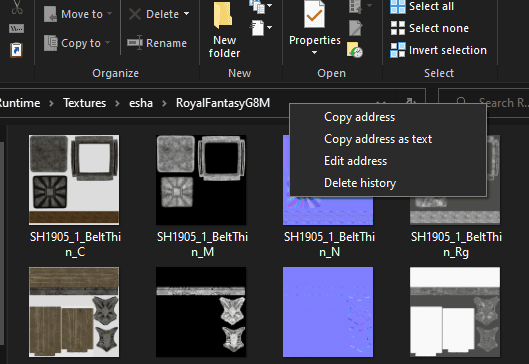
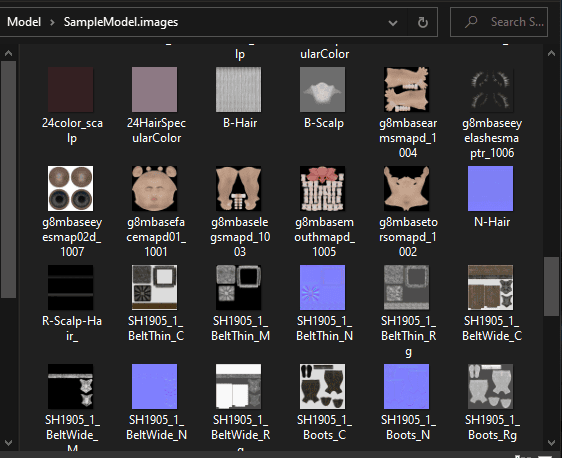
We will do this for our male model skins, clothing and hair sets of texture. Worth noting, we only need to trace at least one piece from the set, since in the origin folder we will find the textures for the whole package.
Reminder: Check your texture folder in any project before you move to Unity, you might be missing important data.
Ready? Lets move to Unity!
We will create a new 3D project, name it and drag and drop our Assets folder to our pane.
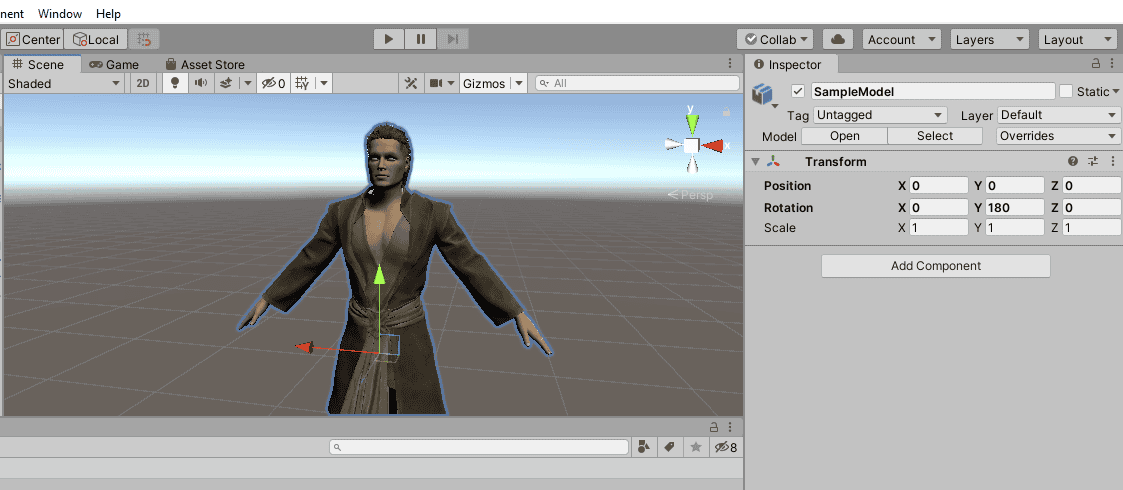
Click on the .fbx file thumbnail and drag it to our viewport. The character will be visible with some textures applied. You can also change the position to 0,0,0 and rotation to face the light source.
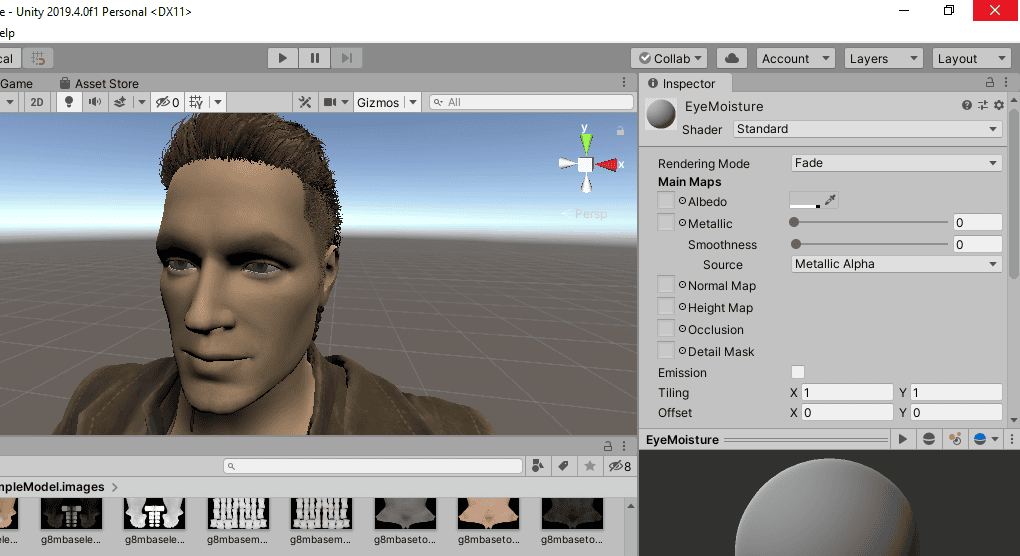
Now we head to the inspector and we will trance and bring our materials to our model. Click on Extract Materials and select your “xxx.image” folder. We will place all the maps there.

For the last part, we want to make the final adjustments just as we did with the previous case. Change eyelashes’ alpha to transparency and its material to fade. For the Cornea, we will do just the last step, Rendering Mode > Fade and Albedo transparency to its max value. Click on Apply.
This is the final outcome of a daz character export from Daz3d to Unity. Our character is now ready to be animated.
Applying the Animation
First things first, we will go to Maximo website. The platform belongs to Adobe and offers high quality animations for free and specially designed for Unity. They can also be directly imported to the software (so far so good).
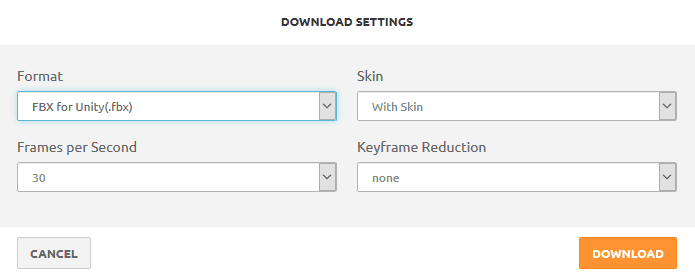
For the purpose of this tutorial I will pick the Short Left Side Step animation and make some few adjustments before moving on.

You will need to log in or sign up to proceed. If you did, click on Download and make sure to choose “FBX for Unity” format.
We will create a new Folder named “Animation” in our Assets directory. Drop the animation file inside the folder.
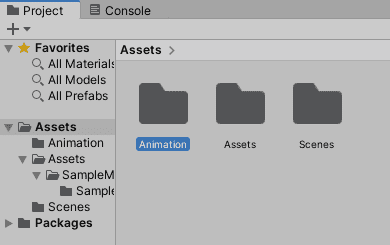
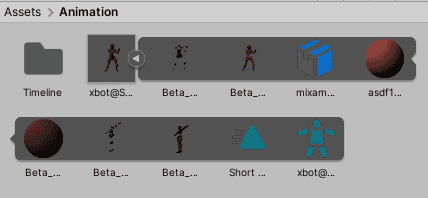
We will have something like this:
We will also create the subfolder Timeline and add the Timeline tab respectively to our workspace.

To add it Window > Sequencing > Timeline
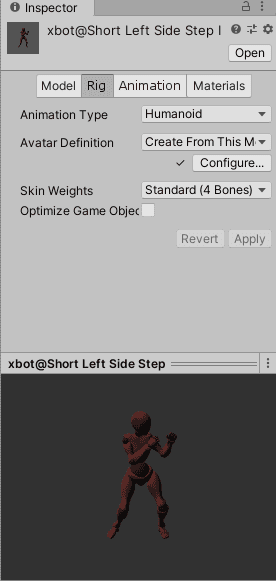
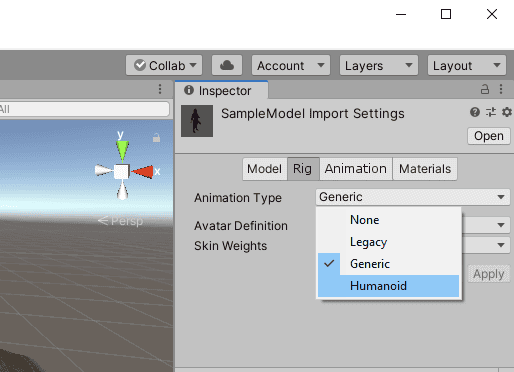
Now let’s get to work. Click on your animation’s main thumbnail, go to Rig and change to Humanoid.
Drag and drop in the 3D viewport your animation downloaded from Mixamo.
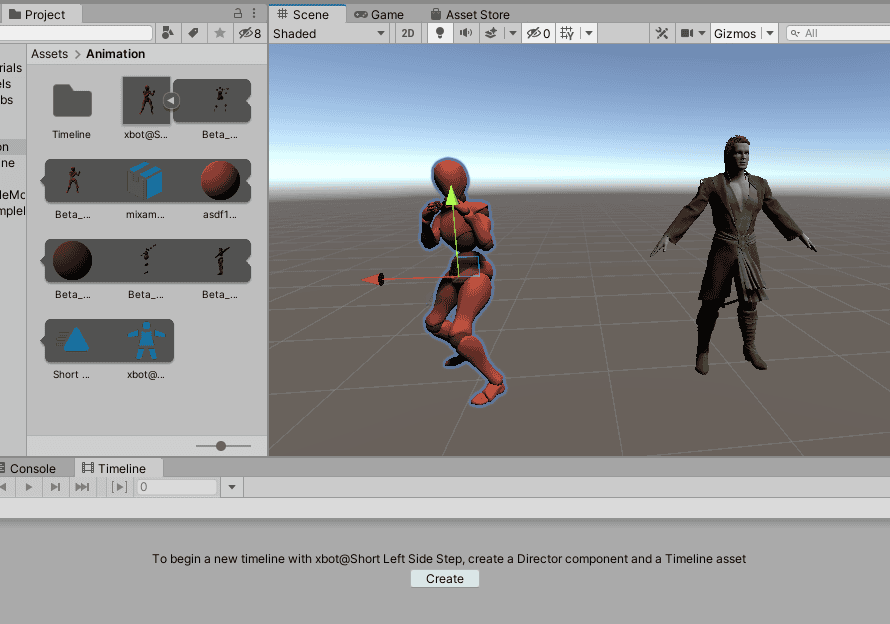
Click on Create in the Timeline Tab and save the file in the Timeline folder. Next, drag and drop the small icon that looks like a triangle in the timeline. Click on Play and we will see our animation come to life.
You can delete your pivot figure.
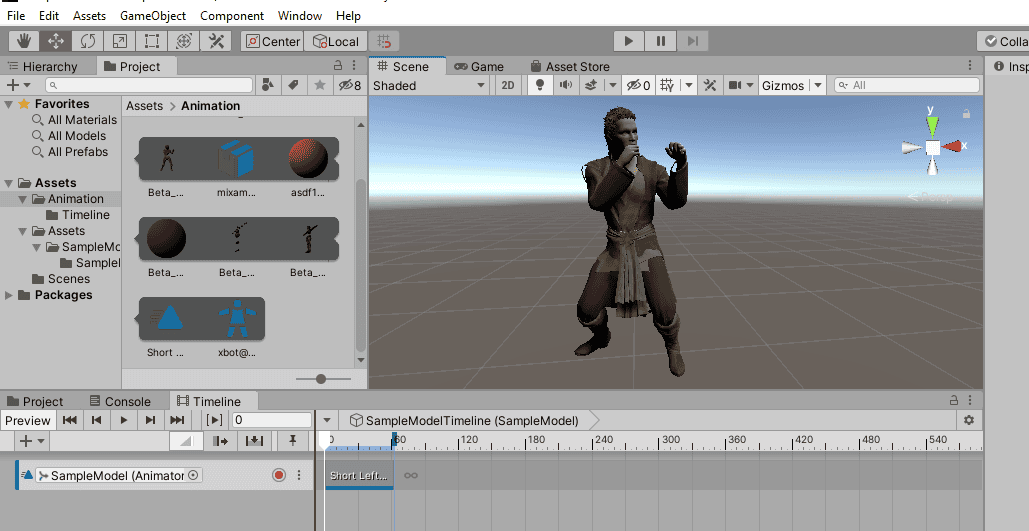
Now, we will apply everything to our character. First select the character, go to Rig and make it Humanoid. Next create in the timeline tab and save the file in the timeline folder.
To finish with this first part, drag and drop the animation from the Mixamo file located in the Animation folder (the small triangle) to our character’s timeline. Play and voila!
Our animation is almost finished. Now we need to work out some minor details. When we play the character we can see that the mouth is kept open and for this purpose, we need to correct that.
Ctrl + D on the small triangle icon of the Mixamo Animation file and rename our duplicate file. Now it’s editable. Drag and drop the new file into the timeline, right click and Edit in Animation View.
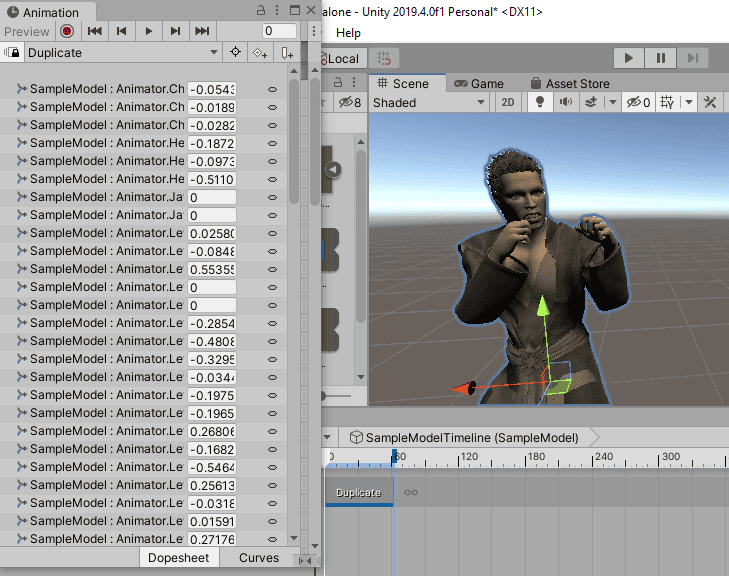
Do not worry! It is actually very simple, we will expand the window and look for the command Animation Jaw Close. Select it and head to the other tab named Curves. We will change its keyframe from 0 to a convenient one. In my case, value 1 does the job.
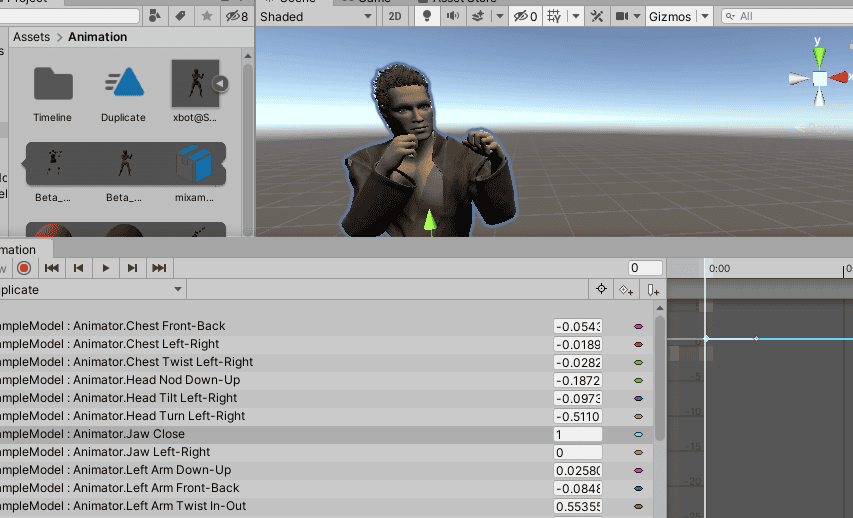
Problem solved and animation up and running!
Conclusion Exporting Daz3d to Unity
We have seen that working along cross-platforms can be a headache. But there is always a way to get it done. After reviewing these cases in depth it is clear that we can work without problems exporting between Daz3d to Unity. This is another smart way to use the resources from each of them saving time and getting outstanding visual outcomes. Give it a try, and take your games to the next level. Also have a look at our other article e.g. How to export Daz to Blender or one of our top Daz3d tutorials.