Daz dForce is an exclusive technology from Daz Studio software. This engine was designed to accurately simulate the physical collisions and interaction of soft material such as fabrics and hair movements, among others. Its purposes vary and users even continue to update on new findings. In this article, we will check out some of the main uses of dForce and also share some quick steps on how to apply dForce in your own projects.
If you prefer watching a video, checkout our Youtube video below. Otherwise keep reading.
Daz Products mentioned in the video:
- dForce Winter Splendor Outfit
- dForce Tropical Breeze Outfit
- dForce Master Cloth Simulation Presets
- Classic Long Curly Hair with dforce
- dForce Maureen Hair
- dForce Darlingx Hair
- dForce Magnet
Daz Studio dForce
dForce comes by default in Daz Studio. We can manage dForce settings in three panes: Simulation Settings, Surfaces and Tool Settings. (There are modifiers and more menus which we will see later).
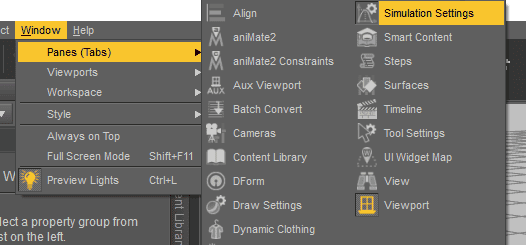
Most likely you won’t find these tabs unless you add them to your workspace. Click on Window in the upper menu > Panes (Tabs) and make them active.

Here what they mean in detail in a few words:
- Simulation Settings: This pane contains one of the most important settings to run dForce Simulation – may it for the current frame or for whole animations
- Surfaces: This pane includes parameters of your cloth, such as color, type of material, etc.
- Tool Settings: This pane includes the tools to add Weight Maps. These weight maps define the dynamic areas and non-dynamic areas within the same object.
Important note: In the Simulation Settings, there is a small tab named “Advanced”: Make sure to choose your graphic card. This way, your renders run faster.
In addition to these three tabs we have several modifiers that we will see later in which way they help. For now, we need to mention them and locate them easily:
dForce Modifier: Add Dynamic Surface Edit > Object > Geometry > Add dForce Modifier: Dynamic Surface. It will make the asset compatible with dForce physics.

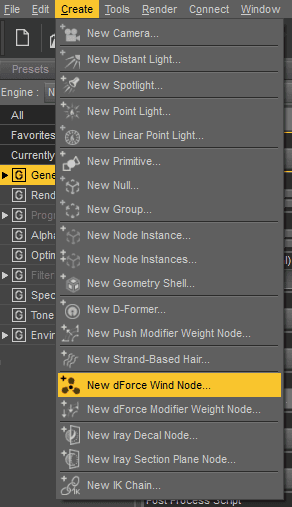
dForce Wind Node: Create > New dForce Wind Node. Creates a Wind Node to add Wind conditions in the scene

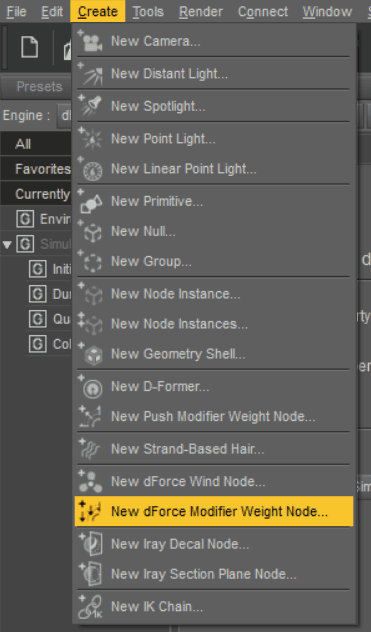
dForce Modifier Weight Node Create > New dForce Modifier Weight Node. Creates a weight map that defines which areas are dynamic and which ones are non dynamic.
Using Daz dForce Clothing
dForce is specially made for clothing purpose, so you can rest assured that there is much to play with. In this short overview, we will introduce you to the main features of dForce and clothing physics.
I decided to use this casual outfit to show as an example. You can download it from here:
Every time you download a piece of clothing for your model, make sure it is compatible with the dForce engine.
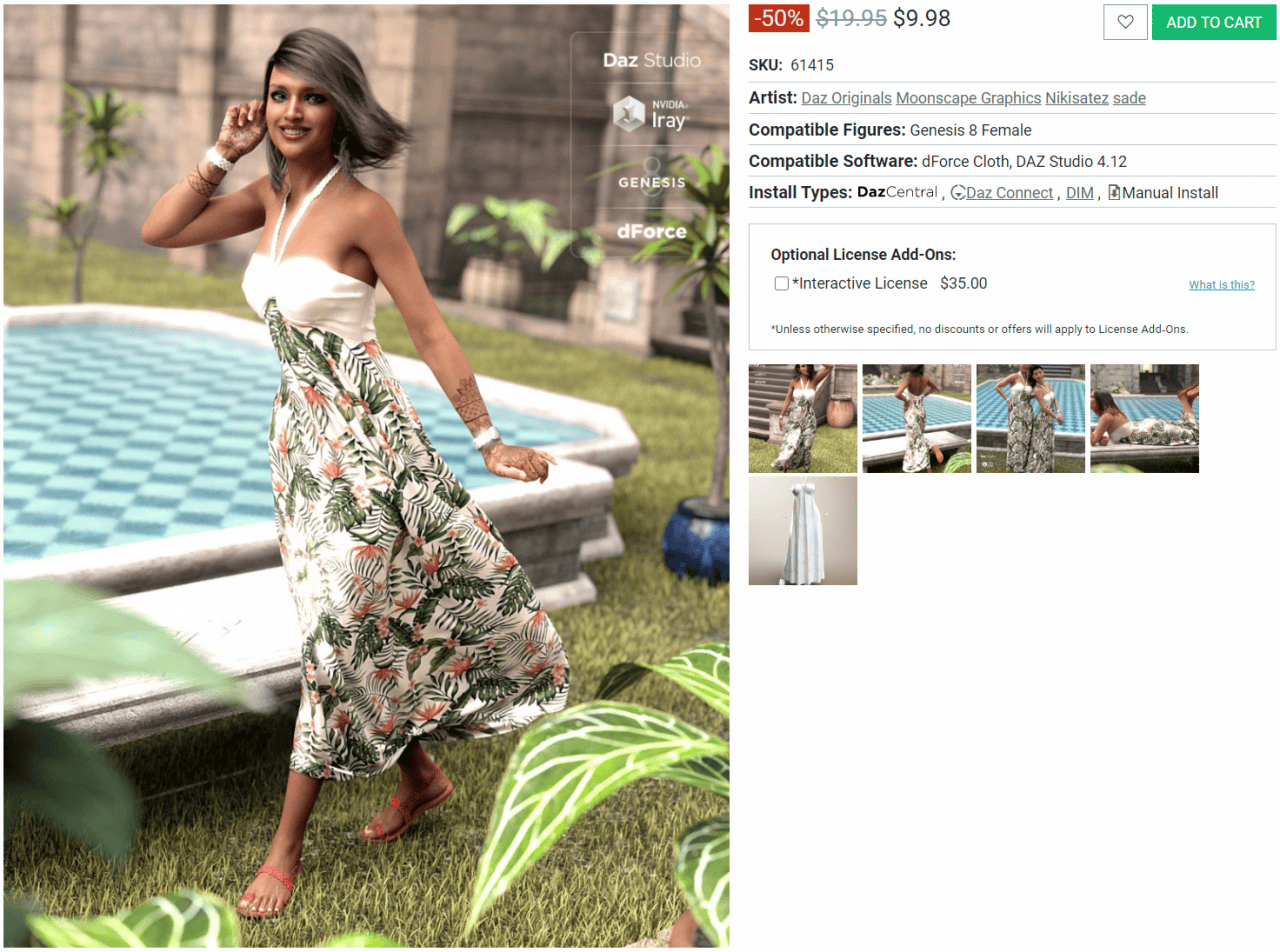
dForce Dress – source Tropical Breeze Outfit
It should read Compatible Software: dForce Cloth or dForce Hair depending on the product.
Now we will load a figure from our Smart Content, in this case the Aurore Genesis 8 model.
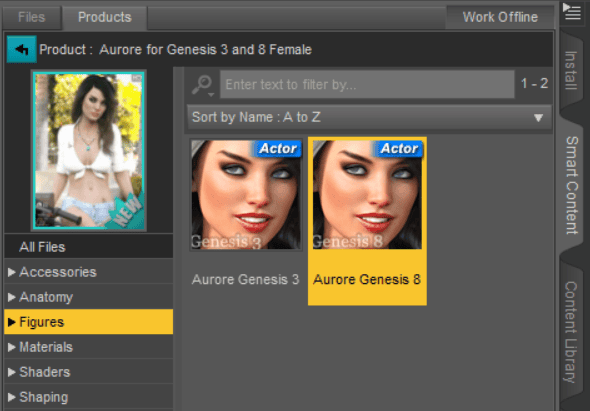
Then we will apply the dForce dress

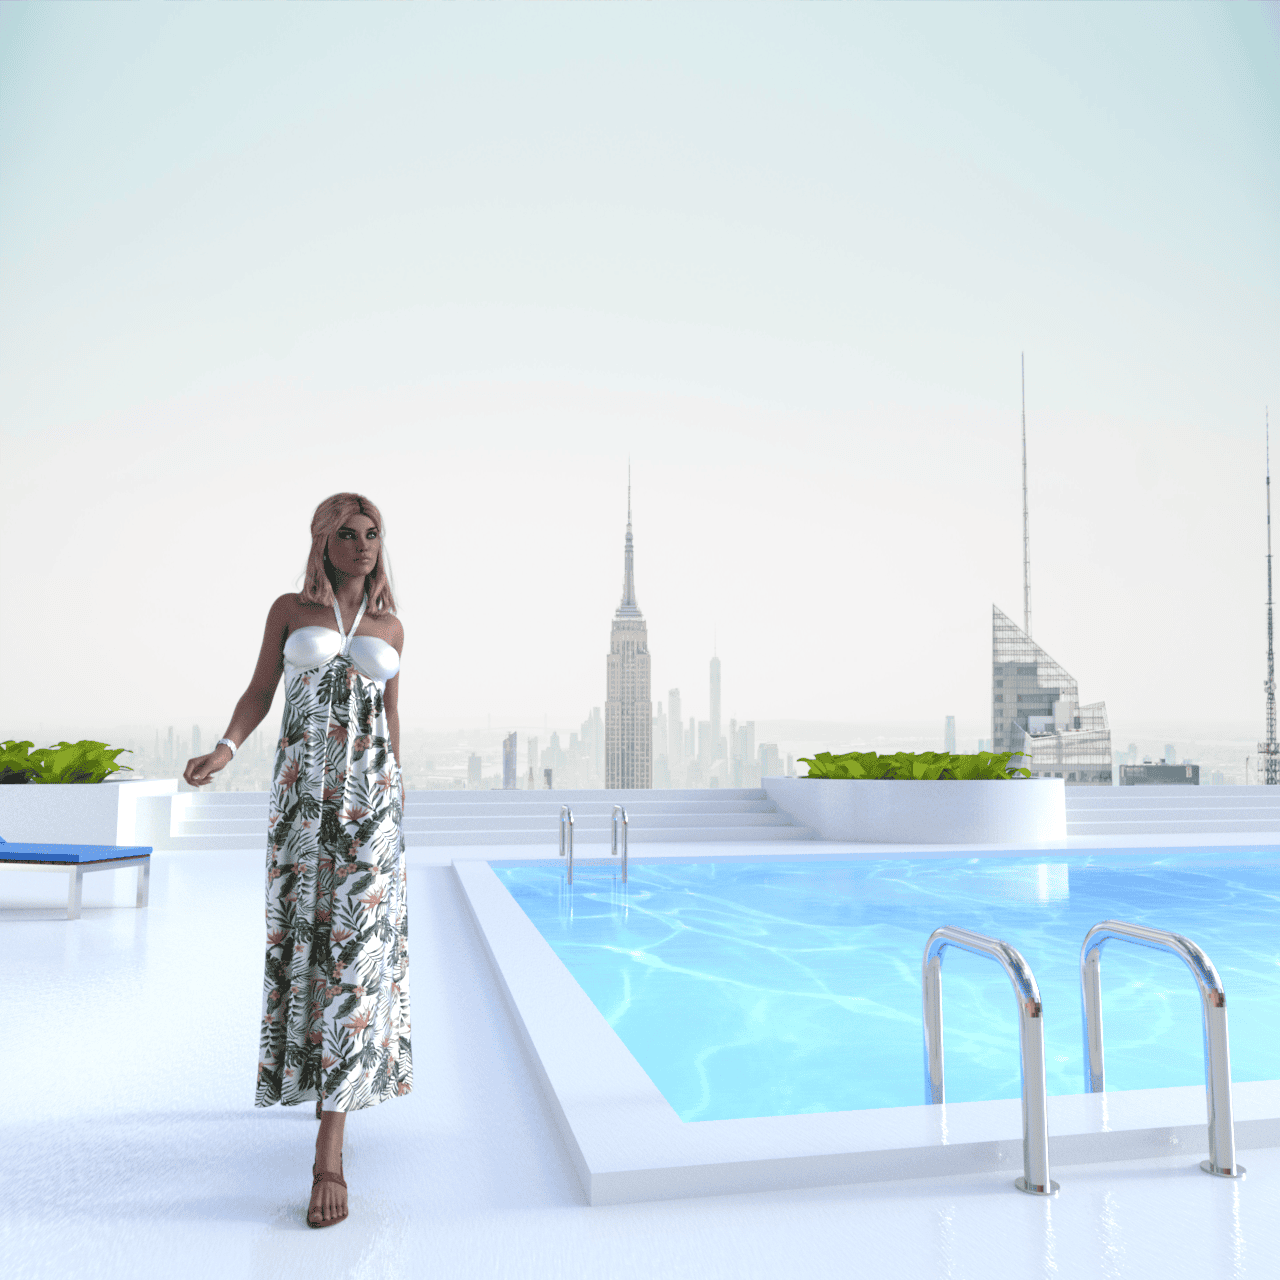
Additionally we will add this hair, add a pose and include this background including a backdrop – also checkout our top swimming pool 3d models article. After doing all this we have the following render, that shows that the dress gravity is still not applied.

Then we go to the Simulation Settings pane and we make sure “Frames to Simulate” is in “Current Frame” and “Start Bone From Memorized Pose” is switched on.
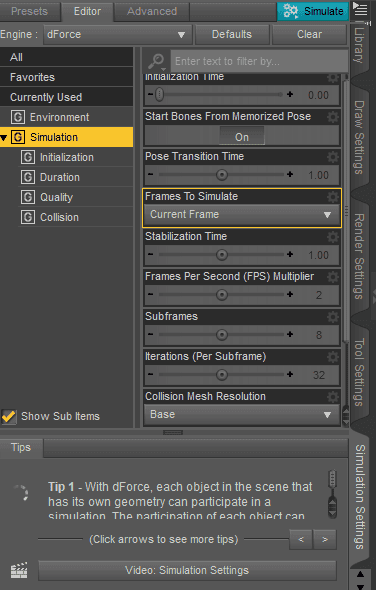
Only left is to press Simulate. Daz Studio will simulate all steps from base pose with the dress on to the final chosen pose. During these steps it takes the gravity and physics of the the clothes into account. Here we can appreciate the difference.
As we have seen, the clothing has more gravity and thus more realism. We can also change the option “Frames to Simulate” to “Animated” to play the simulation based on the timeline. We can choose different poses and during the animation dForce will simulate all along.
Creating Material Presets Without Saving Simulation Settings
Now, let’s suppose that we want to save a material we liked, to be used in another piece of clothing. For example, we want to create a material preset based on the dress from our model.
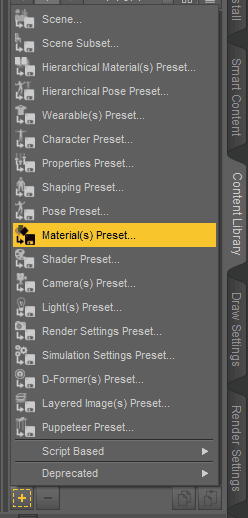
We should click on the product from the Scene pane. And then click on the plus sign to add the material preset. We should pick a folder and assign a name.
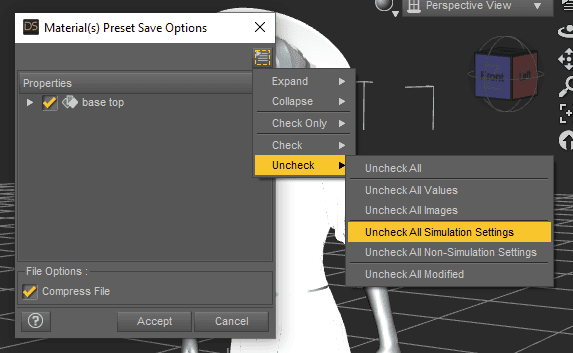
A new pop up window will appear asking if we want to preserve all presets for the material, including the simulation settings. So if the material behaves in a specific way, we also want to keep those properties, otherwise we can uncheck it as seen in the picture. Once saved, it is ready to use.
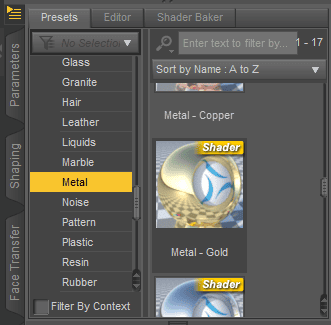
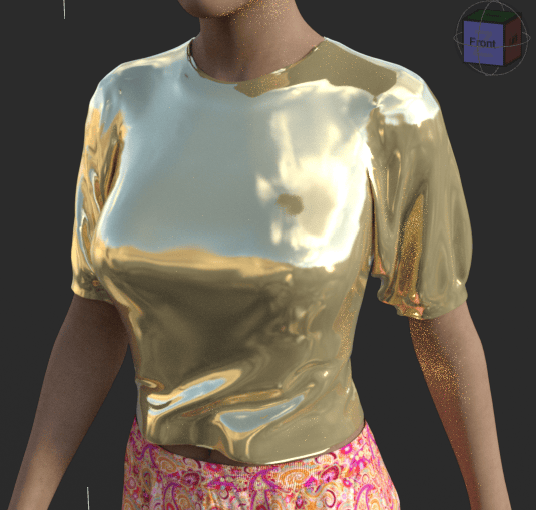
If we want to apply either saved materials or shaders, we will go to Presets of the object selected and look for them from the given list of preset shaders or inside our custom folders. In my case, a metal gold shader for the top of my model, and here the result:
Fit Control Add-on
Wait, because there is still more. In the Daz marketplace there are many cool add-ons that we can use to give a better fit to our existing clothes.
One of them is called Fit Control and can help solve the dynamics of certain parts in the clothing as seen in the pictures.

source Fit Control
With the help of a vast collection of morphs we can pick any part and tighten up for example around the waist if needed. It can also help stack up clothes for a more polished finish.
Using Daz dForce Hair
dForce Hair is part of the dForce engine, likewise what we have been reviewing so far also applies to its physics. We will see a noticeable improvement of flow and more responsiveness to the environment. In general you can use the standard dForce settings to apply also to the hair or you can also check out the dedicated daz products about the such as dForce Master Cloth.
Strand and dForce Hair Settings
The panes and settings apply the same way as clothing, since for the software they are both wearable presets. This means that the software does not distinguish between one another and things you can do on a cloth also work on hair.
Therefore read the instructions that come with dForce hair and check out the Simulation Settings pane (make sure “Frames to Simulate” is in “Current Frame” and “Start Bone From Memorized Pose” is switched on) like described in the Using dForce Clothing section.
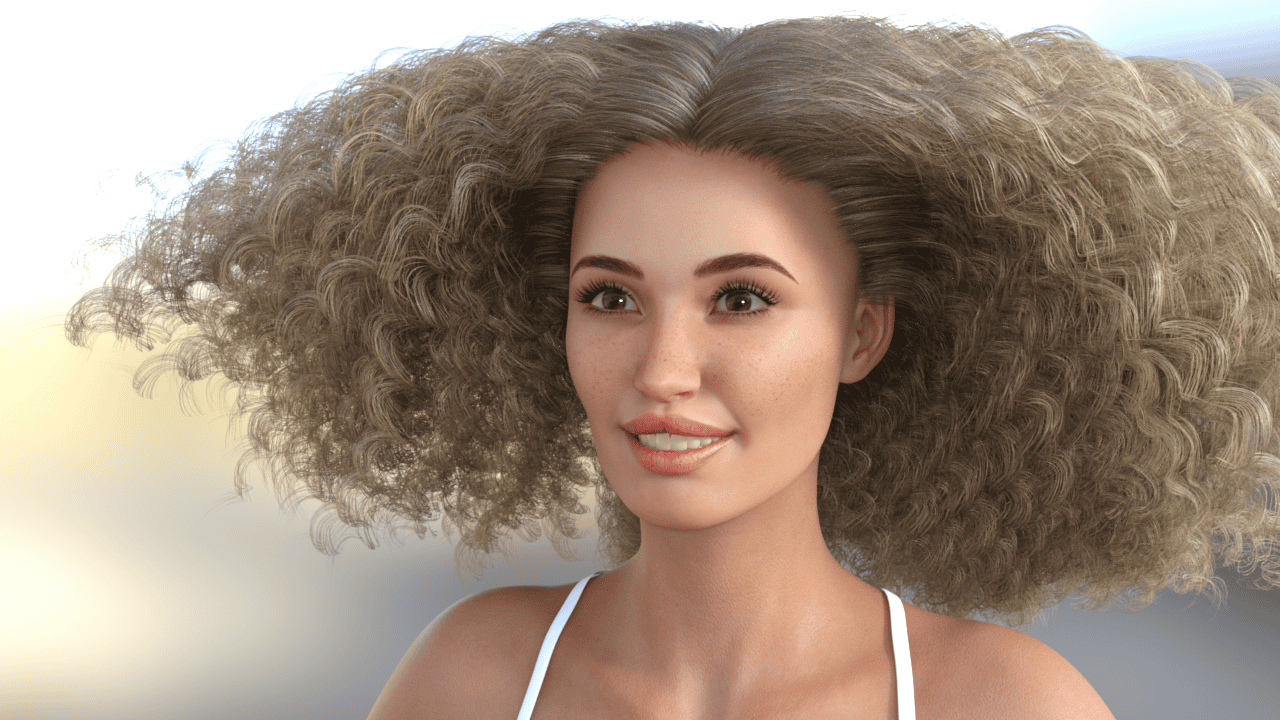
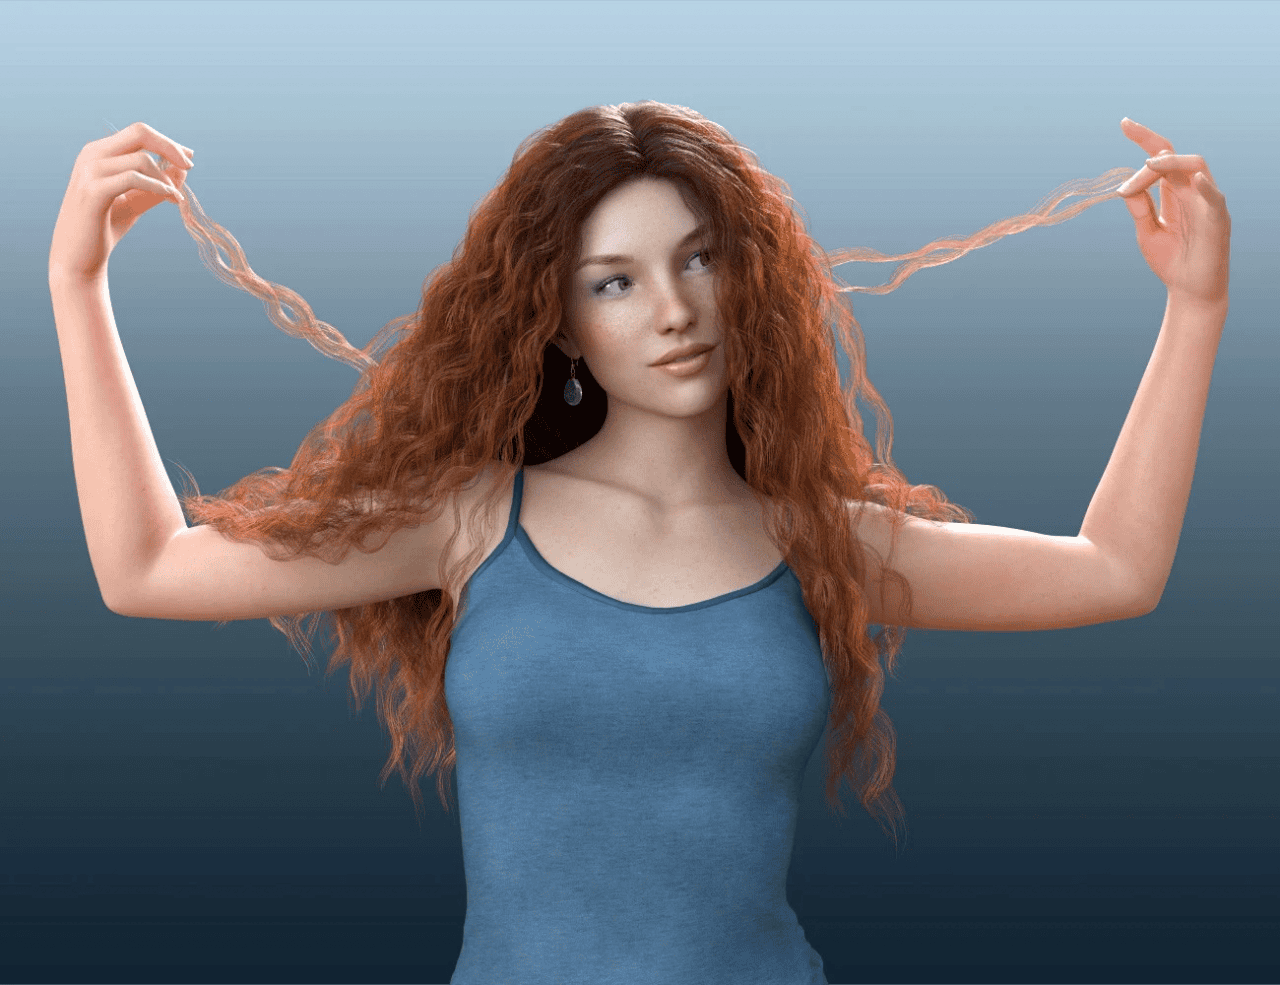
Here an example of the classic long curly dForce hair before the simulation:
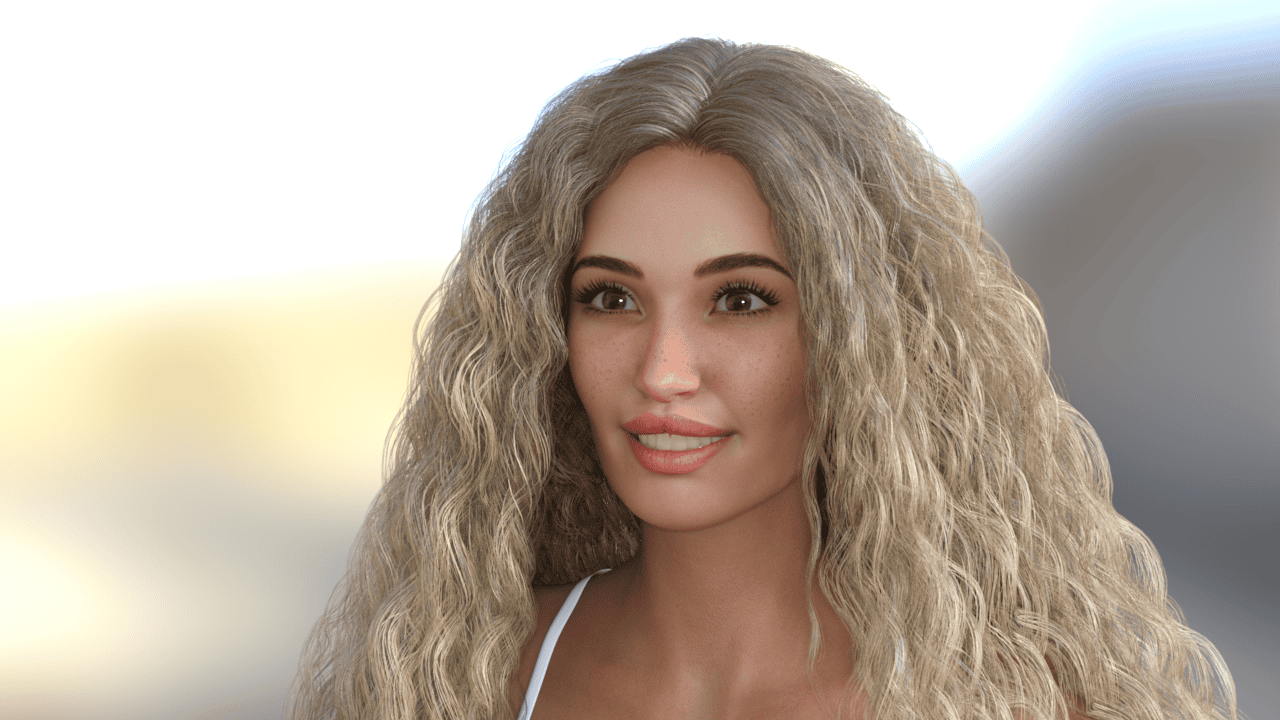
And here after the daz dForce hair simulation finished:
From non dForce hair to dForce hair
This tutorial also works for clothing. I will be using the following product:

source Virginia Hair
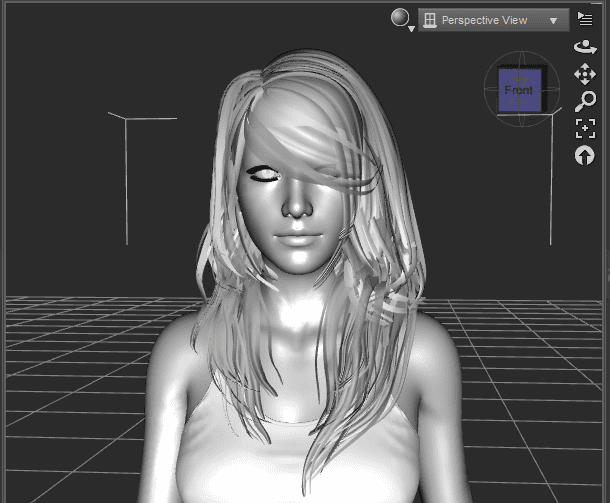
We will open our project and choose Smooth Shaded in the viewport to take a look at the structure of our hair. Since we want to make it dForce compatible, we will first click on the actual hair in the scene pane and add a Dynamic Surface modifier. Also, we will add a dForce Modifier Weight Node to define which parts are less likely to move and which parts are more likely to freely motion.
Now we are going to create the actual Influence Map. Go to the Tool Settings tab and select from the Active Tool option, Node Weight Map Brush. We will literally paint the different influence areas.
Where says Unused Maps, we want to add Influence Weights and click on “Add Map”.
We will see our hair just turned red (well, the models hair). No panic!
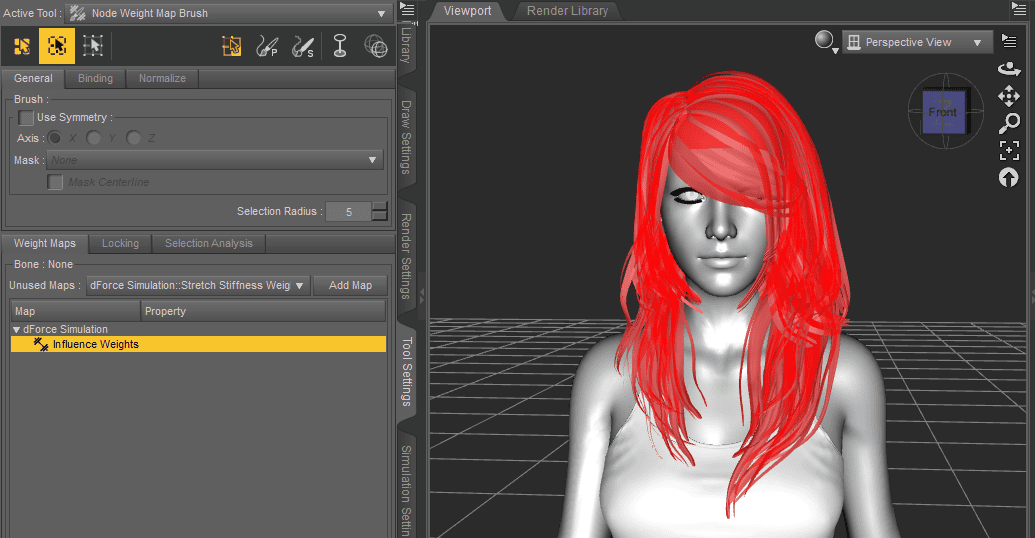
Red means it is an active area and thus, dynamic. When it is gray meaning off it is an inactive area and thus static.
Right click in any part inside the viewport area, we will set Selection Mode > Marquee Selection. Now click and drag where we think there is going to be less movement. In general terms the upper part of the head should be gray, hair closer to the scalp. After the selection right click > Weight Editing > Fill Selected and we want a value of 0 for inactive areas. Click Accept.
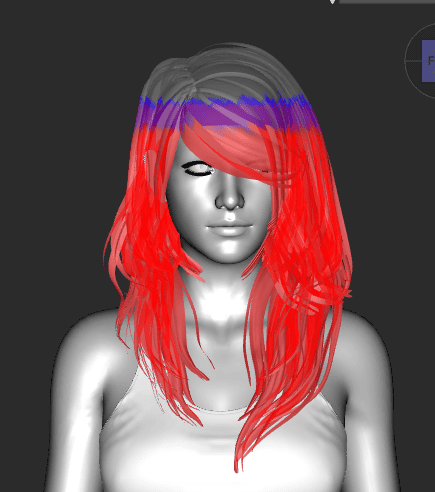
In the example I also set other regions with values in between to make the motion more gradual.
All done with the map, now go back inside the Tool Setting tab and in Active Tool you want to choose Universal
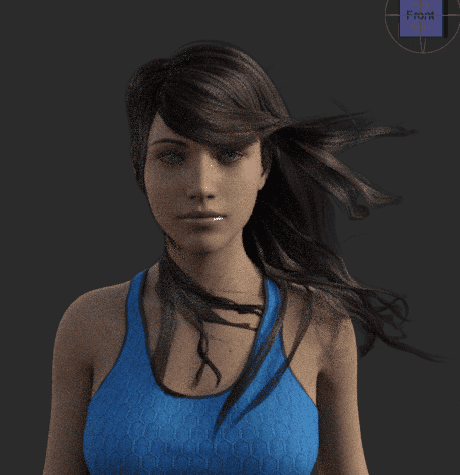
For the fun part, we are going to simulate our model. In my case I also added a fan for better preview. If its all set, go to Simulation Settings and in Duration set it to Animated (Timeline) and define the amount of frames (length) of the animation. Click on Simulate!
Amazing! But we are not finished. For the last step we want to save our hair with these new properties to use in our upcoming projects.
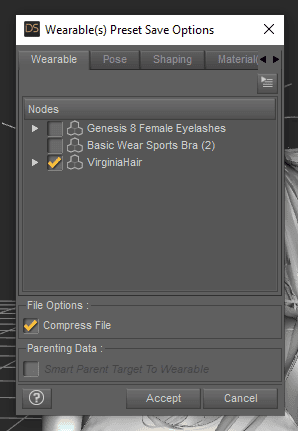
Select the Genesis 8 Female model in the scene tab. Next, go to File > Save as > Wearable Presets (as explained, hair is considered a wearable). Name your file, click on Save and a new window should appear. We want to untick everything but the hair asset. We’re done!
Wet Hair
We can always enrich our library with unique software extensions such as Long Wet Hair for Genesis 8. The pack includes not only a collection of different hairstyles with wet visuals but also water and sand skin geometry shells to give the overall impression of absolute photorealism.
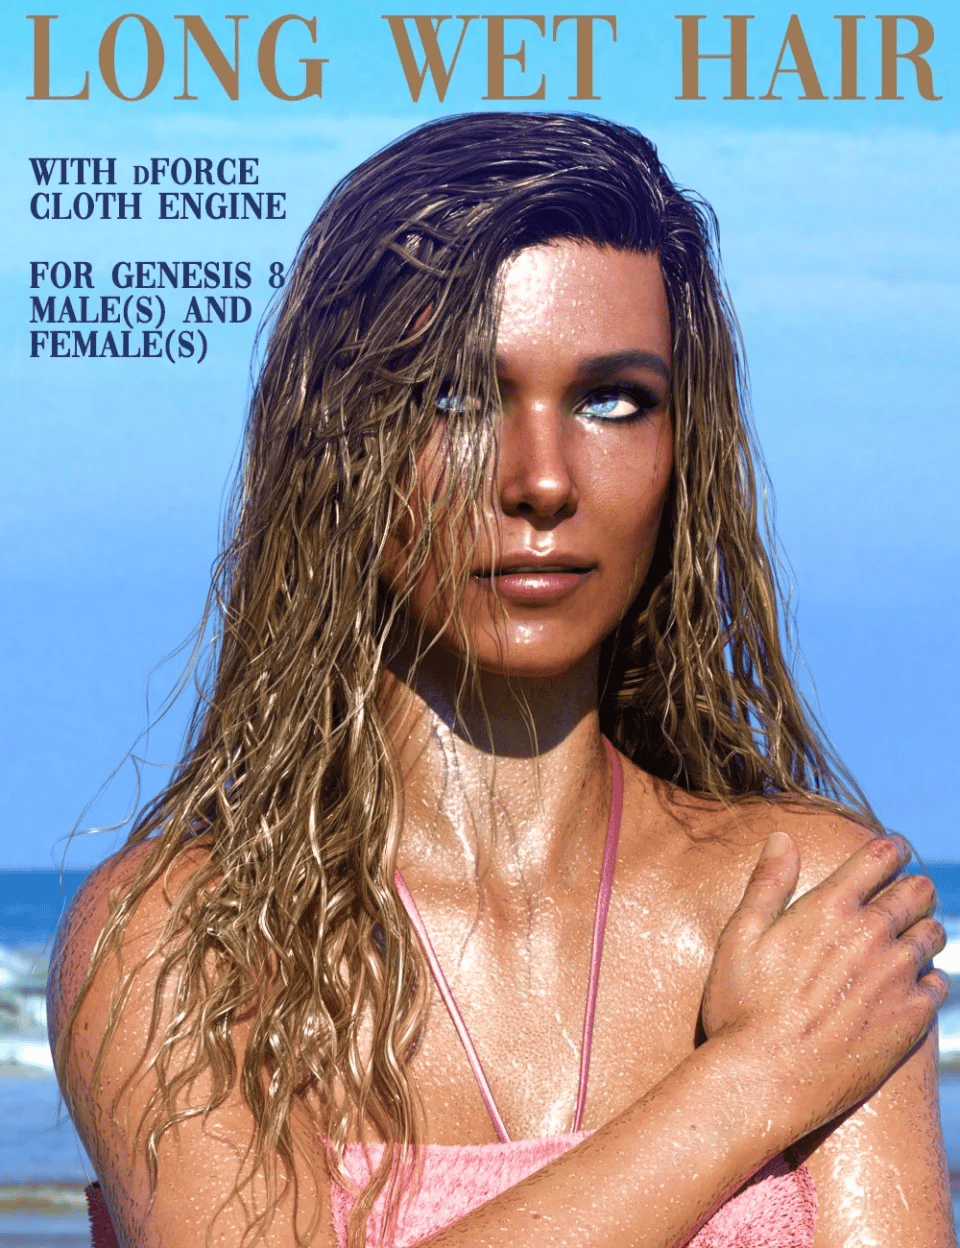
source Long Wet Hair
Using dForce in terrains for Grass Simulation
Another interesting feature from dForce is the possibility, following the principles seen before, to create meshes that will act as terrains. This can be done pretty easily and the results are promising. First of all, we will download the free grass shader here.
If you need help with the installation, see How to Manually Install Daz3d Content article. Once downloaded and installed in our Daz Library, we will proceed to open the software. What we need to do is create the topology of the terrain.
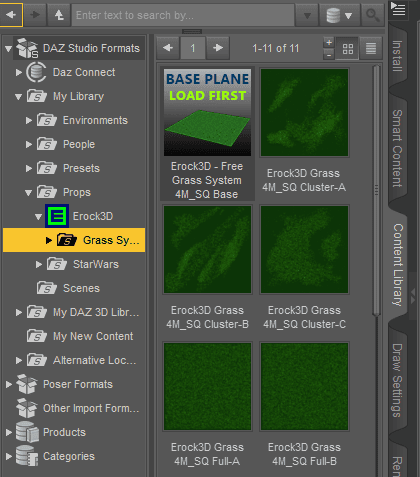
We are going to look for the folder where the content has been installed. And double click on the base plane inside the Erock3d subfolder. The new plane should be loaded.
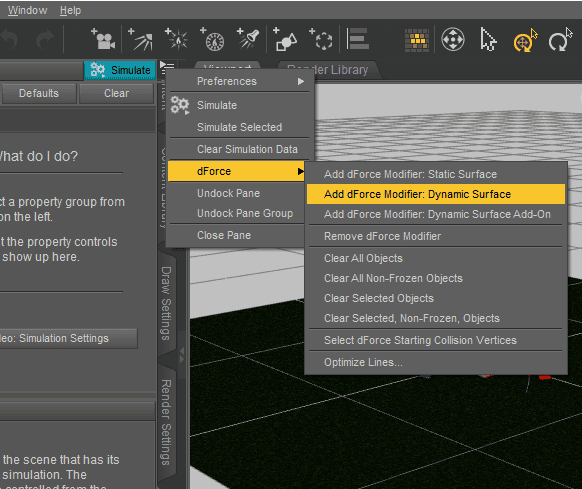
Our next step will be to transform the rigid plane into a dynamic one so dForce can be applied onto it.
We go to Simulation settings and then look for the option add dForce Dynamic Surface as shown in the picture below.
In case you do not find the tab in the left pane, you can always add it by clicking going to Window > Panes > Simulation Settings on the main menu.
After adding the dForce modifier, we will see a new tab has been also added in our left pane called “Surfaces”, inside we will find some parameters from our base model, and also some new features that come as properties of the Dynamic Surface modifier.
We will change only two parameters:
Dynamic Strength: 0.9
Density: 4500
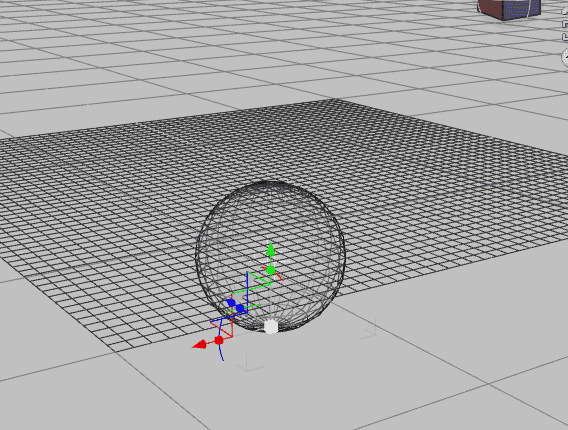
Before simulation, we will add our new primitive sphere that will act as the collision with the plane. We want to place it also a little beneath the plane. Also, we should make sure to leave some space between the two objects.
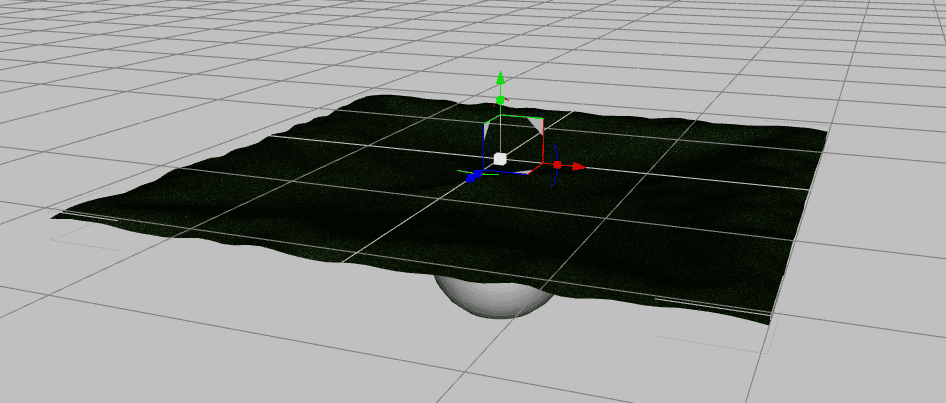
For our last step, we go back to Simulation Settings and press “Simulate” on the blue box. And amazingly, we have achieved the irregular surface we were looking for. Below an example of a rendered image.

You could combine that with another asset for forest modelling – source Harpwood Trail
Also checkout what artist are doing with it here and other daz products e.g. for having a more realistic dForce grass here, here, here and here.
Using dForce on Surfaces / Primitive Figures
The following section shows several uses of dForce in combination with surfaces and primitives.
Add physics to clothing on surfaces, such as tablecloth
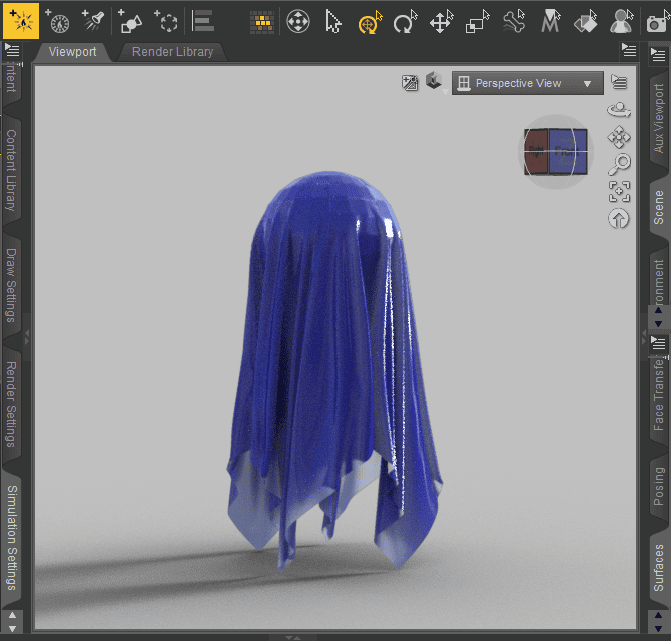
I advise playing with primitive figures at first to understand how dForce works in general terms. Geometry, wind, etc. We will now take a look at how to simulate the fall of a cloth onto a cube.
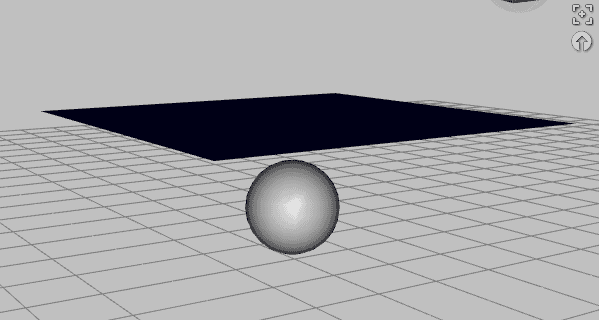
We will create the two figures, a sphere by default and a plane that will act as cloth. We want it big enough to cover the sphere and preferably with many divisions. In my case I set it to 200 (i know it is a bit too much, you could do with just 50). Remember that the material perception is defined by the geometry. The more divisions, we can say, the silkier the cloth with more wrinkles and folds.
Pretty humble for now. We will set our plane as a Dynamic Surface, and in the surface tab we want to choose a color for the cloth and also play around with metallicity, diffuse roughness and so forth so it gives a feeling of texture.
Last step, go to Simulation Settings, and remember in Duration we set “Animated: (Use timeline play range)”. In the timeline we will set at least 60 frames so give it enough time for the cloth to fall. In my case 100 is ok. We now press on Simulate. The result:
Once we get the notion of dForce physics and how everything comes together, we can take it to the next level. A few more examples below:
dForce Bed Blankets
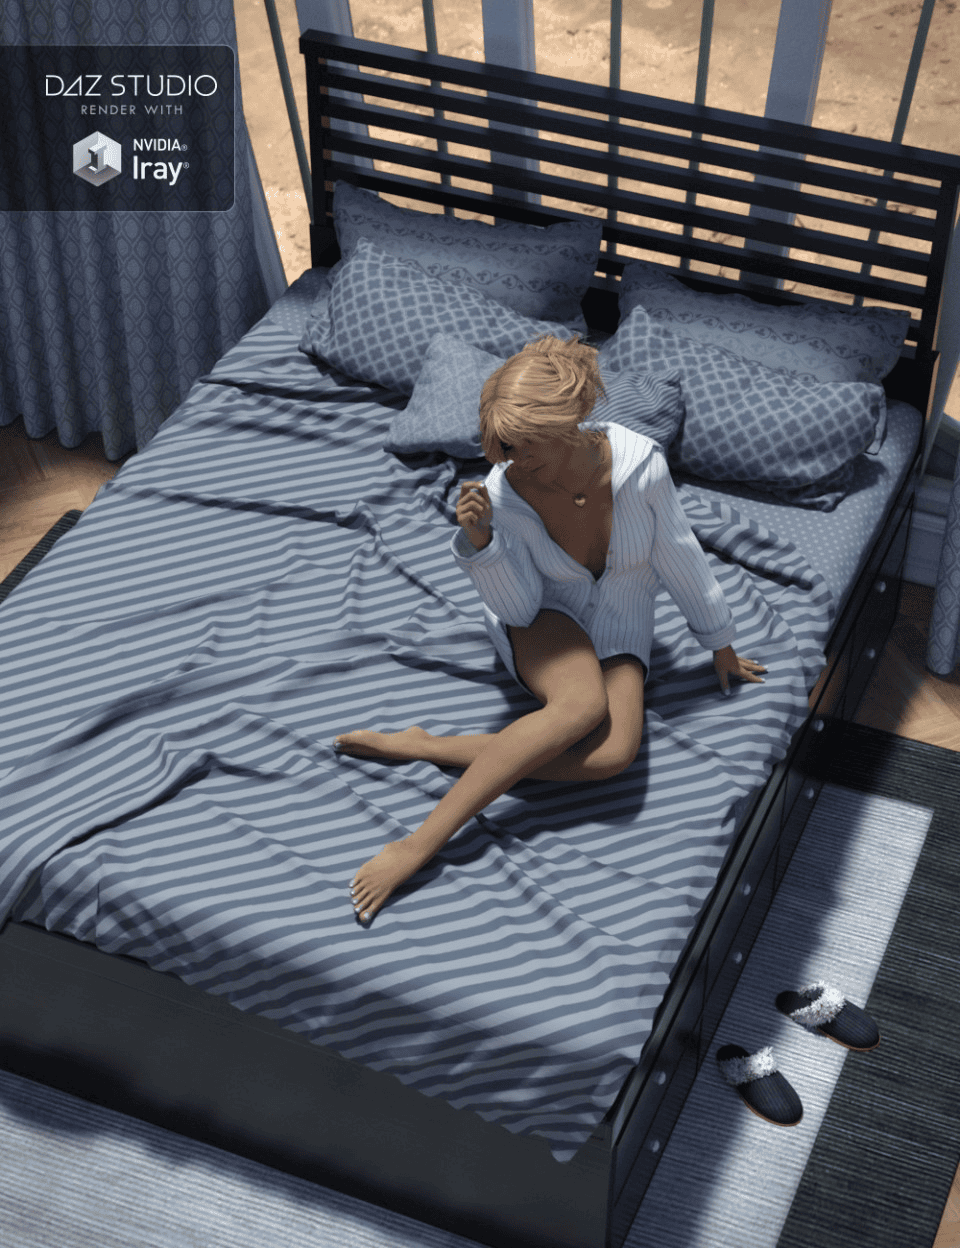
source CozyBed
Drapes
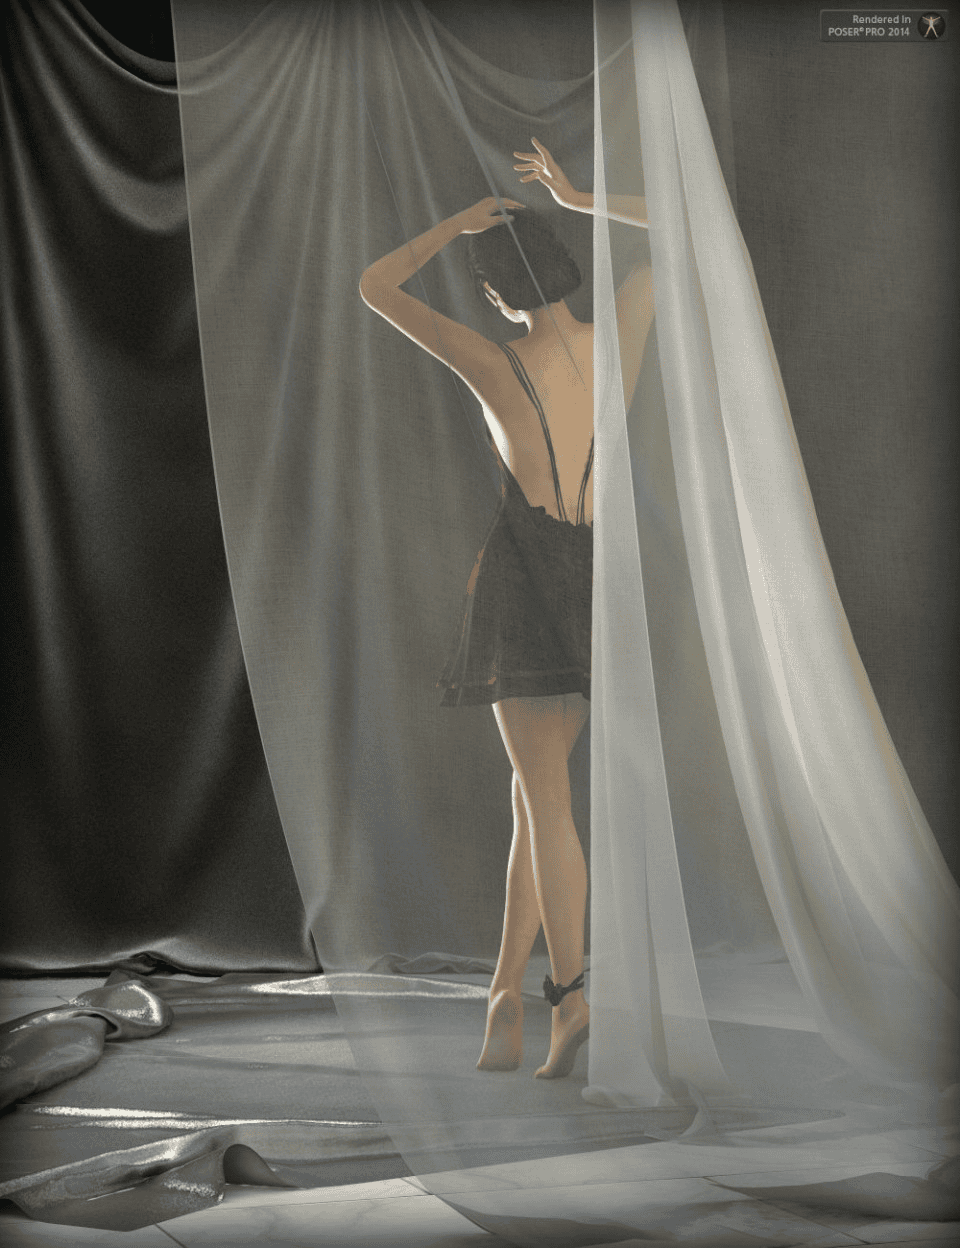
source Drapes Base Pack
dForce Flags
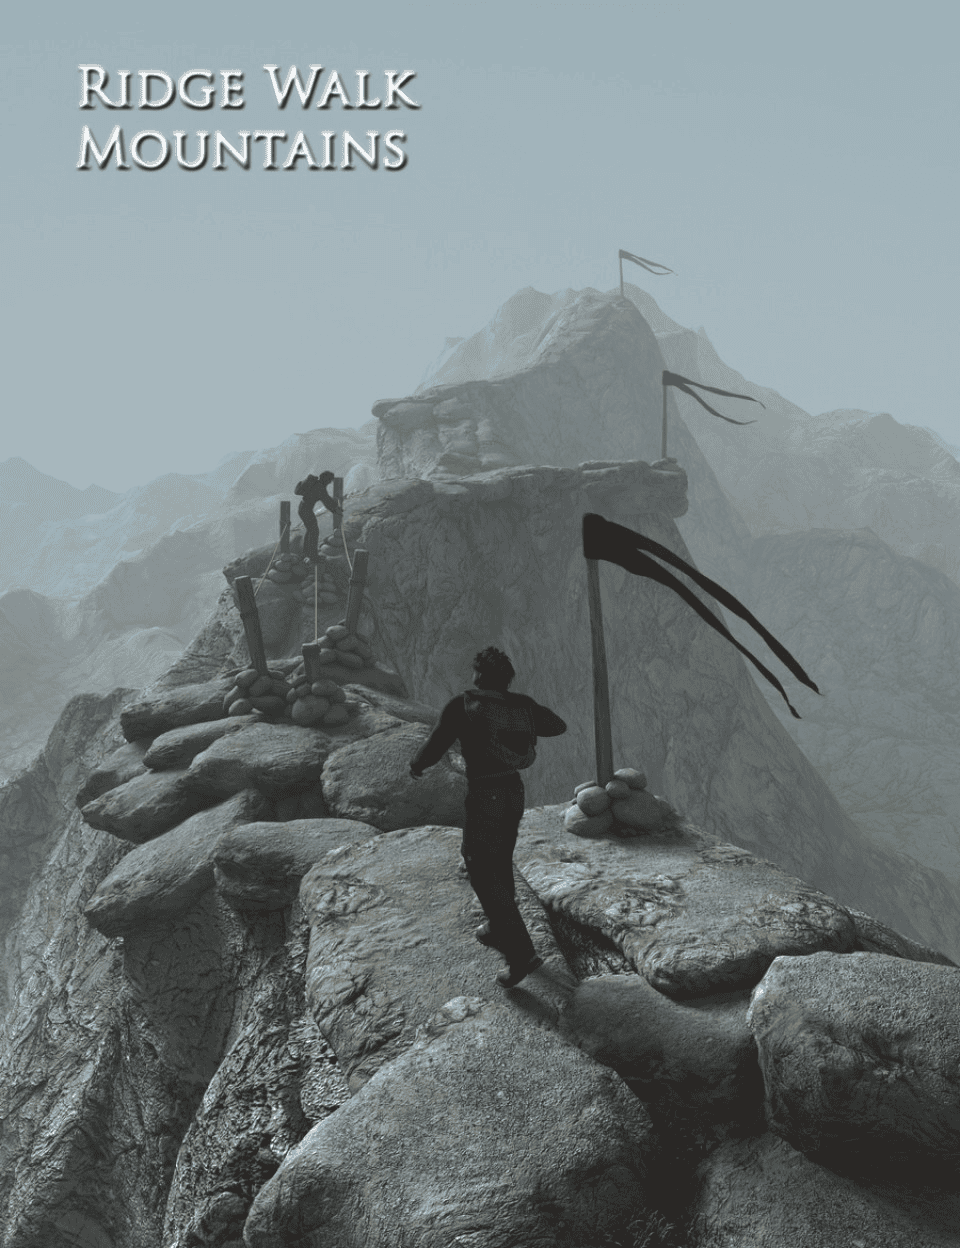
source Ridge Walk Mountains
Using Daz dForce Animations: Creating a Waving Flag
Creating a flag is really simple. It only takes a few minutes and even fewer steps.
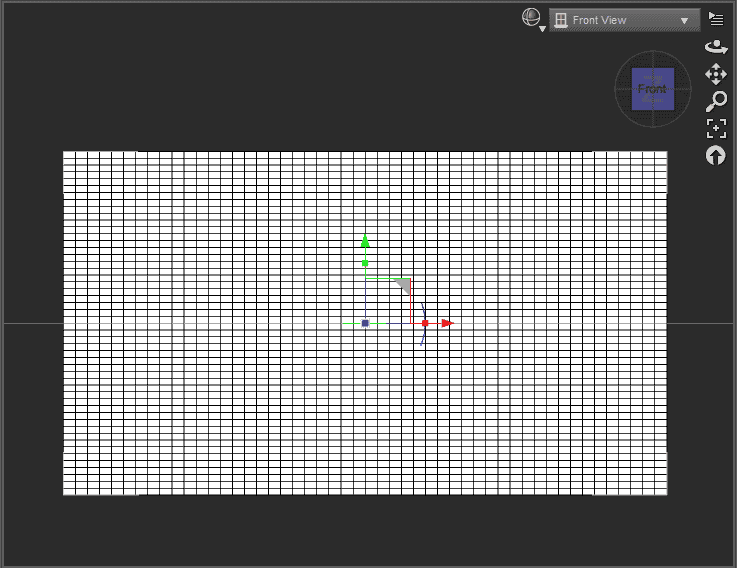
First thing is to create a new plane primitive (I would suggest 100 divisions) and change its position to “Z positive”. Once positioned we should extend out the surface by clicking and dragging from the red box next to the arrow. Next step, activepoint set to front view and Wire Shaded. .
Next, we need to define our plane as a cloth, so we add the dForce modifier Dynamic Surface to the plane.
So far we should have something like this:
Now, for the fun part, we will make one side non-dynamic. This means that it will not move acting as a pole.
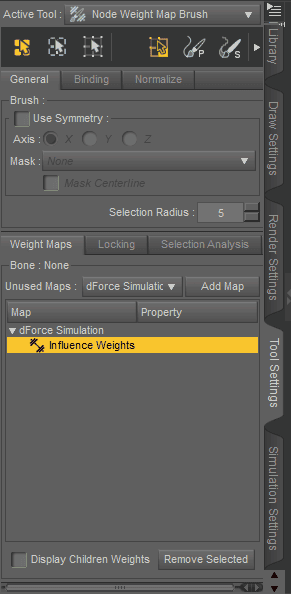
While selecting the plane, go to Create and add a new dForce Modifier Weight Node.
Now go to Tool Settings and where says Active Tool we choose Node Weight Map Brush. And in the Weight Maps tab, add Influence Weights and “Add Map”. The idea is to create a map where we will set values for non-dynamic areas.
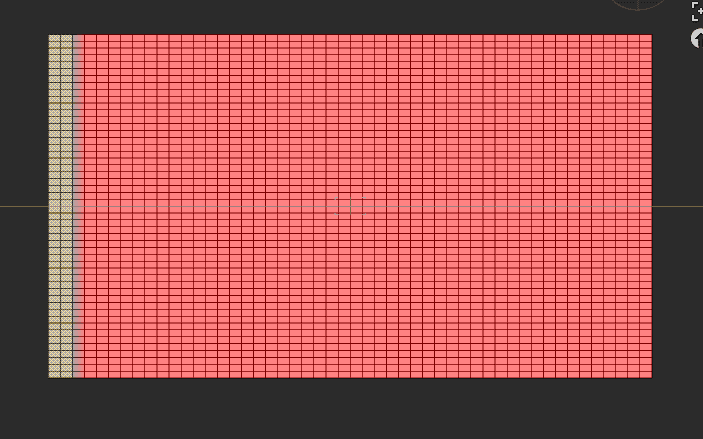
Next, with the cursor over the flag area right click > Selection Mode > Marquee Selection
We want to click and drag the two first columns from the left and we want to set their value to 0. Right click again and Weight Editing > Fill edited… and set value to 0.0%. All done.
Going back to the Tool Settings menu, we change the Active Tool to Universal.
We are almost there, we need to add a fan so we go to Create > New dForce Wind Node.
In the next part you can check which parameters work best for you.
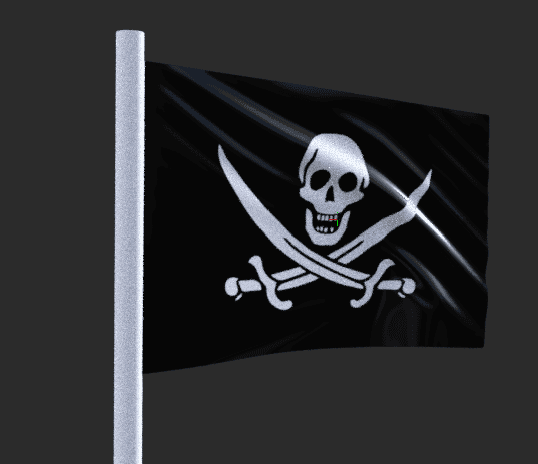
Last but not least, we will add an image to our flag so it doesn’t look so boring.
Surfaces > In Base color click on the small square and browse your image.
Now we head to Simulate Settings and the set Gravity to 0.20 and Duration to Animated ( Timeline Play Range), and below we set frames to at least 60, so it gives enough time to generate a waving motion. Now simulate! Flag done.
(You can also go to Edit > Object > Geometry > Convert to SubD for a higher quality model, especially in the fold regions)
Using Daz3d dForce Wind Simulation
To create a new wind node, from the main menu click on Create and click on “New dForce Wind Node”. Next, click on “Accept” to apply.
A new fan should be added to the scene. This will be the tangible representation of the wind.
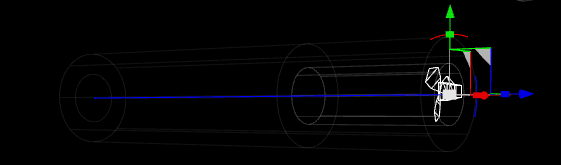
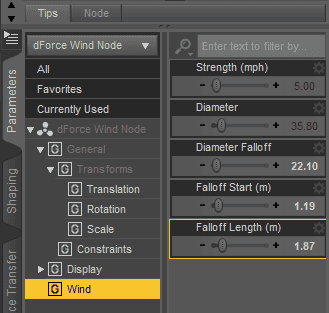
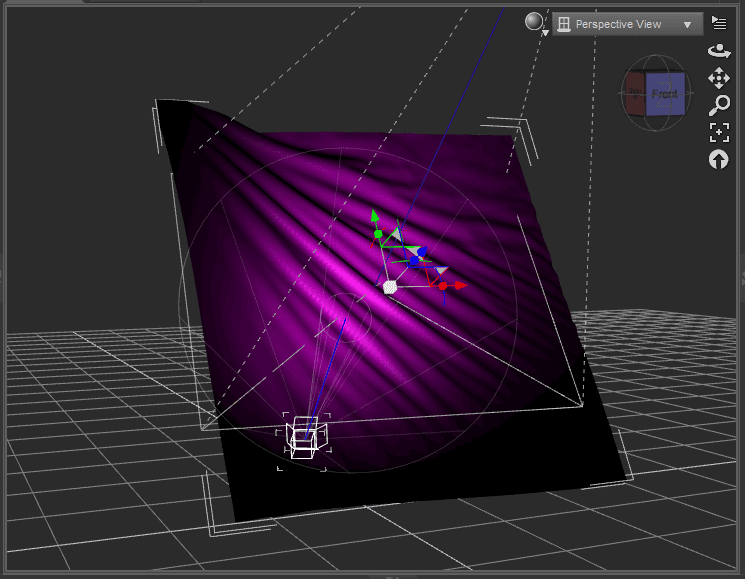
In this picture from the bottom-right pane we can see the “”Wind” Settings. By clicking, we can access the parameters and determine its behaviour in the scene.
To understand a little better:
Strength: The pink lines show the maximum influence of wind
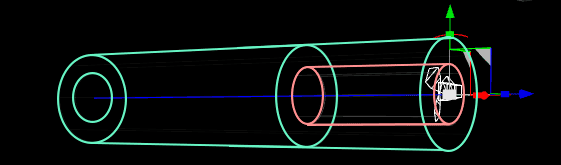
Diameter: Defines the size and area of wind influence
Diameter Falloff: The outer green lines show in which measurement wind disappears until 0 value.
Falloff start: The pair of circles in the middle show at which point wind gradually starts to weaken in strength.
Falloff length: The pair of green circles show the distance until wind reaches 0 value.
Find more details in this video.
Daz dForce Magnets
You can purchase dForce Magnets following this link.
What are dForce Magnets? It is essentially an add-on that allows you “grab” fabrics as well as hair and influence their movement. Here a couple of examples:
Source dForce Magnets
Daz dForce for Conceptual Artworks
Another brilliant use has to do with conceptual artworks. Daz can help you achieve the results as seen in the pictures, with no difficulty!
We can create our primitive plane, and after applying the Dynamic Surface and playing with surface parameters, we add camera, source of light and then we render.
I decided to export to Photoshop for some post-edition color adjustments. So this is my result: It took me no more than a couple of minutes.
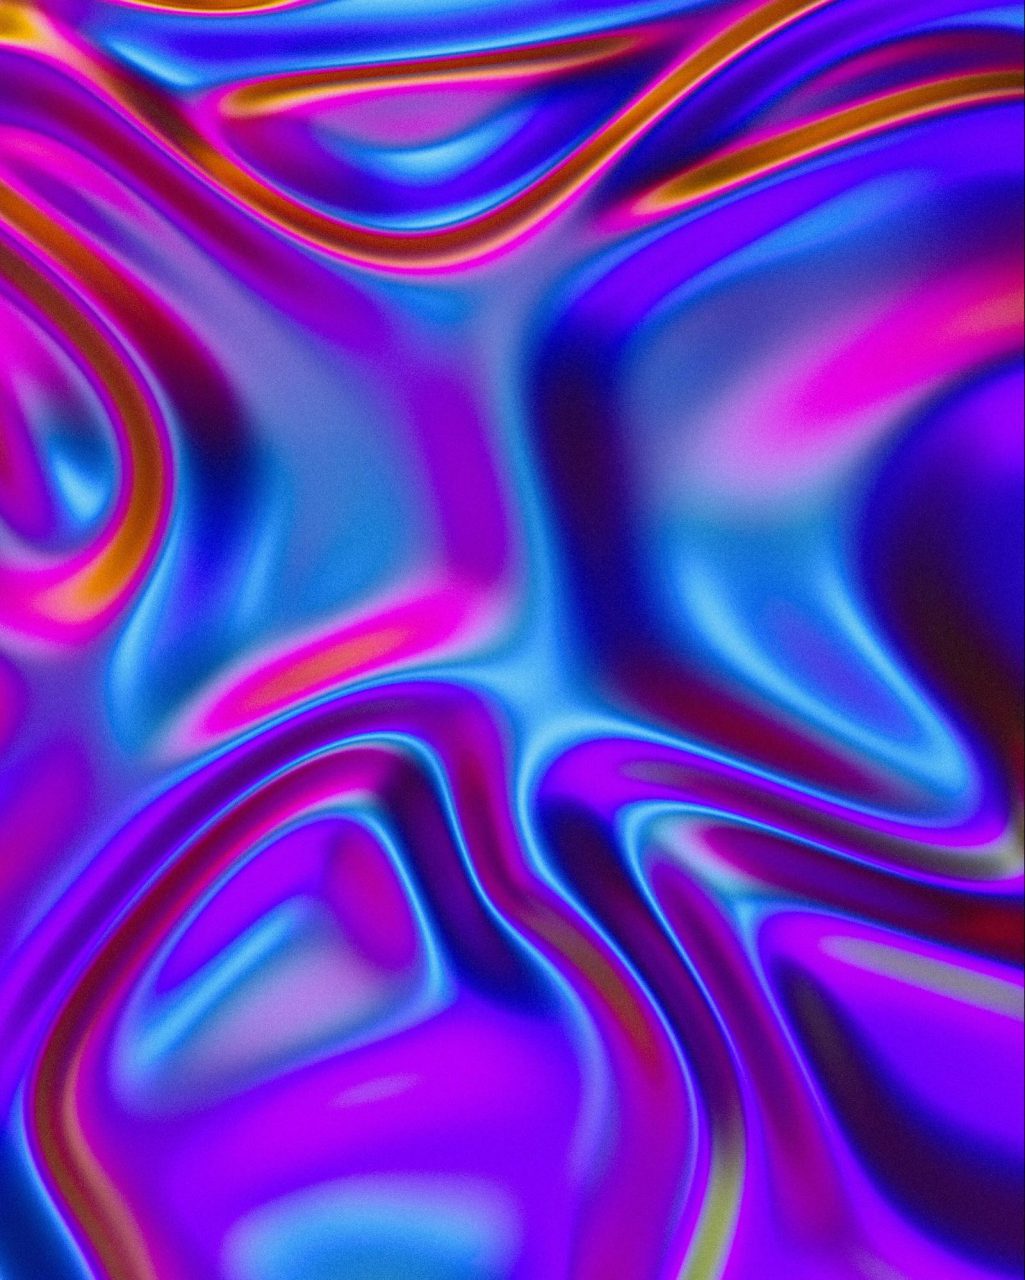
Source Antonio Manaligod
Other dForce Use Cases
There are many more use cases for dForce, here another list for inspiration:
- Bags, plastic bag with content
- Depth in Mattresses (like a cat sitting on a small cushion), pillows and cushions in general
- Crashing materials
- Footsteps in snow sand or mud
- Create Icicles
- Chains and cords (also jewelry like necklace, dog leash and seat belts)
- dForce for Conceptual Art
Daz dForce Possible Errors
Mesh exploding with clothing: This error usually happens when there is an object too close interfering with the hair or clothing. As consequence, the engine does not know what to do. The component cannot figure its way out after colliding. The mesh therefore explodes as evidence of this calculation mess. Try moving away possible objects that collide with the material. You can find here some additional tips.
Compatibility of dForce with old models: We have already explained in a quick tutorial how to transform non dynamics into dynamics to use with the engine. Still you can find here some additional tutorial about converting a dress between daz genesis.
Daz3d dForce: Conclusion
As we have learned, having the right tools does make a substantial difference in the quality of your projects. However, this is a quick overview of the Daz3d dForce engine, and we encourage you to discover and learn new ways to take advantage of it. The more you learn, the easier every new challenge becomes. Achieve new quality standards effortlessly and save a lot of time.