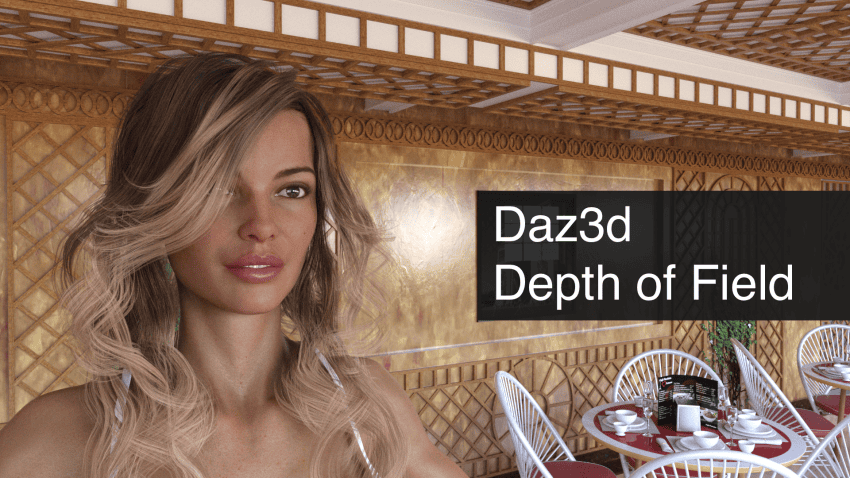
This article explains everything about using Daz3d Depth of Field. We will cover what Depth of Field means, how to setting up the camera with it, Customization and round up with a couple of examples.
If you prefer watching a video, see below, otherwise continue reading.
What Depth of Field is
Depth of field, also called DOF, refers to the range of distance that appears acceptably sharp. A simple word – focus will help to understand it better.
Human eye always has its focus on something. That is to say, that the object that you look at will be clear and sharp(in focus), while objects further from it will look blurry and unclear(out of focus). This is depth of field.
So people have depth of field right in their eyes and it is impossible to have everything in focus. Same in real-life photography. You can control depth of field, choose the focus of the photo. But you can’t make everything equally sharp-looking. The article Understanding Depth of Field explains this in more detail. But just have a look at the Daz Shop to see how many artist are already applying this to their promo graphics as seen below.

Daz Genesis 8 figure – source Yve for Alawa 8
When you work in 3D, you can make everything equally in focus. Furthermore, that is the default option. What is important, that it looks very unrealistic, as neither humans, nor even such technology as cameras can achieve this effect. That is why you absolutely need to add DOF to your renders to some degree. Thus, this article will teach you how to set up a DOFcamera in DAZ3d.
Setting up the Camera
First of all, we need a scene to work with. This scene should include at least one subject that we are going to focus on and some lights. If you don’t know how to set up the lights in your scene, we already have Daz3d Iray Lighting Tutorial article.
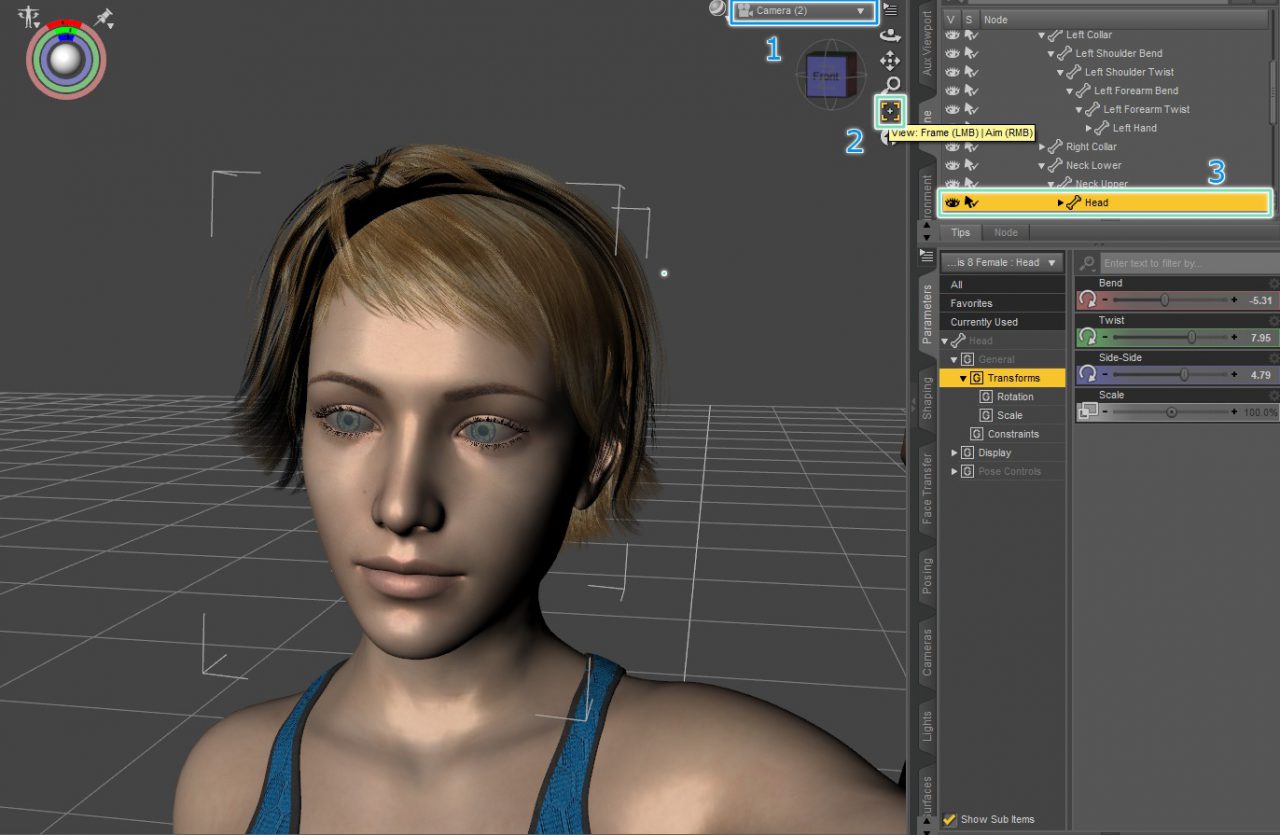
After placing some characters, you will need to add the camera to the scene. You can place the camera manually by moving it. Alternatively you can use the “Frame” button in Daz Studio. This button automatically frames the selected objects.
You need to change to the camera view[1], then select any part of the scene that you want to frame. For example, the head of a character. You can select it by simply clicking on it in viewport or finding it in the “Scene” menu[3]. After that, just use the “Frame” button [2]. It is a really useful way of framing something, especially for beginners who can struggle with doing this manually.
This is my final, really simple scene setup, you can copy it if you want:
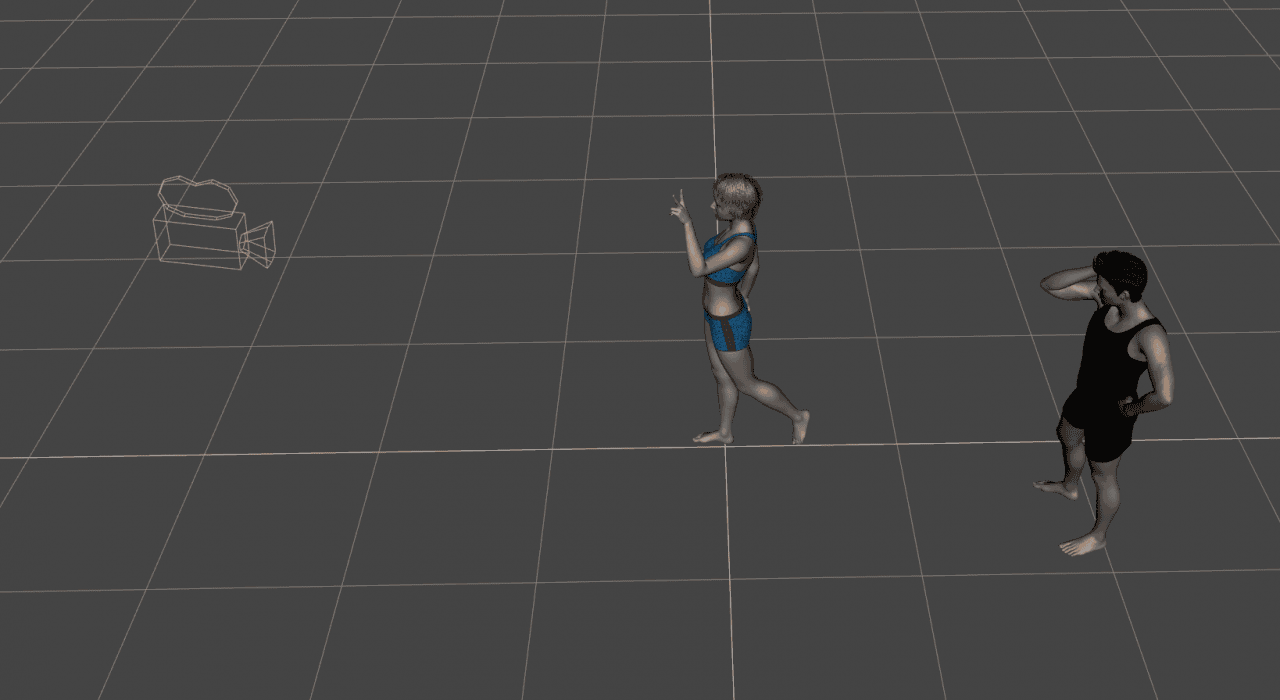
I have used two characters placed at a distance from one another. It is to show how DOF works on their example. Camera was placed manually. And also I have added some simple lighting setup, about which was said earlier. Here how the scenes look when rendered:
Adding and Customizing the Daz3d Depth of Field
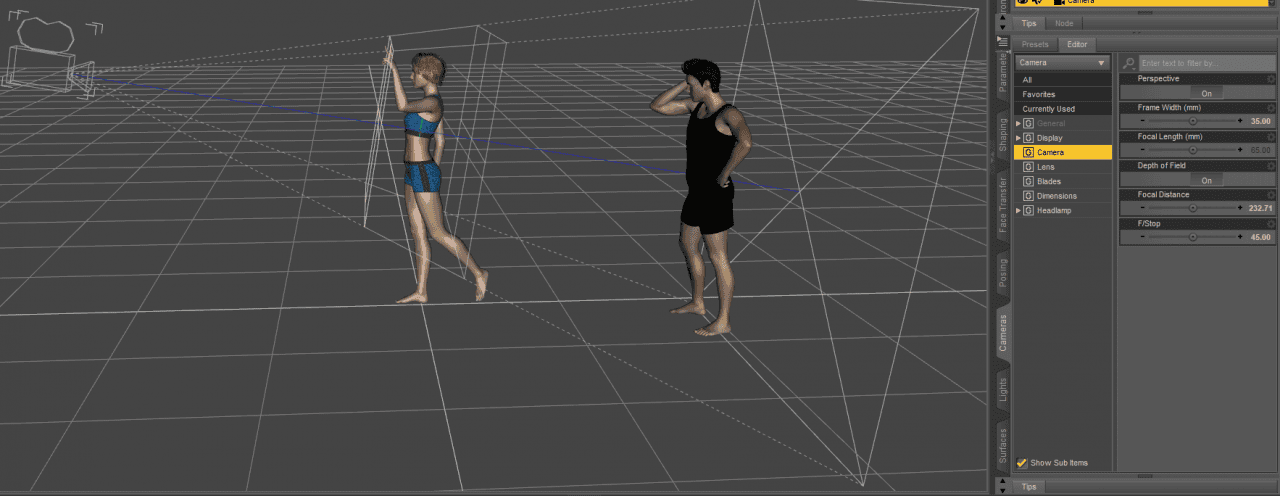
Now, after we have a scene, we can set the Daz Studio depth of field. To find DOF settings, select the camera and go to the Camera settings:
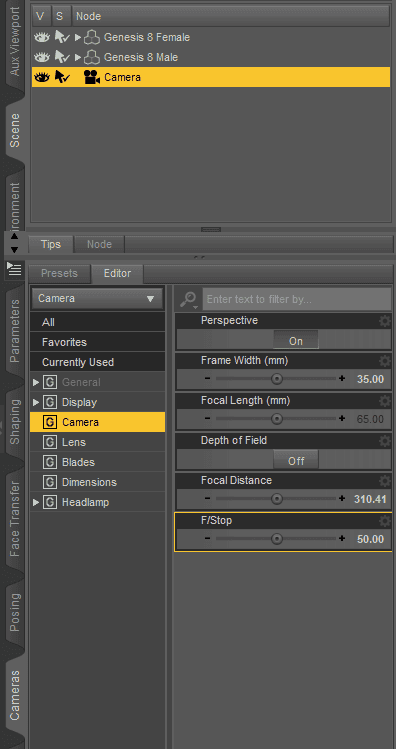
Here we are interested in “Depth of Field”, “Focal Distance” and “F/Stop” options. We are going to talk about all of them and explain. For the beginning, let’s turn on the “Depth of Field” setting.
Now, if you change to the perspective view out of the camera view, you should see some changes. When you select a camera, there should be the green and red “plus”[1] and two white borders[2].
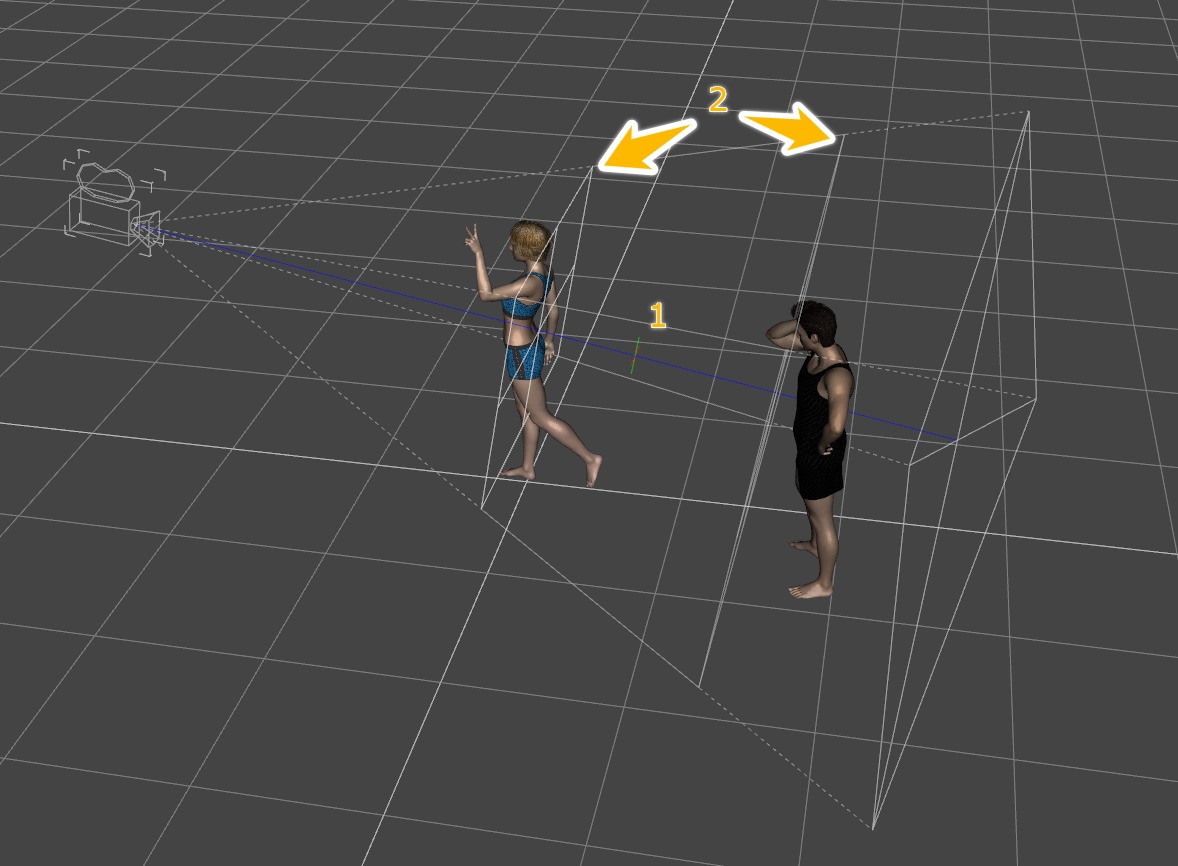
“Plus” is your point of focus. Meaning that at its location, everything will be clear and sharp. And borders show distance from the cross that also will be in focus and clear. Everything out of the borders should be out of focus and look blurry. You can change to the Iray preview and check how it looks already.
In our case, focus is in the middle of nowhere. So let’s try to make our female figure in focus and male blurry. For this, you need to change “Focal Distance” and “F/Stop”. First one moves your focus. When you change it, you can see how red and green plus is moving, also influencing the white borders.
After you place the focus point where you want it, change the F/stop setting. It changes how far borders are from the focus point. Closer the borders – blurrier are everything outside of them. I have set this up like this:
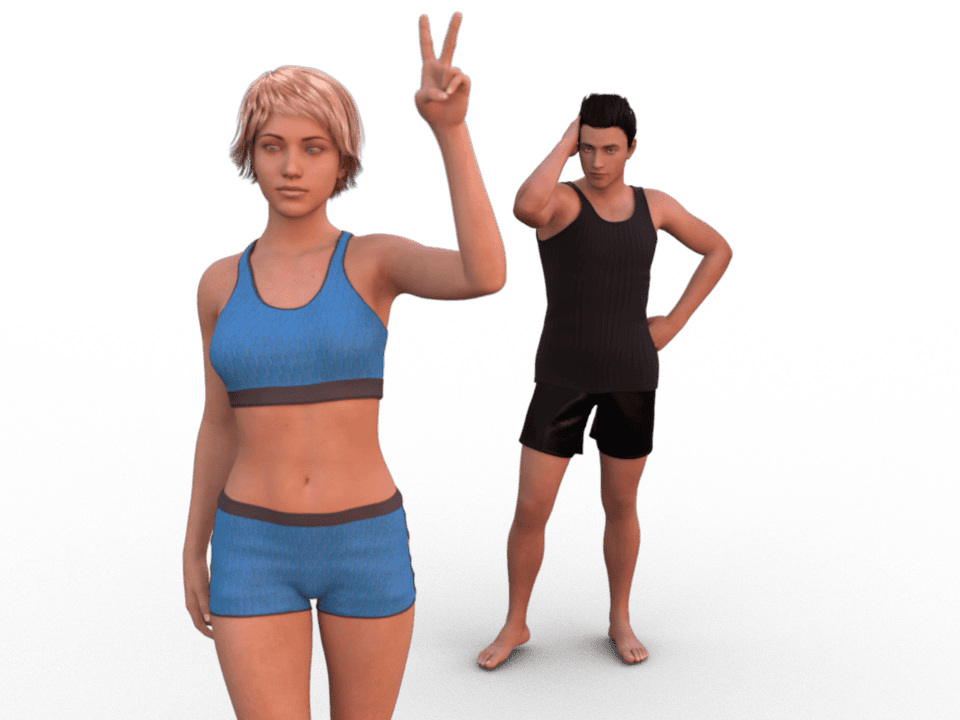
And this is the rendered result of this scene:
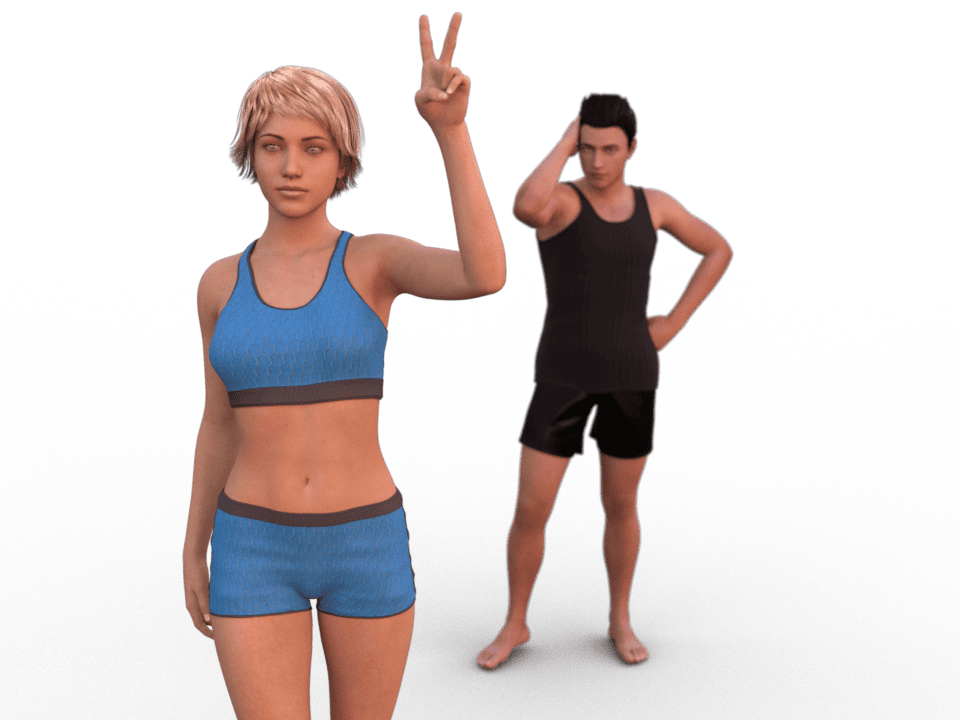
You can see that the male character is a bit blurry, while the female character looks clear and sharp, without any blur.
This is a common method of making photos. Usually the closest object to the camera is in focus, while the background is out. Let’s now try to make it vice versa. Meaning, foreground would be blurred. Also let’s make the effect quite more stronger.
Note, that moving the Focal Distance also moves the borders. And further the the focus point from the camera – wider are the borders. Thus you will probably need to adjust F/stop every time you change the Focal Distance. Here is settings I used for the second render:

As you can see, I needed to bump up Focal Distance quite a bit, so it would be near the Male character. Also I have changed F/stop to a really low amount. That is to make the blur effect much stronger. Result of render with these settings:
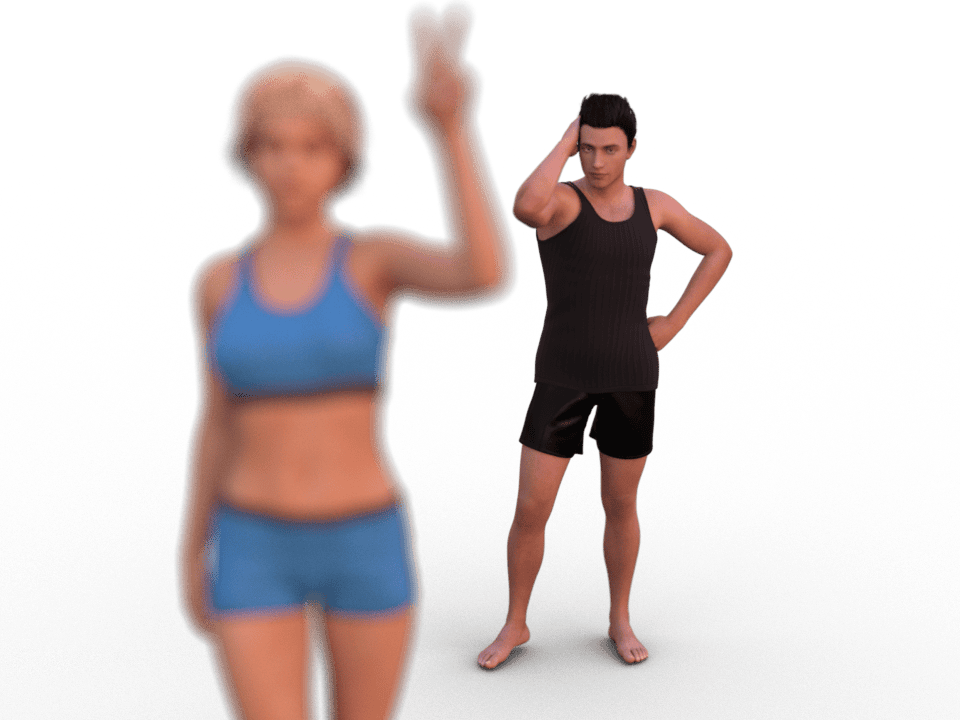
Female is indeed very out of focus, you can’t even recognize any details on her face. At the same time, the man is not blurry at all, you can see him clearly.
Conclusion
After reading this article you should now know how to use the DAZ3d depth of field and where to find it, what different options do. Also we answered the most common questions like how to increase blurriness in depth of field in daz studio iray and how to make less blur in the depth of field daz studio.
In the end, I want to recommend you always use the depth of field if you are aiming at a quality end result. Have a look at the top asset on the Daz3d Shop that are often using this technique.

Daz Product using Depth of Field – source Scarlett for Josephene 8
As was explained at the beginning, humans have the depth of field built-in to their eye. So when we look at the picture that does not have any kind of DOF and everything is equally in focus, it makes this picture much worse than it could be.
Also, if you are struggling with making DAZ3d depth of field setups, there is always another option. You can render with DOF turned off and then manually make it yourself in post-production.
Below also some additional products that include DOF.

Source UltraHD Iray HDRI With DOF – Meadows
or browse the following daz product that includes Depth of Field.
