In this article we are going to look into the art of rendering. Try to explain everything a standard user needs to know about daz3d best render settings. How to tune them correctly and produce excellent pictures.
If you prefer to watch, checkout our Youtube Video below, otherwise keep reading.
But first of all, what exactly is rendering? It’s a process of creating an actual image or series of images(animation) from your 3D scene. The best way to understand this is to compare it to taking a photo in real life. So if you want to take a good picture, firstly you would want to place everything correctly in the scene.
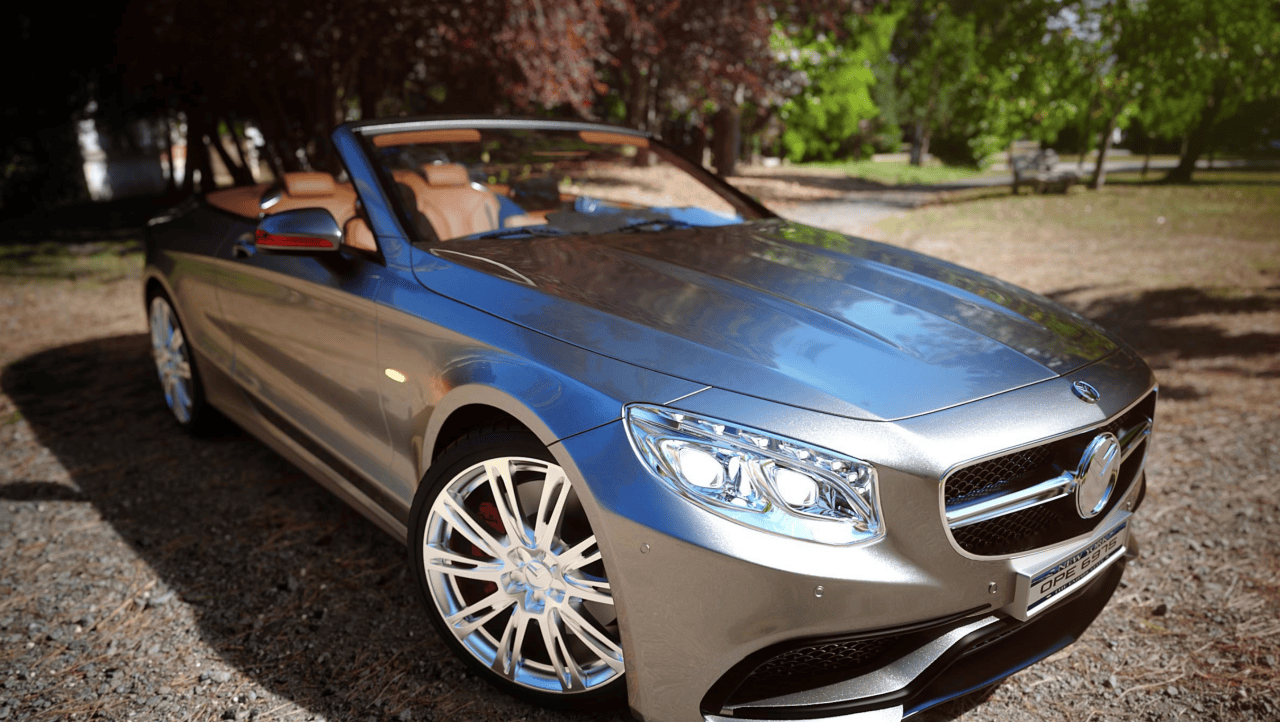
Source Ultra IRAY HDRI With DOF
The second most important thing is the camera settings. Because it does not matter how good the scene is, if your camera settings are not right. Picture would be ruined. Absolutely the same things apply when you render your 3d scene in the Daz Studio.
That is why we decided to explain everything we know in this article. Knowledge about iray render settings in daz3d to improve your daz3d rendering quality.
The Daz3d Render Settings Tabs
Obviously the first thing is opening the Render settings tab. By default your interface in Daz Studio should look something like the screenshot below. And the rendering tab should be on the left side, where most of the common tabs are [1].
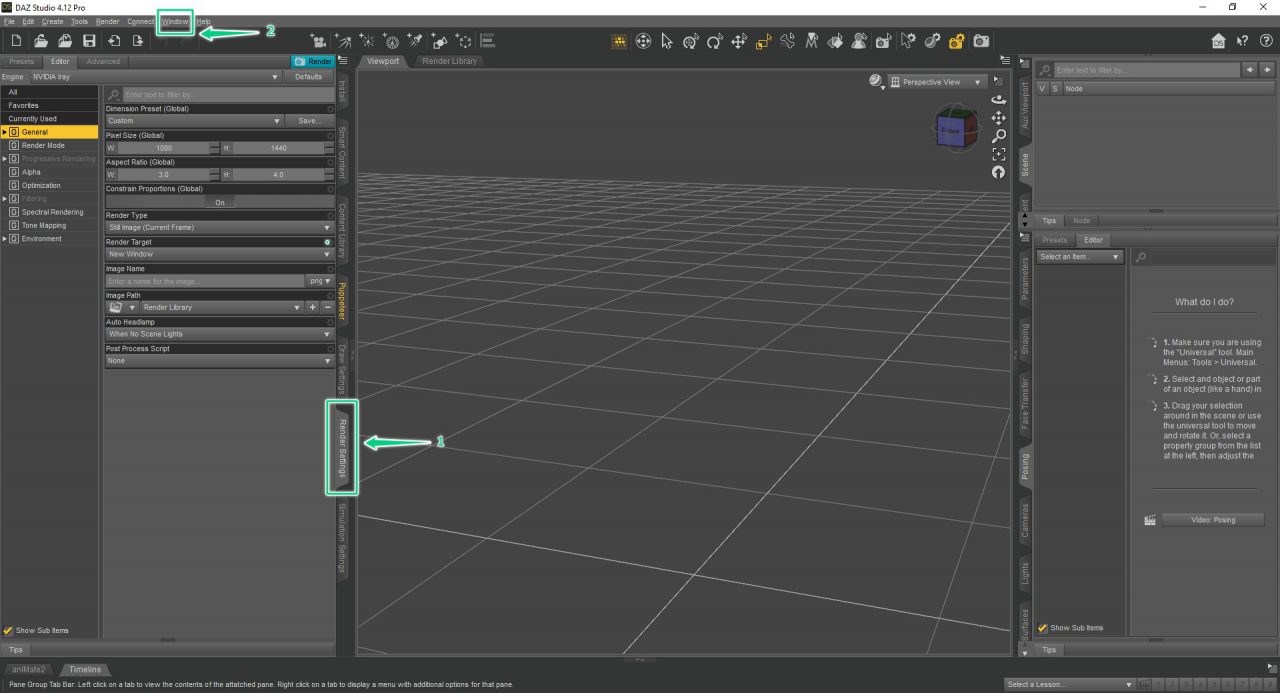
If for some reason you don’t have a render settings tab there, you can always open the new one. You should go into “Windows” menu [2] on top of the interface. And there, in the “Panes” option you can choose the window you want to open. In our case its Render Settings:

After this we will go through each and every tab inside the Render setting menu and explain.
General Daz3d Render Settings
The first tab is “General”. Here we have settings for “Dimensions”, “Destination” and “Misc”.
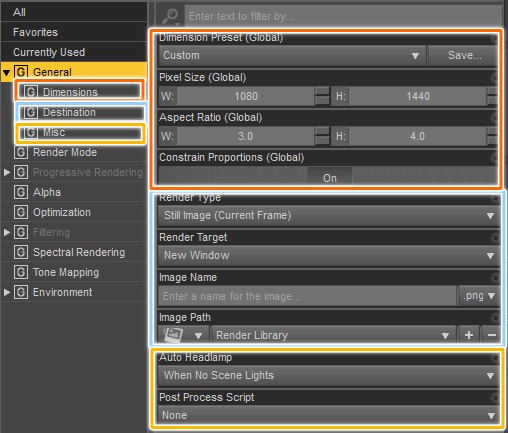
In the “Dimensions” you can set the size(resolution) and ratio of your render. You can choose from many presets or set it yourself. So if you want a FullHD picture you would set Pixel size to 1920×1080 and Aspect ratio to 16:9. For portrait pictures it would be 4:3 aspect ratio and so on. Easy to understand.
“Destination” helps you to choose where your final render files would be stored and their type. So if you are making an animation and need a series of images, here in “Render type” you can change it from the default “Still image”. Also here you choose the name of your render file. “Render Target” decides whether you would see the process of your render in the new window or it will just save the file upon finishing.
“Misc” or miscellaneous is mainly for controlling headlamp. Headlamp is a tool that produces light directly from your camera view. It is useful only when there are no other lights on the scene and should be turned off if there are. That is the default option too. Also there are settings for Scripts, but it is too advanced and only needed for a small amount of people who are making scripts.
Daz Studio Render Mode
After “General” we have the “Render Mode”. Here we can only change the Render mode.
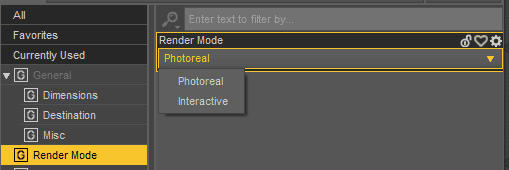
As you see, we can only choose between Photoreal and Interactive iray render settings. Photoreal is the default and is simply put, a bit stronger type. To clarify, “Interactive” would also render everything in a really good quality though not as good as “Photoreal”. Good way of using “Interactive” is when you want to make your renders quite faster.
Daz3d Progressive Rendering
Next tab is one of the most important ones. The “Progressive rendering” with “Update” and “Completion” subtabs.
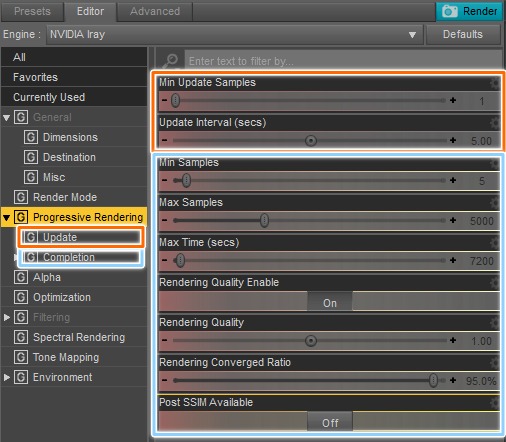
When you press Render, you will see the picture that shows the state of render right now. The “Update” controls how much this picture updates. Default settings (on screenshot) mean that every 5 seconds it updates the picture if at least 1 sample were done from the previous update.
On the other hand, “Completion” is for deciding when render will be considered completed. Because theoretically Daz Studio Iray can render forever. So it needs some rules for knowing when the render is finished.
First such rule that you can set is “Max samples”. That is to say, when rendering will reach this number of samples, it will stop and consider finished. Obviously the higher the number, the longer it will take. In return you will receive a better quality picture with less grain.
So you need to find the perfect number that will both not take too long and get you the clear image. Sadly we cant provide you such a number as it depends totally from your scene and settings and changes from one render to another. The best way to find it yourself is to lower the “Max samples” value to a small number like 100 and go up from there.
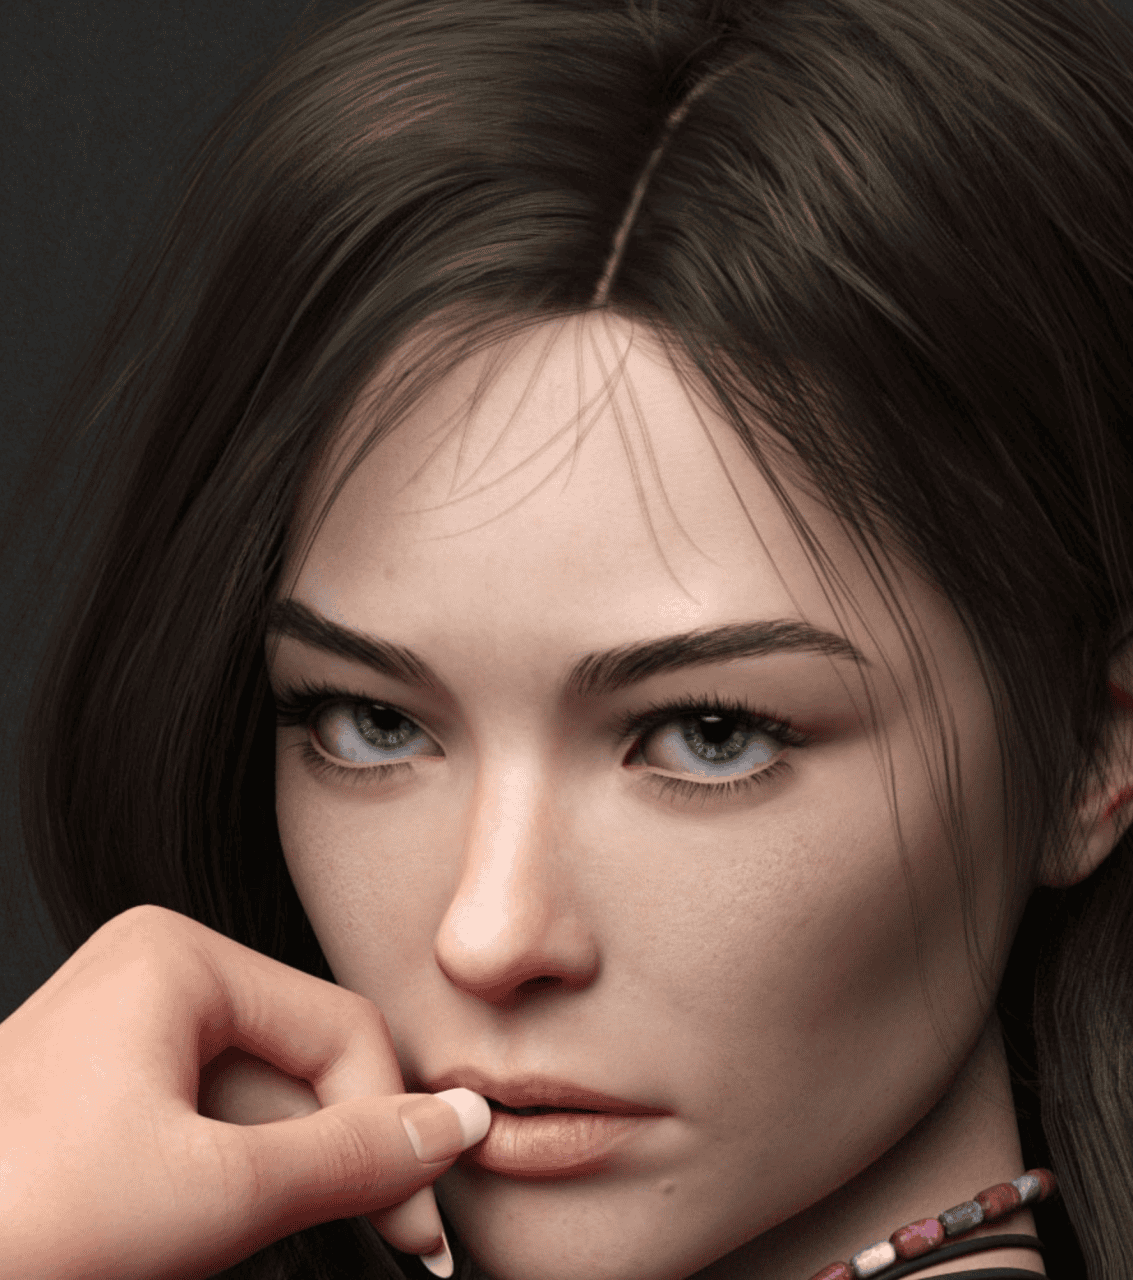
Here an example render with 100 Max samples. Notice the grain on the face, especially on the left cheek.
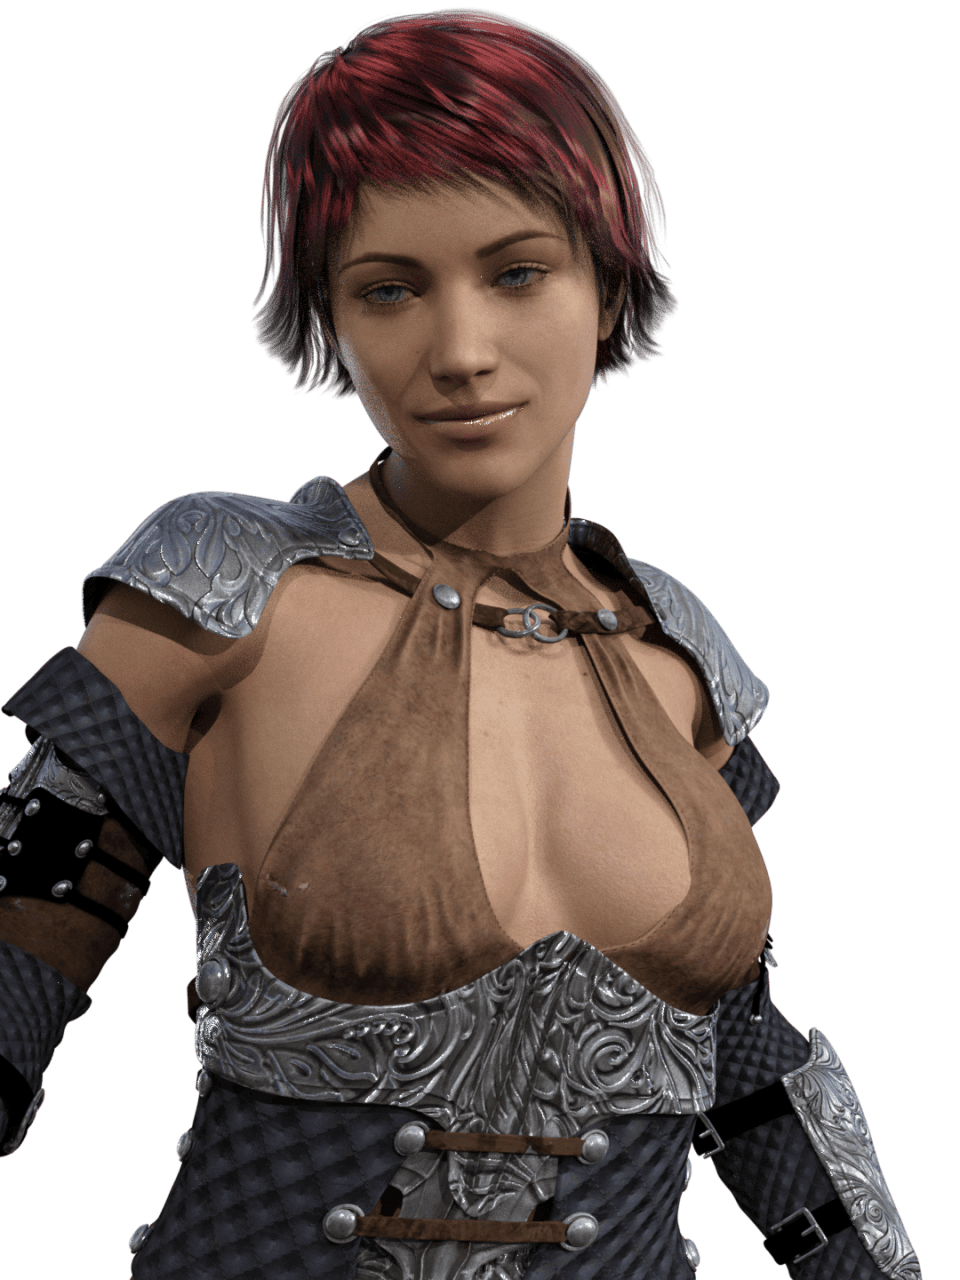
Another example render with 500 max samples. You still can see grain in places, but it is much better, especially on the left cheek.

Second option that you can set to stop rendering is much more simple. You can set the maximum amount of time for render. It can vary from just a few seconds to a couple of months. And in the end, how many samples were made in this time – that will be the final render.
Third and last rule that you can set is rendering quality. You can set it off and on. It is kinda difficult to understand what exactly this setting does. In technical terms it means how much of the image has been put together properly. One might think that you should just crank up these settings then. But it is not true, because then render can take far too long. And doing so can be useless. Since the image could be looking good enough after an hour or less. You should try things out and find your perfect settings to use.
You should also know that every of the three options above can work simultaneously. This means that you can set them to the desired values and when one of the options will reach said value – rendering will stop. This is useful, because sometimes reaching, for example, the set amount of max samples can take too long, thus setting the max time and rendering quality would be a good idea.
Alpha Daz3d Render Settings
Moving down the list, comes “Alpha”. Here we can change only one option – Default Alpha LPE(Light path expressions).
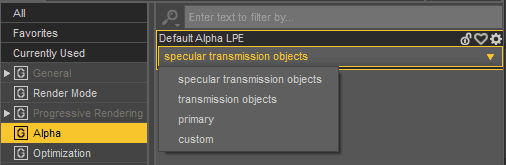
Changing this setting is only needed if you render the alpha or have transparent objects. We do not recommend changing from the default “specular transmission objects”. The only situation when you would change this is if you have problems and your alpha is not rendered properly.
Daz Render Optimization
Below this, we have a very important “Optimization” tab. It is important because of the “Caustic sampler” option. Caustics is a coating of light rays reflected or refracted by a curved surface or object, or a projection of this coating of rays on another surface. You can find caustics a lot on a sunny day by just looking at any glass object.
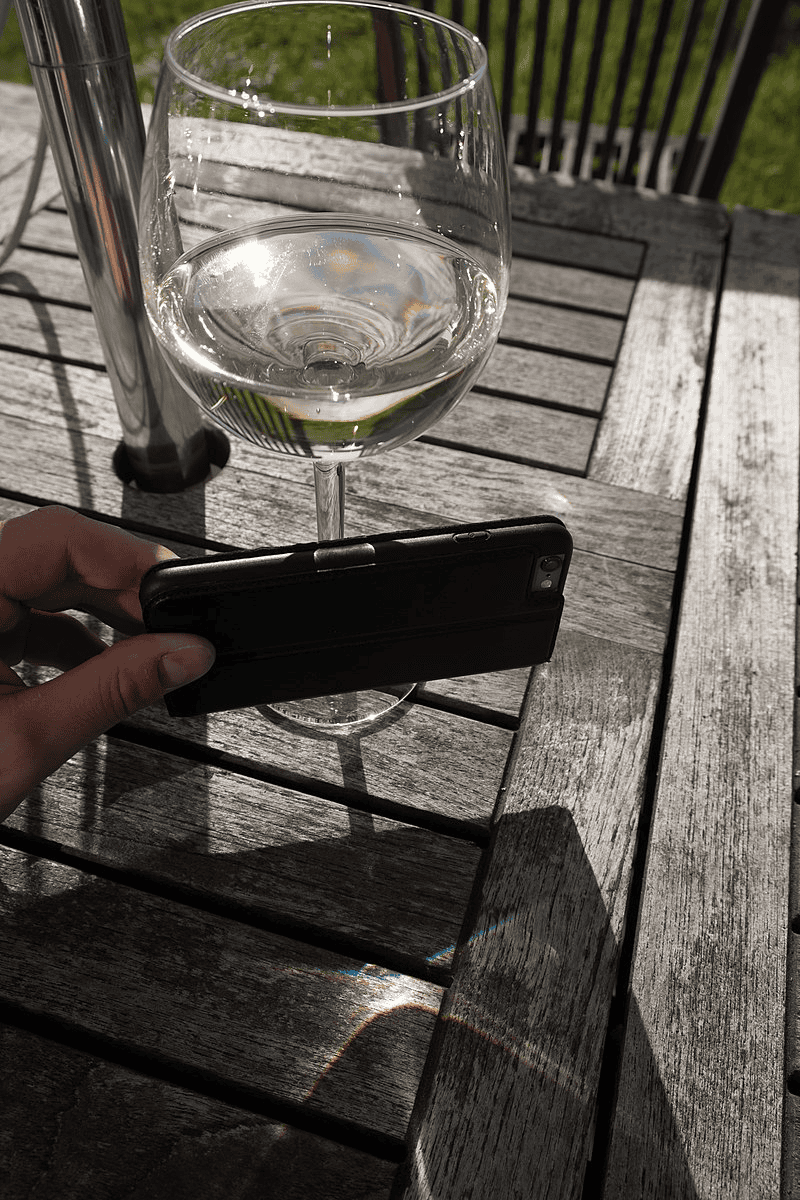
Caustics in real life created by wine glass – source Wikipedia
Daz Studio will create caustics to some degree even without turning the “Caustic sampler” option on. Then what does it do? Well it simply does enhance this effect. Making it look a lot more realistic and interesting. Though, you will trade render times for this improvement.
It is a small change that does not attract a lot of the attention. But it is making a huge difference to your scene. Making your scene look a lot more realistic on a subconscious level. Because the human eye can unknowingly notice the lack of such details as caustics and detect that picture is not realistic.
Below an example of a scene with the caustic sampler off.

Example of a scene with the caustic sampler on.
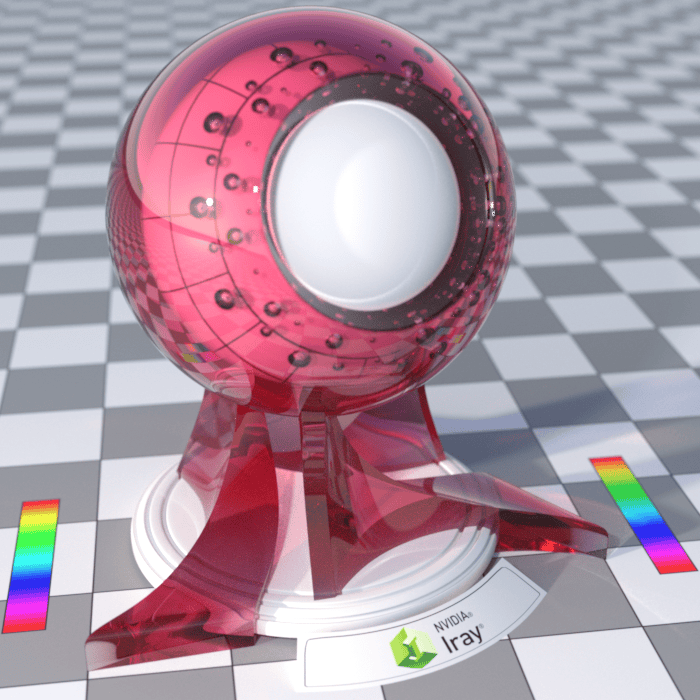
To notice the most difference in the provided example look at the points of interest such as: right below the red ball, white insides sticking out of the ball and shadow on the right hand side.
Daz Iray Filtering Settings
Next we have the quite important “Filtering” menu. Available options here are: Firefly filter, Post Denoiser and Bloom filter.

Let’s go from the top. Under some lightning conditions and with a low amount of samples you may see bright spots occur. These bright pixels are called “fireflies”. You can see plenty of fireflies in the example below.
The “Firefly Filter” tries its best to remove all of these fireflies.
Post Denoiser resolves a similar problem as Firefly Filter. But its purpose is to remove all of the noise(grain) from your final render. It searches the picture for the noise and then smooths it out while still maintaining overall sharpness. So you can sometimes on purpose lower the amount of samples made and then use Post Denoiser to compensate.
Example render with the Firefly filter and Post Denoiser activated.
And the last from the filter section is the “Bloom Filter”. It does simply what it’s called. Adds some bloom to your scene. But to be honest, it is not the best. Especially as it is very sensitive and you need to change settings a lot to find the perfect combination. Much better to add a bloom effect in post production.
Spectral Rendering
“Spectral Rendering” menu is for turning on and off the Spectral Rendering. It analyses the components that make up the spectrum of light instead of faking it.
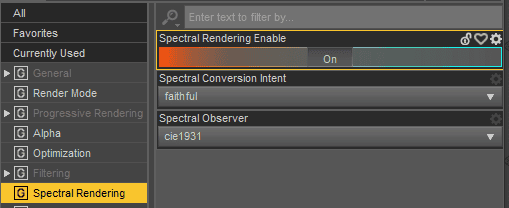
Calculating the entire spectrum produces more accurate to real life colors. This comes with a price of longer renders and potentially more noise.
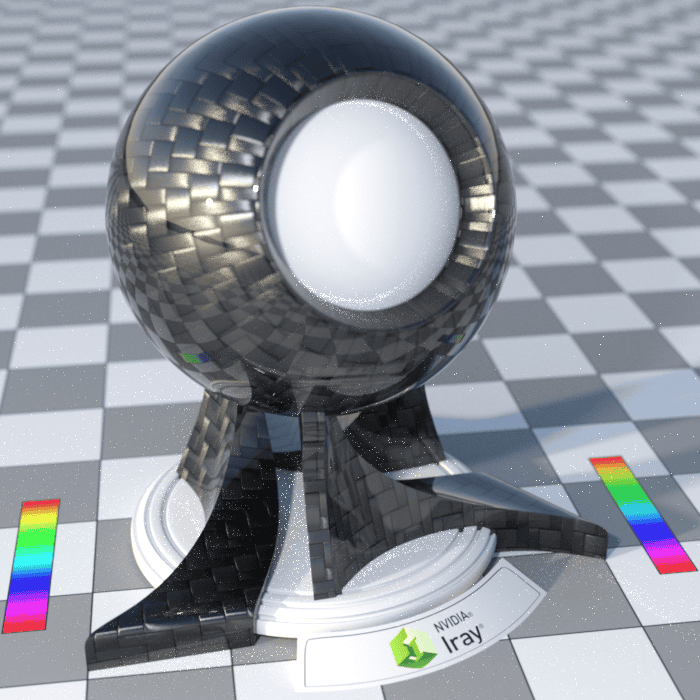
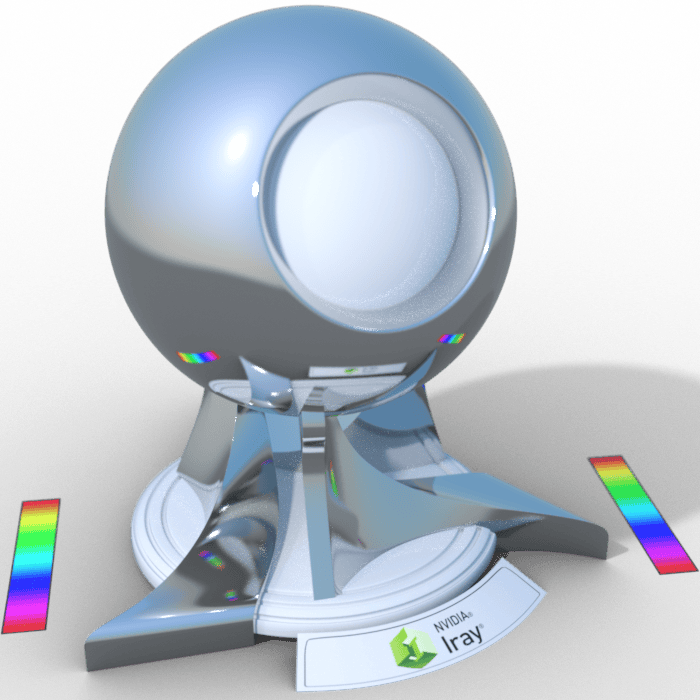
Here an example render with Spectral Rendering turned off.
Spectral Conversion Intent setting can be changed from “faithful” to “natural”. And Spectral Observer changed from “cie1931” to “cie1964”. With Spectral Observer everything is quite easy. The cie1964 is the newer standard, so we recommend using it.
And what is the difference between faithful and natural? “Faithful” option tries to make more true to life colors. “Natural” on the other hand, tries to compensate for things that are out of gamma. And potentially can create problems. Let’s look at more examples:
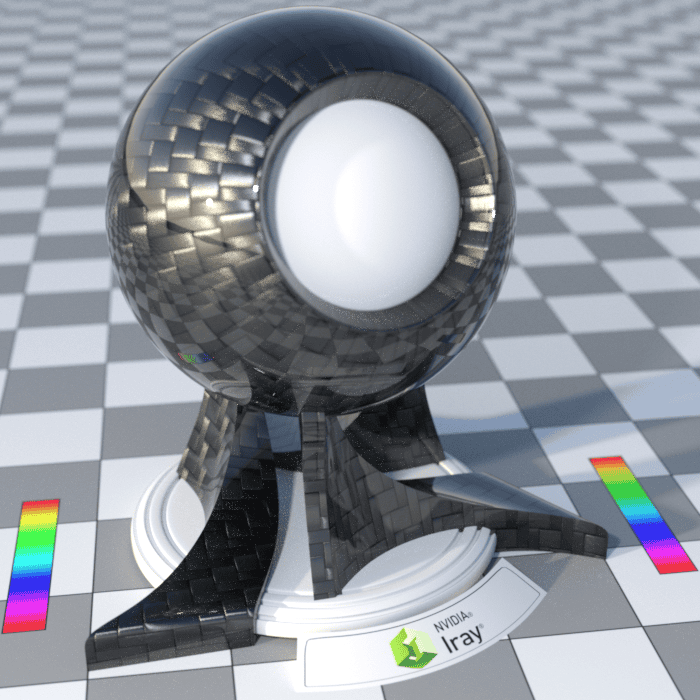
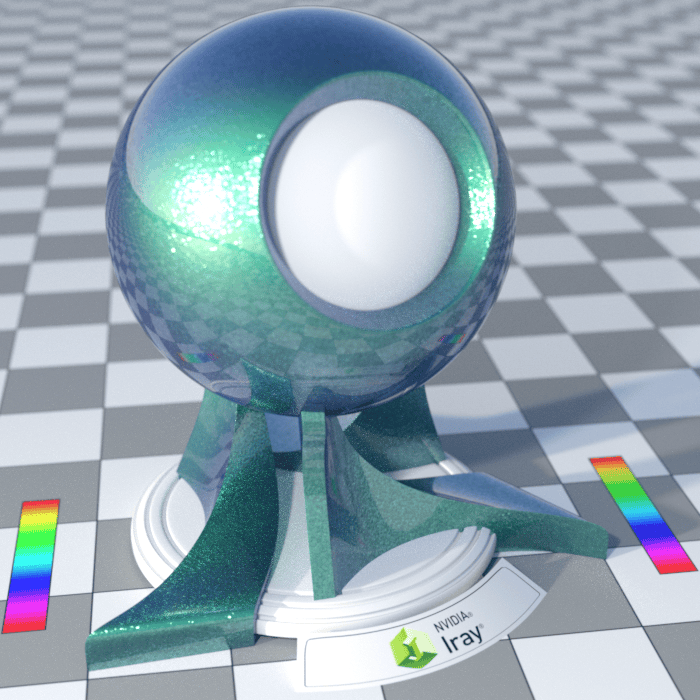
Below an example render with Spectral Rendering turned on to faithful.

Another example render with Spectral Rendering turned on to natural.
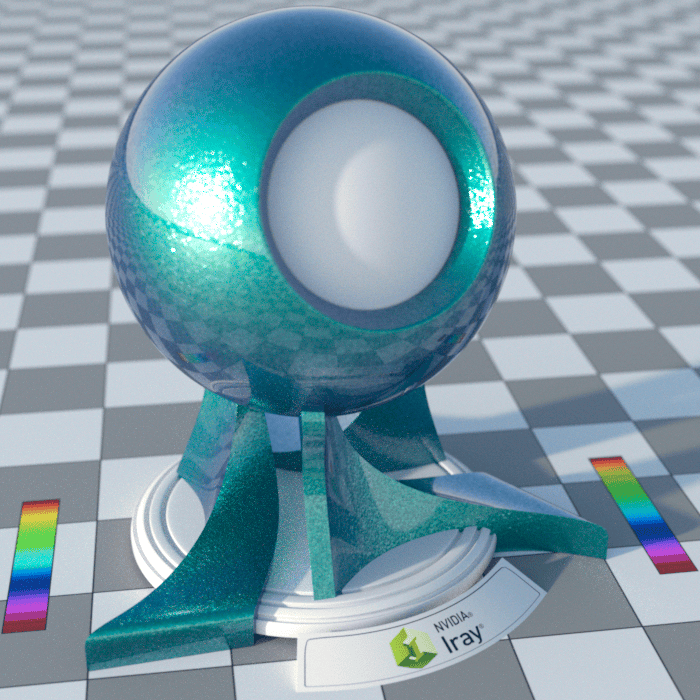
You can see that both variants are different from the initial example without Spectral Rendering. One might say that colors are more interesting and realistic.
Look at the color gradation to the left of the sphere. Here you see the difference between “Faithful” and “Natural” and notice the problems that we talked about. The default render and “Faithful” have smooth gradation. While “Natural” is all divided into stripes and you can clearly see where one color becomes another. This happens because it tries to push out of gamma colors into more natural colors. The problem is that we lose part of the information. So in the end, we do not advise you to use the “Natural” option.
Daz3d Tone Mapping
Almost at the bottom we have the “Tone Mapping”. In this tab is the stuff that usually you don’t want to mess with. Because these options are for compressing the dynamic range of the image.
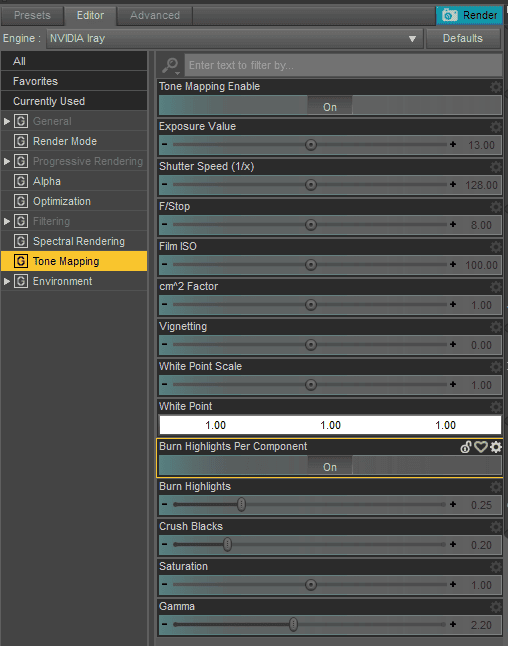
To say in other words, this tab controls the options that most of the people would do in post production. Things like Exposure, Gamma, Saturation, Film ISO and others. We also would recommend you to use any other software for these purposes. If you don’t use any other software, you can still play with different values, for example the Exposure Value influences the brightness for your render. In case the render is to dark you can reduce that value. As side note all kind of light resources of course make also an impact, including if on your camera the headlamp is switched on or off.
In general if you change something inside the Tone Mapping settings, it impacts the final picture right away. And if you don’t like the result, then you need to render again. Sometimes that can take a really long time.
But be mindful not to turn the Tone mapping off. Because this will lead to a broken render as seen below.
Daz Studio Environment Lighting Setup
The last menu we have on the list is the “Environment”. This tab is for controlling the environment of your scene, especially environmental lightning.
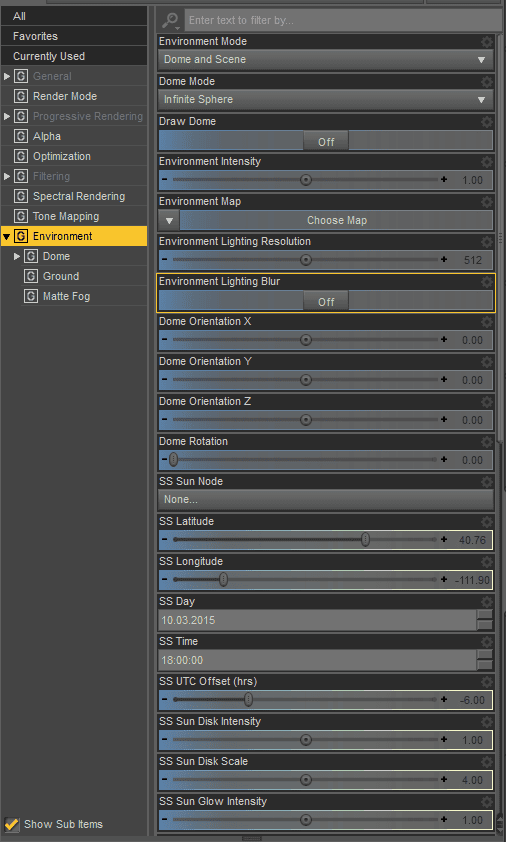
Main thing we can control here is the “Dome” settings. Dome is the environment that will decide the lightning and reflections of your scene. To clarify, if your dome shows the sunny day in the forest, then your scene will be lit up and you will see the reflections of the forest in your reflective objects.
In the Environment Mode you can choose between a couple different settings
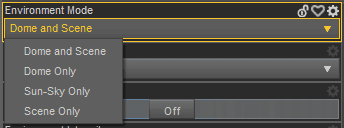
“Dome and Scene” will use lightning both from your scene(Spotlights that you placed) and from the dome. “Dome only” will not use your scene lightning at all. “Sun-Sky only” is using only the part of the Dome settings that control Sun and Sky. And “Scene only”, as the name implies, uses only the Scene lightning and not Dome. So for the most control of the settings you want to choose the “Dome and Scene”.
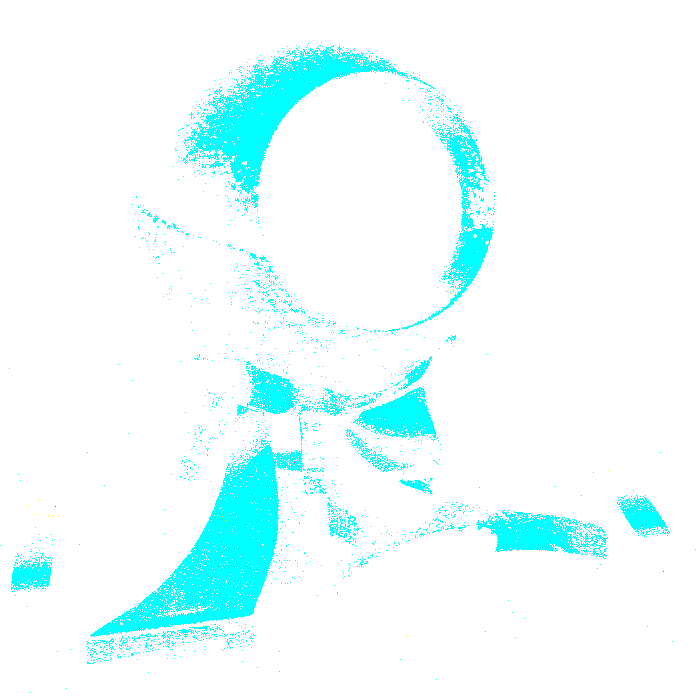
First of all let’s try to set up the Sun and Sky dome. To do this you need to look into the settings that start with the SS (Sun-Sky). You can select the Latitude and Longitude of a real place in the world. Then you can choose the day and time. In the end you would have the simulation of where the sun was at that point of time at that place. Below an example of the Sun-Sky setup.
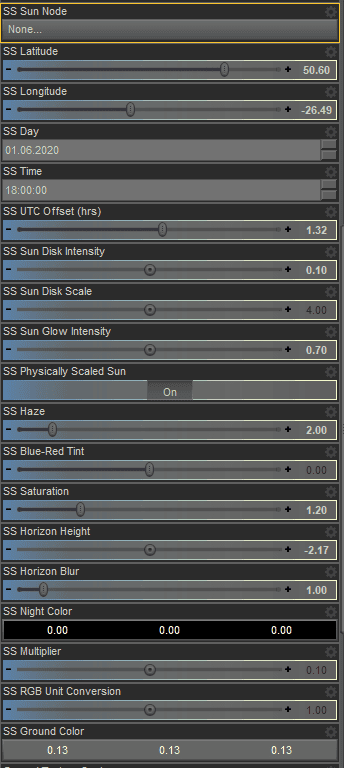
Also you may change the Saturation of the sun-sky, how high is the horizon and how blurry it is. One of the important settings is “SS Haze”. It controls the hazines of the sky. By default it is set to 0, but the sky is never this clean. So for realism you always should change it to at least 1. Also the hazier your sky is – the softer are the shadows. At 0 haziness shadows are too crisp, which makes the scene surreal.
Render made with the Sun-Sky settings showed earlier
But changing all of the settings for the longitude, latitude and time of day can be very fiddling. So instead of that, you can create the sun yourself and control it. To do this, simply create the “null” object in the create menu.

Then in the environment tab find “SS Sun Node” and choose your null object here. Now the Null object is your sun, so you can place it wherever you want.
HDRI in Daz Studio
Instead of setting the environment as sun and sky yourself, you can use the High Dynamic Range Image or just HDRI. HDRI is the 360° image that contains information about the environment, such as reflections and lightning. After applying HDRI to your scene, all of the settings will be set for you, so no need in messing with settings. You just need to choose your image in the “Environment Map” settings.
Users would want to change only a couple of settings on the subject of HDRIs. First one is the “Environment Lighting resolution”. It controls the sharpness of the shadows. The best way to set up this setting is to match this number with the resolution of your HDRI.
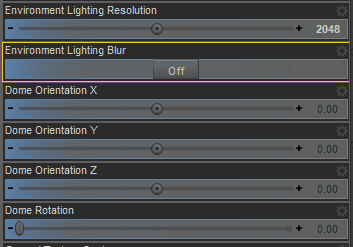
Settings for HDRI dome
All other settings just control the Orientation and rotation of your dome in comparison to your scene. So changing these parameters can change the lightning. For example, you can change the position of the sun relatively to your scene.
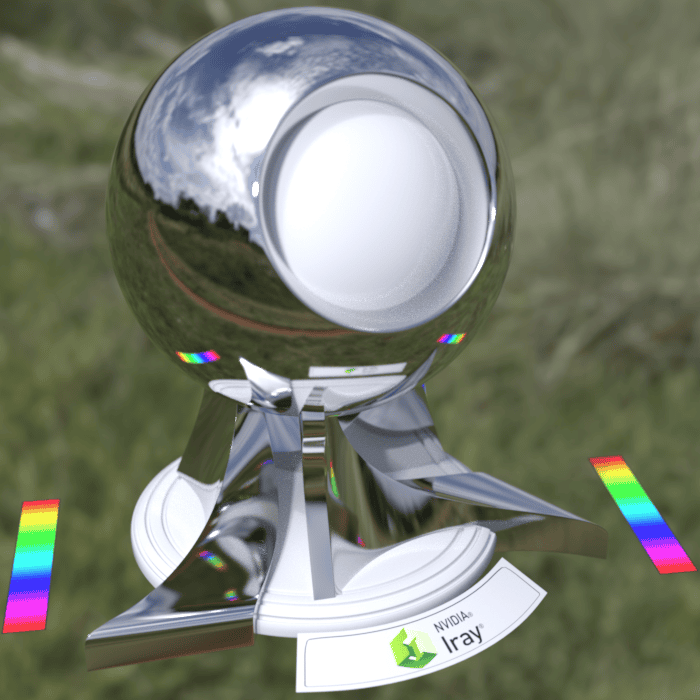
Render made with the HDRI
Where to Find Useful HDRIs?
You might ask – where would I find these useful HDRIs? Well, it is pretty easy to find them on the internet. You can just type “HDRI” into a search engine and find some sites that propose a big range of different HDRIs, some are even free. Or you can also find them on daz3d shop, where all of the HDRIs are created precisely for Daz Studio. Below a short list of high quality HDRI products.
- iRadiance HDR Lighting for iRay
- 180 HDRI Studio Light Pack
- HDRI Toolkit
- Ghost Light Kit 1
- Ghost Light Kit 2
- Ghost Light Kit 3
- Fashion Lights
- Sunsets and Deserts
- Light Probe Kit
- iRay Light Manager
Daz3d Render Settings Tips
In the end, let’s talk about some stuff about Daz3d render settings that one might want to know. Just some small tips and things.
Texture Compression High Threshold and Devices
First of all, look into your “Advanced” section of the “Render settings” menu. We are interested in two things there – “Texture compression high threshold” and “Devices”.
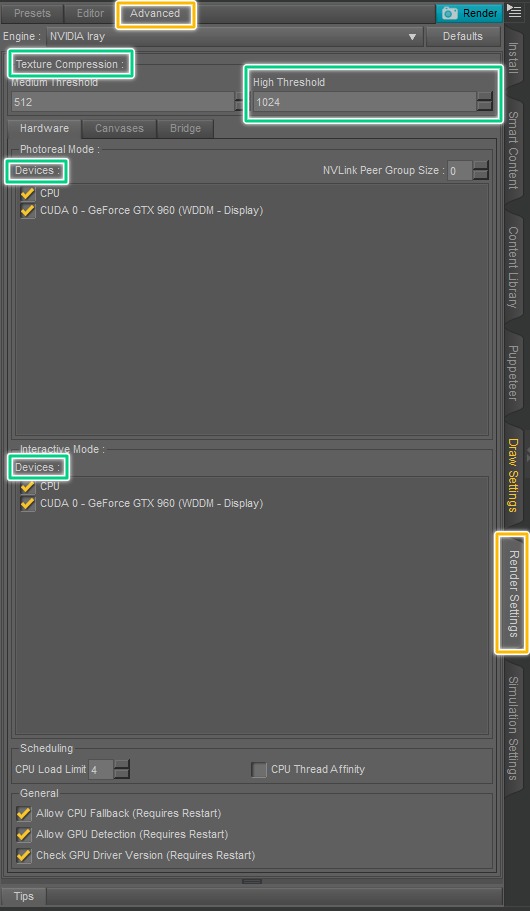
If you have problems with your textures, then you should try changing the “High Threshold” to something higher. Sometimes even up to 4096. This should help you, as your textures would not be overcompressed.
Another very important thing you want to pay attention to is your Devices. You always want to choose your GPU there. GPUs are wildly better for rendering complex scenes and can improve your daz3d iray render time drastically. You can also try to combine CPU and GPU. But be vary that it can lead both to faster and slower renders depending on your computer.
Source Keriann HD for Genesis 8 Female
Oversampling
The last tip that we have for you today is oversampling. It is when you render your scene with a very high resolution as 4k, for example. But with quite a low sample number, so you end up with a grainy image. And then you scale down your picture to lower resolution as FullHD. After that, your grain should be gone. Sometimes oversampling can be faster than rendering with a higher samples number.
Conclusion about Daz3d Render Settings
In this article we introduced you to the daz3d render settings. Showed you all of the most important aspects and explained all of the main tabs of the Daz Studio rendering interface and what is done in which tab. In conclusion, you need to remember that there are no daz3d best render settings. Simply because they vary from one scene to another. All of the materials, lights, objects and even camera position change the way how you should come to the rendering. In the end, only a lot of practice will make you master of this art. Checkout also our other articles about Daz dForce, great morphs for Daz3d Genesis 8, or any of our model reviews such as Top 6 Bar 3d Models.