This is a tutorial article. Me and you are going to make a scene together. This will be the beginner scene, so even if you are new to the Daz3D – you can follow up with ease. Especially as everything used in the tutorial is built-in the program itself, so you don’t need to spend a cent to follow it with me.
We will go into each step from the very beginning of installing and first launching the Daz Studio to the final render. If you want to rather watch a video checkout our Tutorial on Youtube.
So let’s start.
How to Install Daz Studio
First of all, of course, you will need the Daz Studio itself. You can download it for free from the official website after a simple registration.
After that, there should be simple instructions about how to install everything using the default DAZ Install Manager. Alternatively you can use DazCentral, which is another software with basically the same functions. Also installing everything manually is always an option too.
Installing should be easy and don’t be a problem. But if it is – don’t worry. We have an in-depth article about installing Daz Studio in every way possible. With its help you should handle everything.
How to Add a Figure in Daz3d
To add most of the things to your scene you will need to use the “Smart Content” tab. In the default layout this tab can be found on the left side of the interface.
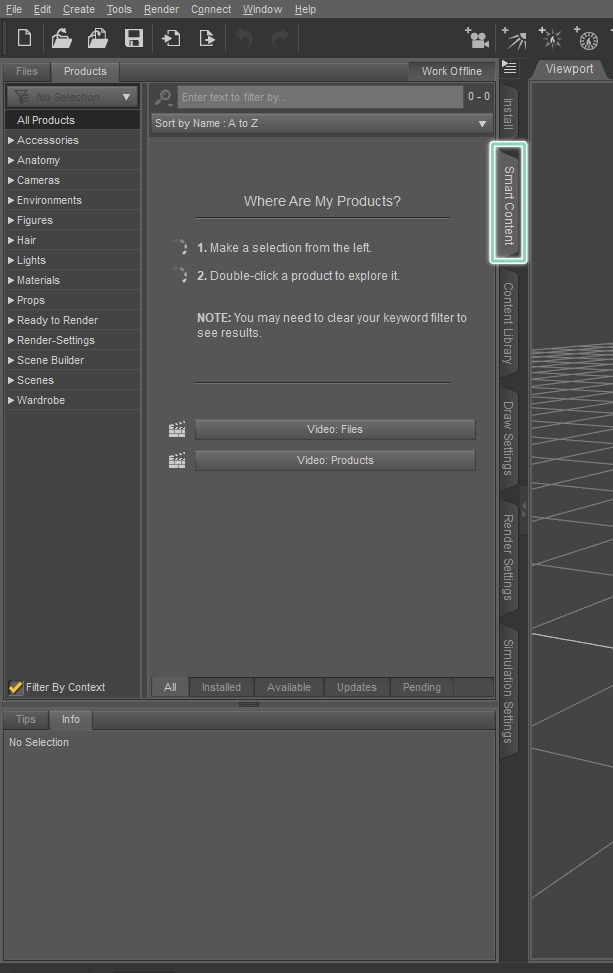
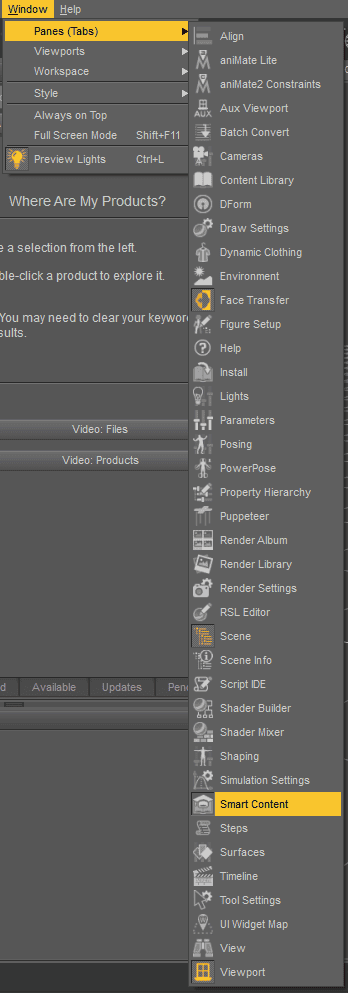
It should be always open by default, as it is one of the most important and used tabs. But if for some reason it is not there for you – don’t worry. It is always possible to open any tab if you go to the “Window” at the top bar and “Panes” from there there.
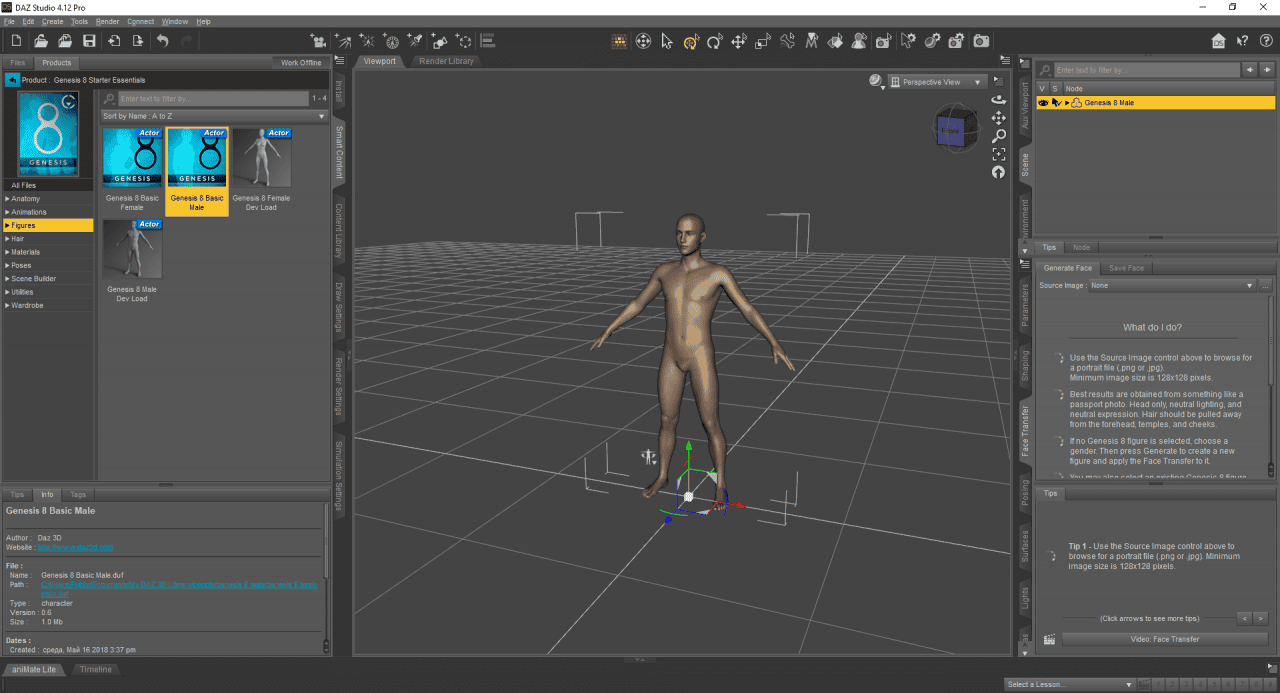
Now in the “Smart Content” find the “Figures” option, click on it and you will see a selection of all Genesis technology generations. I recommend selecting the newest, Genesis 8 technology. Or the previous, Genesis 3 is also good. Choosing any other is not a good idea, as they are simply too old.
On our website we have articles, where we explain everything about the Genesis 8, why it is named like that and it’s pros. Also you can read about the Genesis 3 and why a lot of people are still using it instead of the newest generation.
After choosing the generations, you will be sent to its folder. Here you need to again find the “Figures” options. Now select whether you want Male or Female characters. Be wary not to choose the “Dev load” figures, as they are for developing stuff. Double click on your selection and your character should appear at the center of the viewport:
How to Add Clothes in Daz3D
After adding the character – it would be obviously naked. So let’s not leave them like that and find something to cover their body.
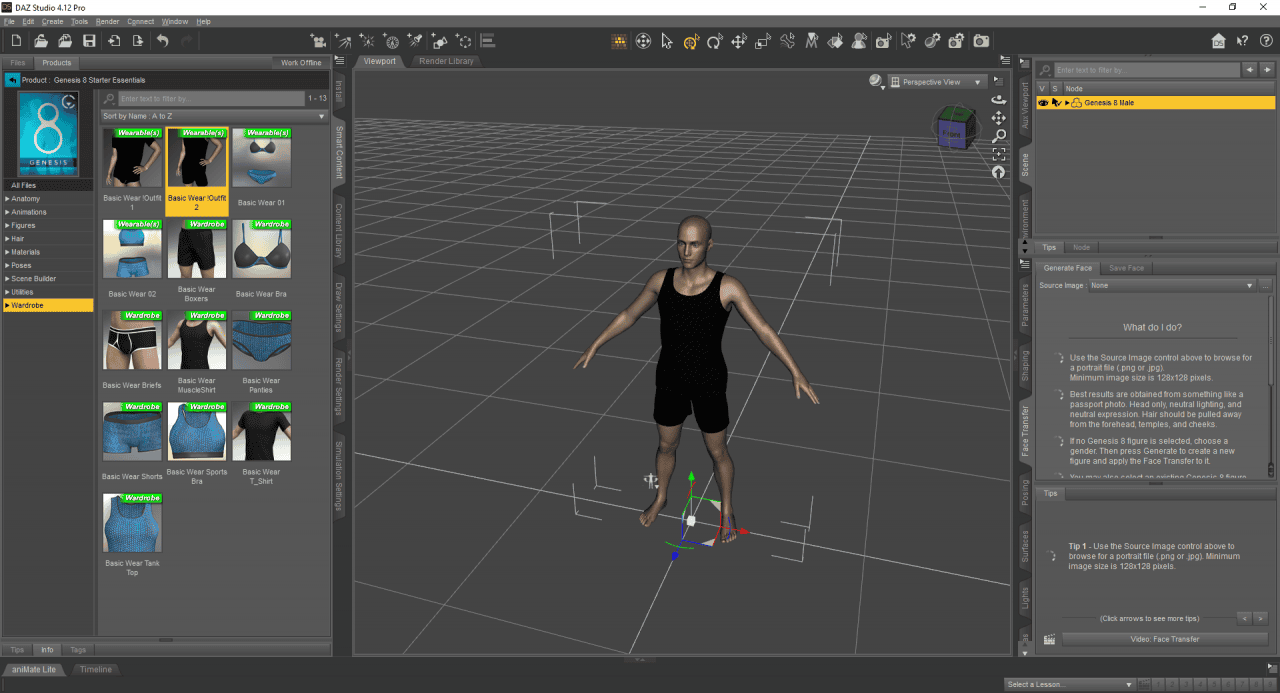
Still in the Smart content tab, in the Genesis folder, find the “Wardrobe” option. Sadly, by default there is no real selection of clothes, so choice is between just some Basic wear. You can dress characters in outfits or in a seperate pieces of the outfit.
Double check that your character is selected. It can be seen if it has the white borders in the viewport or yellow selection box in the “Scene” tab on the top right(see screenshots). If it is not selected – select it by clicking on it in the “Scene” tab. Now select the wanted clothes.
How to add Hair in Daz3D
Adding hair is not too different from adding the clothes. Everything is still the same. “Smart Content” tab, find the “Hair” this time. There should be only two default options. One for male and one for female.
As there are not a big selection of hairstyles and clothes, feel always free to browse the Daz3D shop. You can find there a lot of different items and bundles that you will probably like. I will stick with the default options for the purpose of the tutorial, but you can change the scene how you like it.

Clothes available in the store – Genesis 8 Female MEGA Wardrobe
Again, be sure that character is selected and then double click on the desired hairstyle so it would be applied to the character. You can try to experiment and fit the female hair to the male figure and vice versa. But I am going to stick with how it was designed at the start.

Male figure in the base outfit and with hair applied
How to add Environment in Daz3D
Right now your character should just be in the middle of viewport. Basically around nothingness. Daz Studio can simulate some kind of floor, but it would be much better if we could place the environment around our character. Let’s do exactly that then.
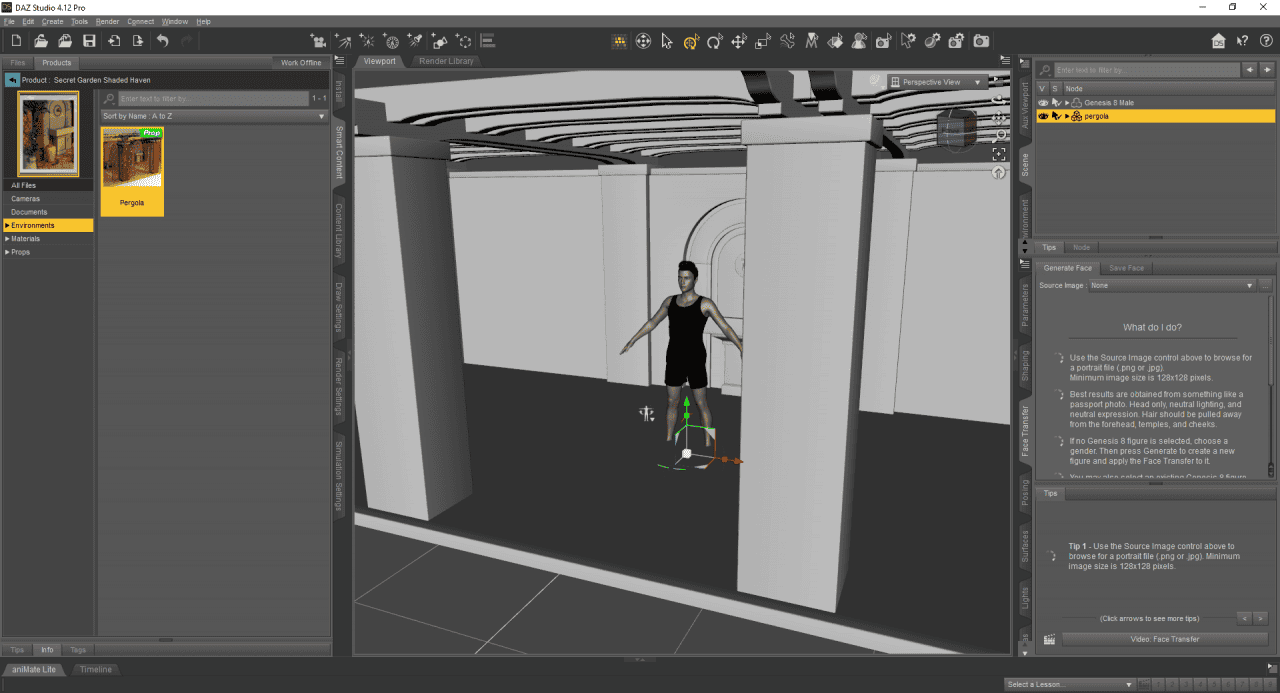
First of all, exit the “Genesis starter essentials” folder that you should be in. In the “Smart Content” at the top left there should be a blue button with an arrow. That is what we need.
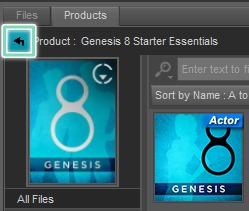
Now find the “Environments” option. There you can select whatever you like. I personally think that the “Secret Garden Shaded Haven” is the perfect environment for the beginner scene. So double click on it, it will open the folder again. In there find your environment, in my case it is “Pergola”, double click again and it should appear at the center of the scene.
Sometimes after doing this, the environment would be ready. In my case, I will need to also add textures. Though, sounds complicated, in reality it is really easy. Just find the “Materials” right under the “Environments” and with your environment selected find something like the “Full Materials” option.
If you want to use something more interesting and, frankly, better, read our articles about some of the top environments that we found. There are articles about top bar models, best swimming pools or residential houses.
How to Pose a Character in Daz3d
Now that we have our character in the clothes, with the hair and surrounded by some kind of environment, we can begin detailing our scene. Firstly, let’s make the figure take a pose. There are a couple of ways of doing this.
First and the easiest, that I recommend using for beginners is just finding needed poses under the “Poses” option in the “Smart Content”. Try selecting poses that were made for your figure in mind. Meaning female poses for females. You can try to experiment and use, for example, female poses on males, it should not be a problem. They just may not look as intended.
After selecting a pose, you might want to move a character. As seen on the screenshot, in my case the character’s foot is under the floor. And a pose definitely does not work in this place, he needs some kind of a wall behind him.
To resolve these problems, I need to move him. For this I just select the figure and at its origin point the axis should appear. I can drag the arrows to move figures in that direction. If for you the axis does not appear – find the “Universal tool” in the toolbar and select it.
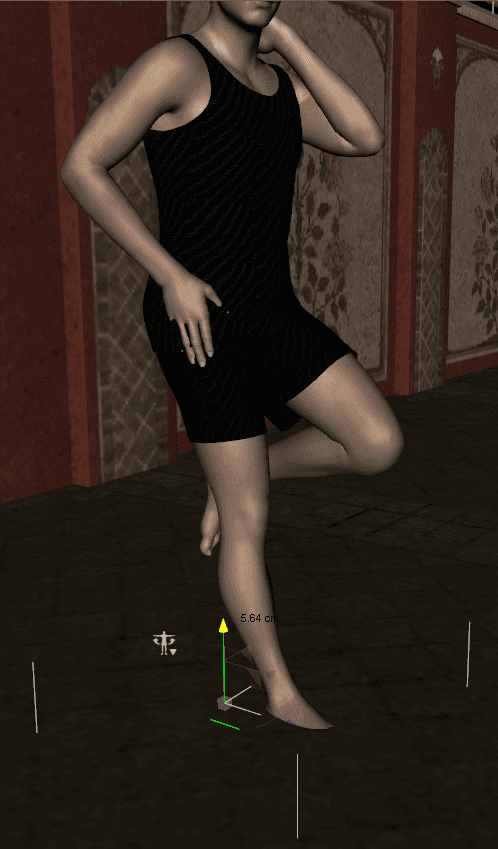
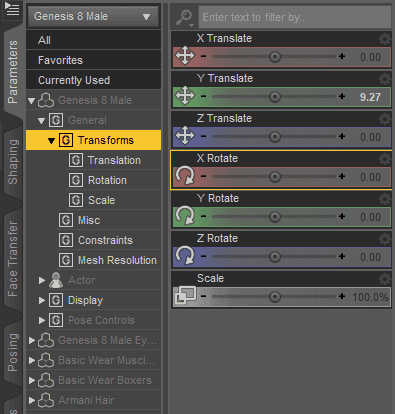
Alternatively it can be moved in the “Parameters” tab. Tab should be on the right. If not, see how to open tabs at the beginning of the article.
In the “Parameters” tab you can move, rotate and scale any objects. Absolutely the same stuff as with the “Universal tool”, but instead of using arrows in 3D space, you can drag sliders here. This way is just a bit more precise, especially as you can write exact numbers here.
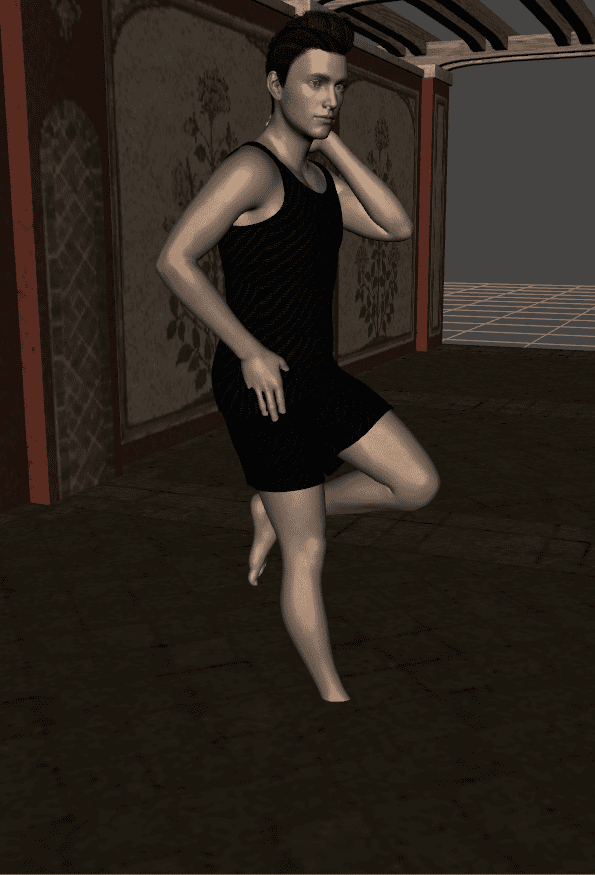
I have placed my figure against the column of the building, as this really fits the pose I chose.
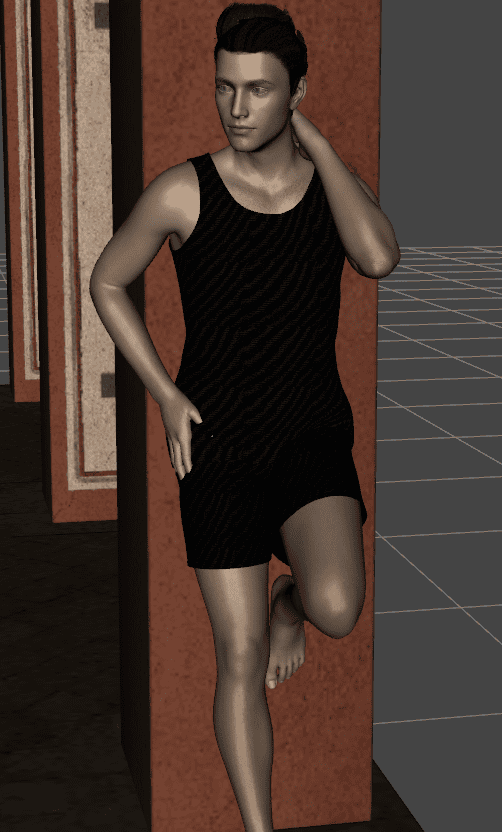
This pose clearly has a couple of problems. It can be seen that his right hand is sticking inside the clothes. Also he is looking not in the best direction. Because if I want him to look in the camera, I need to place it in the way, so you could not see the emptiness behind him. Would be better if he looked the other way. So let’s fix this.
There are a couple of ways how we can manually change the pose. First one is the easiest to understand. On the toolbar find the “ActivePose Tool”.

When it is active, it is possible to click and drag any part of the character’s body and change its position. It is a very easy to use tool that anybody can understand. Though it has its flaws. Main is that it affects nearest bones too, not only one you want to pose. And also it can be hard to be precise just with the mouse dragging. But if you want to do something roughly and precision is not a main point – this tool is perfect.
Second tool is more precise. You will need to select the exact part of the body that you want to pose. You can do that either in the “Scene” tab or by clicking on it with the “Active Pose Tool” from earlier.
After that in the left top corner of the viewport should appear this interface:
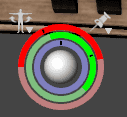
Here you can use these sliders to rotate selected part of the body along the corresponding axis. Meaning, that if you change, for example the green one, then selected part will rotate along the Y axis:
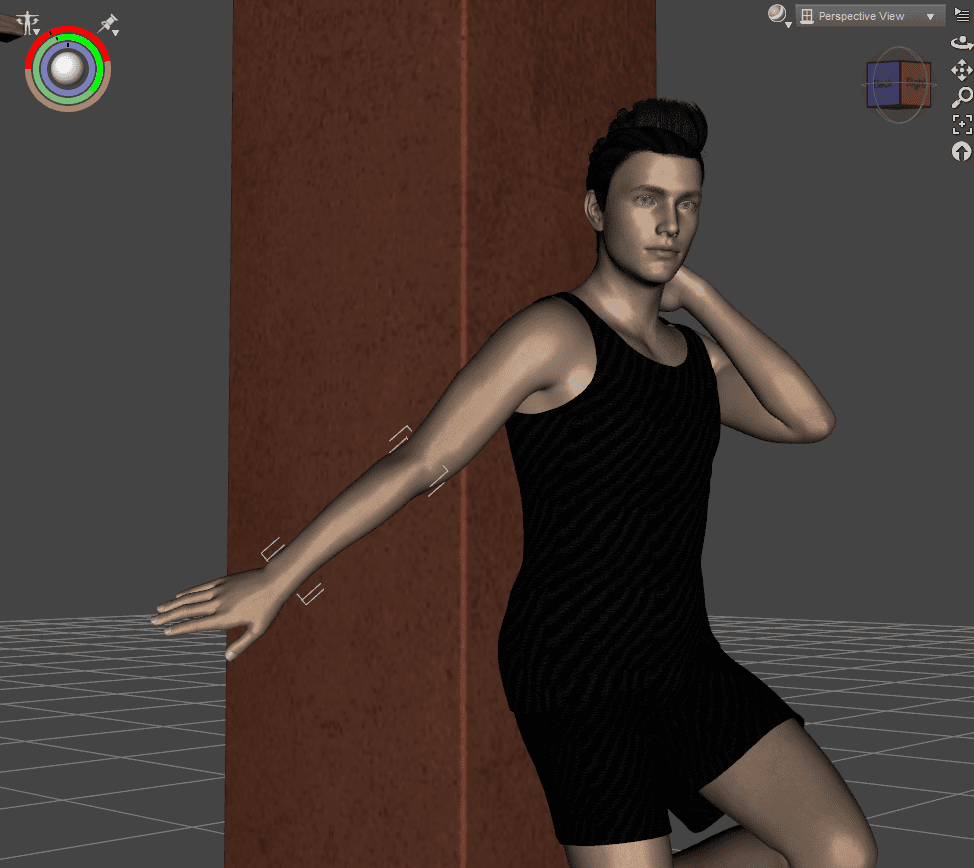
Also you can do absolutely the same changes in the Parameters menu, while part is selected. There these transforms are called “Twist”, “Side-Side” and “Bend”.
Last, but not least I will show you the “PowerPose” tool. It is an awesome tool that allows you not only to change the pose of a body, but also will help to make facial expressions. As always, open it under the “Window>Panes(tabs)>PowerPose”.
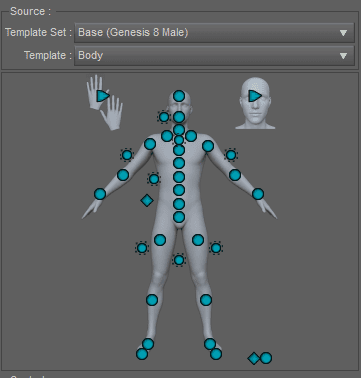
PowerPose interface
In the PowerPose interface you will see the scheme of the character with the turquoise circles. Click and drag said circles – it will move the corresponding part of the body. Circles that look like the sun affect a bunch of parts at the same time. For example, both legs or shoulders with the hands.
The diamond shapes are for moving the whole figure at once. Also you can change to the hands, body or face templates. Worth noting that PowerPose works better with Genesis 8, as this generation received its own Template Set instead of the generic one.
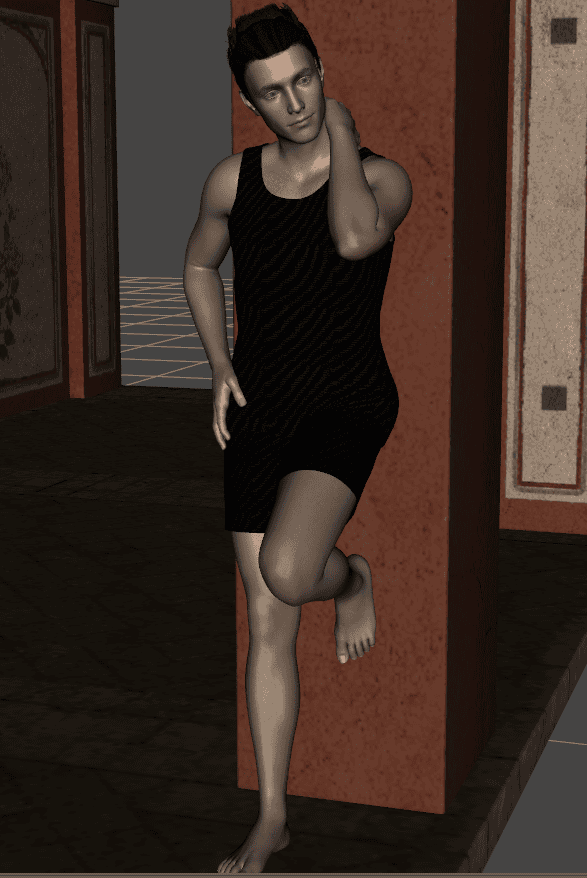
The final pose
How to Set up a Camera in Daz3d
So you should now have your character posed in the way you want. This is a perfect time to set up a camera. It is a very important step, as you can’t render properly without a camera.
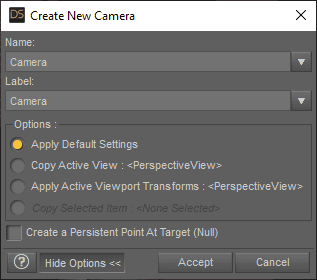
Adding a camera by itself is easy. Just click “Create a new camera” button on the toolbar:

After that, Daz Studio will open a separate window for adding cameras. Using it you can name and Label future camera. Also, if you click the “Show Options>>”, more options will appear that allow you to change the starting point of a camera.
Now we need to place the camera in the suitable place. You can move the camera in the standard ways, such as in the Parameters tab or using the “Universal tool”. But for cameras there is one more way, which is really convenient. It is possible to change the Perspective view to the Camera view. Meaning, that you can control the camera as it is your view. And after placing it in the perfect position – just change back to the perspective view.
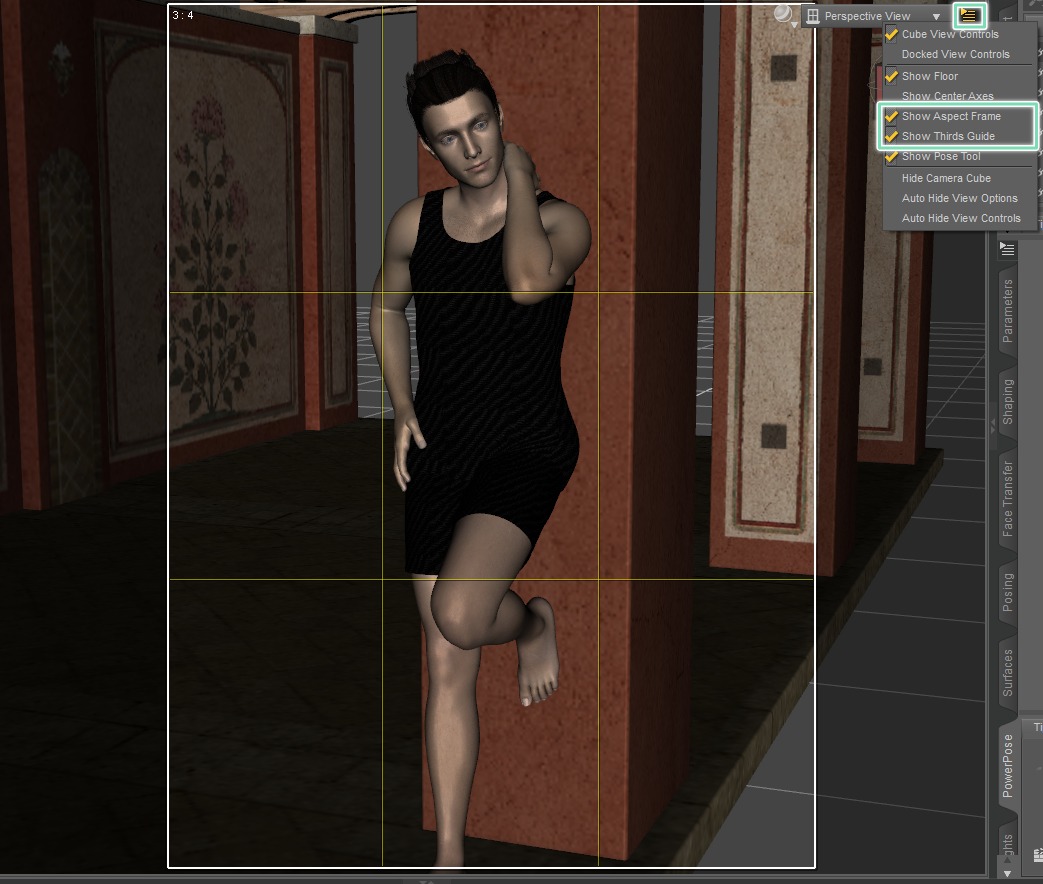
To help yourself with the positioning, you can turn on the “Aspects frame” and “Thirds Guide”(see screenshot below). First one shows the frame that indicates part of the view, that will be rendered. And the second option will divide the screen into 9 identical rectangles. This will allow you to easily find the center of your view and help you with placing camera.
There are a lot more to the cameras. Especially as there is a separate tab for camera settings, where you can change it in a way, similar to real world cameras. That is to say, that you can change focal length, lens of a camera and make a bokeh effect. In this tutorial I will stick with the default settings, but nothing stops you from reading the Daz3d Camera Settings Tutorial and making your scene much better.
Although I will use the depth of field option. Mainly because it is not hard to set up, while making almost any scene better by a lot. But explaining depth of field requires too much space to leave it in this tutorial. That is why I highly encourage you to read Daz3d Depth of Field: How to Use it.
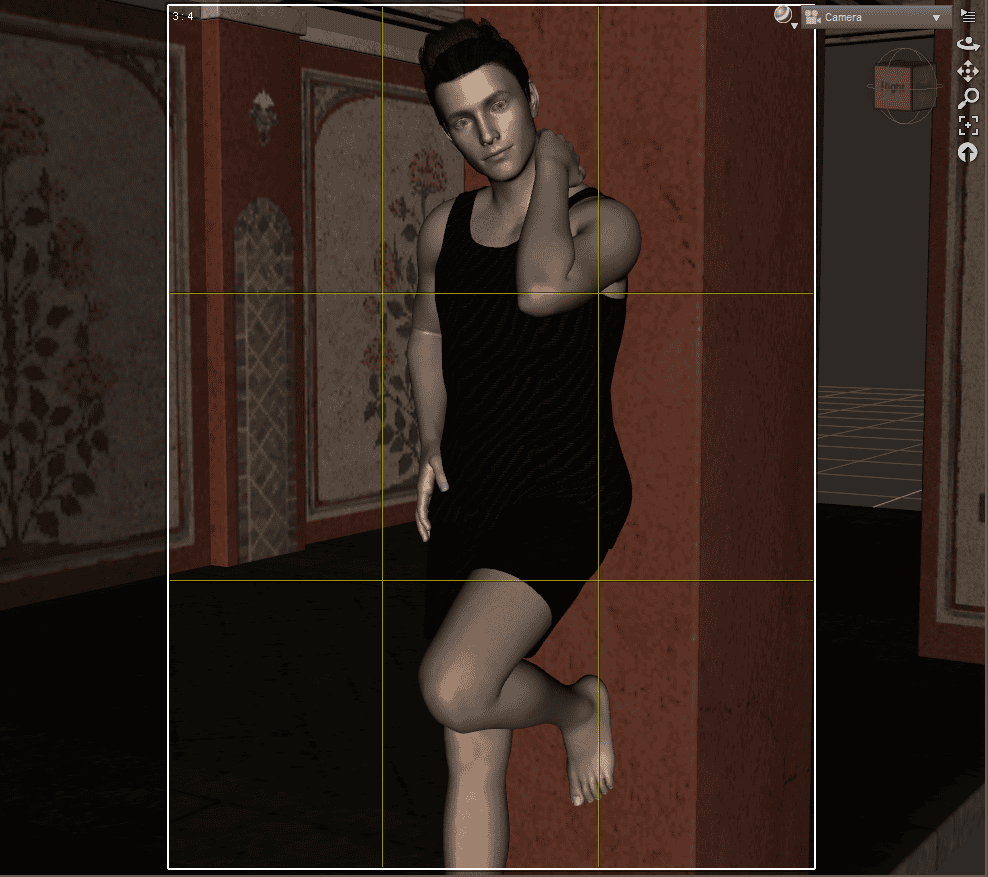
This is the final camera placement in my scene:
How to Set up a Lighting in Daz3d
It is possible to already render the scene. But it will not look good. Simply because we have no lighting on our scene. By default Daz Studio has Headlamp turned on. It is a light that comes directly from your camera. So render would not be black:

It is clearly seen that the lighting here is terrible. It is pointed directly from the camera, which creates a very flat and bland lighting. The background is really dark too. That is why it is very important to set up proper lighting on the scene.
I am going to use the free outdoor HDRI that I found on the HDRI Haven website for the environmental lighting. Also the default three-point lighting technique is used. If you do not understand what am i talking about and how to set this up yourself – worry not. We have the Daz3d Iray Lighting Tutorial that will teach you everything that was used in this tutorial and many more.
My final lighting setup consists of the strong key light a bit on an angle from the camera, fill light in the top and left of the character and a back light to the bottom of a character from the behind:
How to Render in Daz Studio
At this point you should have a scene with a dressed character in a pose and proper lighting. Which means that we are almost at a finish line and the scene is ready to be rendered. But before rendering, we need to go into render settings and set things up. In this article I will just show some simple stuff. For a proper tutorial on this matter – read Daz3d Render Settings: Basics & Tips.
Render settings menu tab should be open by default on the right side of the interface. As per usual, open it in the “Window” if you don’t have it opened.
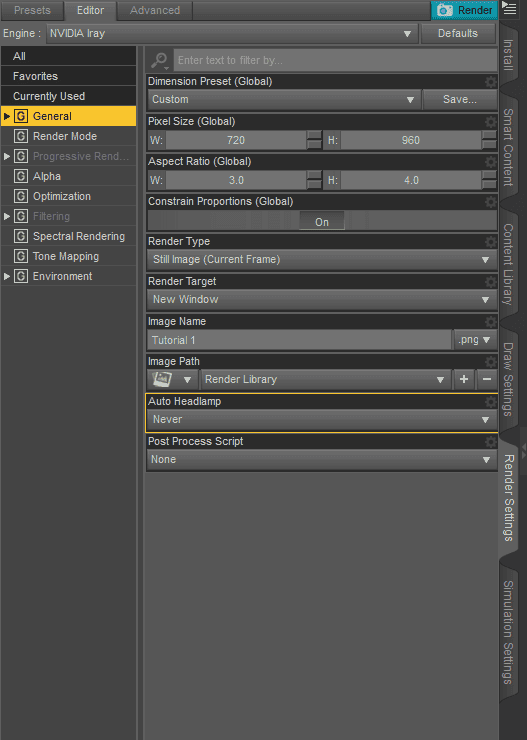
First of all, we need to make sure that Aspect Ratio and Resolution are good. Depending on the scene, these settings may vary a lot. In my case I want a full length portrait render. That is why I chose the 3:4 at 720p. Feel free to use something more common, as a 16:9 ratio and 1920×1080 resolution for example.
Under the “Progressive Rendering” I have only changed the Max Samples to 750. Because I think this number should be plenty for the tutorial image purpose. But you may set it to something much higher if you want.
And at the “Filtering” I have left “Firefly Filter” turned on, turn it on too if it is off for you. Also turned on the Denoiser and set start to the 700 samples. This way, it will not denoise all the time, increasing rendering time drastically, but only at the end. Denoising at the first samples is not doing much anyway.
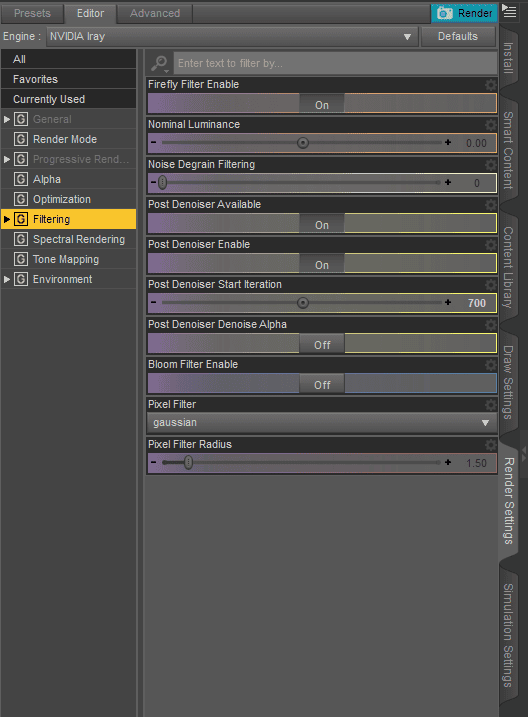
That is basically it for the Rendering tab. As you can see, I have skipped quite a lot. As was said, this is just a superficial acquaintance with the rendering tab and you should check the dedicated article for more information.
How to Animate in Daz
So we have done a single image render together. But what if you want your characters to move and interact? What if you want to create a movie? Well, you can do exactly that with the help of Daz Studio.
Animating consists of just changing the time on the timeline and the pose of your character. Rinse repeat a lot, and voila – a ready animation. You can change poses both using presets or by doing it manually, as was shown in this article earlier.
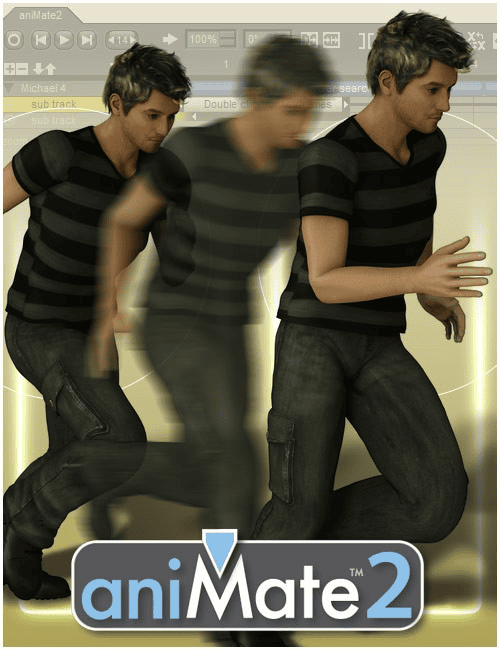
Source AniMate2 for Daz Studio
Sounds easy, but in reality it is a big discussion that needs its own article. That is why we have exactly that – Daz Studio Animation Tutorial: Step by Step.
How to Use Daz3d – Conclusion
Here is the result of my final render:
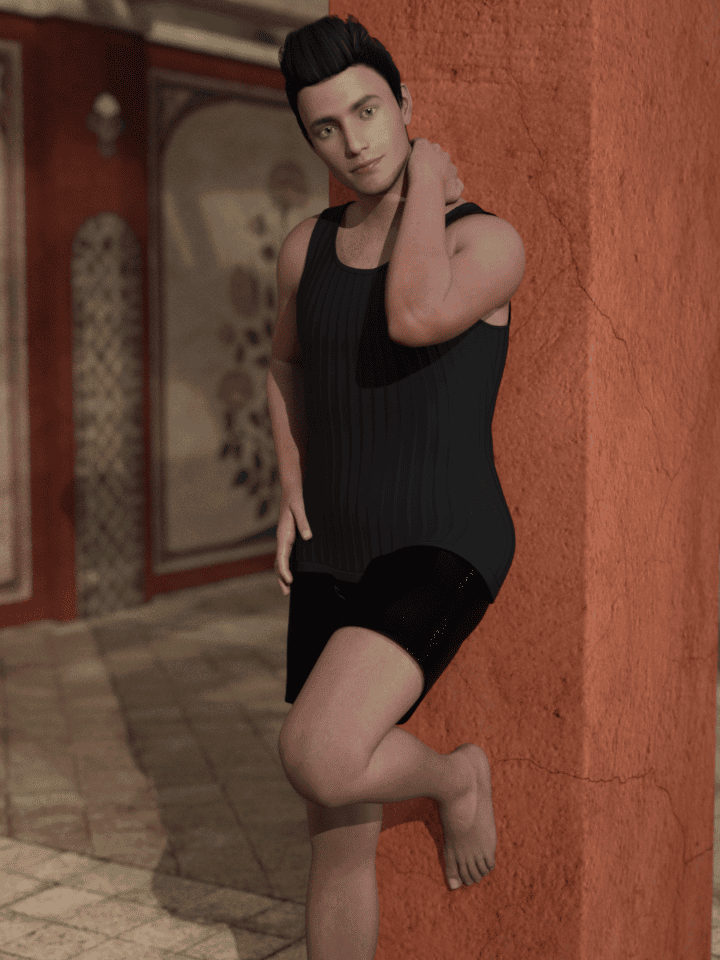
This was a simple step by step tutorial how to use Daz3d. Hope you were able to follow it and end up with your own unique render. Have a look at our other Daz3d Tutorials to learn even more.