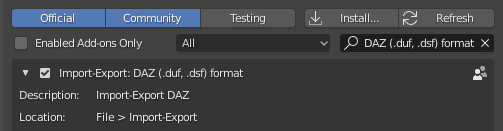
[Update: Daz3d released the “Daz to Blender Bridge” here which we explain in our detailed Daz to Blender Bridge Tutorial].
Otherwise in this tutorial we are going to see how to export a model from Daz to Blender manually. But before we start it is important to make a clear difference. When exporting a file we have in general terms, three big format players. .OBJ, .FBX and .DAE. So what’s the difference?
To put it simple:
.OBJ : Stands for Wavefront Object, it is a simple data-format supported by most 3D tools. Transfers static meshes, custom UVs, colors and textures, however it cannot store data related to animation, lights or camera.
COLLADA .DAE : XML-based file. Widespread alternative that also stores full-scene data and animations.
.FBX : Developed by Autodesk. It holds full-scene data – models, uv data, joints, skinning information, animations, and even embed texture files.
Depending on the use, sometimes it is better to export just mesh and UVs in .OBJ file, this way we keep only useful data and avoid anything extra. In some other cases, .FBX or .DAE for more data export will be required.
Export a Character as OBJ from Daz To Blender
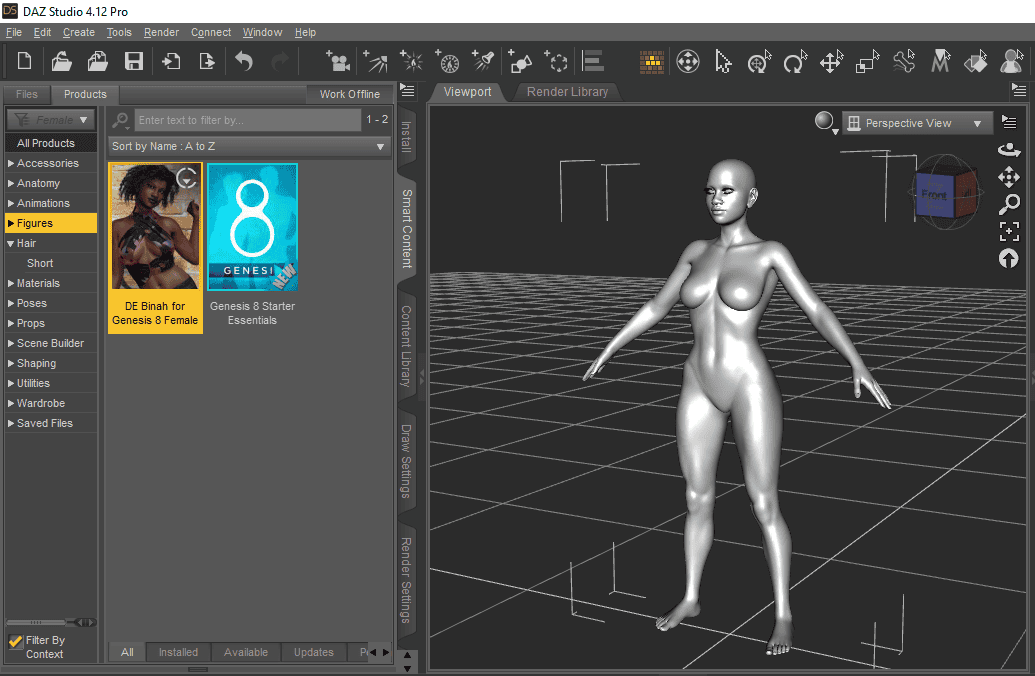
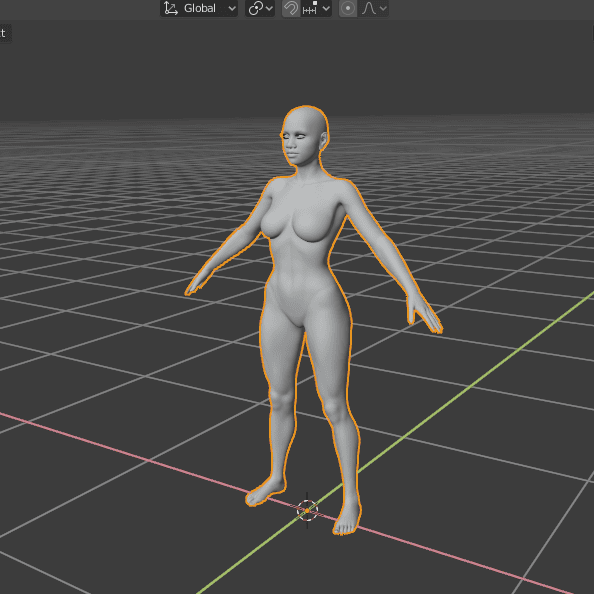
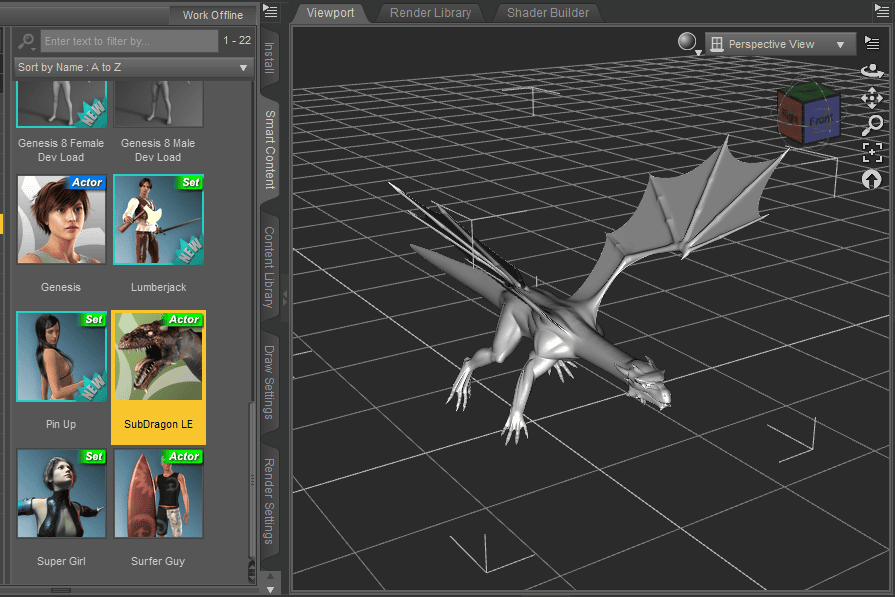
For this tutorial I will use the following 3d model.
And I decided to export to Blender to work on the mesh, making a few adjustments. I will be sculpting some areas so I can bring it back later to Daz.
In order to export head to File > Export > and choose .obj (Wavefront Object) format
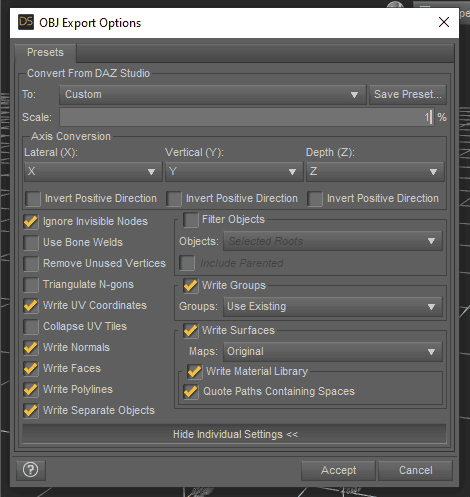
A new window will pop up like in the image above to make sure which components should be exported and how.
We will leave everything as shown except for the Scale. We will set it to Custom and set it to 1%. Why? It’s pretty simple. Daz Studio and Blender work with different unit measurements and coordinate locations, just as meters and inches we need to convert it so the size is equal.
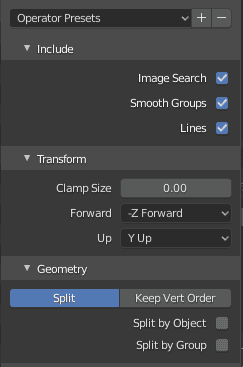
Now in Blender, click on File > Import > .obj format

Once the file was located, we can check depending on the version in Blender to your right or left a set of default parameters. Make sure to uncheck any option from the Split menu.
Great, our model was successfully imported.
Before we go and edit the actual model, CTRL + A and apply Rotation to the model.

This transformation is necessary to set the rotation to a value as seen in the viewport. Also, in the Unit and measurements tab from the right, check that units are set to centimeters in my case for the human model.
Once we have finished editing our model, we will save (export) our project from Blender and import again in Daz Studio.
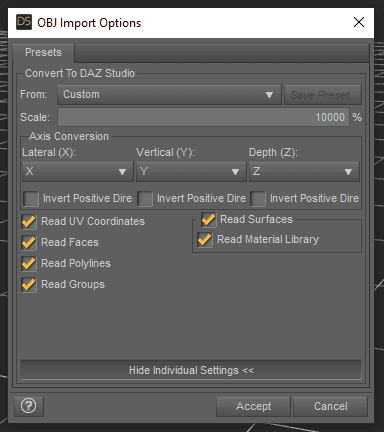
Again a new window will pop up to set the parameters of our obj for best visualization in Daz. Scale this time will be 10000%.
Safe and sound, our model is back home with the new adjustments.

Export Animation from Daz to Blender via .FBX and .DAE
I will choose a model and add some simple animations. I will save my project and also export it to Blender in FBX format.
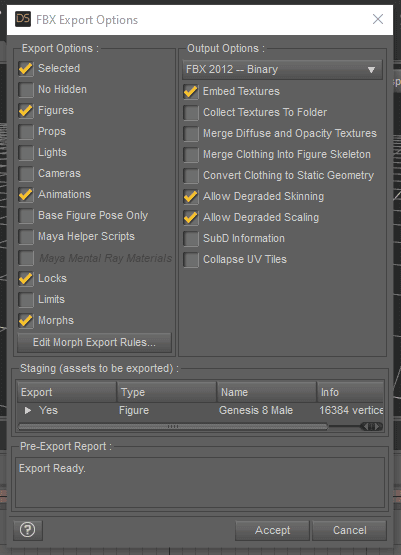
For that, we go to File > Export > and pick Autodesk format (.FBX)
We will leave all parameters as shown below. Make sure to check the Animations box. If the model happens to have clothes, you should also check Merge Clothing into Figure Skeleton
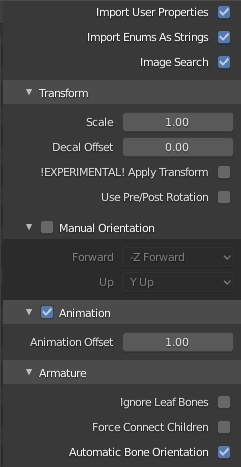
Now open Blender. File > Import > FBX.

In parameters settings, we will uncheck Pre/Post Rotation and check Automatic Bone Orientation (Armatures tab)
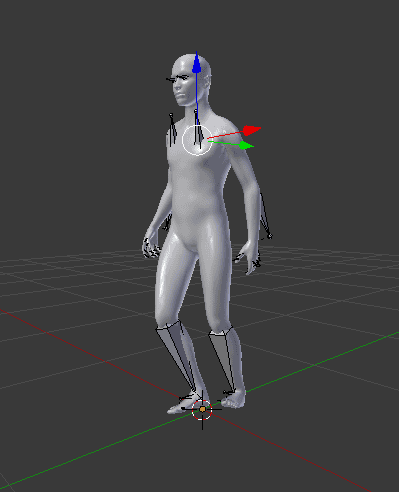
All done! Model was imported as well as rigging. From this point you can modify the animation.
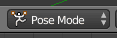
Go to Pose Mode and play around with the posing.
Export Animation from Daz .DAE
As a sample, I chose the following 3d model.
As in previous cases, we head to File > Export > DAE Collada file. The following window will appear. We keep all parameters as shown. Click on Accept.
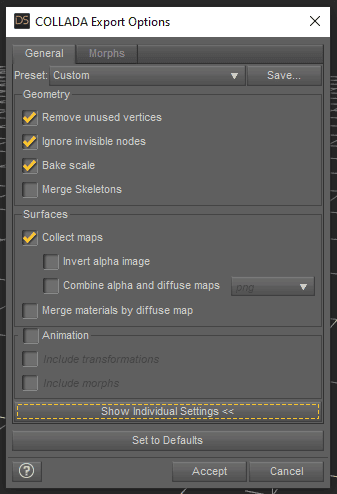
In case it’s an animation we will check the animation box, otherwise keep parameters as they appear by default.
Then we head over to blender to import the collada file.
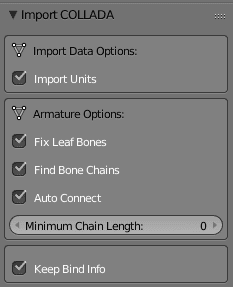
Depending on the model, the scale might be affected too, so press S in Object mode to resize.

In Pose mode we can play around with the bone structure and by pressing R we can rotate each part. Once done, we need to check our material in the material tab. As mentioned before whenever you export something to a different software, most likely some components will fail to load, or you will have to do some manual adjustments.
Daz3d to Blender Import Plugin Diffeomorphic
To start we will download all necessary files from here.
Note: The plugin only works for Blender versions 2.79 and 2.80. I have tried it myself in version 2.83 but it does not work at the moment.
Once we have downloaded all necessary files, we will open Blender and click on Edit > Preferences and locate the button install in the “Add-ons” option from the menu.
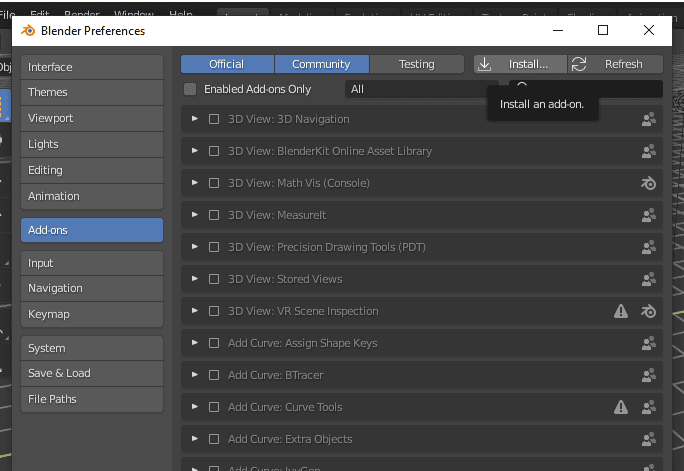
After we locate our .zip file we will proceed to install and tickle the box. The add-on should be active now.
If we press key N in the active viewport a new set of tabs should pop up and we can now see our add-on as a new tab named DAZ.
Daz Studio Set-Up
Now we need to do the proper setup also in Daz Studio. Before we start, make sure to locate the file “Export_Basic_Data” inside our zip folder. It should be located in the “to_daz_studio” subfolder.
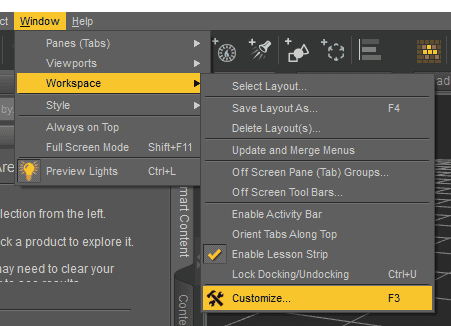
Once located, we open Daz Studio and head to Window > Workspace > Customize…
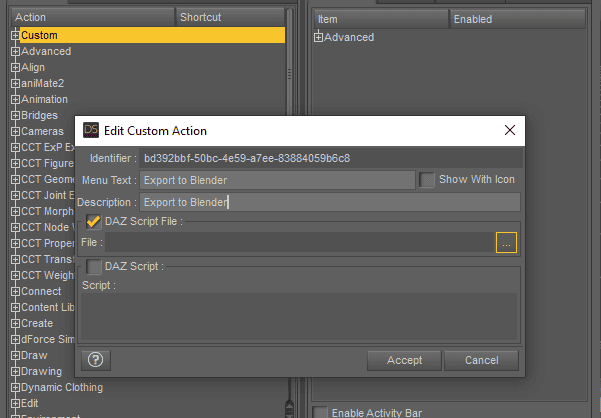
Right Click on Custom to create a new custom action. A window like shown in the picture will appear. We will here create our new option in the menu to export the data to Blender. So I picked an easy name “Export to Blender”. Next, click on the box with three dots and track your file named “Export_basic_data”. This is the script we need to make it work. Click on Accept.
Now head to the Menus tab in the right panel.
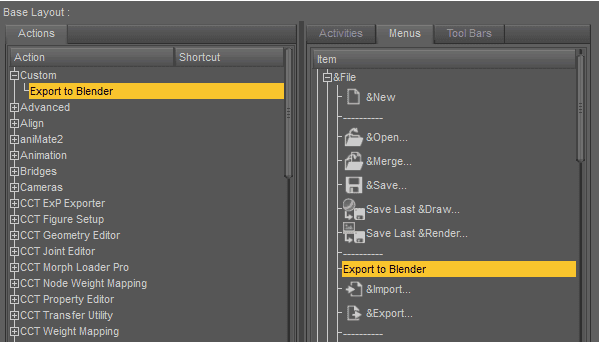
We want to set our new option in a rather accessible directory. For convenience, I will set it in the File dropdown menu. Drag the script created (Export to Blender) to the right panel as shown in the picture. All set, now accept to close.

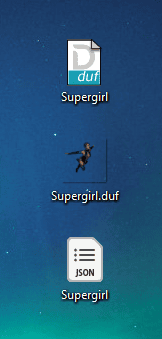
I have decided my content to export so before we head to Blender, we need to do a bunch of things in Daz. First we will save our file in .duf format (File > Save). I chose to call it Supergirl.duf. Right after that, you will also need to create the necessary file that will later be exported to Blender. Click on File > Export to Blender (Remember, the option recently created) and also save this file.
Important: You need to name this file just like the one saved in “.duf” format. Also, it should be in the same directory, together with the .duf file.
A new .json file should be created. Having done all these steps we can close Daz Studio.
Back to Blender
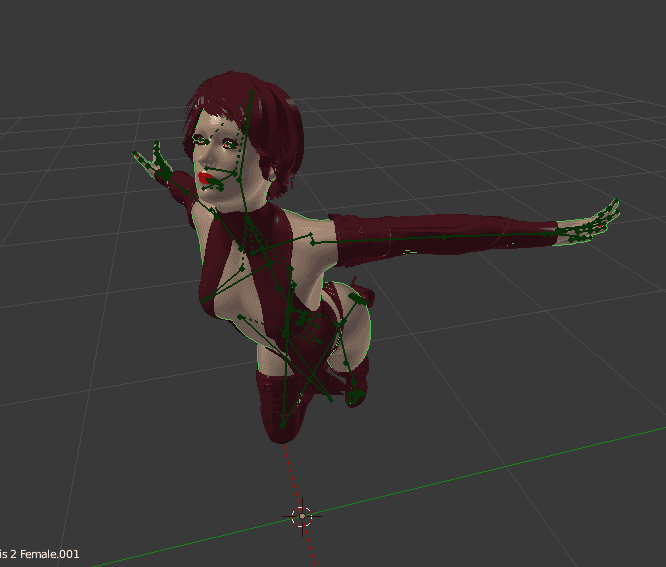
Inside Blender press “N” or version 2.80+, go to DAZ tab, choose Import File and pick your .duf format file. For version 2.79 it’s going to be File > Import > .duf
We are going to leave all parameters as default. The software will suggest two colors for the viewport, red for clothing and sort of gray for skin tones. This is just to easily identify each component, in the final render it will show differently with its predetermined material. Sometimes the add-on fails to load the materials, you will have to do it manually.
One last thing:
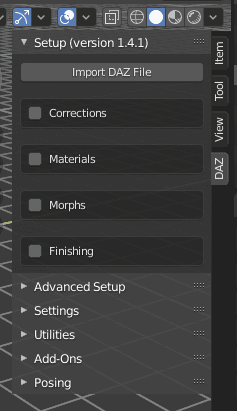
The model imported has several parts, each one with its own rigs, to merge everything into one, we need to go to Corrections in the DAZ tab (Versions 2.80+), and having selected all body parts in the scene tab, click on merge rigs. The small icons next to each part should change from a person symbol to a triangle symbol.
Daz to Blender – Conclusion
This article has been a general overview on how to export a project from Daz to Blender. Nonetheless, there are many more detailed topics that we have not yet covered. How to export UV maps, how to work cross-platform with shaders, textures, materials and more. We invite you to explore the softwares and try new ways to get things to work. Also, try consulting other articles to have a better understanding of each individual feature. As for us, we will keep uploading new material to make the whole process of learning easier and more fun. Checkout also our other articles about daz3d render settings or many of our product reviews for example the top swimming pool 3d models.