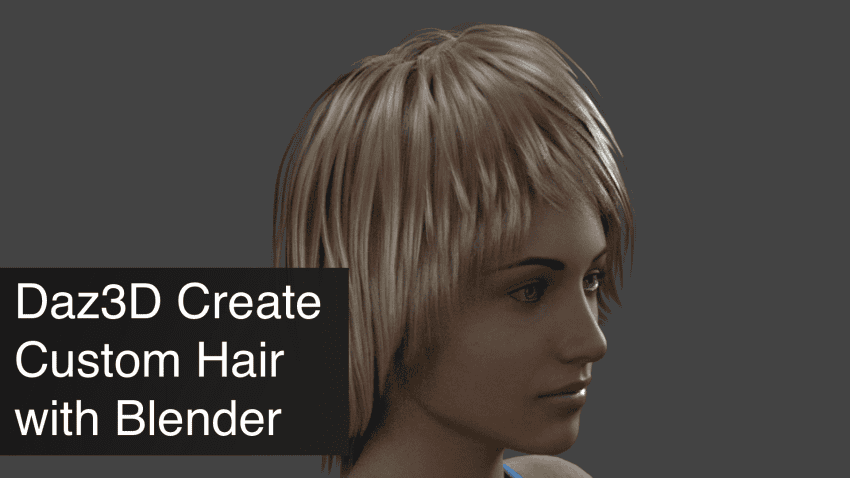
This Daz3D Create Custom Hair Morphs with Blender Tutorial explains to you step by step how to modify an existing Daz hairs-style and apply it to your genesis figures. One of the main features available in Daz Studio is the all different morphs that are available there. Especially hair morphs, as they easily allow you to change how the hair looks without changing the hair object itself.
In this tutorial we will look into how you can create your own hair morphs for Daz Studio hair using the free 3D modeling tool – Blender. On our website you can follow the four part Blender Basics Tutorial: Creating a 3D House. Using these articles you can learn the very basics of Blender starting from nothing to creating your first scene and rendering it.
Daz3D Exporting to Create Custom Hair Morphs
First of all – we need to export the hair out of the Daz Studio, so later it could be imported into Blender. There is a free Daz to Blender Bridge tool that allows for easy transferring between Daz Studio and Blender. We even have a tutorial on the matter: Daz to Blender Bridge Tutorial.
Daz figure rendering in Blender – Source Daz to Blender Bridge Tutorial
Though we can’t use the bridge this time, sadly. Creating morphs using the bridge would be more difficult than just using the regular export. Especially as we need some exact settings presets.
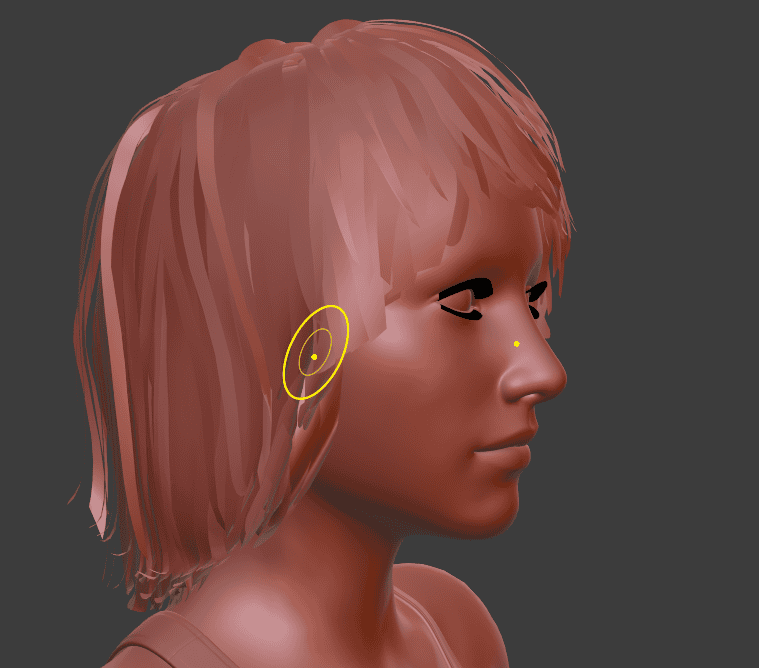
For the start I have created my character and added hair to it. You can export only the hair itself, but then it would be harder to work with it. Because you would not have any reference on how it will look on a character. Thus, I will be exporting hair with the character together.
It is important to select the character. You need to click on it and if it is highlighted – then it is selected.
Now with the character selected proceed to the “File > Export”
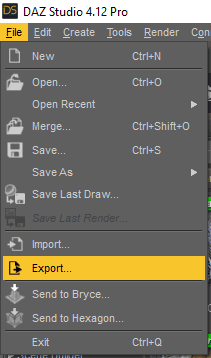
Give it any name that you want and important to select the file format as .obj. Then a new window will appear – “OBJ Export Options”.
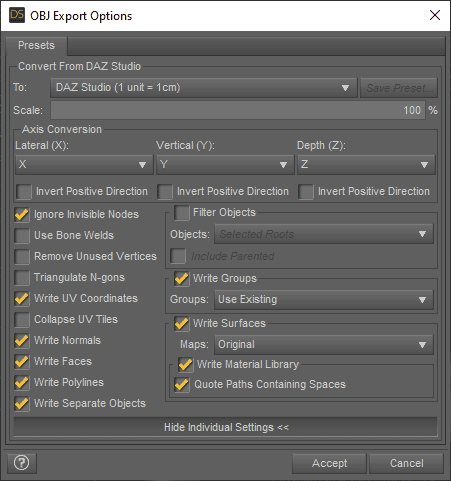
Here we can set up how and what will be exported. There are a bunch of presets below the “Convert From Daz Studio” drop-down list. There you can even find the “Blender” preset. Though it is not that good and I recommend to stick with the “Daz Studio” preset and just change the Scale to 1% from 100%.
Importing Hair Into Blender
Next we need to import it into Blender. Open Blender, proceed to the top bar, then “File > Import > Wavefront(.obj)”
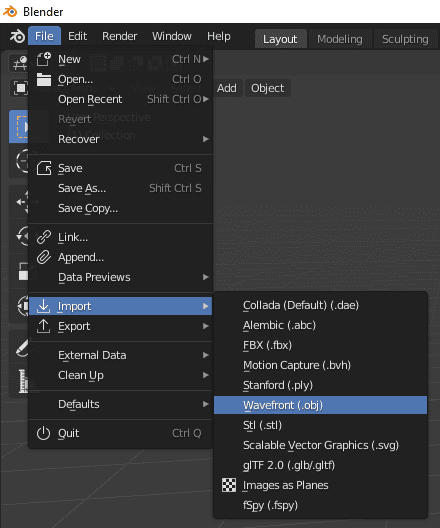
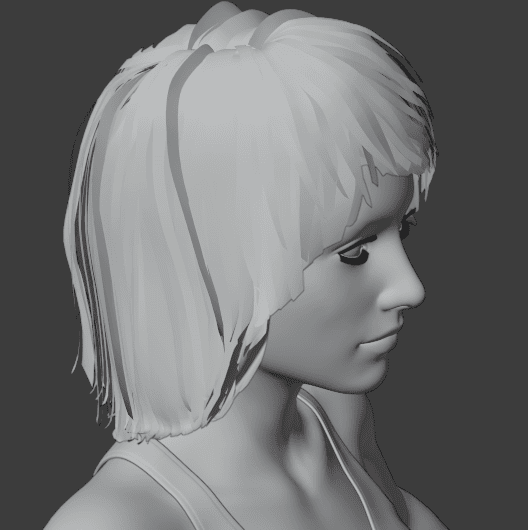
Then choose the file location and click accept. No need to change any other settings. The character should appear exactly at the center.

Creating a Daz Custom Hair Morph in Blender
Now is the time to create your own morph. You can do whatever you want with the hair. But the best way is probably to use sculpting. Sculpting is a way of editing geometry that is best for creating natural shapes. So it should work really well with the hair.
You can check out our Blender Sculpting Tutorial [Coming Soon] to understand all the tools there and how to use them. For creating a simple morph as I do – just a longer hair, you can use the “Elastic Deform” tool, that is really good for this purpose.
Exporting Hair from Blender
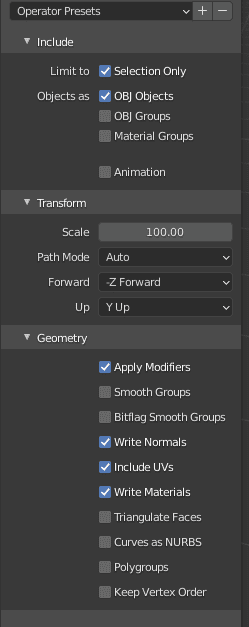
When you are done with the editing – it is time to export from the Blender. Select only the hair object and in the same place, where you imported, now click export. It is “File > Export > Wavefront(.obj)”
In the appeared window select the file name at the bottom. Then turn on the “Limit to Selection Only” and change the scale from 1.00 to 100.00.
Daz3D Importing Custom Morph
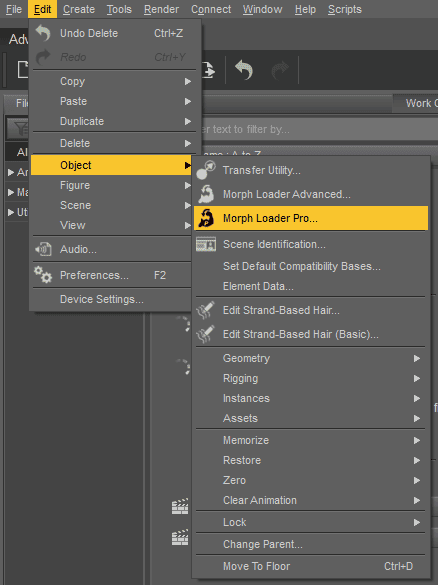
Back to the Daz Studio. Select only the hair of your character and open the “Morph Loader Pro” that can be found in the “Edit > Object”.
Here we only need to click on the “Choose Morph Files…” and find the file that we created in Blender. Keep the preset at “Daz Studio” and click Accept.
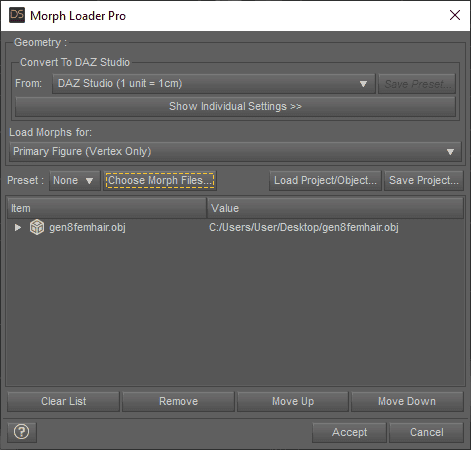
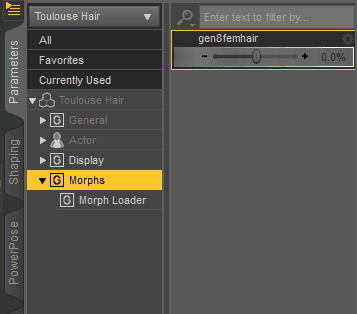
And it is done. Find your new creation in the “Morphs” section of the “Parameters” tab.
Daz3d Hair Morph Products
This method of creating morphs is convenient, but it still requires you to know how to use editing and sculpting in particular. So instead of doing all this manually, sometimes it can be better to leave this to the experts. And you can find the hair morphs made by such experts on the Daz3D Shop.
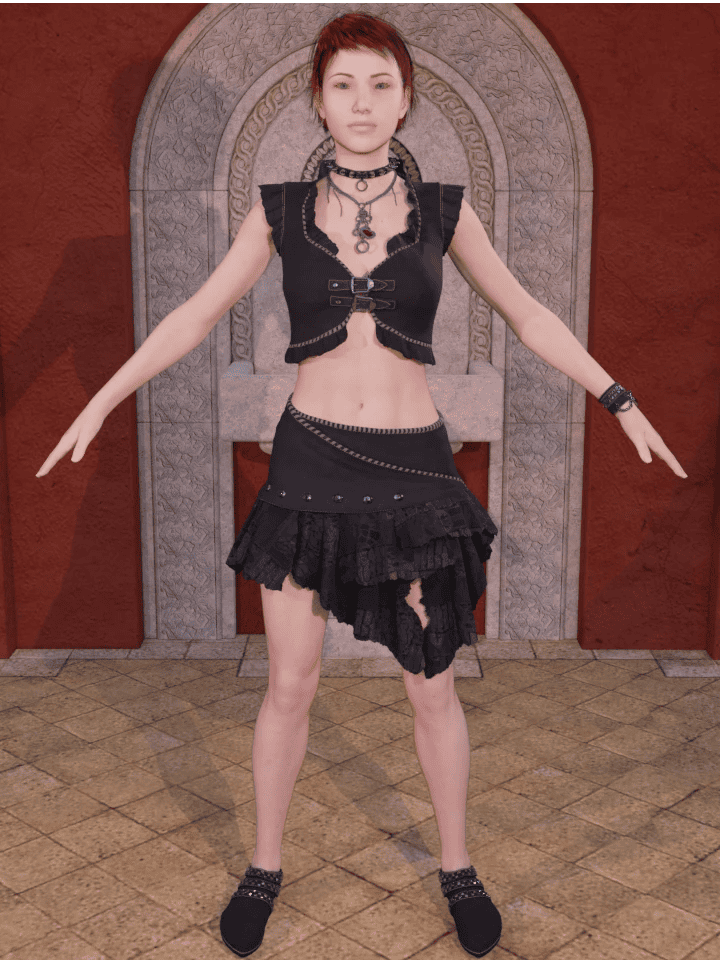
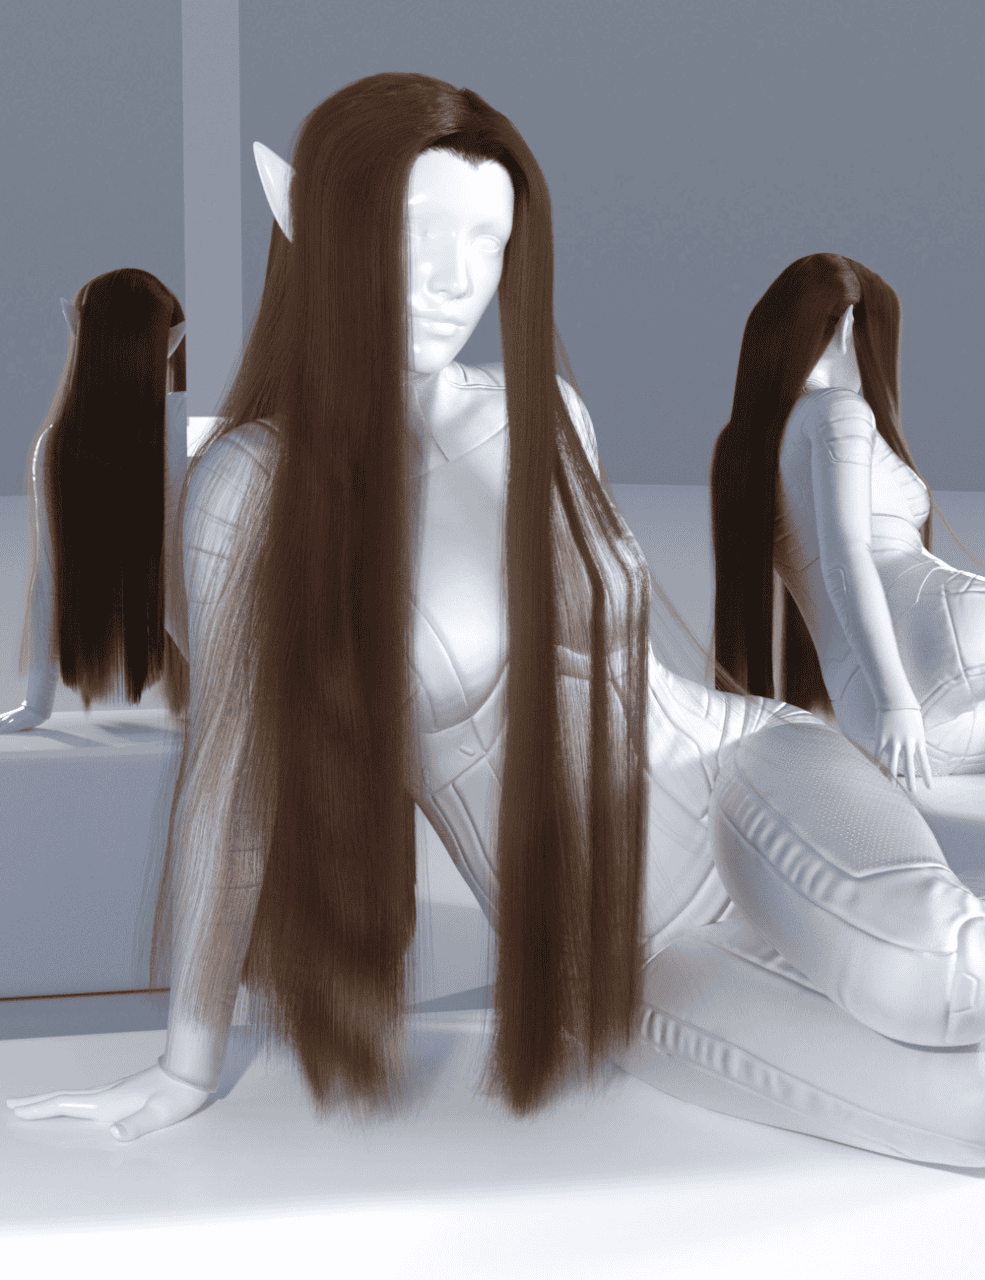
For example, Free Spirit Hair Morph Pack One by Daz Originals & Aave Nainen. It is a pack that includes an astonishing amount of hair morphs for the price. A lot of them are also made to match with the particular poses.
Source Free Spirit Hair Morph Pack One by Daz Originals & Aave Nainen
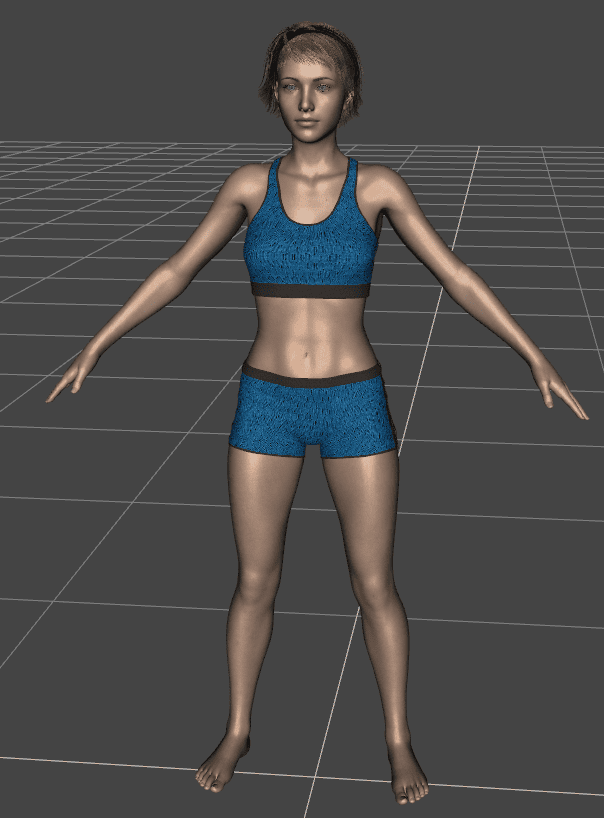
The MRL dForce Mid Length Hair for Genesis 8 Female by Mihrelle is a hair product that includes the hair itself and a lot of the most different morphs so you could individualize it.
Source MRL dForce Mid Length Hair for Genesis 8 Female by Mihrelle
The third product that we recommend is the dForce Elven Lord Hair for Genesis 8 by Sshodan. It is a hair that was designed specifically to work with the dForce technology that is available in Daz Studio and we have Daz dForce: Basics, Tutorials & More. Except the hair itself it also includes morphs that are meant to help you get the look that you want.
Source dForce Elven Lord Hair for Genesis 8 by Sshodan
Conclusion – Daz3D Create Custom Hair Morphs with Blender
Creating your own morphs sounds really tough and that only the people with experience and knowledge can do it. But in reality it turners out that it is not that hard and you don’t even need to buy any additional tools. Everyone can at least try to do something themselves if they want to.
Browse also our other Daz Tutorials and Top 3D Models Reviews.