
Greetings. This Blender 2.8 Basics tutorial is part of a four-part article series about Blender. This series should cover everything you need to know about creating your first scene in Blender. We will walk you through everything from the first launch up until the final rendering of the scene. End goal is to create a simple 3D house using tools available in Blender.
In this Part 1 article we will look into the main Blender basics that you should know before jumping into things like modeling. They are:
- Interface. What and where is situated. Main features of the interface and how to handle it.
- Moving around. How to get around the Blender viewport. How to move your camera view.
- Shortcut Keys and Search function. Why do shortcut keys important in Blender and why you should consider learning them.
What is Blender?
Before proceeding into the insides of Blender, let’s take a minute to figure out what is Blender? It is free and open-source computer graphics software. The main advantage is that it supports the entirety of the 3D pipeline. These are things like modeling, rigging, animation, simulation, rendering, compositing and even motion tracking, video editing and 2D animation. This means that with proper use and knowledge Blender can fully replace the need in a bunch of paid software and for free at that.
To get Blender, you simply need to visit the www.blender.org website and press the “Download Blender” button. There is no need to provide any more information. You don’t even need to create an account. Just download, install and use.

Blender Basics: Interface
After opening Blender for the first time you will be greeted with the “Quick Setup” window. One of the main features of the Blender is its diverse customizability and this is the first step in that direction.
In the appeared window you can change some main settings, like what mouse button to select with and what language you want to use Blender with.
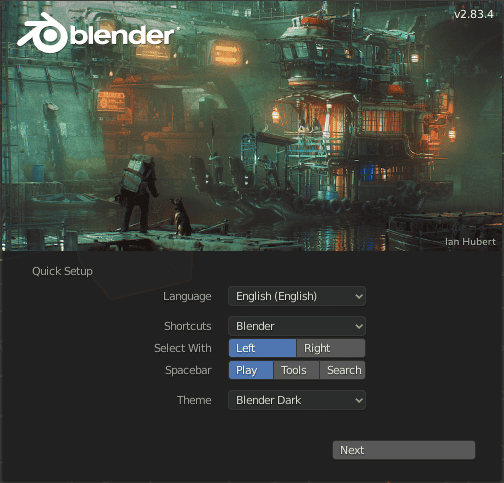
Blender can be really comfortable to migrate into from another software. For example you can change the theme to “Maya” and the Blender interface would become really similar to other popular 3D software – Autodesk Maya.
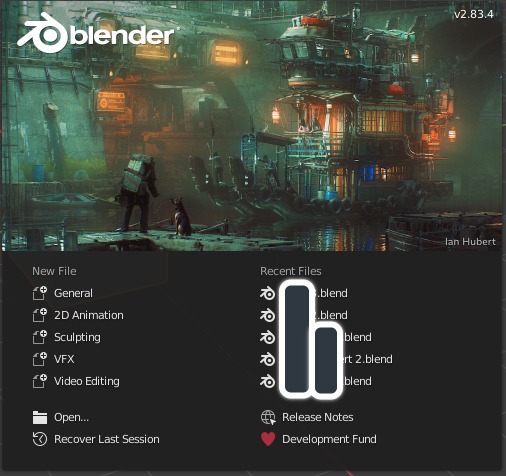
After you finish with the “Quick Setup” window, the next splash screen will appear – a window that you will see each time you open Blender. Here you can open your last session if you lost it for some reason. Or open any of the Recent Files. Besides, on the left there are interface presets. Though they are not very useful at the moment as “General” has everything that we need and more, so choose it.
And now you will see the default Blender setup. Let’s take a closer look at it and find out what is what here.
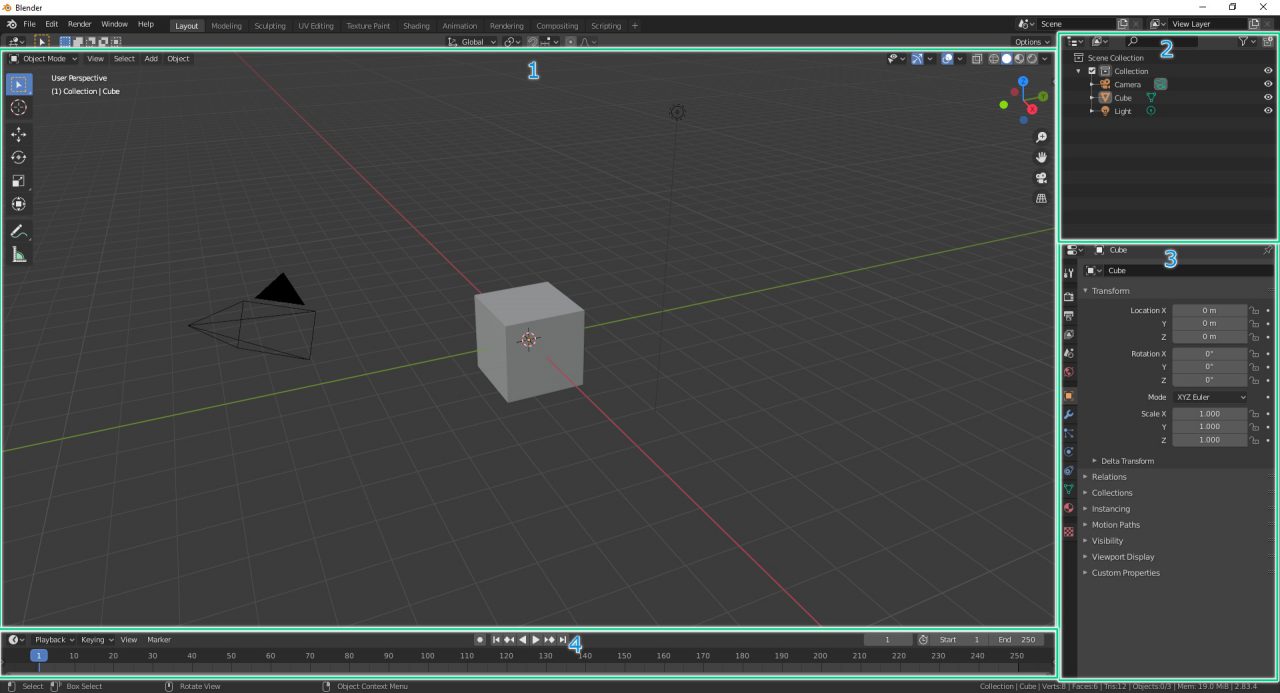
Blender consists of the customizable windows that are called editors. Each window can be at any time changed into another type of window, moved, divided or deleted. In the default layout you have 4 editors:
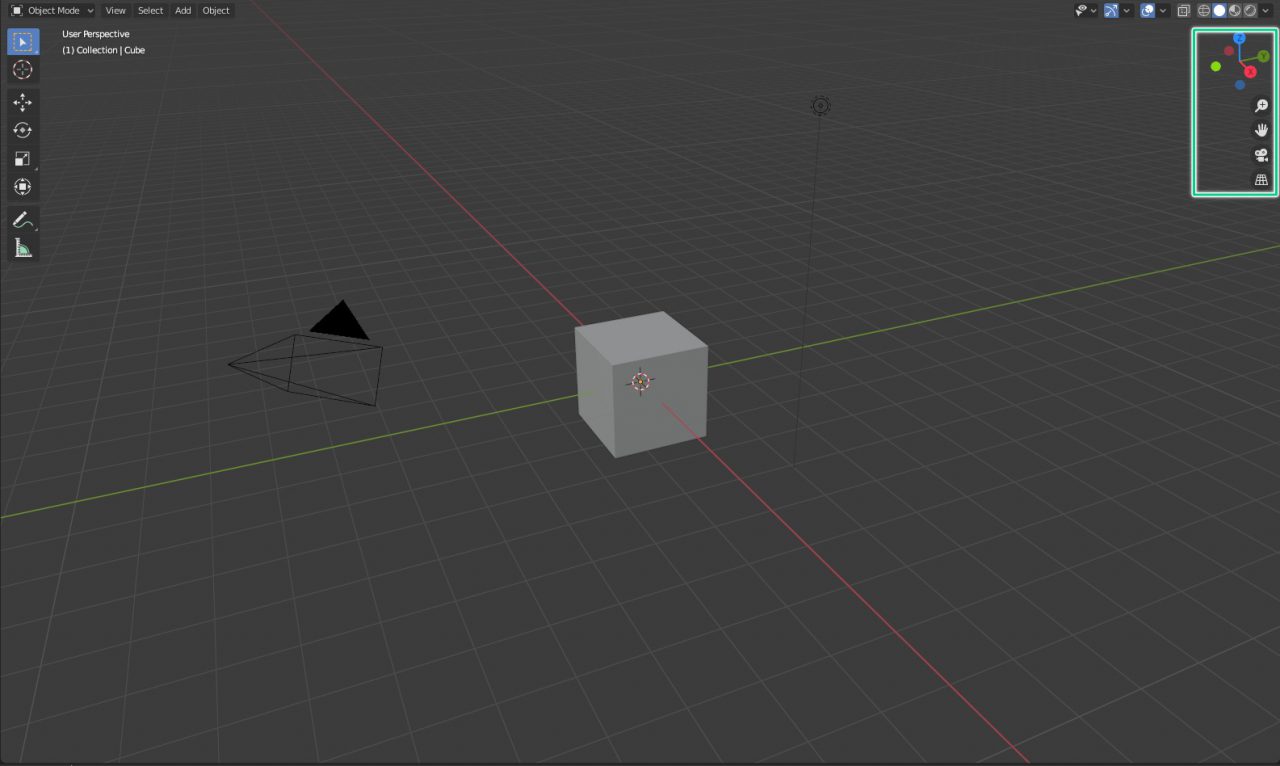
- 3D Viewport. The main window that you will spend most time in. It is your 3D space where you can see your scene, objects and interact with them.
- Outliner. An editor, where you can see everything in your scene in the list form. You can find all objects here and interact with them. Also collections are handled from here. Earlier Blender had layers function, but with the introduction of Blender layers were changed to much simpler and easier to understand Collections.
- Properties. A very important window with all of the needed properties. You can change the materials of your object here, add modifiers to it or change render settings of the whole scene. It is a really big and important menu and deserves a separate talk.
- Timeline. This editor is needed almost exclusively for animation. You can move the time here, set keyframes and choose the number of frames.
How about testing out this praised customization? We established that the Timeline editor is needed for animation. And we definitely don’t plan to animate in the closest time. And as we don’t really need it – let’s get rid of it.
Place your mouse right between the Timeline and Viewport windows. You will see that your cursor changed into two arrows pointing opposite each other. Now right click and select “Join Areas”.
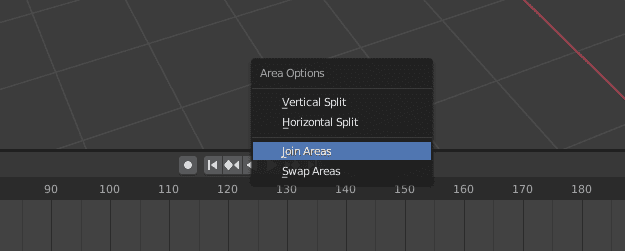
After that you need to choose which of the editors will absorb another. For this just place the mouse on the editor that you want gone. You will see that it becomes darker and the arrow pointing from the main area appears:
Now just press left click and the Timeline should be absorbed by the 3D Viewport window.
There are a lot more to the Blender interface. Creating new windows, changing editor types, all the tabs in the Parameters window and customizing everything. That is why we made another article fully dedicated to the Blender Interface.
Moving Around
Now that we are familiar with the interface, we can start interacting with it. First of all is moving your view. This can be done in a few ways.
Firstly there are view controls situated in the top right of the 3D viewport:
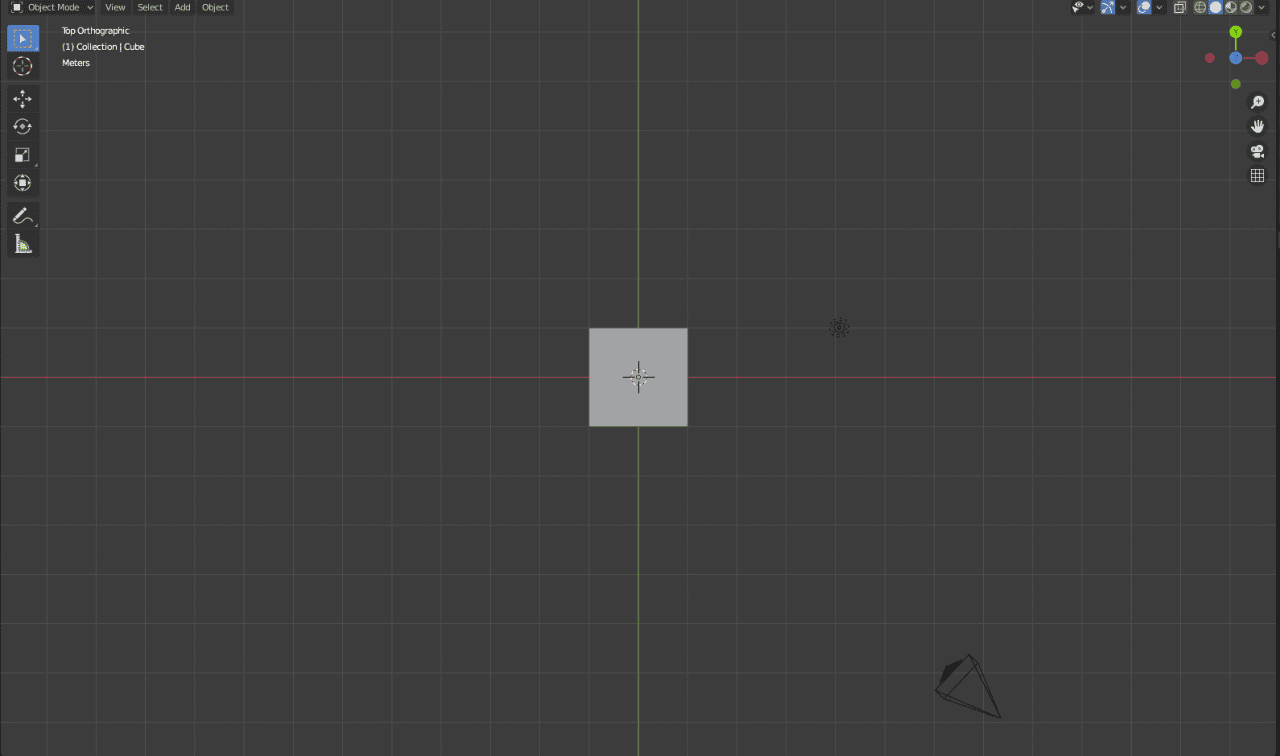
At the top is the gizmo that you can click and hold to rotate around the 3D space. Also you can click on the colored circles to change your view to be from exactly that direction. From example, from the top:
Second there is a magnifying glass on which you can click and press, so when you move your mouse, it will zoom out and zoom in. After that is a hand that you hold to pan around the 3D space.
Then there is a camera button that will change your view to a camera, but that will be in later articles. And the last button is to change between orthographic view and perspective. Orthographic view is quite an interesting thing and can be really useful, but it needs experience to use it properly.
Orthographic view
Instead of using all these buttons and each time wasting your time to come to them – you can make everything using your mouse and keyboard. Rotating around is holding Middle Mouse Button. Zooming is by either scrolling the mouse wheel or by holding CTRL and Middle Mouse Button for more precise movement. Panning around is Shift + Middle Mouse Button
Other shortcuts are on the numeric keypad(numpad):
- 0 — Camera view
- 1; 3; 7; 9; and CTRL+ 1 or 3 — are for the front, right, top, bottom, back and left views respectively.
- 5 — Orthographic view.
- 2, 4, 6, 8 — is to rotate in even increments.
- + and – — zooming in and out in even increments.
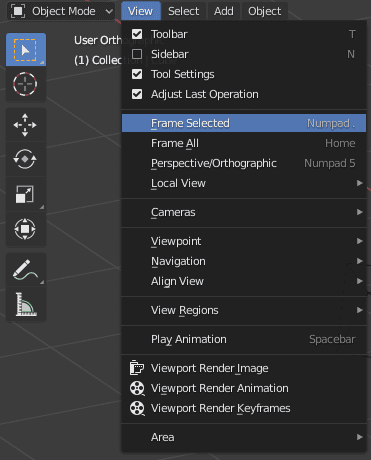
And one of the most used and important – “Numpad .”. It will frame the selected item at the center of the view. It is really useful, because sometimes you can get lost or just instead of manually setting up the camera – you just press one button. You can find this function if you will go to the “View > Frame selected”.
Blender Basics: Shortcut Keys and Search
One of the big pros of Blender is that it is really optimized for the shortcut keys. Meaning that using them is really comfortable and will speed up your work significantly. I can’t stress enough how much it is comfortable to use Blender with the shortcut keys.
But don’t be pressured to do that, as it is not a necessity at all, if you are not comfortable with them. Earlier it was really hard to use Blender without knowing shortcuts, but with the introduction of Blender developers revamped the interface and it is much more comfortable now and newbie-friendly.
User interface in Blender 2.79 – Source Blender 2.79 Manual
During all of the articles I will try to mention the name of the used function and their shortcuts for you to remember. But if I mention only the name – it is totally okay. Because even if you don’t know where something is found and how to use it – you always can use Blender’s search function.
Search window can be opened by pressing F3. I don’t know any other way to open it, so try to remember this one. In the search entry field you need to write the thing that you are searching for. After that you can see where this function can be found(green), it’s full name(red) and shortcut key(orange), if it has one.

So the “Frame Selected” can be found in the “View” drop-down menu, as we already showed before. And the shortcut is “Ctrl+Numpad .”(though it works without CTRL too).
Conclusion
And here is where Part 1 of the series ends. We did not have time to look into the most interesting stuff yet, but we still learned a lot of important things. This includes interface, moving around in 3D space and introducing you to the shortcut keys and their importance.
Continue with our 2nd part of the series, where we will introduce you the Blender basics for objects, how to add them, interact with them and even edit.