This Blender Rendering Tutorial explains how to render in Blender. We will cover multiple engines such as Eevee and Cycles and show many render examples. Rendering is very important, as it is the thing that will create your final image out of your scene. So it is vital to learn about how you can render, what settings should you use and so on.
But Rendering is only the last step of the process. We made a series of articles devoted to teaching you the very basics of Blender from moving around to rendering your first scene – Blender Basics Tutorial. And a lot more about Blender on our website. For example, another important step before rendering – Camera Setup.
Blender has three rendering engines. But you most probably are not going to use the Workbench one, as it is very situational. So in this article we are going to take a look at the two main renderers in Blender – Eevee and Cycles.
Blender Rendering – Eevee
Eevee is the newest Rendering Engine added to Blender. And also it is the default option that is active as you open the program. This renderer is very fast, but it comes with the cons on the quality side. Though earlier it was much worse and it is being constantly updated and developed.
To access the Render Settings in Blender – you should open Render Properties tab in the Properties Editor window, that is on the right by default.

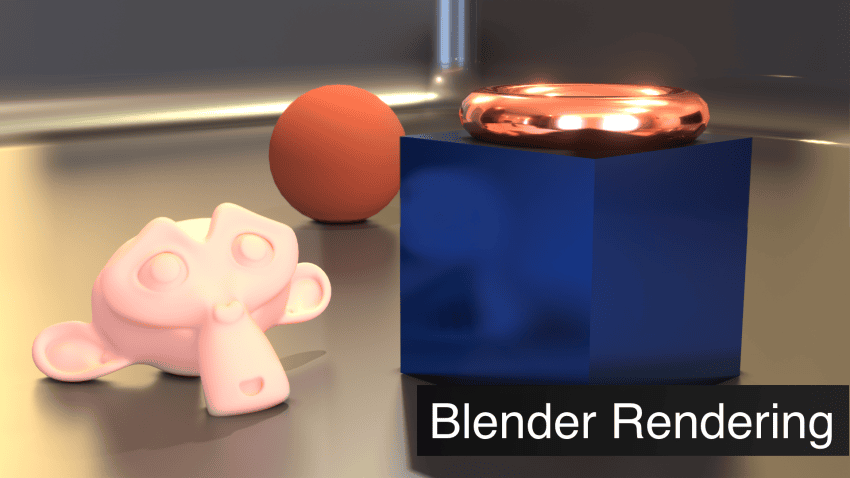
I have created this simple scene that I am going to use to showcase all of the changes in the settings. Added a bunch of different materials to it with different properties so we could see them change.
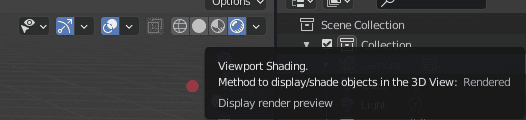
To see materials, lights and overall everything we do – we need to change to the Render Viewport Shading at the top right of the 3D Viewport window.
It is also important to view everything from the Camera View. To change it I can press the shortcut key – [Numpad0]. And here is how the scene looks with all the lighting and materials in Eevee:
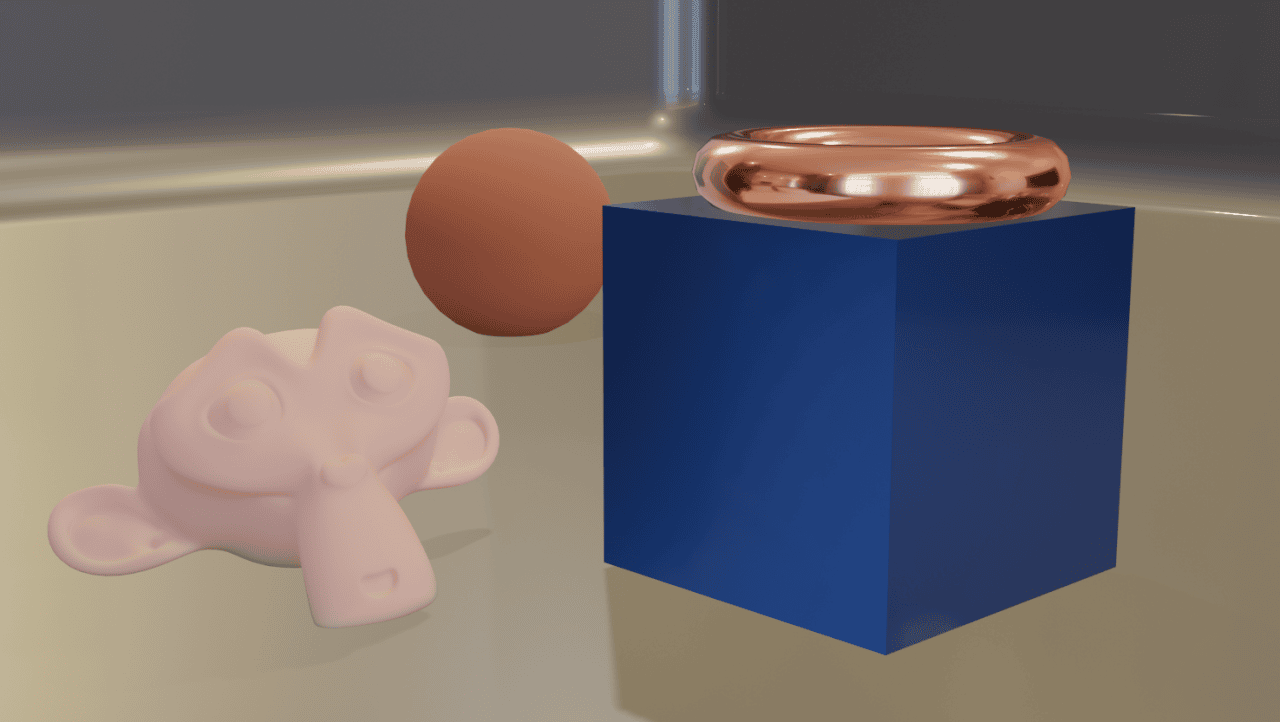
Default Eevee render
It doesn’t look that good. Materials are quite flat, there are lack of shadows, reflections and so on. But we can make it much better if we change some settings.
The first very important one is the Ambient Occlusion. What this does is adds shadows in the places where objects are close to each other and should restrict the lighting passing through.
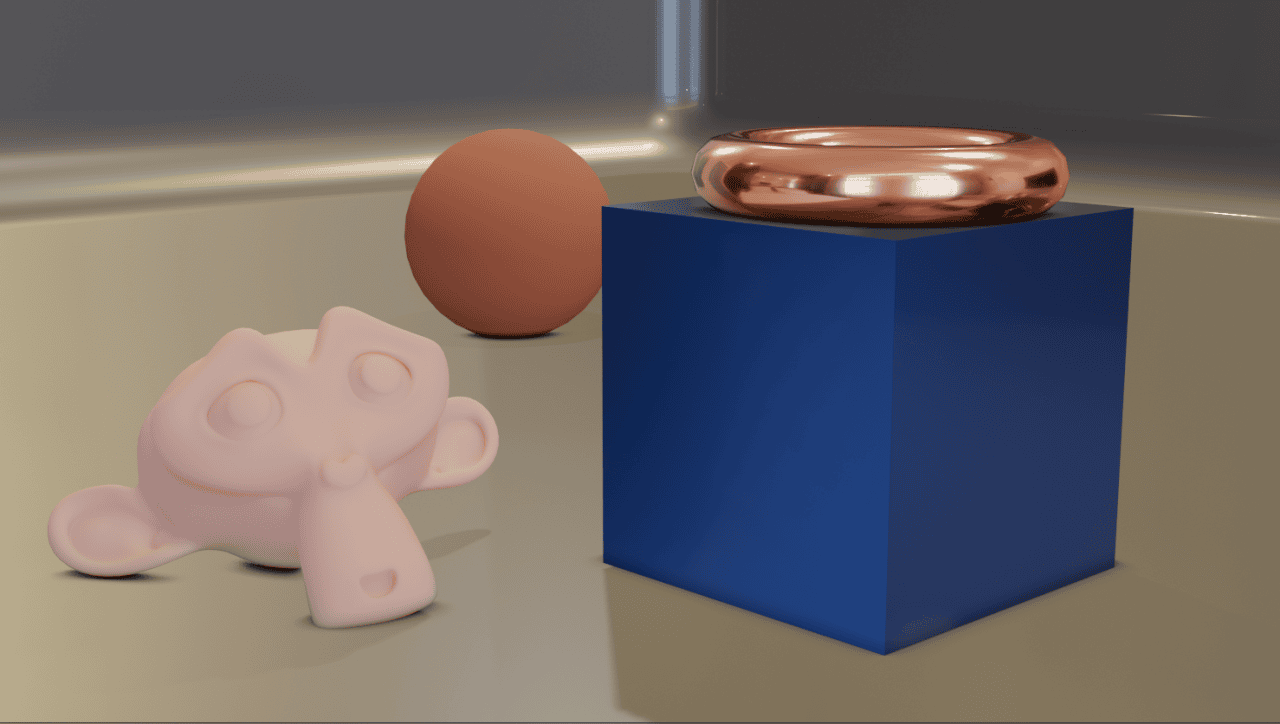
Added Ambient Occlusion
This setting alone improved our scene by a lot. Objects are not so flat anymore and do not look like they float above the ground.
Next interesting setting is Bloom. It adds the Bloom effect on the places that it should probably be. So in our case you can clearly see the Bloom added to the metallic torus on top of a Cube.
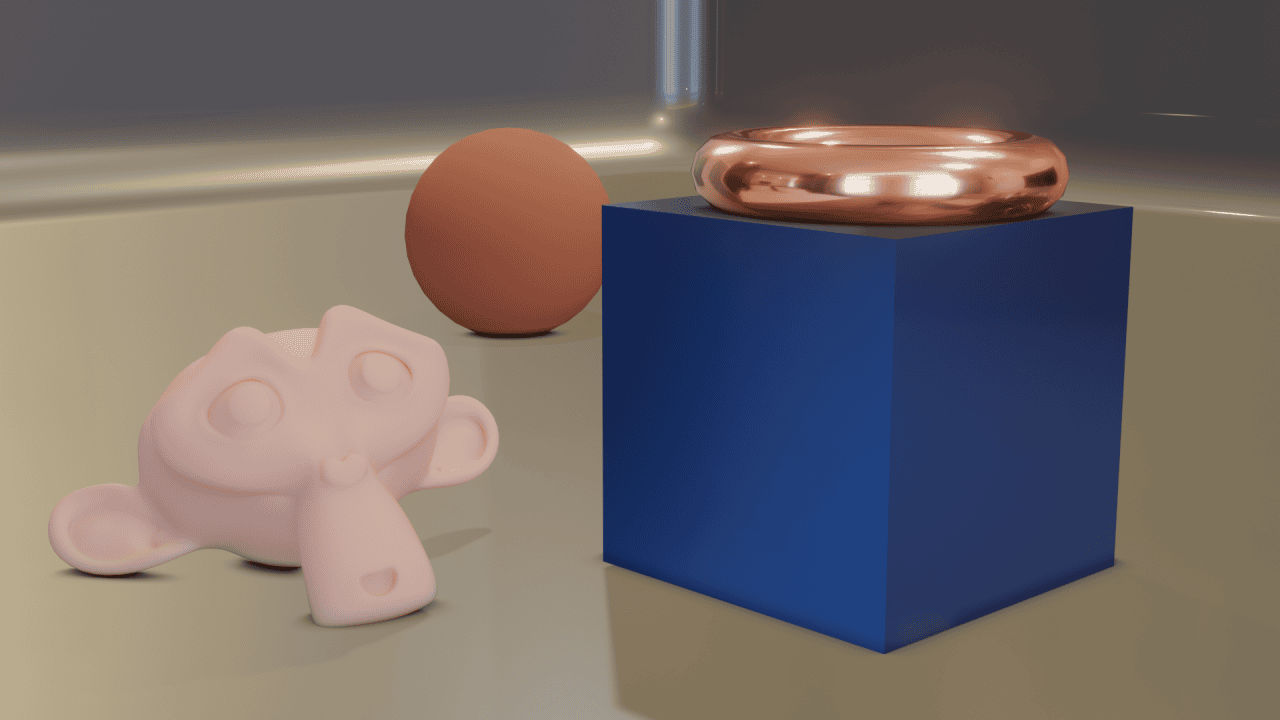
Added Bloom
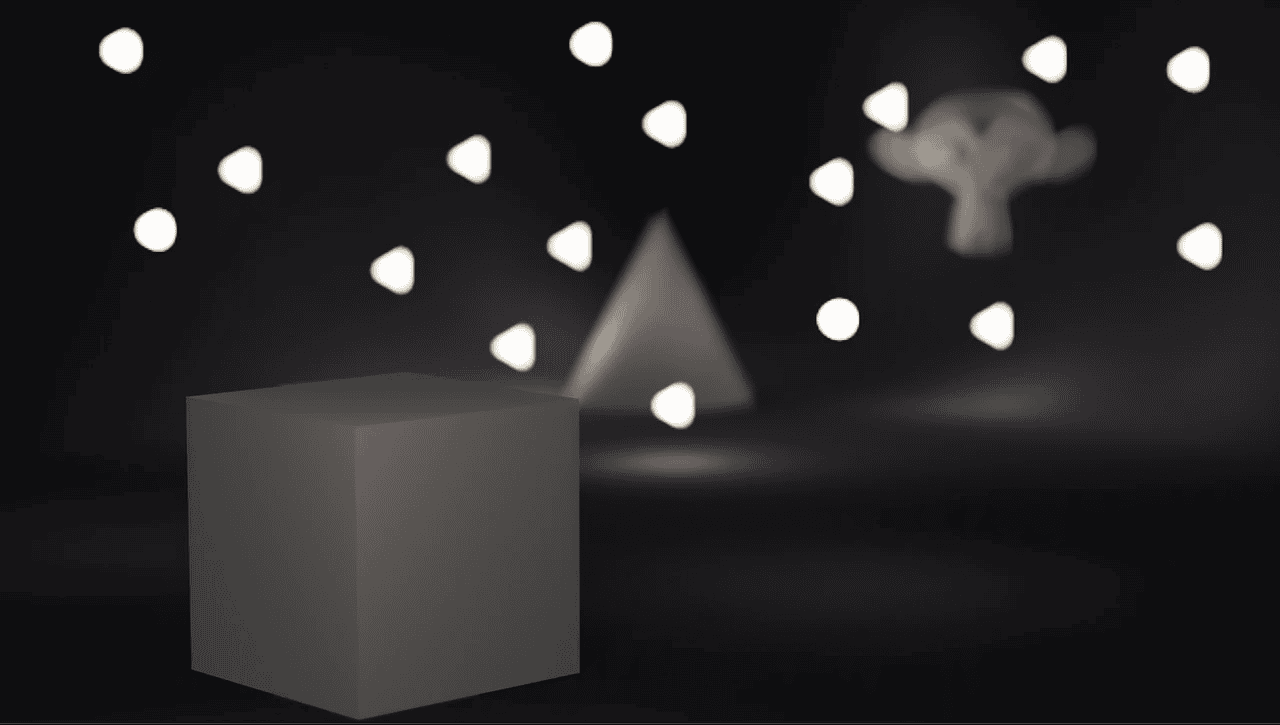
The Depth of Field and Subsurface Scattering will change how the corresponding Camera and Material settings are perceived. So at the moment my Suzanne object does have Subsurface Scattering material on it. Let’s also add some Depth of Field.

Added Depth of Field
Background is now more blurred. And if I now change the Depth of Field and Subsurface Scattering settings in the Render Properties to something very low you will see that there is almost no blurred background and Suzanne is not Subsurfaced anymore.
Lowered Depth of Field and Subsurface Scattering
So you can control these two parameters directly in the Render Settings like these.
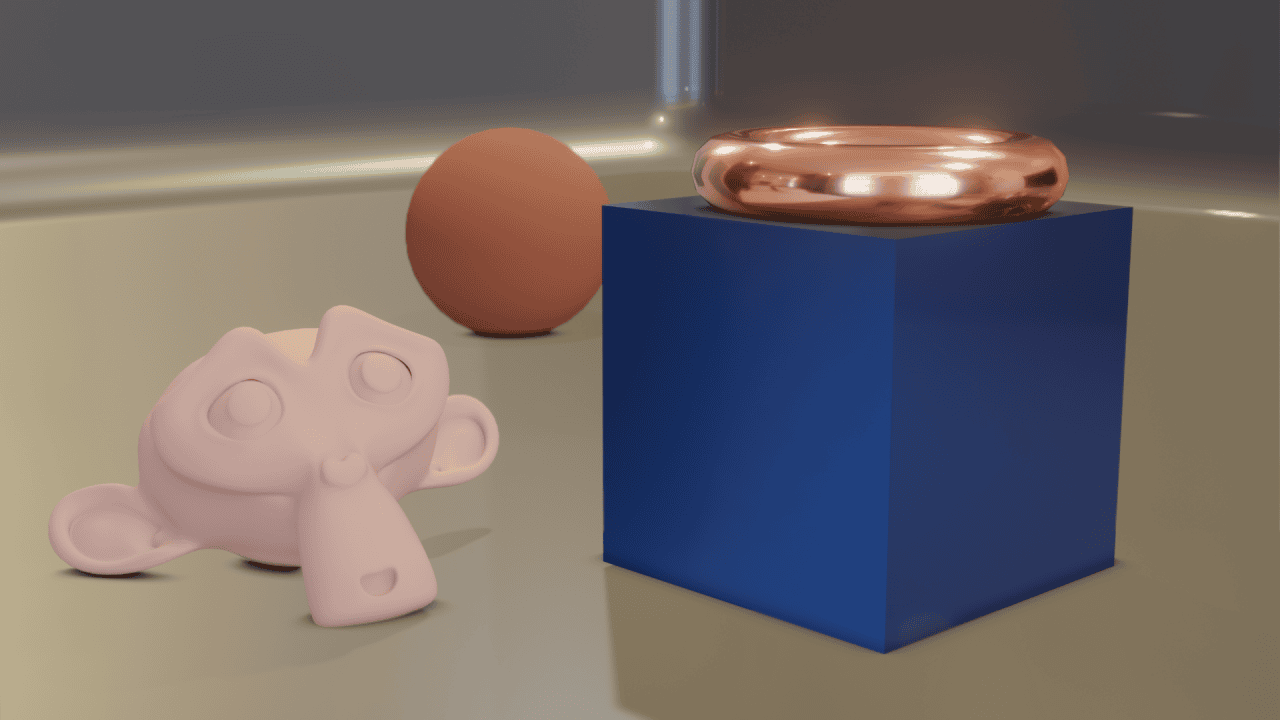
Next Setting – Screen Space Reflections is vital if you have reflective surfaces on your scene. It will make so that reflective materials will not only reflect the World and lighting – but also any other objects that are nearby.

Added Screen Space Reflections
There are some useful settings next too. As for example Motion Blur that will add this effect to your scene. Which can be especially useful if you are working on the animations. But we will not go in-depth on them right now and skip to the last one that is crucial for your Eevee renders.
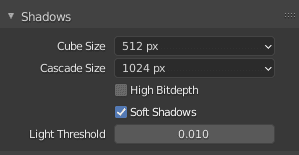
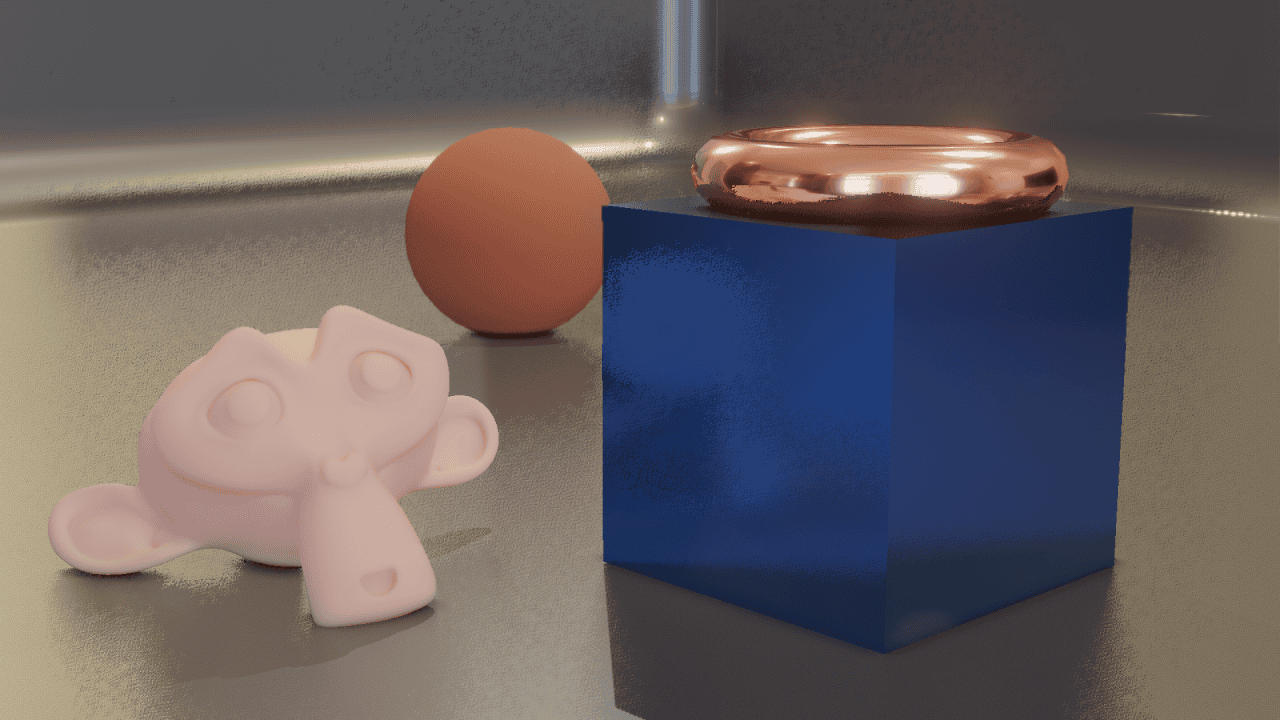
The Shadows setting section near the bottom controls the quality of the shadows on your scene. Mainly the Cube Size and Cascade Size settings.
Lower these settings and you will see the terrible blocky shadows. Take a good look at the one from the Cube.
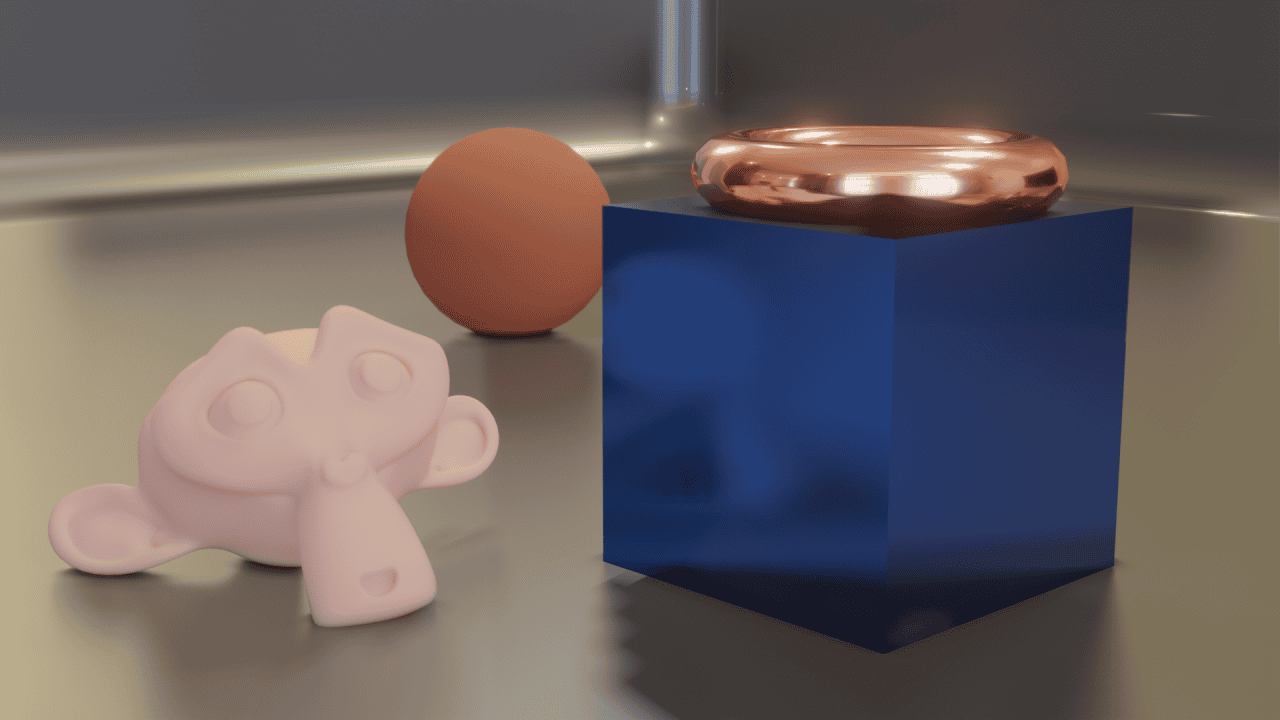
64px Cube Size and Cascade Size
But instead you can also increase these settings for some crisp high-quality shadows.

4096px Cube Size and Cascade Size
Blender Eevee – Sampling
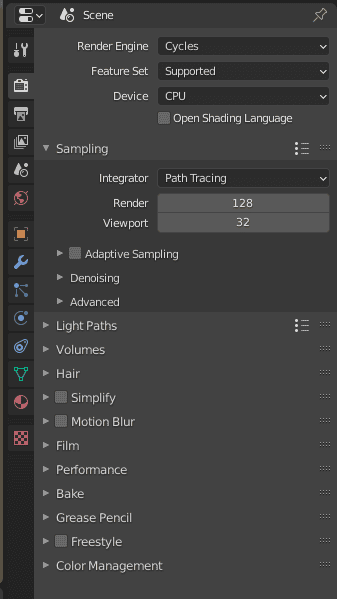
At the very top you should have seen the Sampling section. Here you can decide how many iterations your PC will do of this image. Each iteration will increase the overall quality, remove noise and so on. But each iteration takes time, so more samples equal to longer renders
For example if you would set the Samples amount to 1 – quality would be quite bad. There would be a lot of noise. Especially on the reflective surfaces. Though you can still see all the objects and main details of the image.
1 Sample Eevee Render
Increasing the Samples value will fix all of the above problems.

500 Samples Eevee Render
And as was mentioned – this does increase render times. While the default 16 samples take me 00:00:61 to create (yes, 61 millisecond) – the 500 samples took me 00:12:70. Which is still very fast, but it was 20 times slower.
So it is up to you to decide the right sample amount. The bonus here is that Eevee can do fine with the small sample amounts. Even the default 128 samples can be good enough for the final render in some cases.

Blender Rendering – Cycles
Cycles is a very different engine from the Eevee. It is an unbiased physically based rendering engine. This means that it tries to recreate the real-world look as close as it is possible. It is especially true for lighting, reflections and shadows.
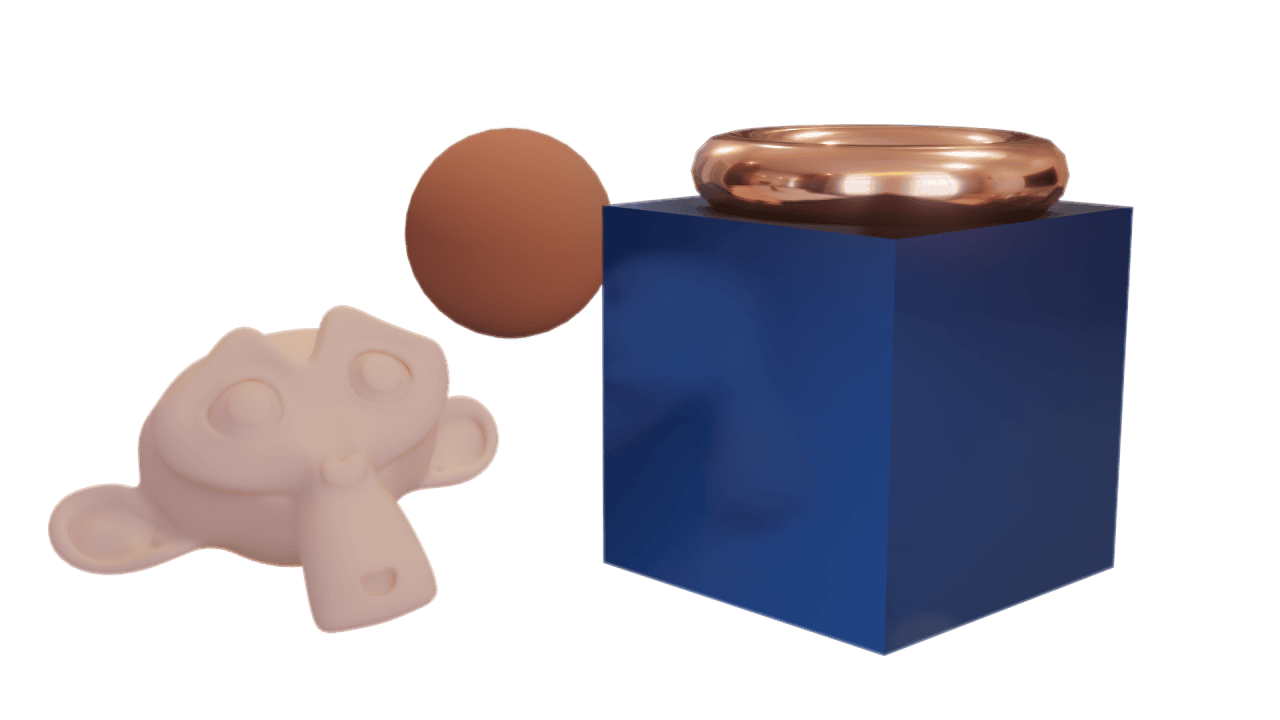
Let’s see the result of the default Cycles settings:
Default Cycles Settings
It right away looks better than Eevee. Reflective materials are more realistically reflective. Shadows also look much better and there more than one, because there are a couple of lighting sources. And of course the materials overall look better and have more details. Especially Suzanne and the subsurface effect. It is much more prominent with the Cycles.
As Cycles is an unbiased rendering engine – there is not a lot of setting available for it. Because it simulates real world lighting, shadows and so on, you can’t really control how real world physics works. It is already determined.
The first important thing that you will probably notice is the Device setting appeared on the top. Using it you can control which device would do a render – a GPU or a CPU with the latter being a default.
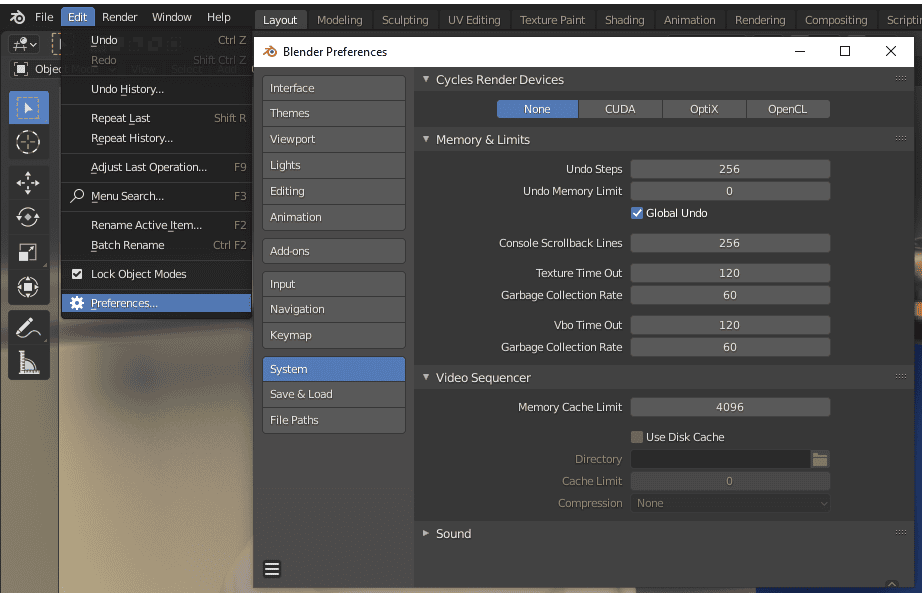
Generally speaking – GPU is a lot better for 3D rendering and will be faster than most CPUs. If you can’t change your Device to the Graphics Card – check the System tab of the Preferences settings. There you may need to change your Cycles Render Devices. Most GPUs and CPUs do support CUDA so it is usually one of the best options.
Things that you can control are stuff like Light Paths, and Volumes. But they are more for advanced users and will not change a lot if you are not sure what you are doing. Other settings are common between Cycles and Eevee. That includes settings such as Hair, Motion Blur and FIlm.
Blender Cycles – Sampling
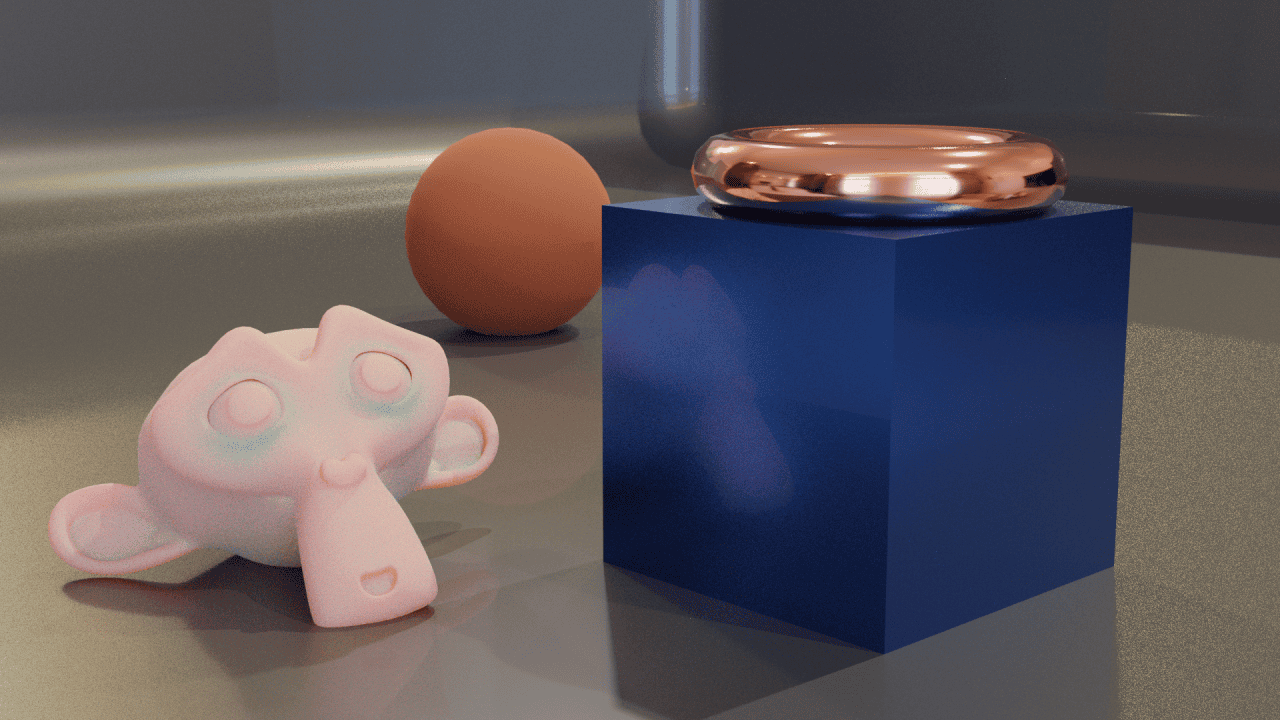
What is far more important about Cycles is the Sampling. If you look on the Cycles Render I did above – you will see that it is quite noisy, especially near the Cube. That is because Cycles is much more demanding than Eevee and the default value of 128 Samples will be no good most of the time.
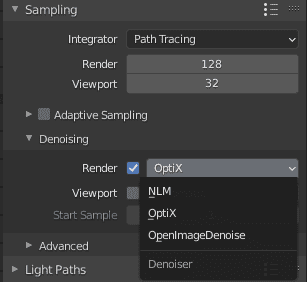
The big advantage of Cycles here is that not so long ago it received support for a very good denoising. You can find it just beneath sampling options. I recommend using the OptiX denoising, as it works much better than NLM.
And the result speaks for itself. It is still the same 128 Samples with Cycles, but there is close to no noise whatsoever. And it did not even make the render much longer too.
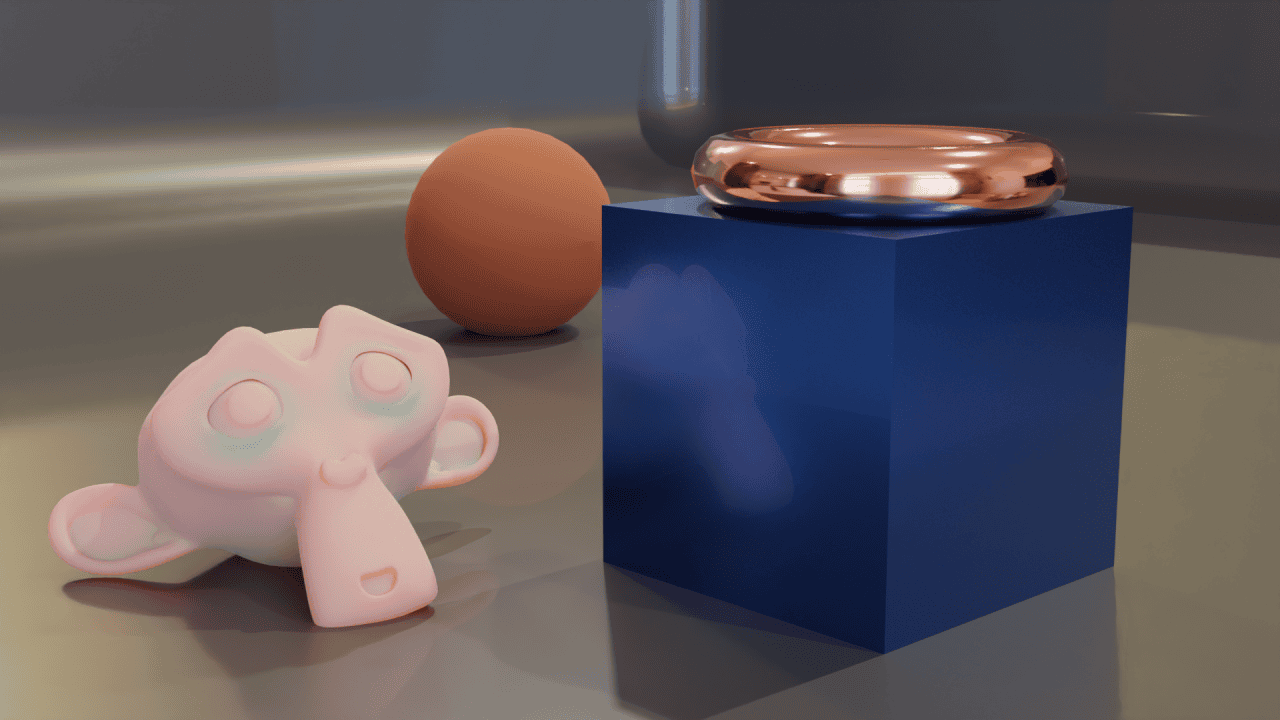
Cycles with 128 samples and OptiX Denoising
Sadly, Denoising is not an answer to perfect rendering. As there are some pretty obvious cons to it – it smoothes out the picture. If you take a closer look you can see that in the parts where there was a lot of noise – it is now a bit blurred, even smudged. That is how denoising works and a lot of it would be very noticeable.
Solution to this would be to increase the overall samples. But we can do even better with Cycles. You see, we can change Sampling Integrator to the Branched Path Tracing.
What this does is that you can now change the amount of samples that is dedicated to different surfaces and effects.
To explain it better on examples: diffuse materials are usually rendered very easily and you don’t need a lot of samples for them, even 128 can be enough. On the other hand, Glossy and Transmissive Surfaces are a lot harder and will have a lot of noise with the 128 samples. The Branched Path Tracing will help with this.
As you can see – it allows you to change the amount of Sub Samples for each individual category independently. At the bottom you can see the Total Samples amount and notice that the ones where I set it to “2” have twice as much Samples.

Cycles 200 Branched Path Tracing Samples
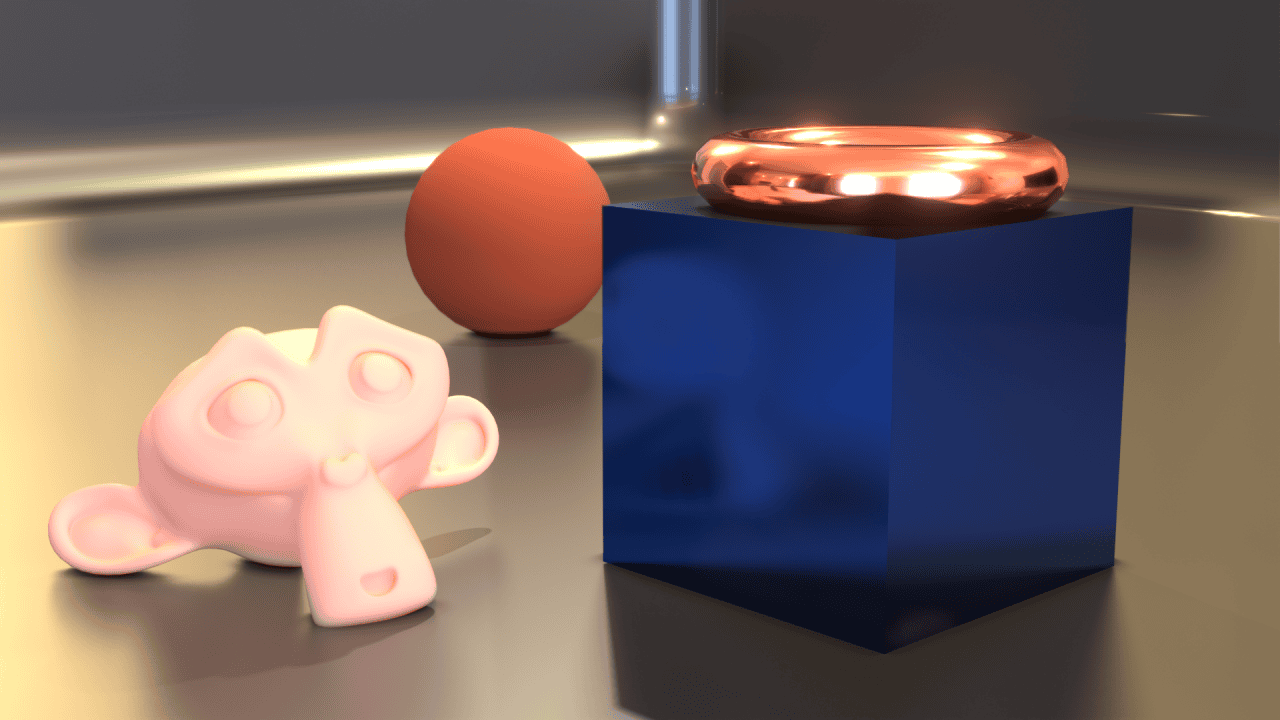
But even this is not enough to get rid of the noise. So you can either increase the samples a lot more. Or combine the Branched Path Tracing with the Denoising and you will get the best out of the two worlds. Which is a pretty good-looking image.

Cycles Branched Path Tracing + OptiX Denoising
Blender Rendering – Tips
Some additional Tips about overall rendering that should be useful both for Eevee and Cycles.
Don’t forget to check the Output Properties tab before your final render. Here you can set up the Resolution and Dimensions of the render. And also specify the path, where files would be saved and which format would be used.

There is a Transparent option under Film in the Render Properties.
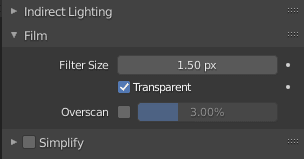
If you enable it – this will make your renders have a transparent background. Which is very useful, as you can later change the background to anything you want.
Also in the Render Properties there is a Color Management settings at the bottom. These settings are basically your simple post-production.
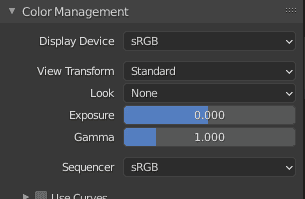
There are far more in-depth settings for post-production in Blender. But these are much simpler and easy for the novices. You can change the overall look using the Exposure and Gamma settings. Or use some presets for contrast, for example.
Blender Rendering – Conclusion
You can’t finalize your scene without rendering it. So it is one of the most important steps in the whole process. That is why we created this article where we tried to explain everything a fresh user needs to know about Blender and how to render in it. What is the difference between Cycles and Eevee. Which one should you use – fully depends on the goal of your scene and render. See also our other Blender Tutorials and 3D Model Reviews.