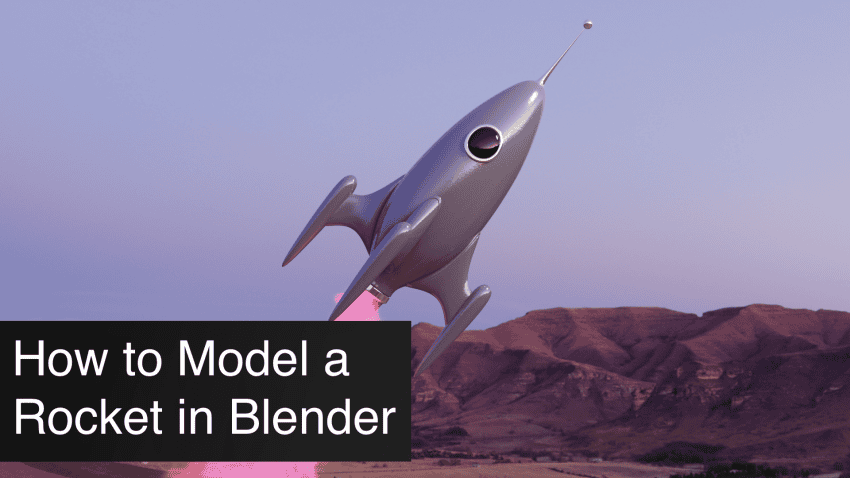
This article shows you how to model a rocket in Blender. We will explain each part of the rocket 3d modelling step by step including some glowing smoke.
Just a quick reminder, this tutorial was made for users already familiarized with Blender and who understand the basic notions of the software. We will consider this to be a more intermediate level tutorial. Take a moment to skim through the article to see if you are able to work on it. In case you don’t feel prepared, don’t worry! You can always check out our full list of Blender Tutorials to learn the basics.
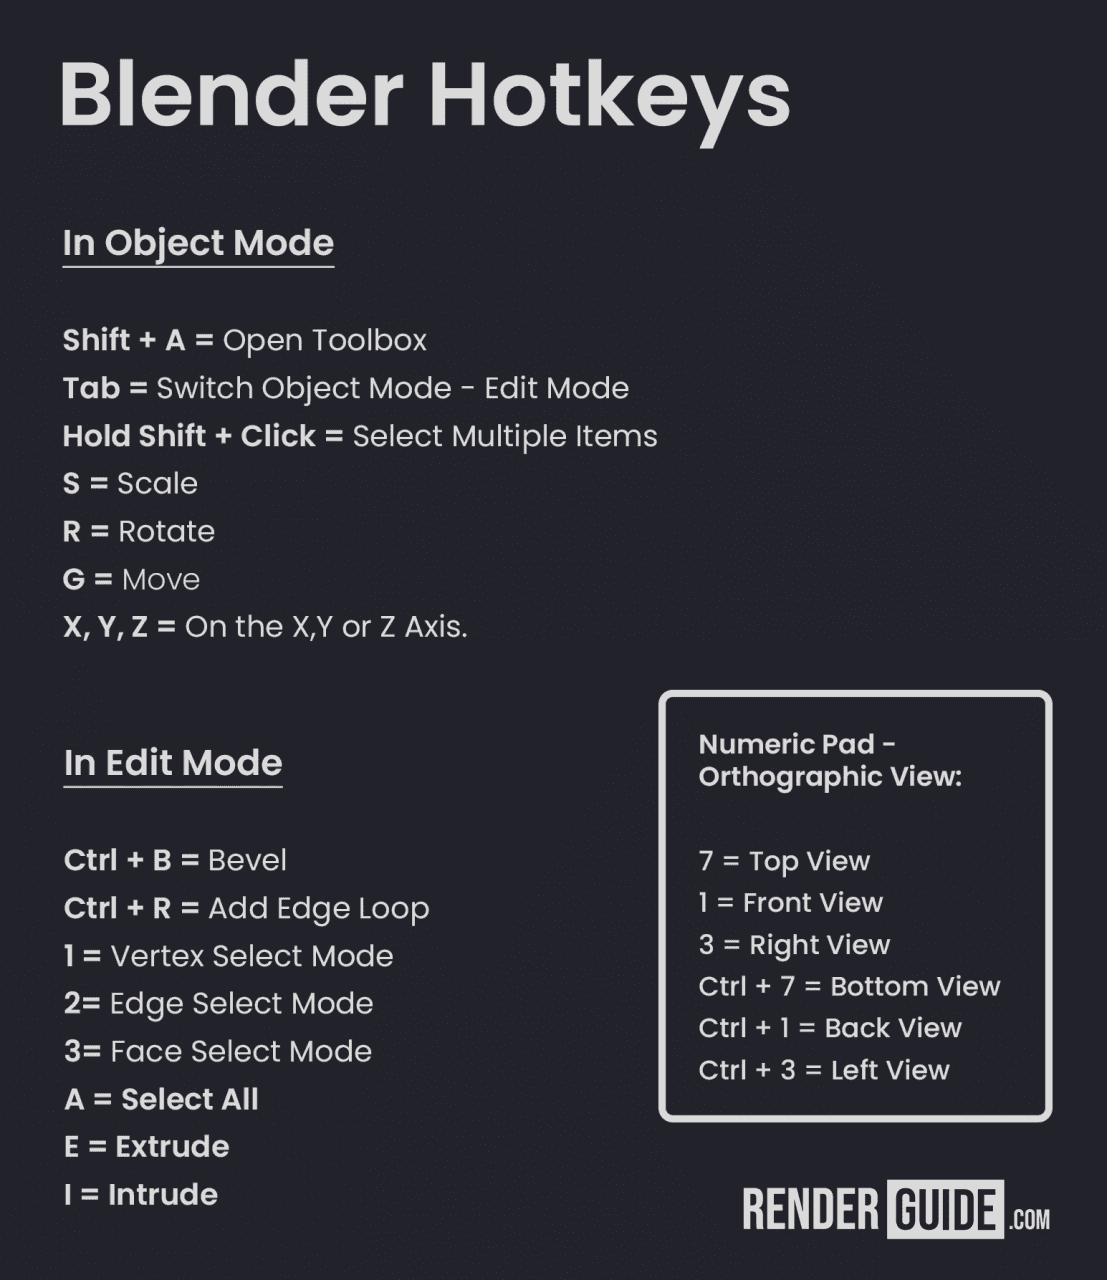
Blender Hotkeys
Just in case, I leave this visual guide at hand.
Modeling The Structure
Let’s jump right into it. Open Blender, delete the default cube and add a cube (sorry for that, it’s the habit).
Add a Subdivision Surface modifier to the cube (Do not apply just yet). Go into edit mode, Wireframe View (Z) and re-shape the cube to match the shape of the rocket.
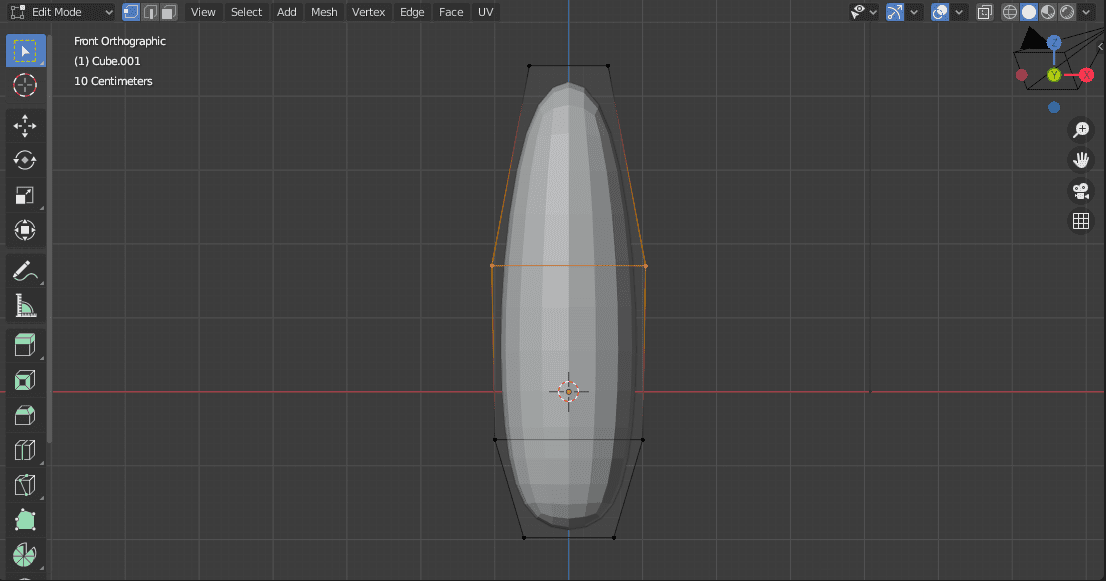
Press Ctrl + R to add edge loops. Right click to release.
Press G to move + X,Y,Z to align on such axis. Press S to scale such as shown in the top and bottom areas.
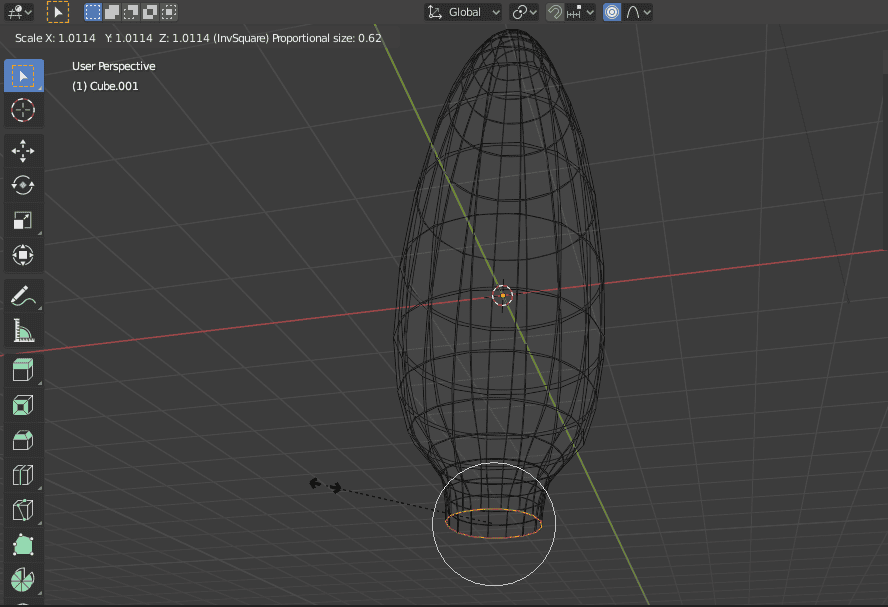
For the middle part, hold Alt and click on the middle edge loop. To get a good round shape when you scale, use the proportional editing tool (O key shortcut).
Go back to Object Mode, right click on the model and apply Shade Smooth. Also, you can apply the Subdivision Surface modifier once you think you are happy with the result.
Modelling the Rocket Tube in Blender
For the Tube, we will delete the bottom faces of our rocket structure. We will then press Alt + click in Edge Mode to select the bottom loop and extrude (E) on the Z axis.
Ctrl + R to add some extra loops. Press O for proportional editing and from the middle loop, rescale to obtain a smooth curve.
Keep resizing edge loops until you are satisfied with the result. To finish, select the last edge loop and press F to fill faces. Press I to intrude if needed.
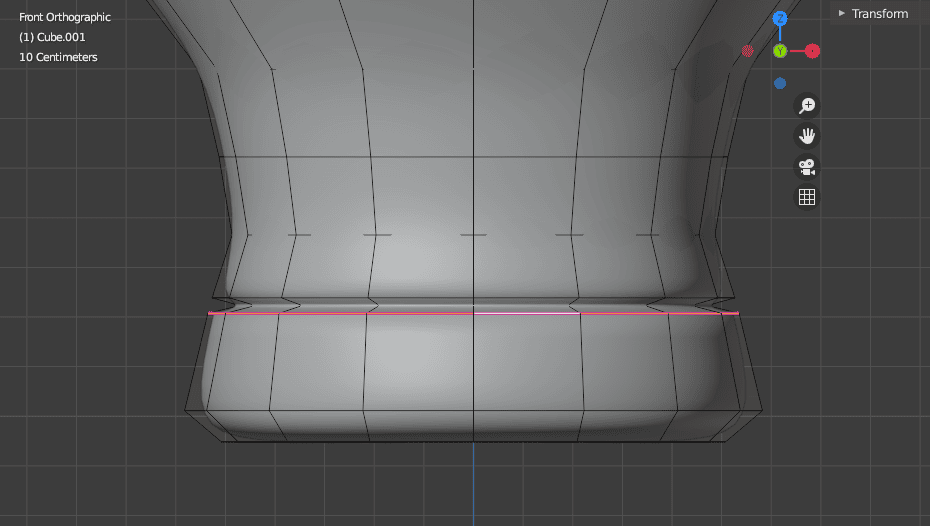
Great! Now, to add more details to the tube, we will create a metal ring. Press Ctrl + B (Bevel) in any edge loop where you want the division of materials. Move away the cursor to see a new loop being added in the middle.
Scroll to add a third edge loop. Alt + right click on it, rescale and push inwards.
For the other two loops we will select each and add an Edge Crease (Shift + E). Move the cursor away until it turns red. This will create a sharp edge between the parts.
Modelling the Fins in Blender
So far so good. Take a break if you need, grab a cup of coffee and let’s continue.
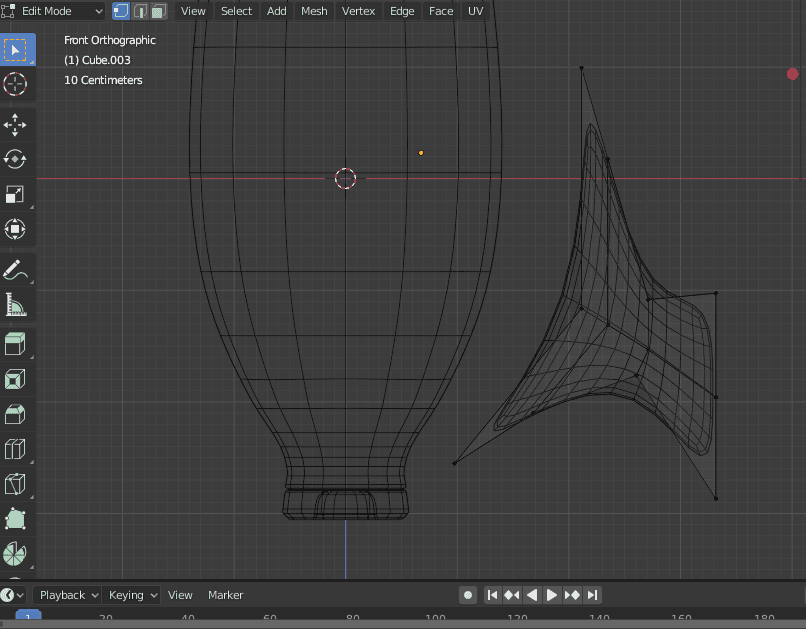
For the fins, to be honest, it comes down to a personal choice. I decided to go for one specific shape but don’t take it too seriously.
Add a Cube, add a Subdivision Surface modifier and reshape in Edit Mode. Play until you are happy with the result. Apply the Subdivision Surface Modifier once you are satisfied and then Shade Smooth.
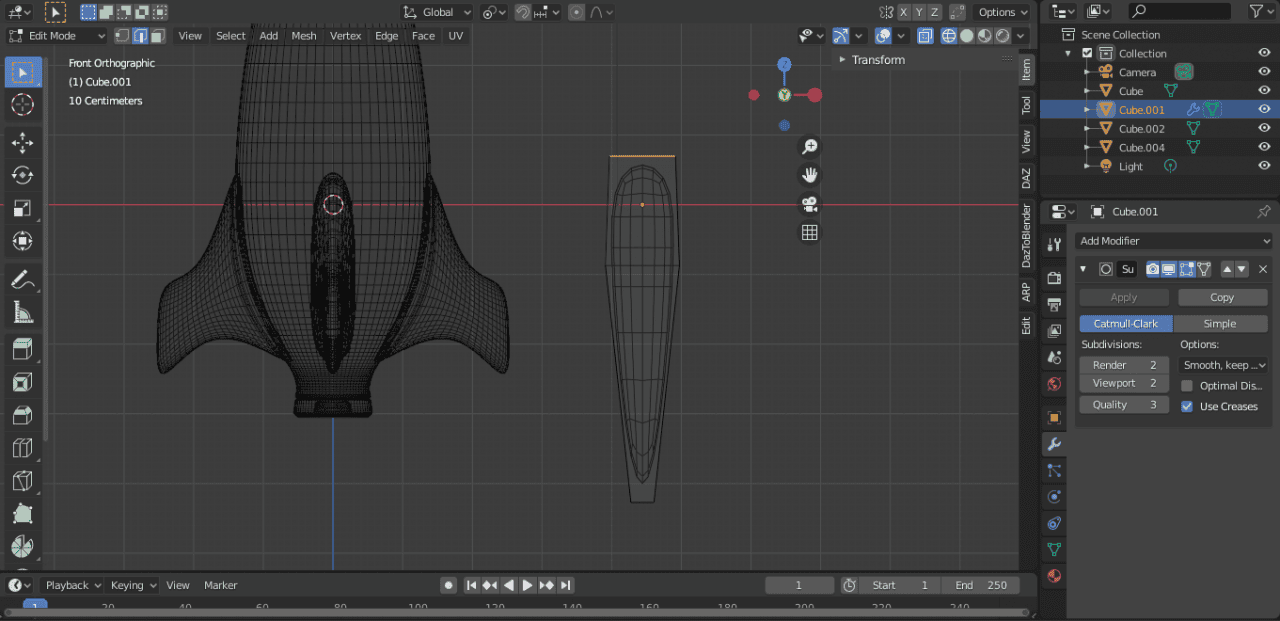
Once in position, let’s apply a Mirror Modifier to create a copy on the exact opposite side. Now press 7 to access the top orthographic view. Select both fins, Ctrl + D and press R + 90 to make the two remaining copies.
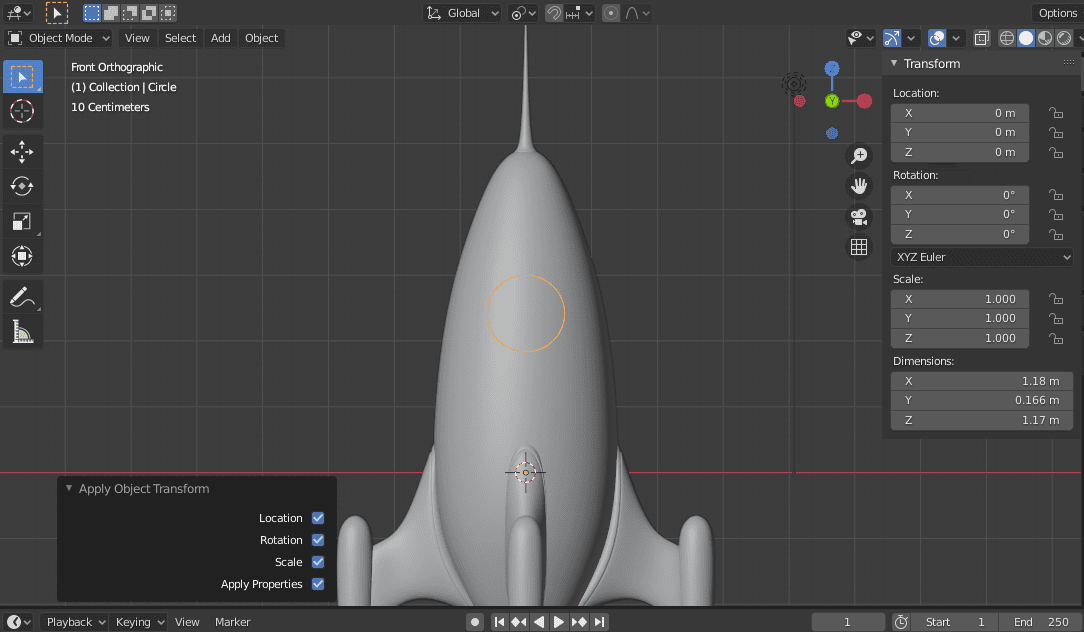
It is starting to look like a rocket. Let’s create some decorative elements to complete the fins. In my case, I followed the same steps as done for the rocket body. Once finished, move the object to the desired spot by pressing G, you can use the orthographic views to put it into place. Remember at all times to check the scale is set to 1,1,1.
Ctrl + A in Object Mode > All Transforms.
Modelling the Rocket Window in Blender
For this Rocket in Blender we also need some windows. To start, we will add a circle and place it close to the surface, without it touching the rocket structure.
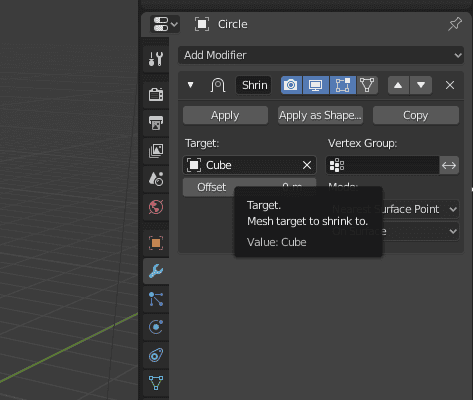
We will now add the Shrinkwrap Modifier to our circle and set the target to the cube or the rocket structure. You should see the circle bend to match the structure’s shape.
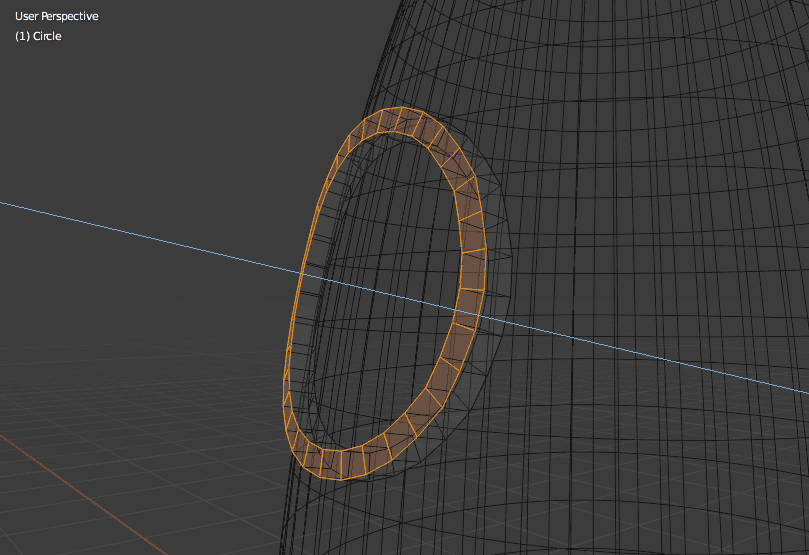
Do not apply the modifier yet. Go to Edit Mode and press E + S to scale inwards. We are now creating the frame of the window. Once done, do apply the modifier.
For the last step, go back to Edit Mode and extrude all faces to add volume. As seen in the picture below, remember to extrude on the local axis. If it doesn’t automatically extrude that way, press Z and again Z (for local axis).
Once done, appy a Subdivision Surface modifier to make it look round.
Now let’s add a UV Sphere again to create the window glass. Add a Subdivision Surface modifier if needed and apply Shade Smooth.
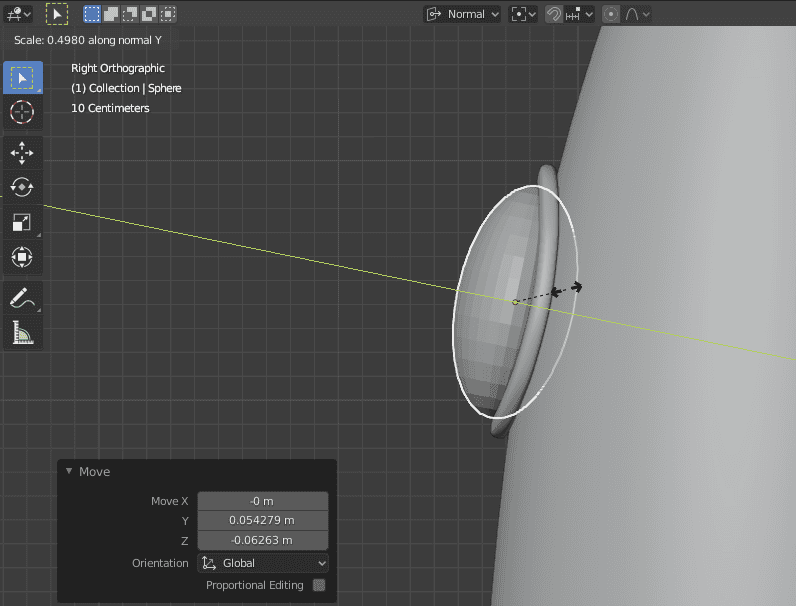
Press G to move the UV Sphere to the right position and S + Axis (twice) to rescale on the local axis. Then, apply the modifier.
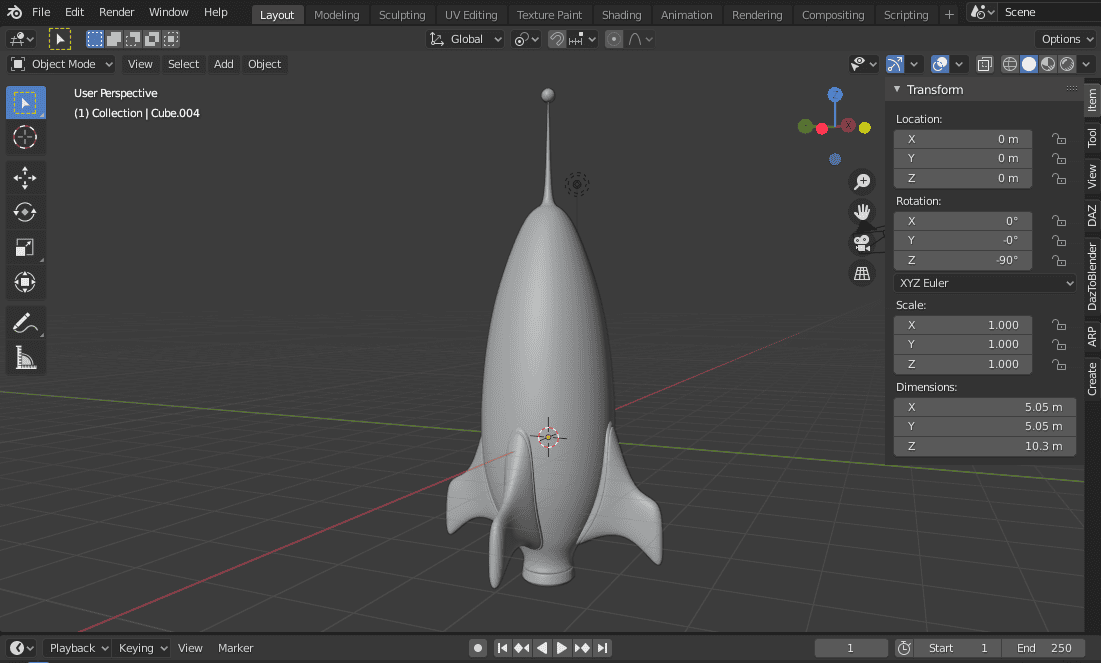
The modeling process is finished!
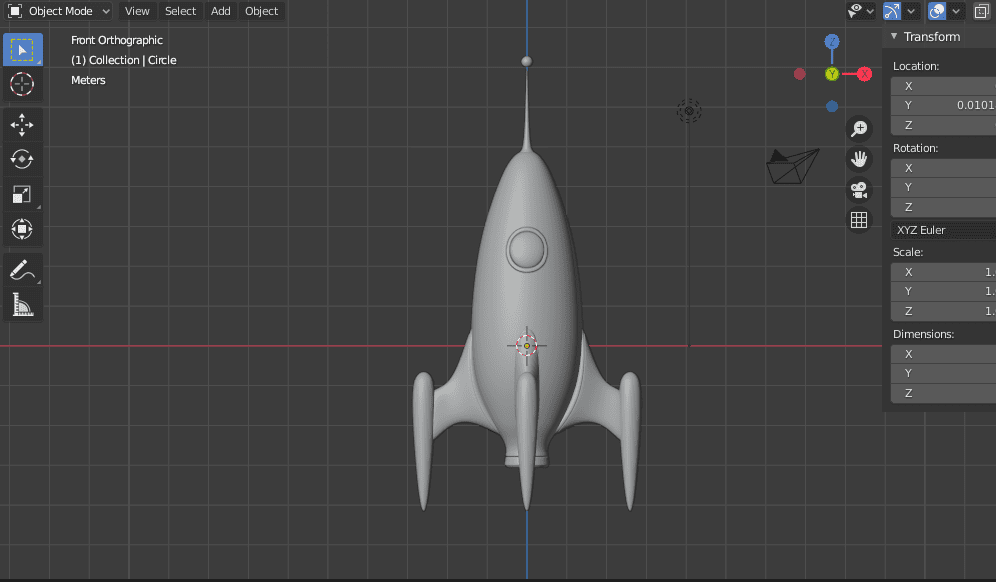
Ctrl + J to join all parts and Ctrl + A to Apply All Transforms.
Glowing Smoke Effect in Blender! Yey!
So, I decided to skip the texturing because otherwise the article would take too long. We have covered that part in other tutorials that you can visit here: Blender Materials Tutorial – Blender Texture Paint Tutorial – Blender Shader Nodes Tutorial.
The glowing smoke effect in itself can get tricky so please, pay much attention and let’s start.
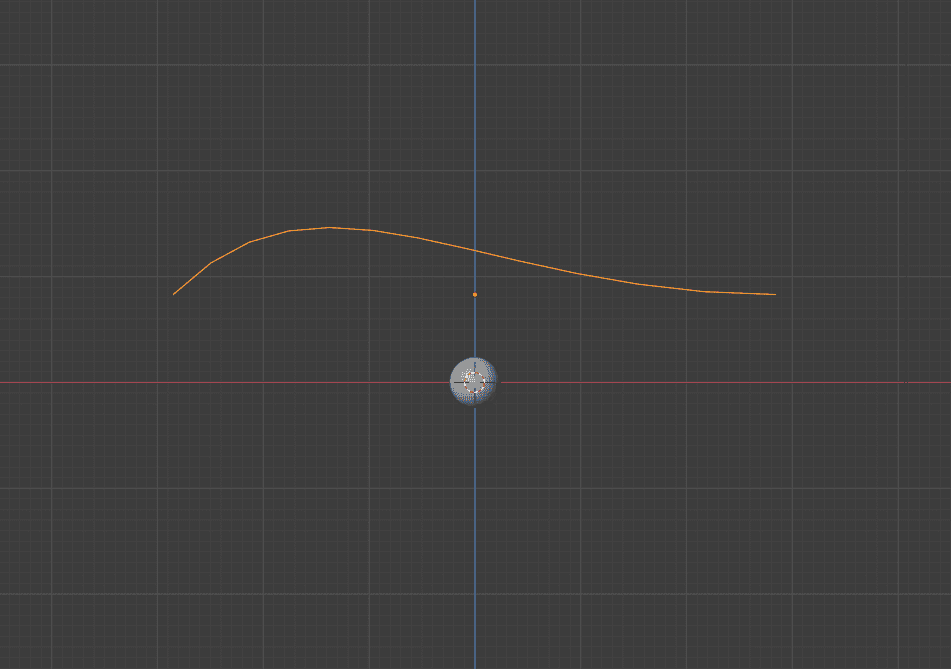
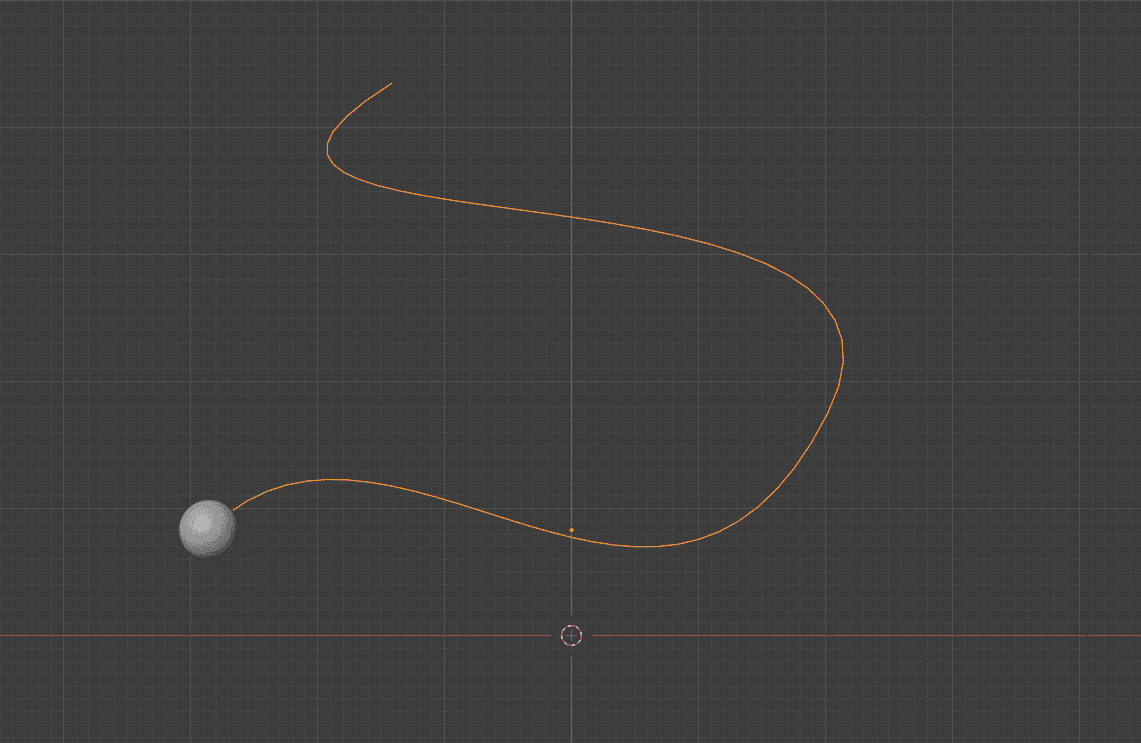
First of all, we will create a UV Sphere, preferably the size to fit the rocket’s tube. We will also add a Bezier (Curve > Bezier)
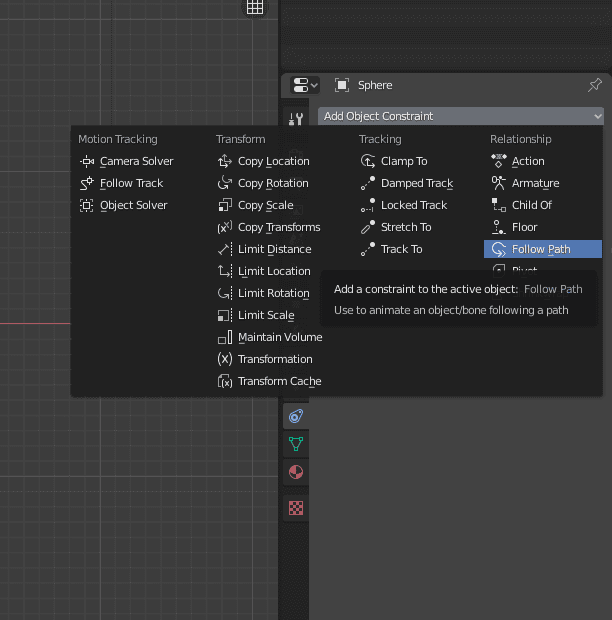
Now, we will select the UV Sphere and go to Add Object Constraint > Follow Path. Set the target to the bezier curve and Animate Path. The curve will set the trajectory of the ball.
If we hit the spacebar the animation will start paying.
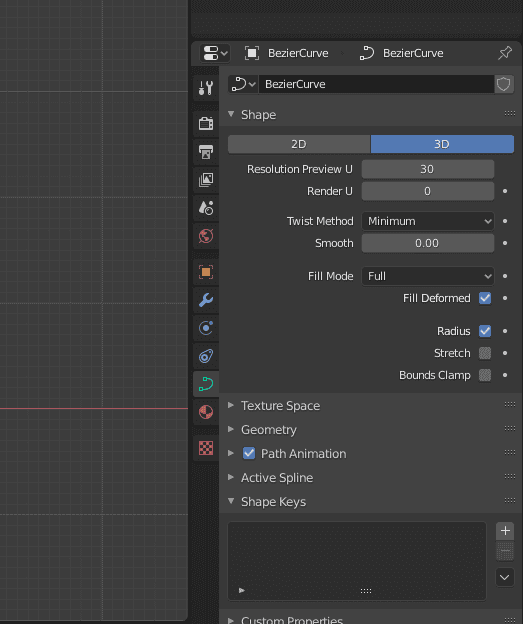
Remember that in Edit Mode you can change the shape of the bezier curve. Also, if you go to the curve’s data properties, in Resolution Preview U you can increase the value to add more segments and make it smoother.
We are getting there, so far we should have something similar to the next image.
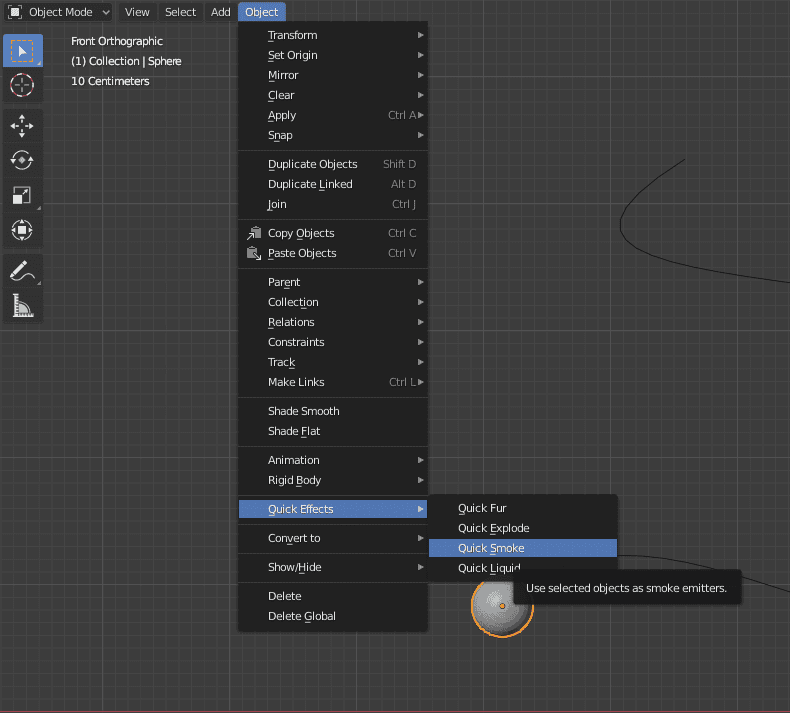
We will select our UV Sphere and go to Object > Quick Effect > Quick Smoke
What happens now is that we have a new element added to the scene, called Domain. The domain basically sets the boundary for the smoke effect. We want to have enough room for our smoke to behave correctly, so feel free to rescale the domain if needed.
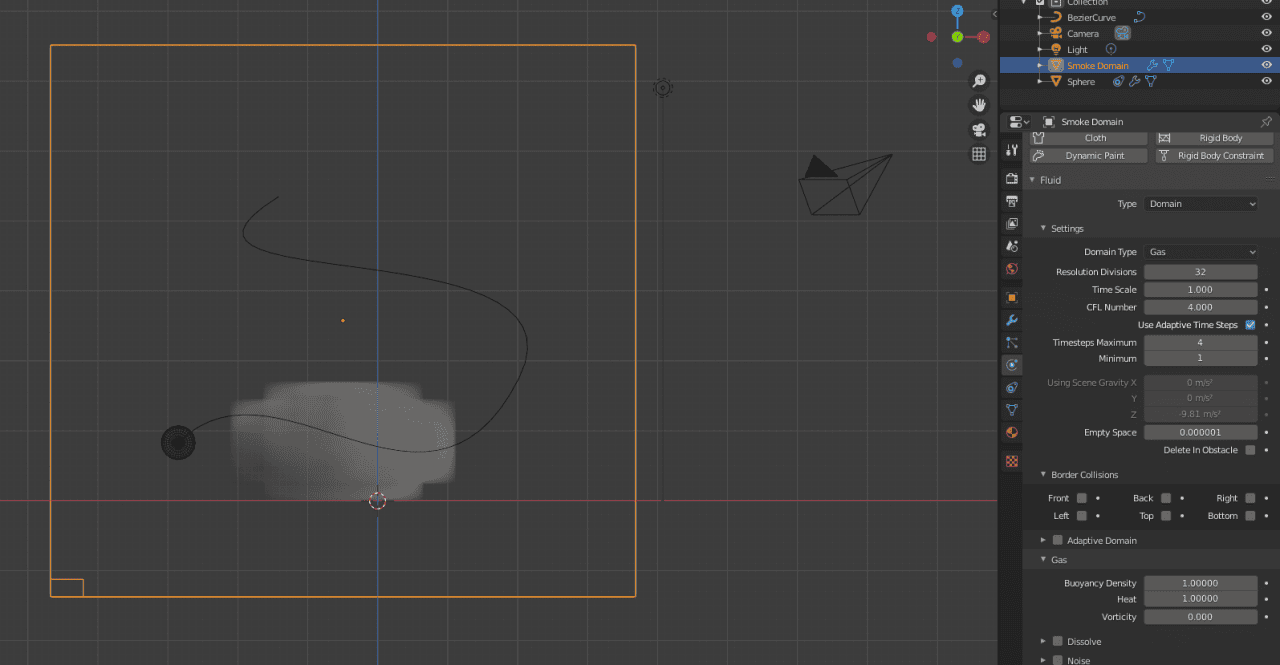
In the Physics properties of our Smoke Domain we will set the following parameters:
Resolution Divisions (sets the quality of our rendered smoke): at least 128, recommended 256 or higher.
Check Dissolve: set time to 20.
Check Noise: Upres Factor: 2, Noise Method Wavelet, Strength 4, Scale 2, Time 0.100.
For the ball, in the Physics properties, we will also change a few things:
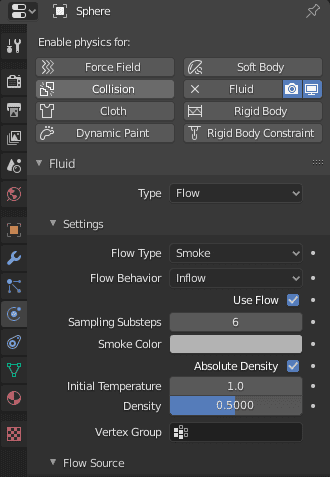
You can play around with density values to obtain strong cloudy smoke effects or weaker ones.
Once done, let’s bake our animation. Go back to your Domain’s physics properties and under cache click where says: Bake All. Make sure the Frame start is 1 and End is set to a timeframe that gives enough time for the ball to follow the entire path of the curve.
In case once the effect has baked and you want to go back to editing some parameters, you will need to click Free All, make the changes and click Bake All again.
For the last part, in the Shader Editor, I made these changes to get the glowing, colorful effect.
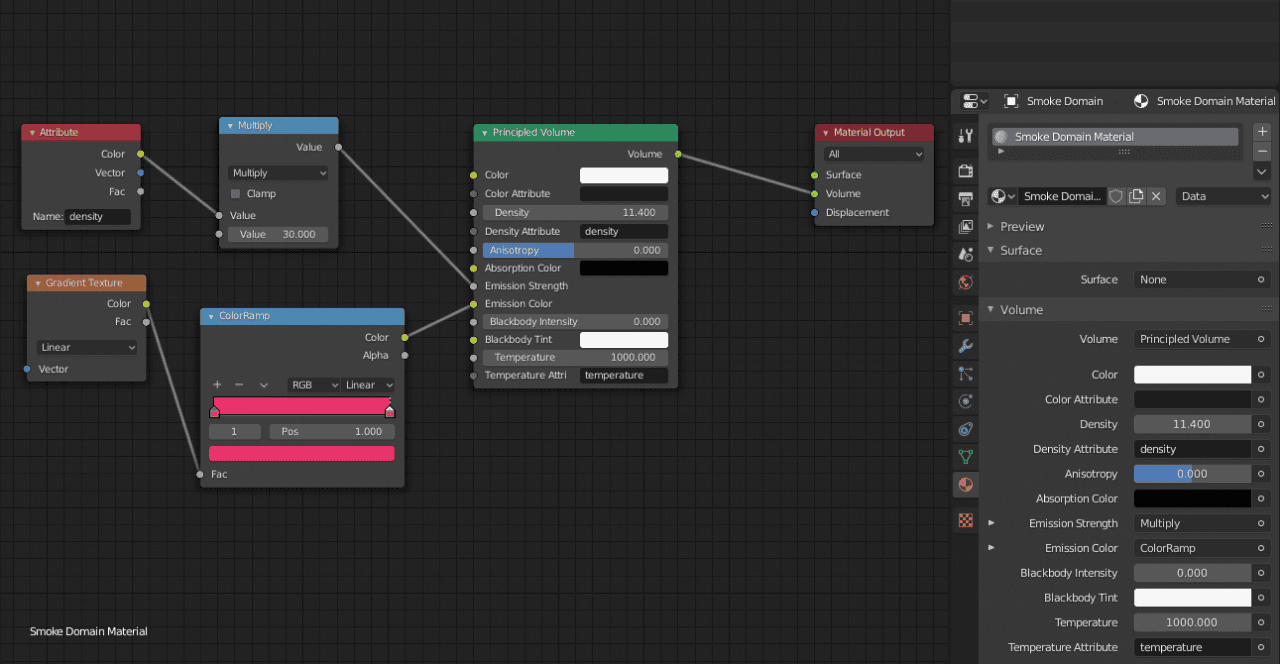
I added an Attribute shader and renamed it density. I also added a Math shader and set it to Multiply. For the value, the higher, the more glowing effect we get for the smoke.
In addition, I added a Gradient Texture shader and a ColorRamp shader. Here you can mix colors, as many as you want to get the colorful gradient. You can even create a rainbow smoke effect.
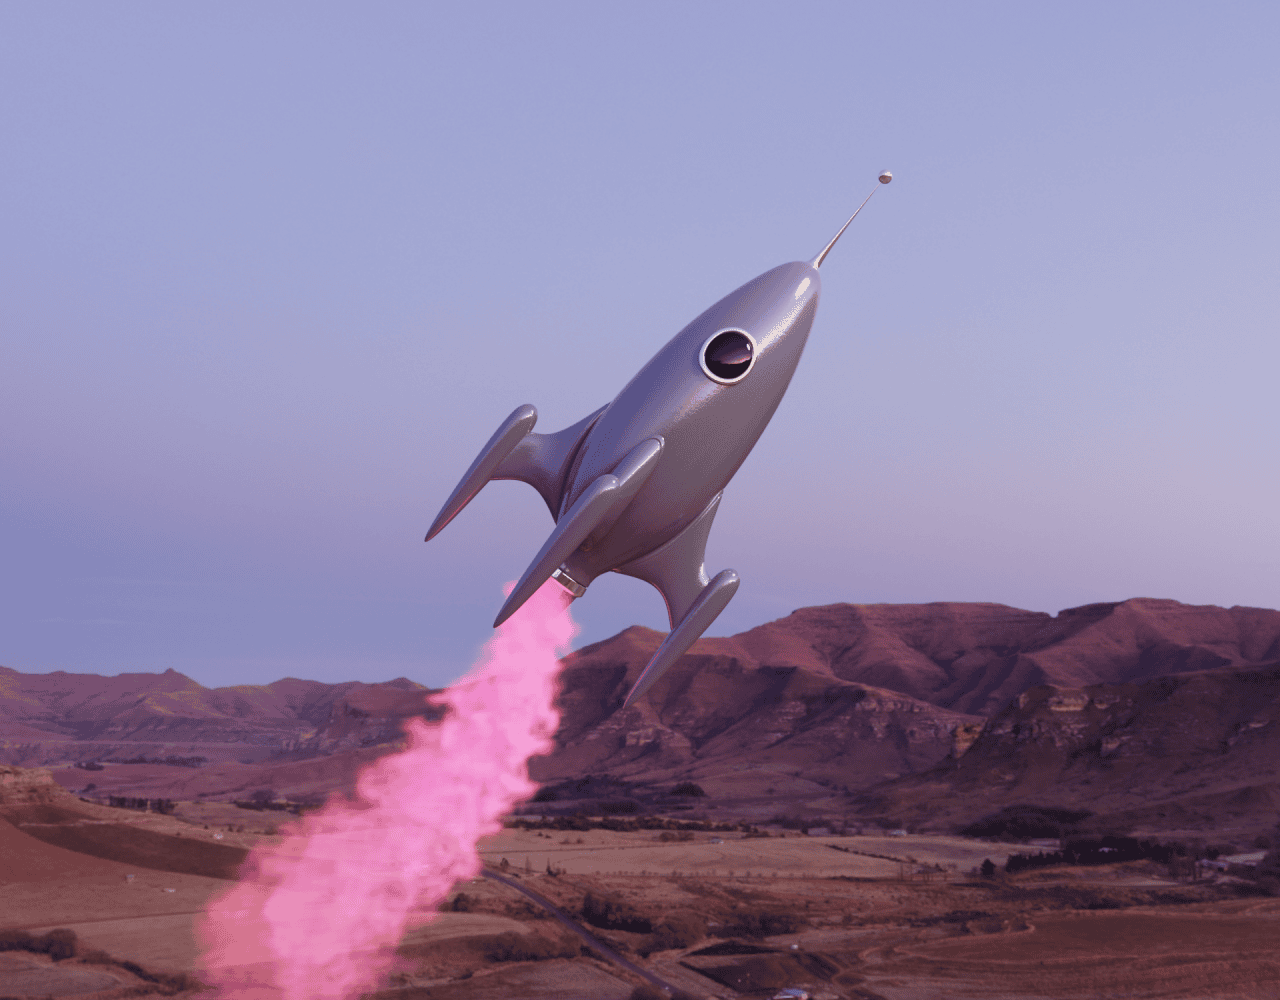
That’s it, go to the render preview to see the effect.
Conclusion – How to Model a Rocket in Blender
To sum up, I would like to say that only practice makes a good render (Thus, artist!). Don’t be afraid to tweak and click even if you are not sure of the outcome. The more you connect with the software and understand how it behaves, the faster you will get your desired results. Hope you enjoyed this Rocket in Blender Tutorial!
Also, feel free to create your very own rocket, with its custom shape. Pick any color, add as many windows as you want and make it your very own design. Visit Pinterest, Artstation or any source of inspiration and start creating. See also our other Blender Tutorials and 3D Model Reviews.