
This step by step tutorial explains how to rig any door & prop to make it open. This is helpful for Daz models that don’t support being opened or closed. Rigging is not an easy thing to understand right away. Sometimes you need to study it for quite some time to get the hang of it. But getting started may be not as hard as you think. Especially if the goal is a one single and simple movement.
In this article we are going to look at how you can rig an object, so it would make an opening and closing rotation movement. Main purpose of such a rig is for the doors to open like they do in real life. If you prefer watching a video see below, otherwise keep reading.
Preparing Object for Rigging in Daz Studio
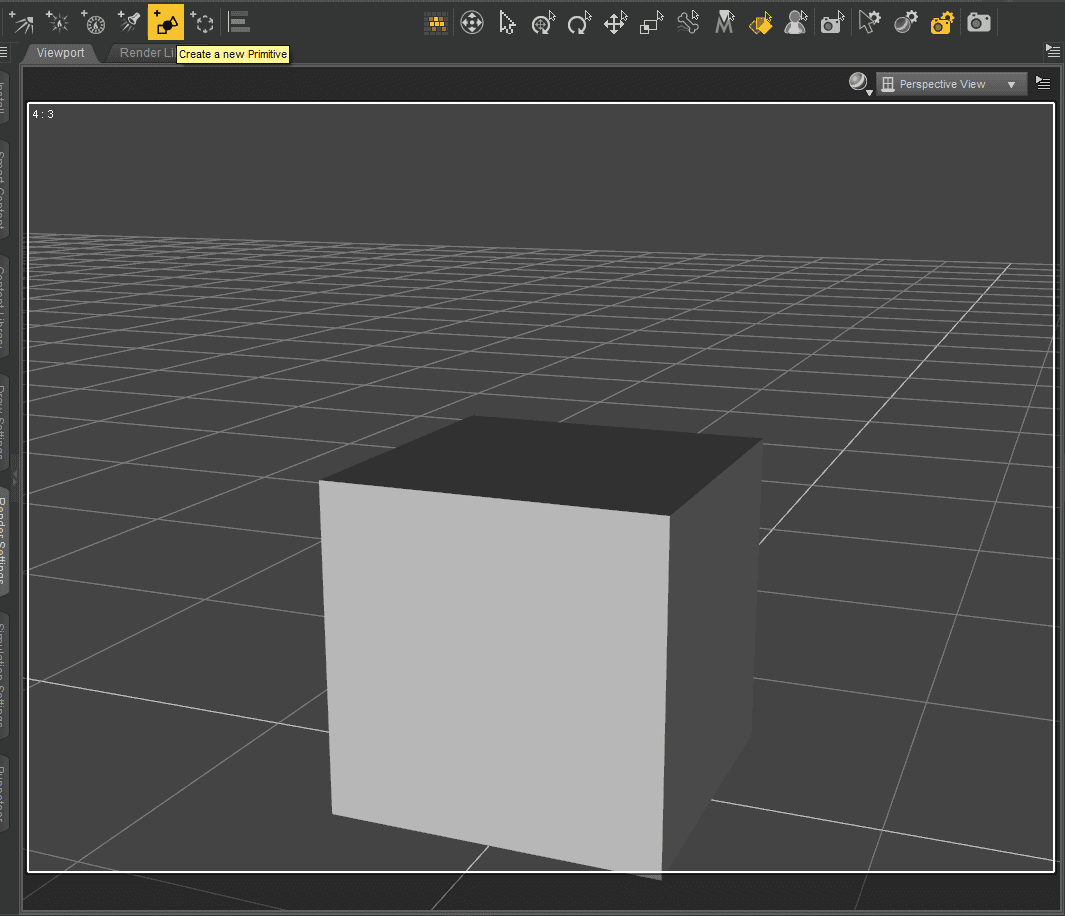
For the starters let’s create an object. The closest to a door primitive we have in Daz Studio is a Cube. So I will add a Cube to my scene.
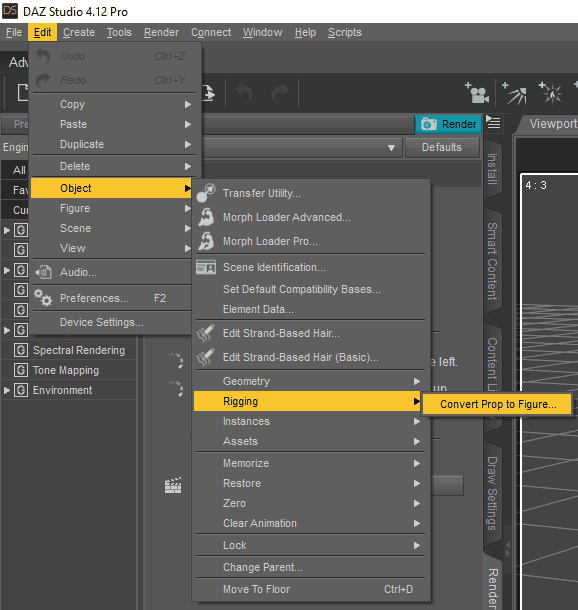
After you add an object – it is a primitive object and primitives do not have bones to work with. To get bones we need to convert the object into a figure. For this select an object and then proceed to the top bar “Edit > Object > Rigging > Convert Prop to Figure…”
In the appeared window change the Rigging Type to the “General Weight Mapping” and press Accept.
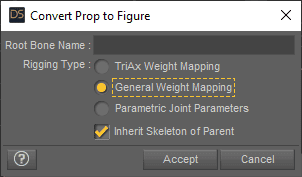
After this nothing should happen from the looks of it. But in reality we now have a figure instead of an object and it already does have a main bone to which we can add even more bones.
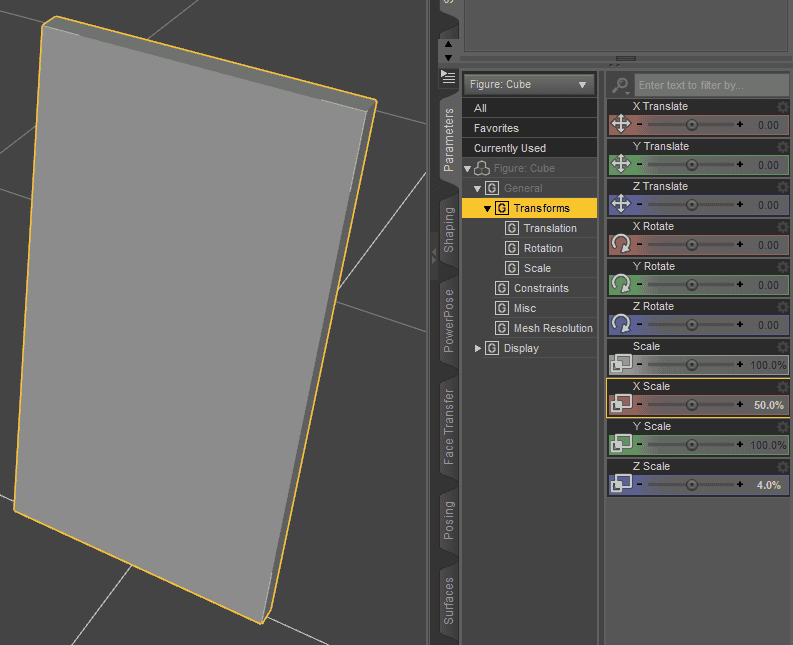
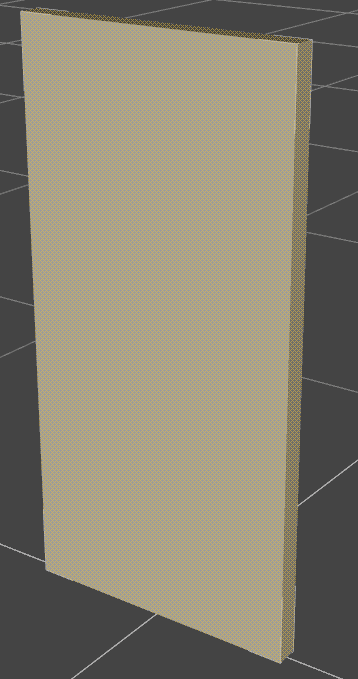
When this is done, we can change the geometry of the object. As I want a door, I can just change the scaling a bit. Made the Cube a lot thinner and rectangular by using the “Parameters” tab.
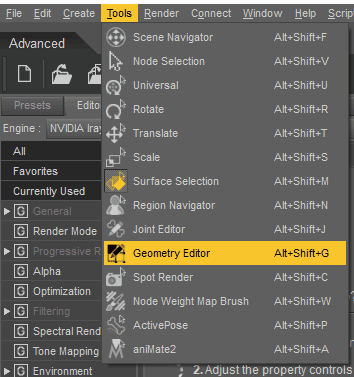
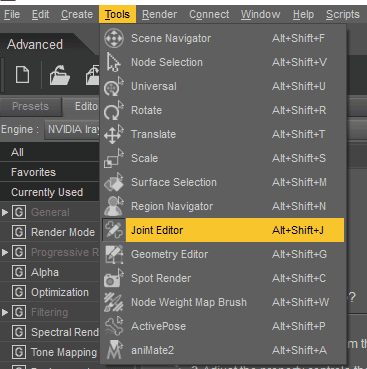
Also it is needed to make one more preparation for later. We need to create a Face Group so later we could add weight to it. To do this you need to use the “Geometry Editor Tool”. It is not on the toolbar in the default Daz Studio layout, but can be easily found in the “Tools” drop-down menu on the top bar.
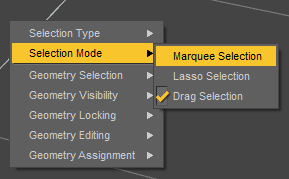
With this tool you can select geometry of your object, such as faces, edges and vertices. We need to select all the faces, but the default selection mode does not allow us to do that comfortably. So change it by right clicking anywhere in the viewport and finding “Marquee Selection” there.
Now hold left click and move your mouse around the whole object with it pressed. Selected faces have yellow overlay over them. All the faces need to be selected.
With all faces selected again right click anywhere in the viewport window and find “Geometry Assignment > Create Face Group From Selected”
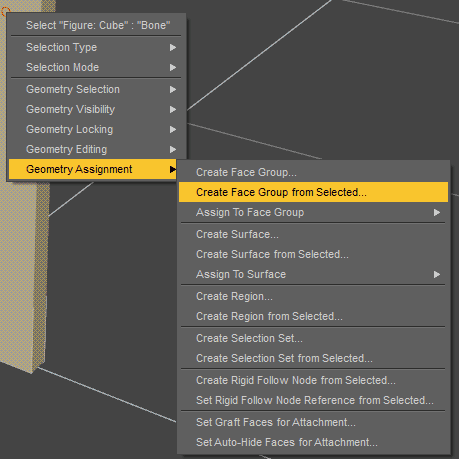
Give it any name you want, for example “Door” and proceed further.
Daz3D How to Rig an Object
Further we need to add a bone. To do this we will use the “Joint Editor” tool. Same as the previous tool, it can be found in the “Tools” drop-down menu.
When the Joint Editor tool is active you can see bones of the selected objects. And you should see that your object already has exactly one bone in the middle. It is the main bone that controls the whole object.
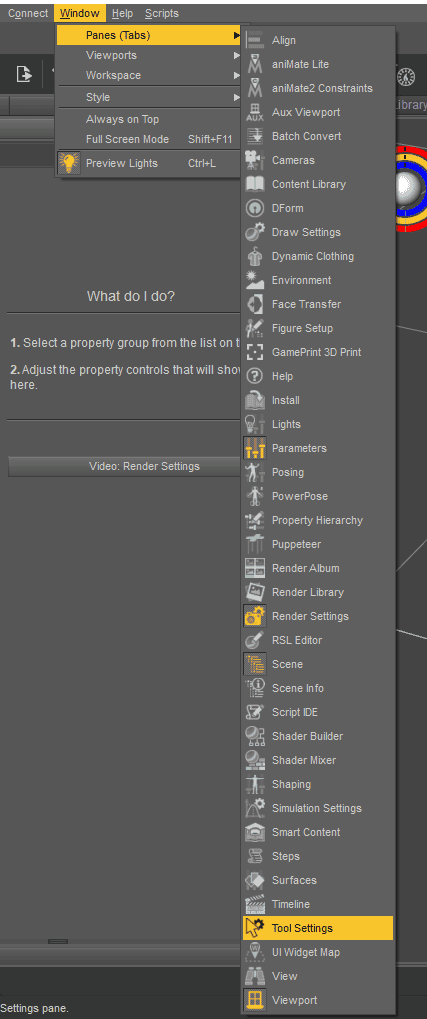
For more information about the tool and selected bones we should open the “Tool Settings” window. In the default layout it can’t be found, but can be opened in the top bar “Window > Panes (Tabs)”.
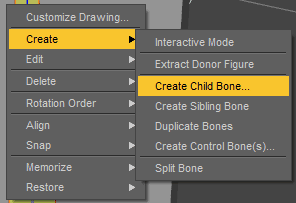
You can apply all further instructions to the main bone itself to create an opening door. But it is not healthy for your model and not recommended. Thus let’s create a new bone for the task. Select the main bone, right click on it and proceed to “Create > Create Child Bone”
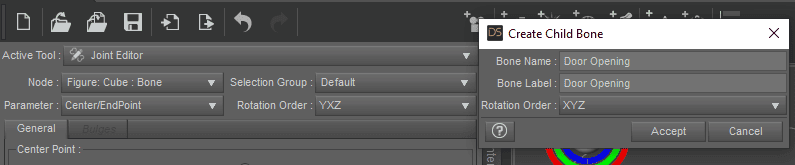
Give any name to the bone that you want. And check that the “Rotation Order” of a new child bone and of a main bone would be the same. “Rotation Order” of the main bone can be seen in the “Tool Settings” window that we opened earlier.
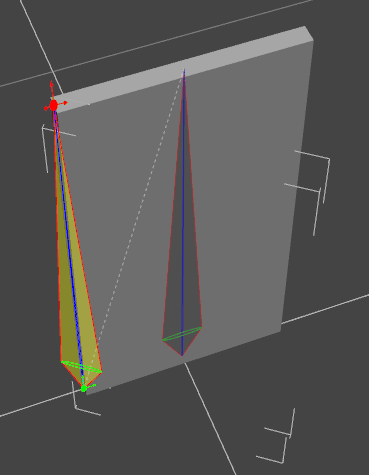
Use the green and the red gizmos on the newly appeared bone to place it in the right place. It should be located either at the far left or far right of the object. It would be the part of the door that stays in place – where hinges are.
Use “Front View” for your advantage as it can help you with the task.
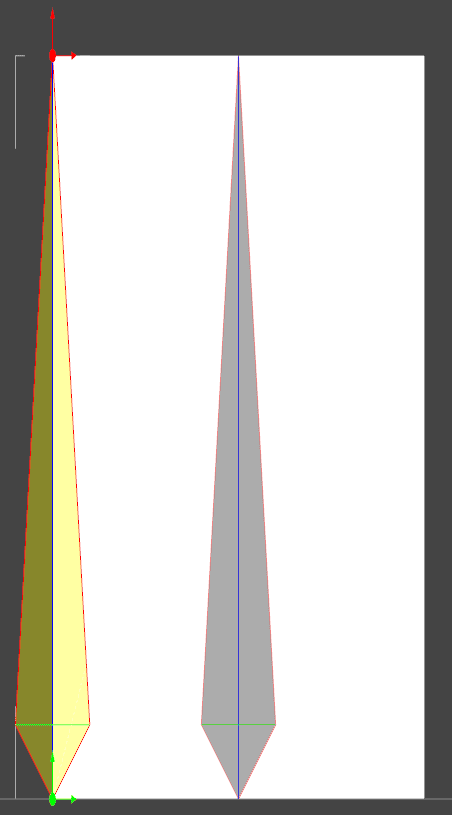
You can also use “Tool Settings” for the most precise placement of the gizmos.
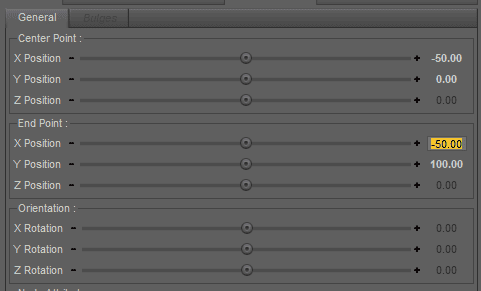
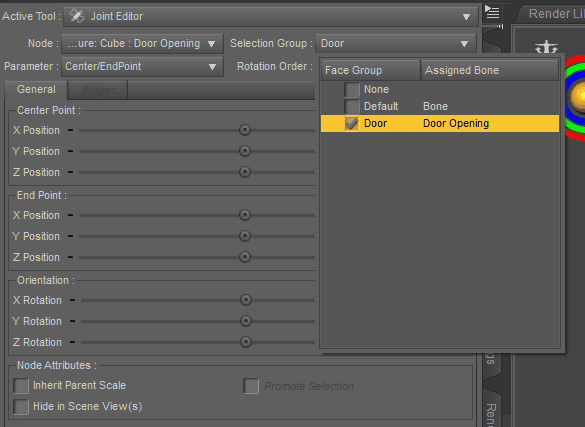
After placing the bone, you need to assign it to the group that we created earlier. In the “Tool Settings” change the “Selection Group” from “None” to the one you created. In my case it is the “Door”.
Assigning a Weight Map
Right now if you try to rotate the child bone – you will see that the wireframe of the object does indeed move. But the object geometry itself stays in place.
This is happening because the bone has no weight applied to it. Meaning that it will literally have no power and move nothing.
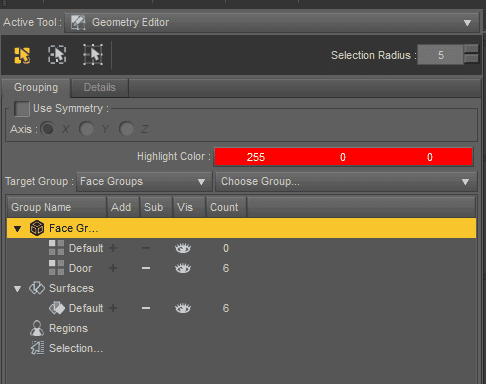
To fix this – let’s create some weight and apply it to the bone. For this firstly select the “Geometry Editor” tool and in the “Tool Settings” select the “Face Group” that has our previously created group in it. In my case it needs to have “Door” in the group.
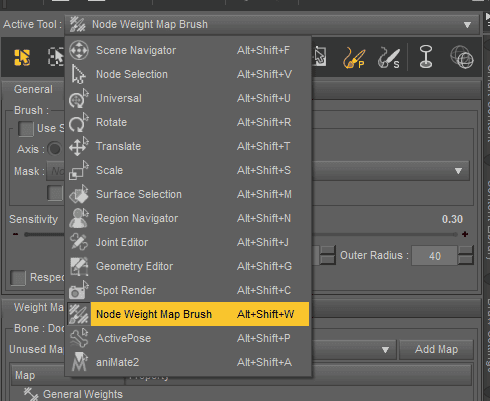
Next change to the “Node Weight Map Brush” tool either from the “Tools” drop-down window or from the “Tool Settings” itself.
Select here the “General Weights” map that should already be created.

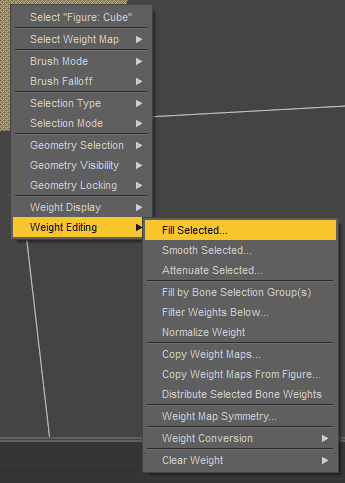
Now apply this weight to the whole object, because we want the whole door to move equally, everywhere with the same weight. For this right click on it in the viewport window and click on the “Weight Editing > Fill Selected…”
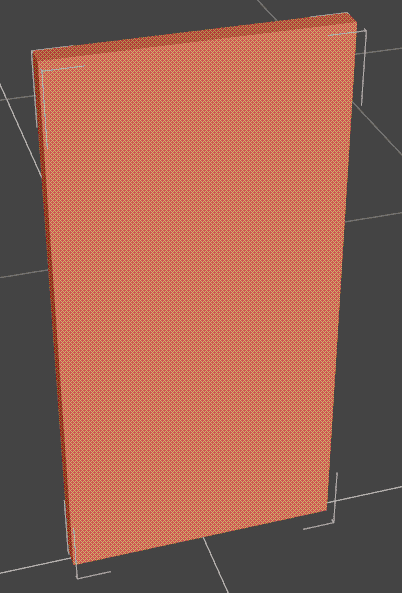
In the appeared window leave the weight value at 100% and press “Accept”. You should see your object turn red. This means that it has 100% weight applied to the whole object.
Finishing a Door
The door can now basically be considered finished. Because if you select the child bone that we created and rotate it on the Y axis – the door would rotate in the opening and closing motion.

Now you can apply some materials to the object to make it look more like a door. Use our Daz3D Texture Tutorial: All about Textures, Materials and Shaders to help you with that.
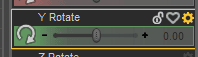
Also you can create a new property in the “Parameters” menu. Meaning that there would be a slider that allows you to open and close the door object. To do this – open options menu of the “Y Rotation” by clicking on the cog symbol in the corner.
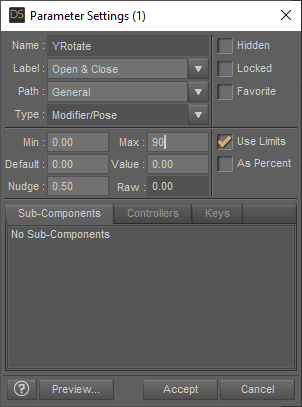
Change the “Label” to any name that you want this property to be. Then change “Path” to the “General” option. Also you can select the “Min” and “Max” values for the rotation. Meaning that if you want your door to open only on the 90 degrees in one direction, you can set it up here.
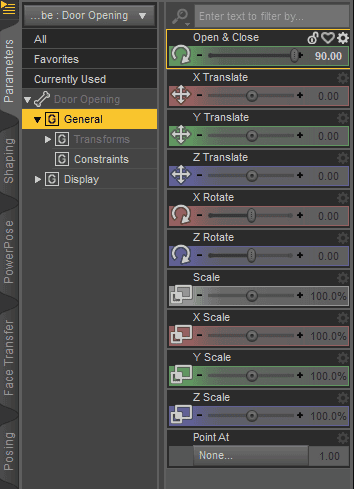
After this is done – in the “General” section of the “Parameters” tab you will see a newly created parameter. In my case it allows me to open and close a door in one direction not more than 90 degrees.
Get the ready-made Door
Instead of doing all this Daz3D How to Rig steps manually there are a lot of doors that you can find that were already made to be opened and closed by other people.
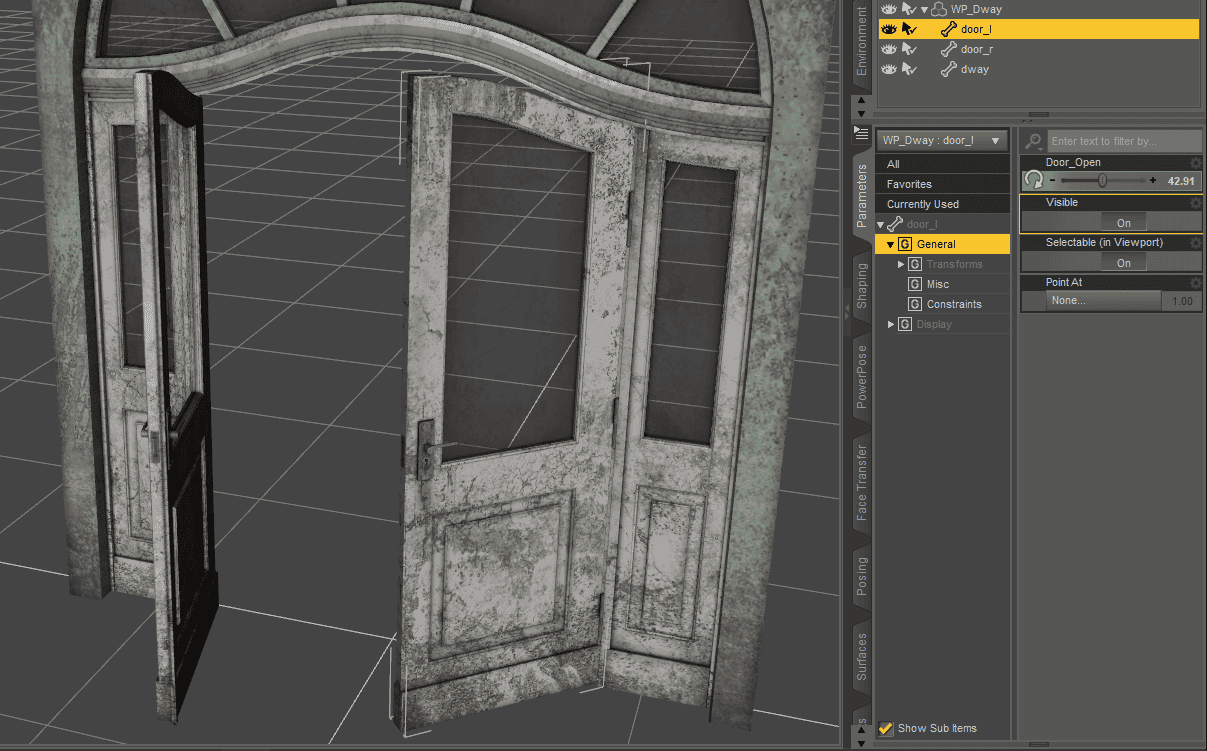
For example this WP_Dway environment that is available for free in Daz Studio. It includes a double door, where you can control each door separately. Besides, it has “Door_Open” property available in the “Properties” menu for both left and right door.
You can find a lot of ready-made doors in the environments on the Daz3D Shop. A good example would be The Cozy Room by Daz Originals that includes pose-able doors in addition to the whole interior of this room.
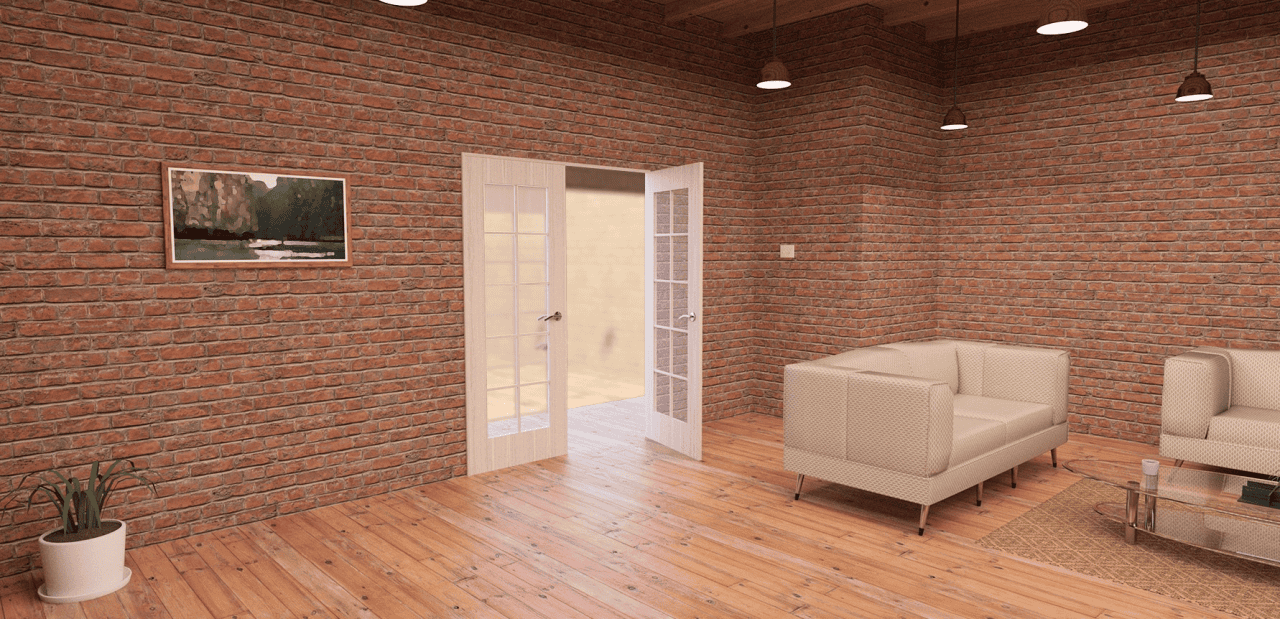
Source The Cozy Room by Daz Originals
Another interior example is the Interiors The Center by maclean. Main feature is that all the doors and walls are made out of glass. Besides, some or the doors here open not by rotating, but by sliding. Including even some elevator doors.
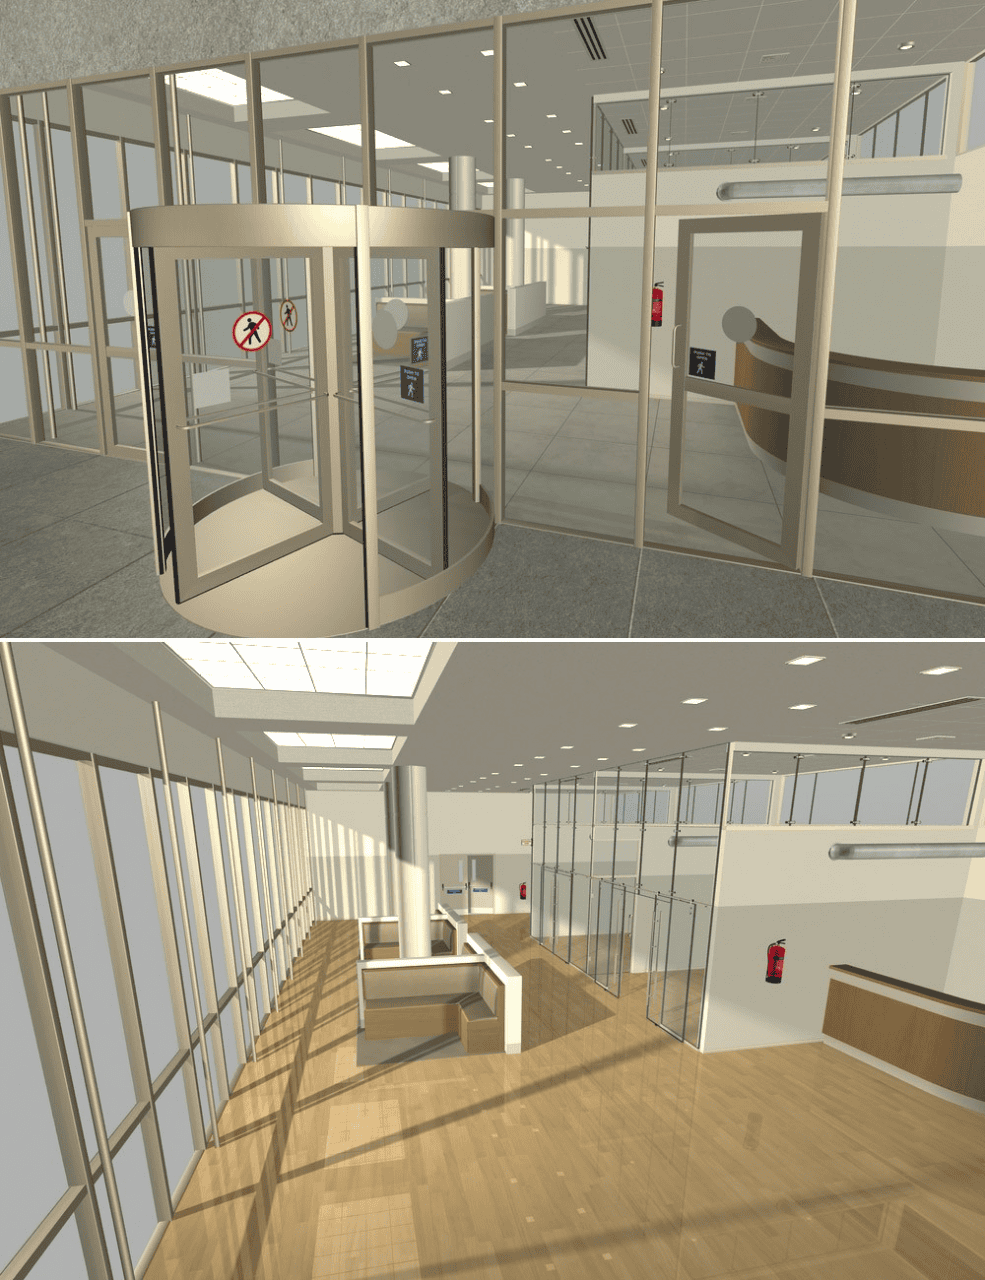
Source Interiors The Center by maclean
Conclusion Daz3d How to Rig Any Door & Prop To Make It Open
This is the end of our Daz3D How to Rig tutorial. We hope that now you are able to create your own objects and rig them in a way to make them open and close. You can also rig other things such as windows to move in a similar way.