This Daz3D Texture Tutorial explains everything about how to work with textures, materials and shaders in Daz Studio.
Textures, Materials and Shaders – all this is what can and will make your character, object of a whole scene stand out and be more unique. They can allow you to change the look of something drastically without needing a lot of work.
There are a couple general methods on how you can work with surfaces in Daz Studio. And they range from the quite easy ones that just use ready-made presets to the advanced ways of making textures practically yourself.
We will look into a few main ways and explain them. So you could choose whatever is most fitting for your needs, skill and experience.
Daz3D Texture Tutorial: Shader Presets
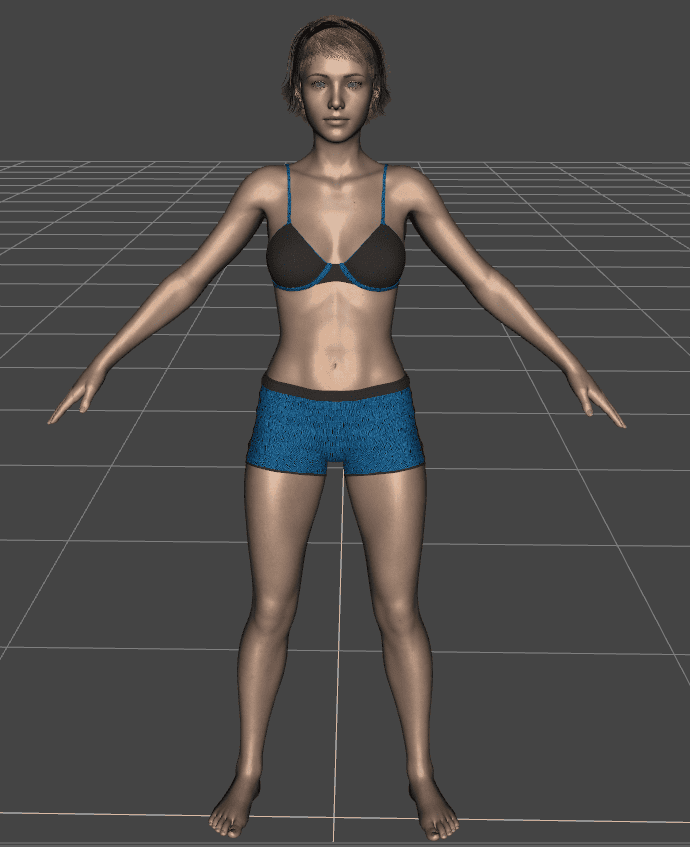
We will start from the easiest method both in understanding and use – Shader Presets. Before that – we need something to test them on. I have just created a default Genesis 8 figure with generic clothing and hair.
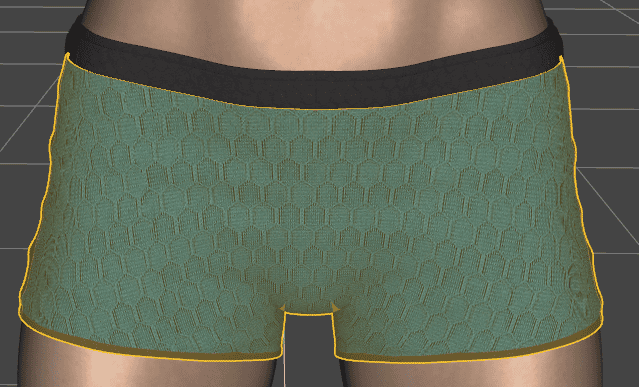
As we work with materials, we will need a specific tool that will help us in this. It is called “Surface Selection Tool” and can be found on the toolbar.

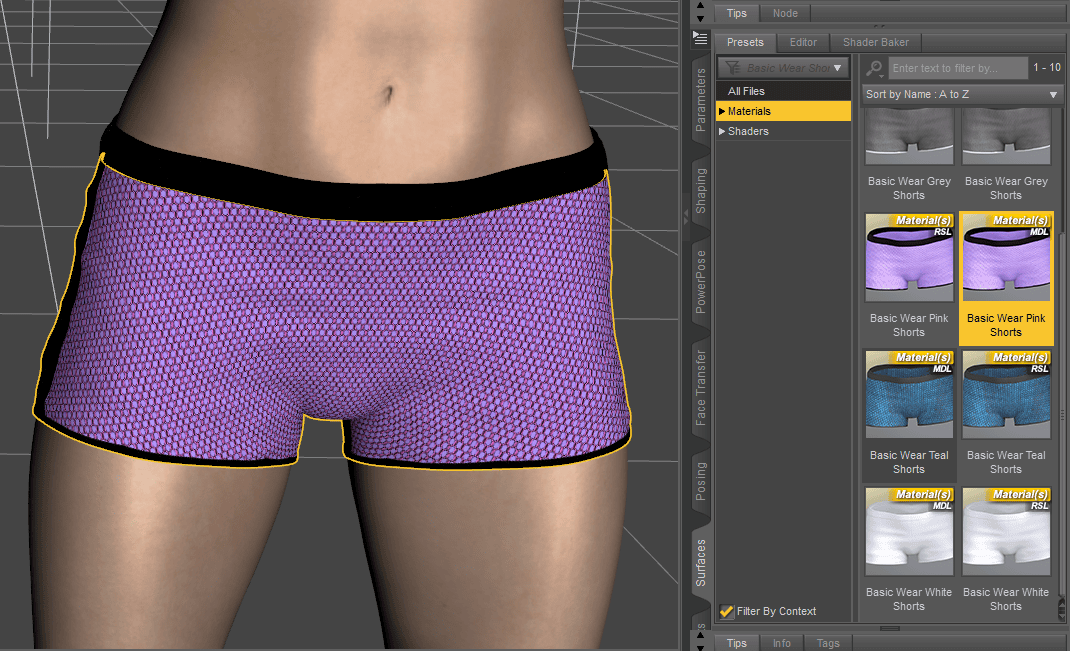
With this tool you now can select any surface of your object, instead of bones or whole objects. For example I can select the main part of the shorts without selecting the elastic band above.
With the surface selected go to the “Surfaces” tab of the interface. It should be open in the “Editor” section by default where we can see that I have indeed selected “MainShorts”.
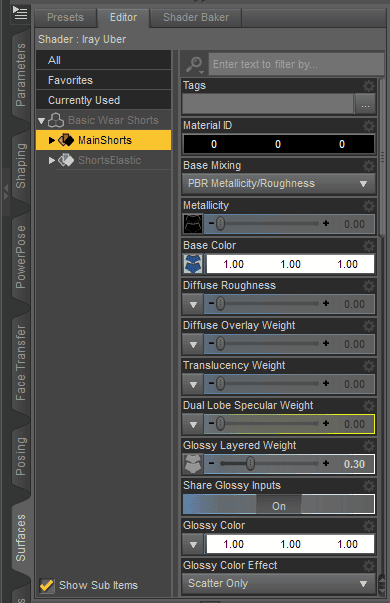
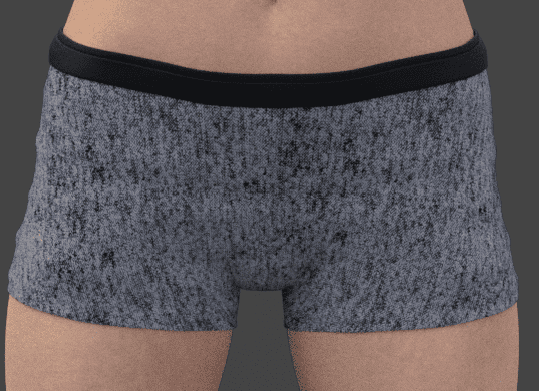
From here proceed to the “Presets” section. If your object has some specific materials presets – they will be shown here. My example shorts have them, so I can change it here right away and see the result. If you are planning to use Iray for rendering – you need materials that have “MDL” written on them.
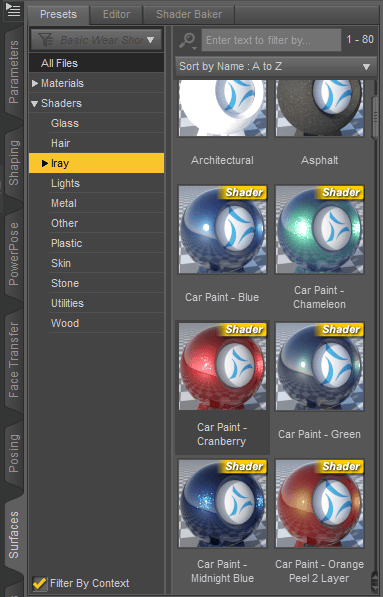
But it is totally possible that your object does not have anything inside the “Materials” window except default materials. Worry not, because there are alternatives – “Shaders”. Here you can choose whatever you want.
Though again, if you are using an Iray rendering engine – you better select something from the “Iray” sub-tab. There could be problems otherwise.
And now you can apply any of the shaders to any surface of your scene. There are no limitations to this. It is just better to use NVIDIA Iray preview shading to see how your objects will look on render.
With this knowledge you can mix and match shaders however you like. Experiment, try things out. For example I have created something like a glass statuette look:
Another big advantage of using shader presets is that it is easy to get them. Even though there are a quite interesting collection of shaders built-in the Daz Studio – you can always find more in the Daz3D Shop
And there are a bunch of different shaders for different purposes. You want to change how your clothes look? Use 4K Fabric Shader Presets for Iray or
Regal Riches: Historical Pattern Iray Shader Presets
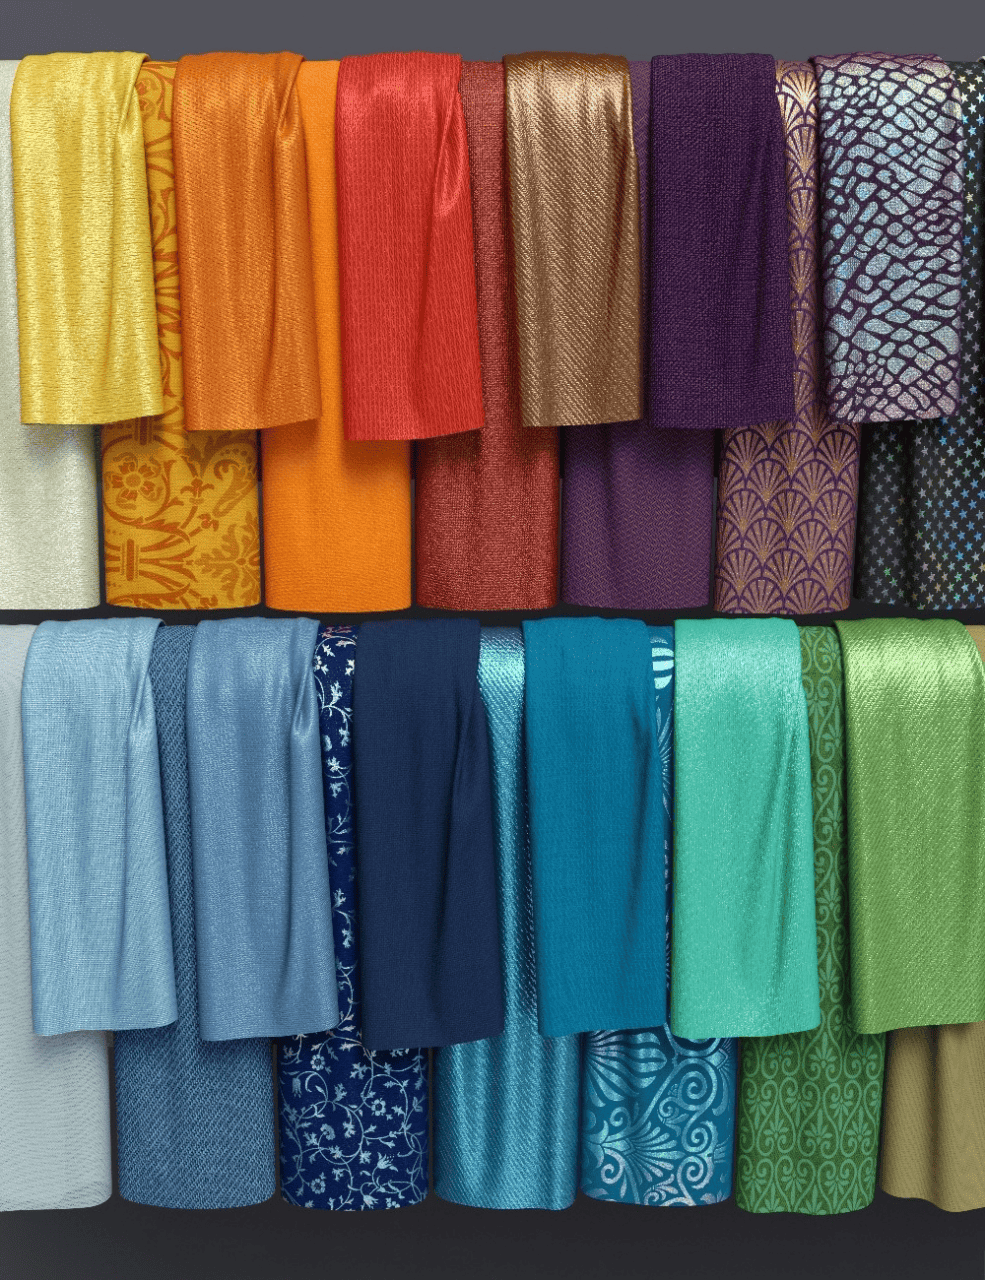
Source 4K Fabric Shader Presets for Iray
If you want to make the floor more interesting you can use Patchwork Chic Floor Tile Iray Shaders that adds a lot of different tiles shaders with extra versatility.
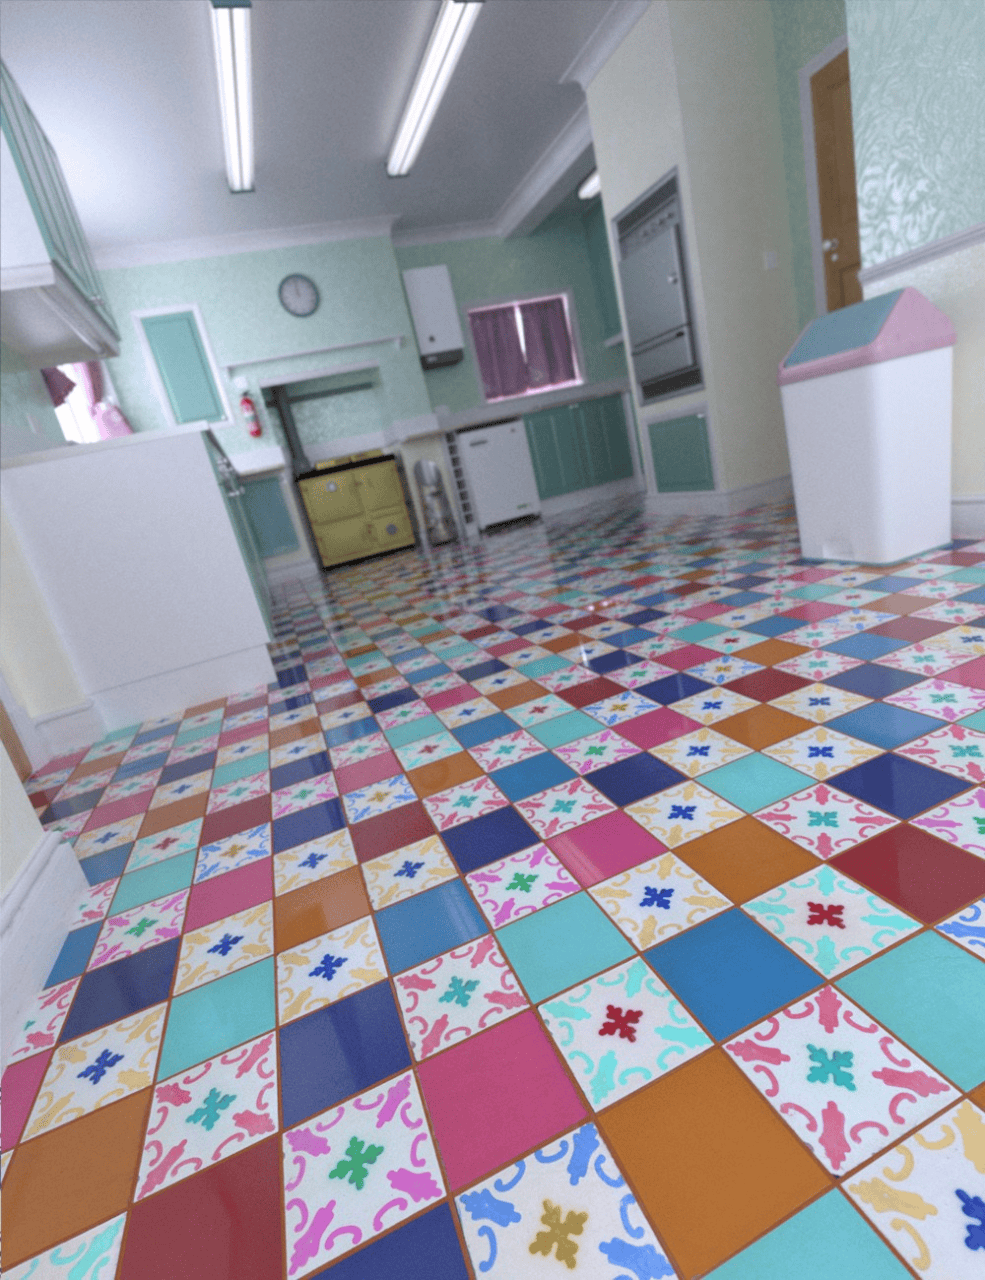
Source Patchwork Chic Floor Tile Iray Shaders
For walls and other environments there are Brick Wall – Iray Shaders and Iray WoodWorx Shaders that can fit your goals.
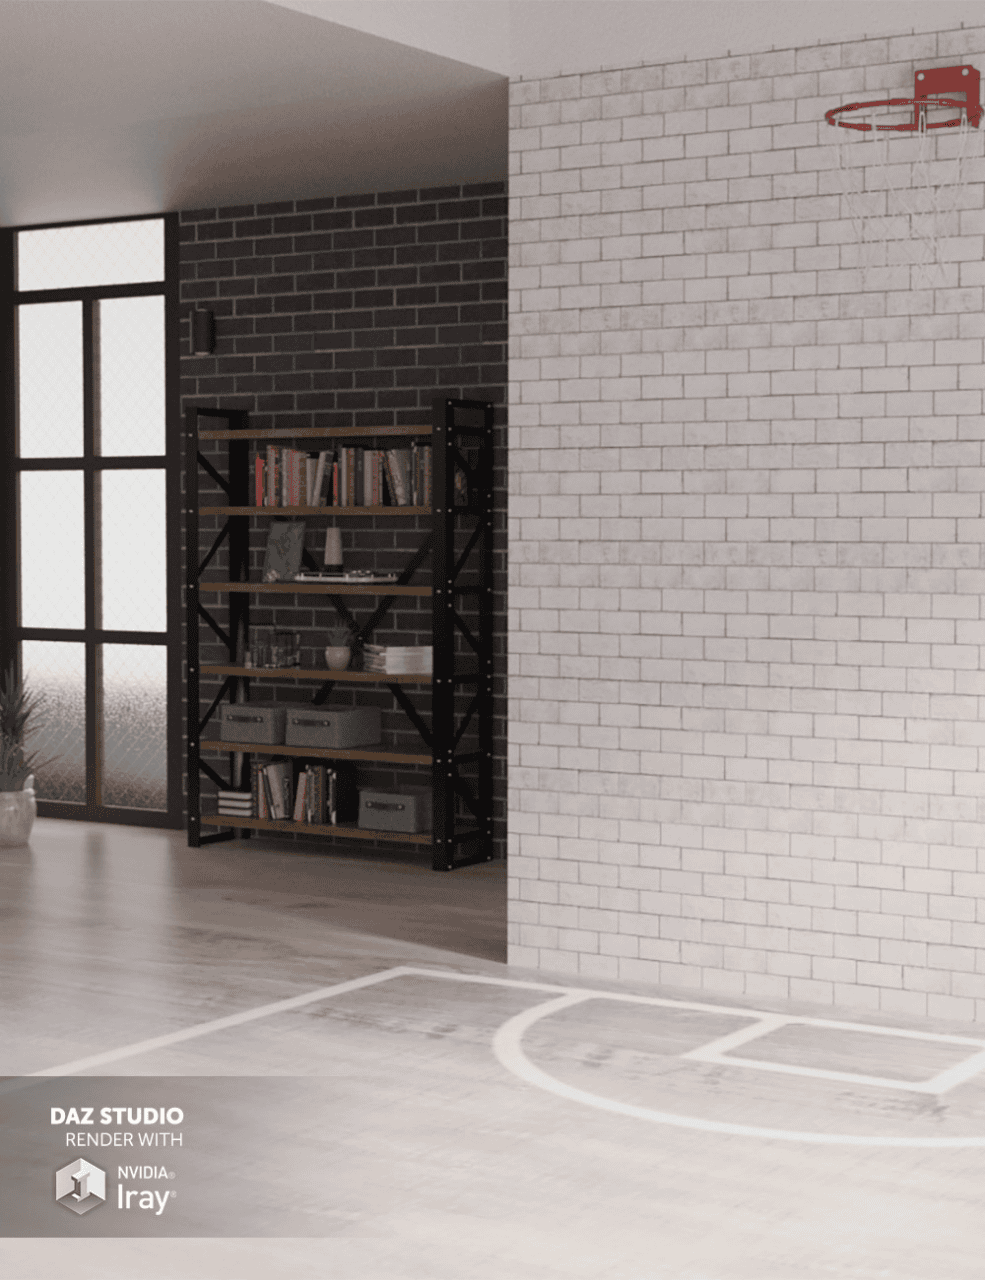
Source Brick Wall – Iray Shaders
Daz3D Texture Tutorial: Editing Materials
It is also possible to edit materials. It is quite hard to create something absolutely different in this way, but you can change the look a bit.
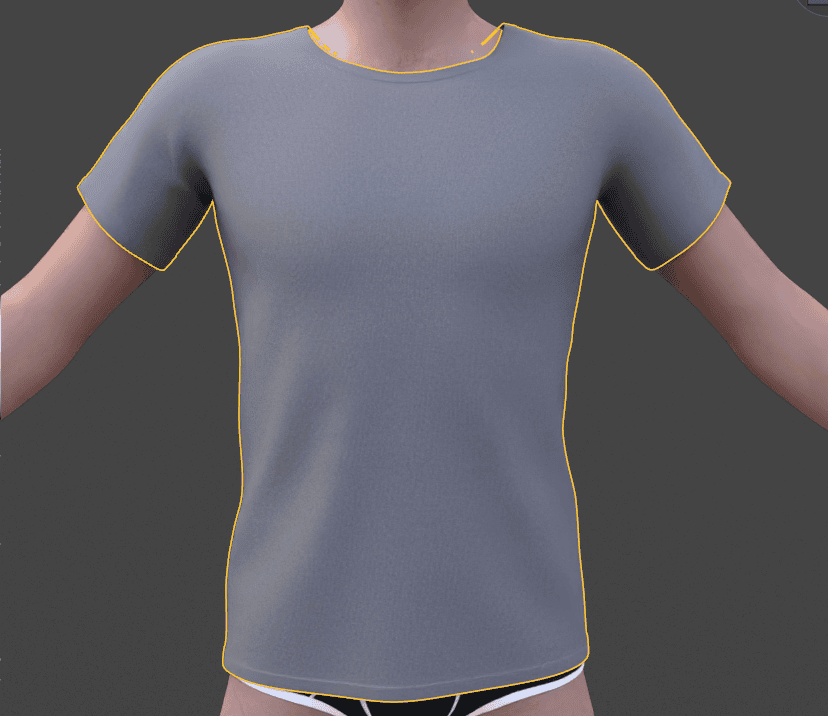
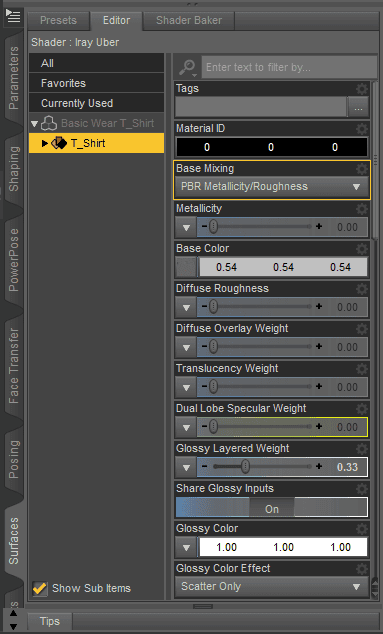
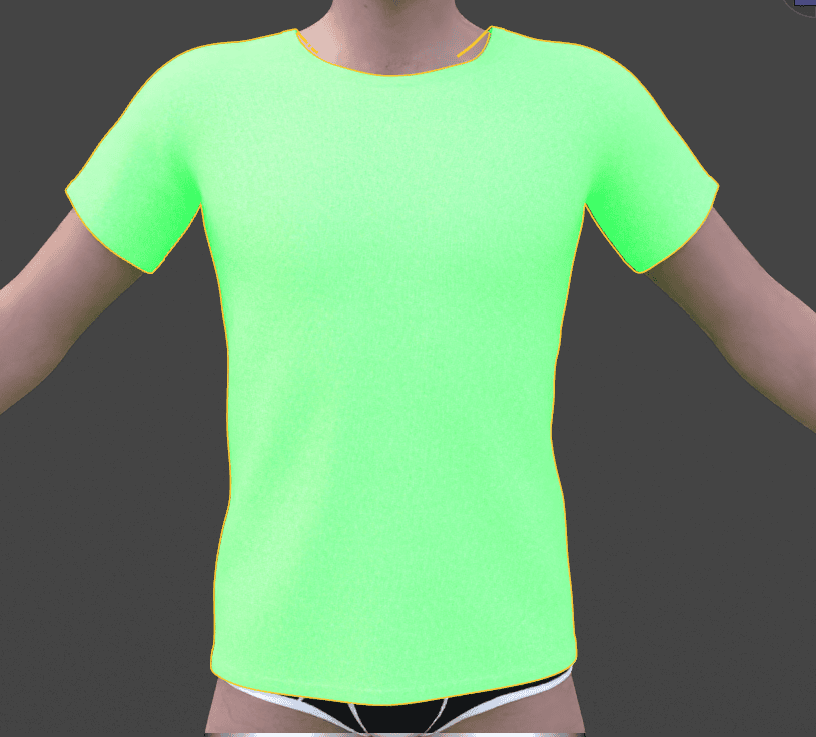
Let’s take this T-Shirt as an example that I will edit in different ways and change its look.
Still in the same “Surfaces” tab, but now in the “Editor” section you can see a menu with a lot of different options and settings on the right side. This is what will be used to edit an object.
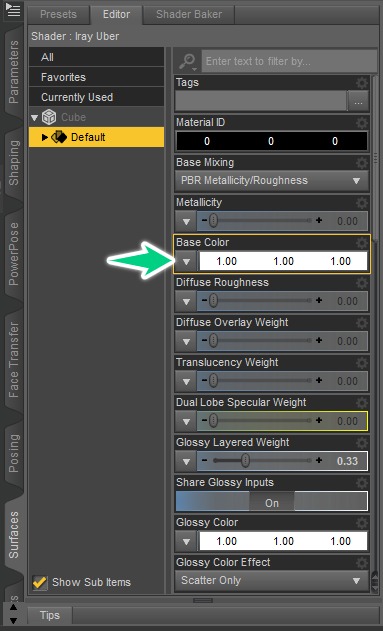
There are a bunch of settings here, but I will only make notes on ones that I am going to use and that make a big difference. So most will be skipped. First is the “Metallicity”, but right now our object is not reflective or glossy, so this will only make it darker. Will return to it later.
“Base Color” should be quite understandable. You change its color and it changes the color of selected surface:
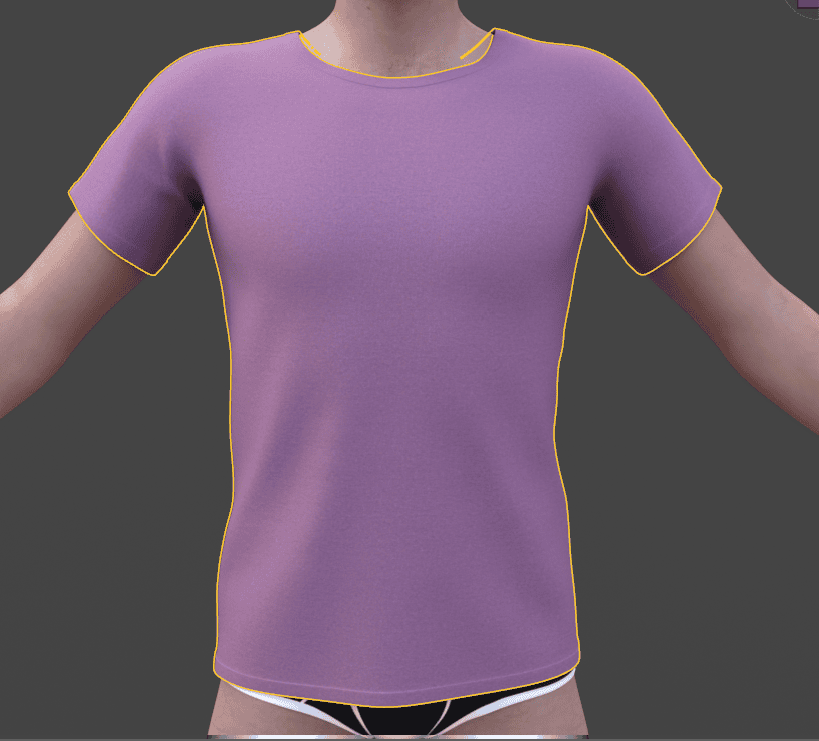
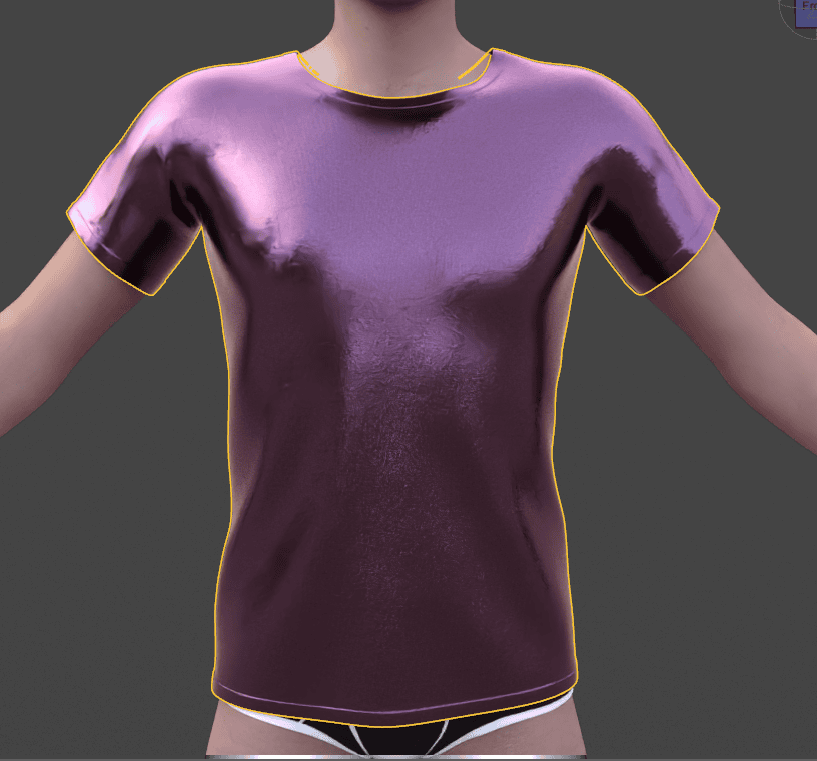
“Glossy Reflectivity” and “Glossy Roughness” will decide how reflective your object is. Reflectivity to 1 and Roughness to 0 for maximum reflection:
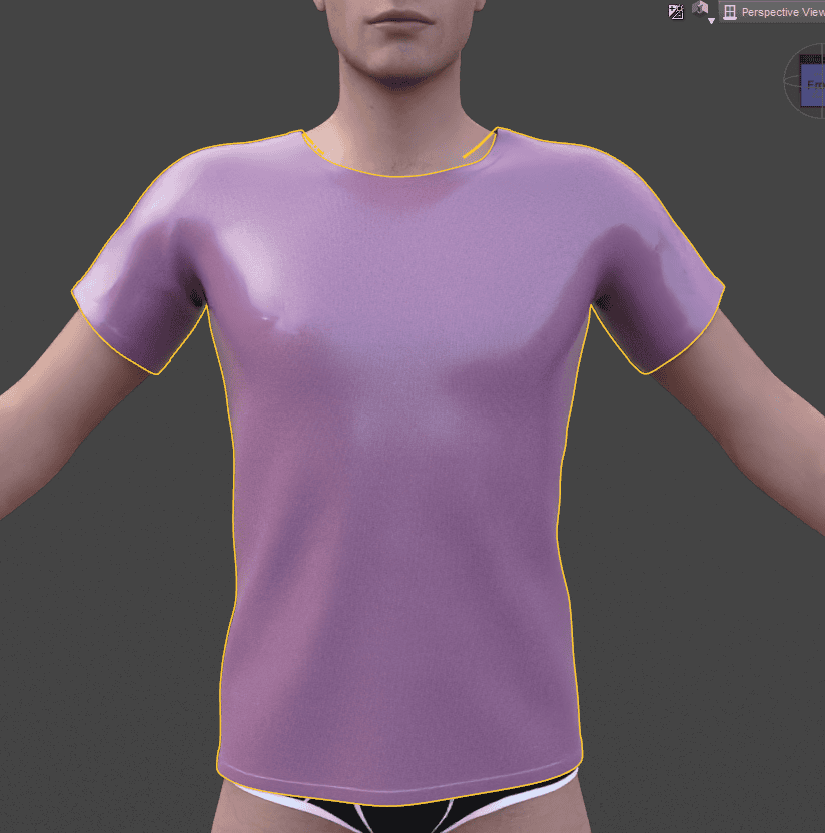
“Glossy Color” will change the color of gloss on your object. Default is white, because it is similar to the real world. But you can change it to match your scene lighting or to achieve a chameleon-like effect:
Now, when T-Shirt is reflective and glossy if I change “Metallicity” – it will really make it look like it is made out of metal:
“Emission Color” adds emission to the object and you can control its color. Any object can be a light source. Don’t forget to also add more “Luminance” after you changed the color.
The last setting from the Editor for today is a “Cutout Opacity” – changes how translucent the surface is. At 0 value the object becomes invisible.

With the knowledge of all these settings and how they work – you can try to create a material yourself. This can be hard, but possibilities are big. Especially if you combine this technique with others. For example use some shader and then edit it.
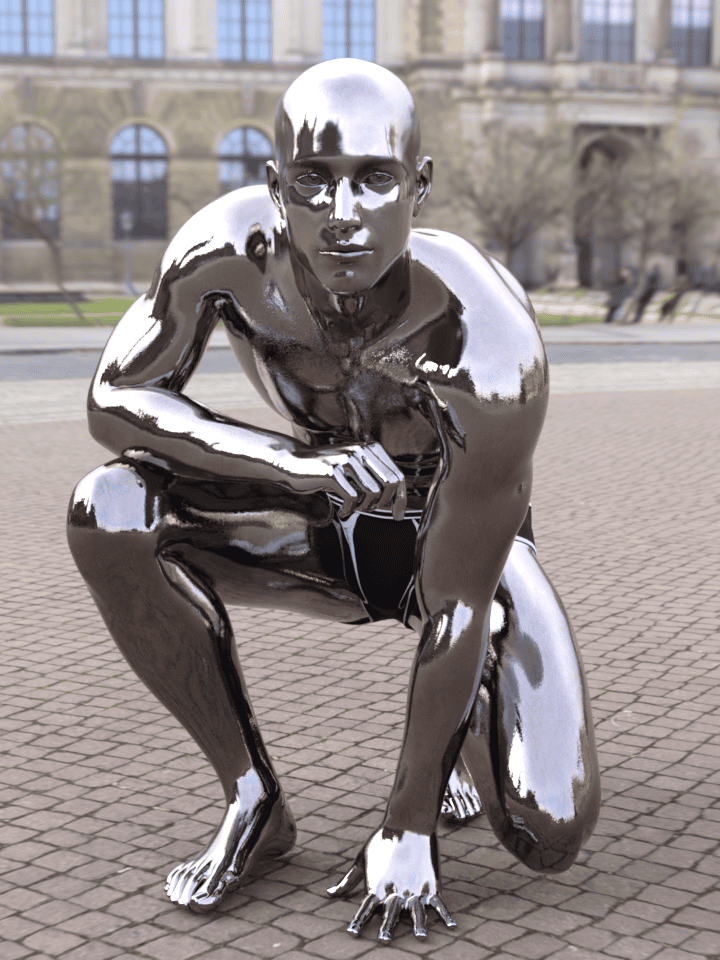
I have made a metallic material that applied to the whole body of a character to create this super-heroic metal-man:
Also we used this Material Editing technique in our Daz3d Change Hair Color article that you can check out too.
Daz3D Texture Tutorial: Using Ready Textures
The last thing about which we will talk today is that you can apply textures to the surfaces. This is simply just adding a picture to the object. I will show on a simple cube for a better understanding.

Now in the “Editor” tab of “Surface” menu you can find an arrow button next to the “Base Color” setting.
In the drop-down list that appears after you press the arrow you can choose to “Browse”. This will open your OS window where you can select the path to the desired image. This image will be applied to your object.
For example I have put a Daz3D logo on the cube:
But this is literally just an image that is placed on your object. It is flat and has no information about anything else except colors. And this can be different. With a much better result.
Introducing PBR materials. PBR stands for Physically-Based Rendering. So this is materials that are made specifically for realistic render. In our case – Iray is exactly a physically-based rendering engine.
Settings that we edited manually in the previous section – roughness, glossiness and other things such as bumps of the object – can be stored in images and used later. So information about, for example, what parts of the surface should be reflective and how reflective – can be stored in special images that are called maps.
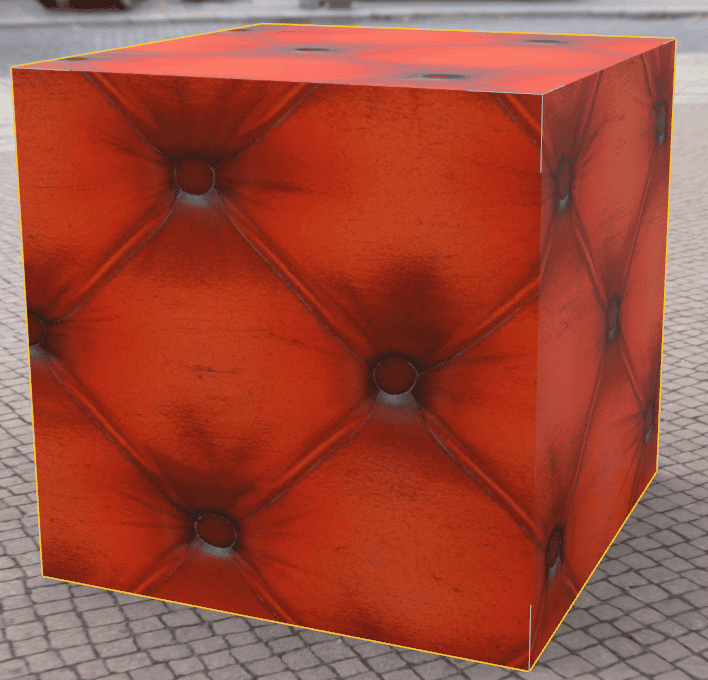
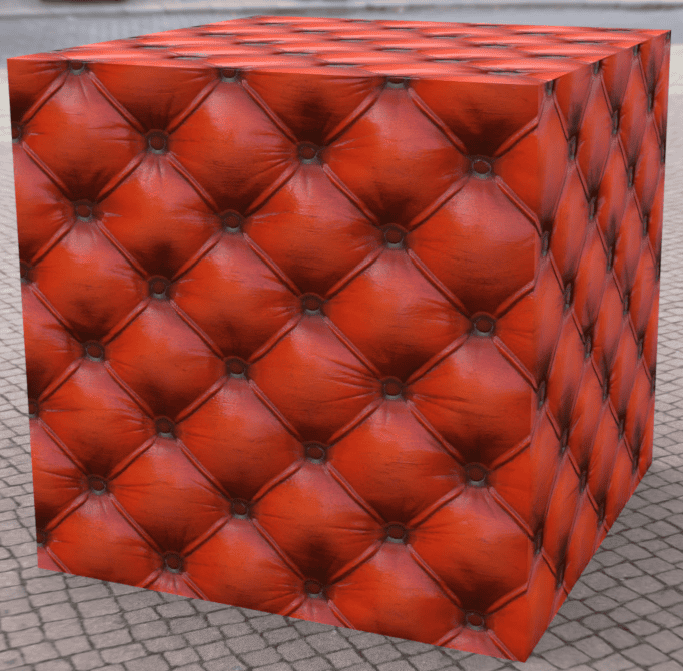
These maps usually come in bundles that, when applied, create a full material. And these bundles can be found pretty easily on the internet. For example on the textures.com I have found this material that I think should look really interesting on my cube.
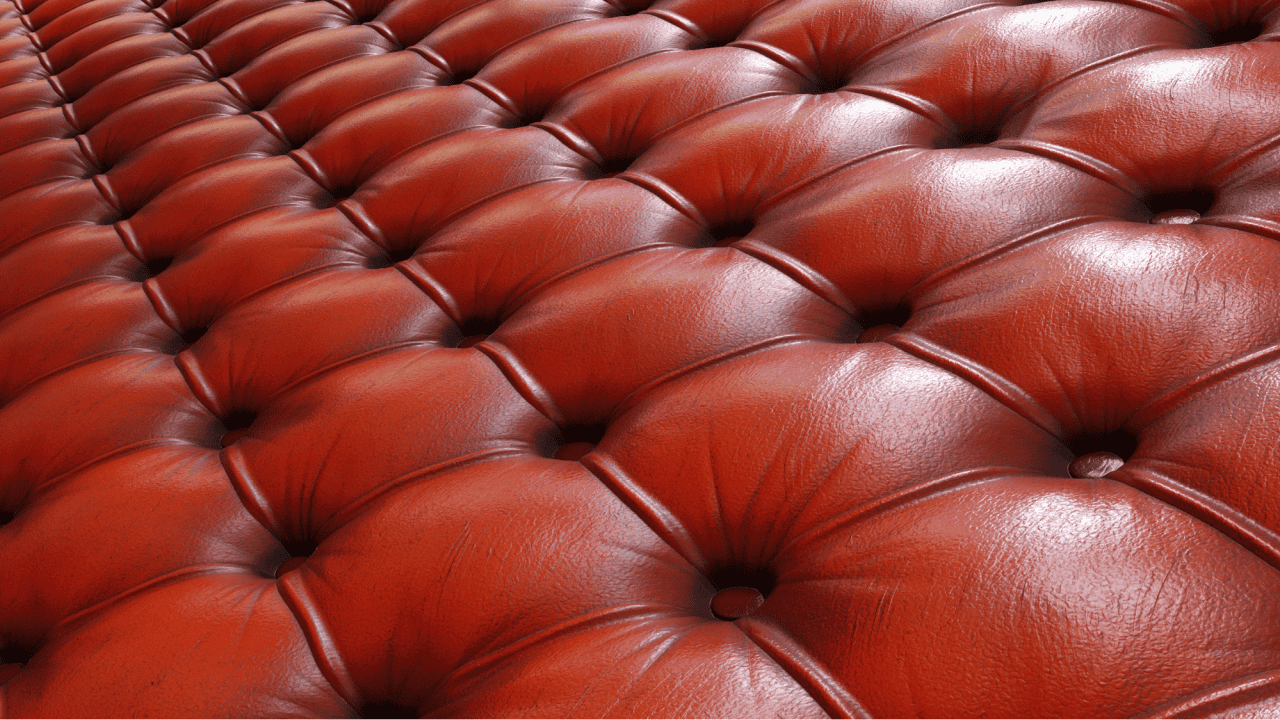
Source textures.com; Tufted Chesterfield Leather
This material proposes a total of 5 maps: Albedo, Height, Normal, Roughness and Ambient Occlusion. I have used only the first four in the final result, so you can skip Ambient Occlusion if you follow me.
Download maps somewhere on your computer. Select the object surface and we still need “Editor” in the “Surfaces” for this. Here we just need to match the image according to settings how we did before.
The only problem is that names do not match. That is because other software can call it in another way. For example the Albedo map is also known as Diffuse map or in a case of Daz Studio – Base Color. So apply Albedo to a “Base Color” setting.
As we already know this just applied an image to our object, so right now it does not look good at all. So let’s proceed to the following step.
Next we have a “Roughness” map. It does match the name of a setting in a way – “Glossy Roughness”. That is what we need to apply our map to. Also set the value of setting itself to 1 so it takes an effect.
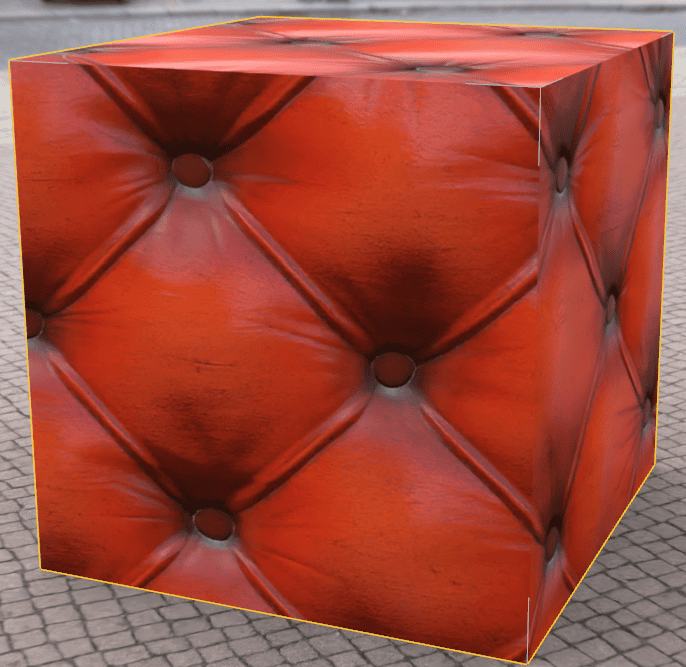
After that we have a “Height” map. The best match in Daz Studio would be a “Base Bump” setting. It simulates as if your object has more geometry than it really does. So in our case it tries to simulate pressed parts of the texture.
Bump map has a lot of control and you can set it up to a value of up to 50, in which case details become more prominent:
Lastly there is a Normal map. It is really similar to a Bump map. It also simulates geometry and details that you don’t really have there. And generally speaking Normal maps are “cheaper”. Meaning that a Normal map will render faster than a Bump map.
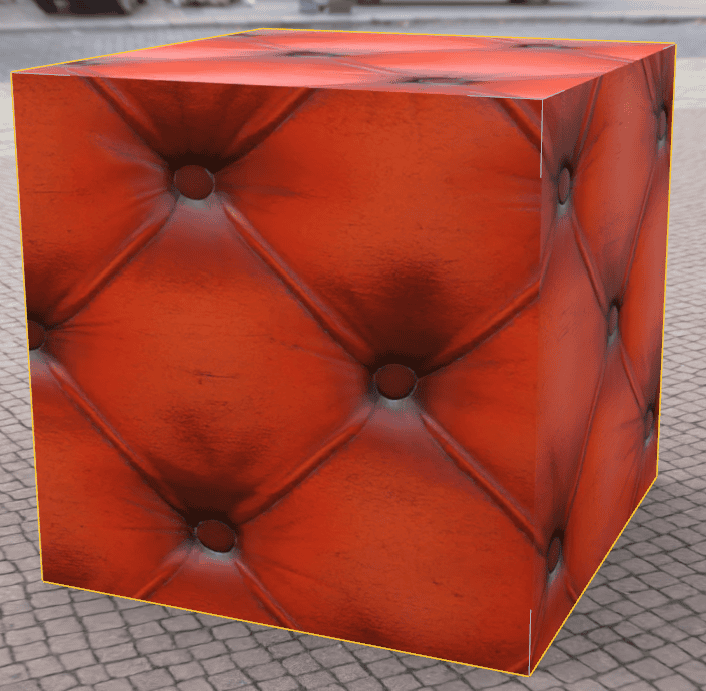
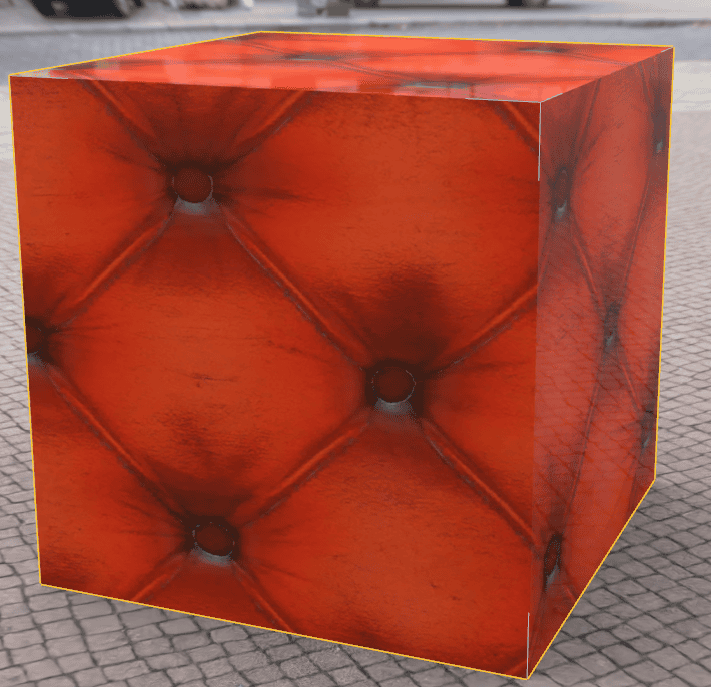
Above is a result of just a Normal map. You can easily use only a Bump or a Normal map based on what you like more. There is no need in both of them simultaneously. But you can do that too, as shown below:
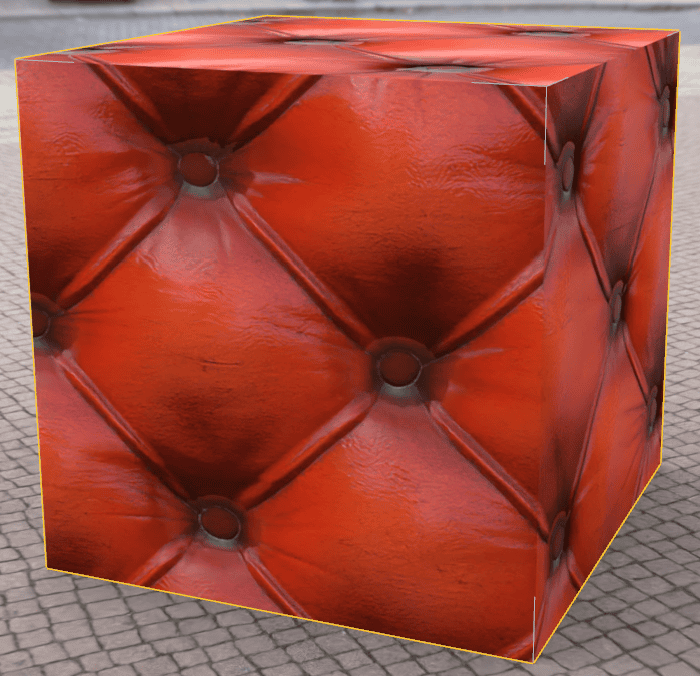
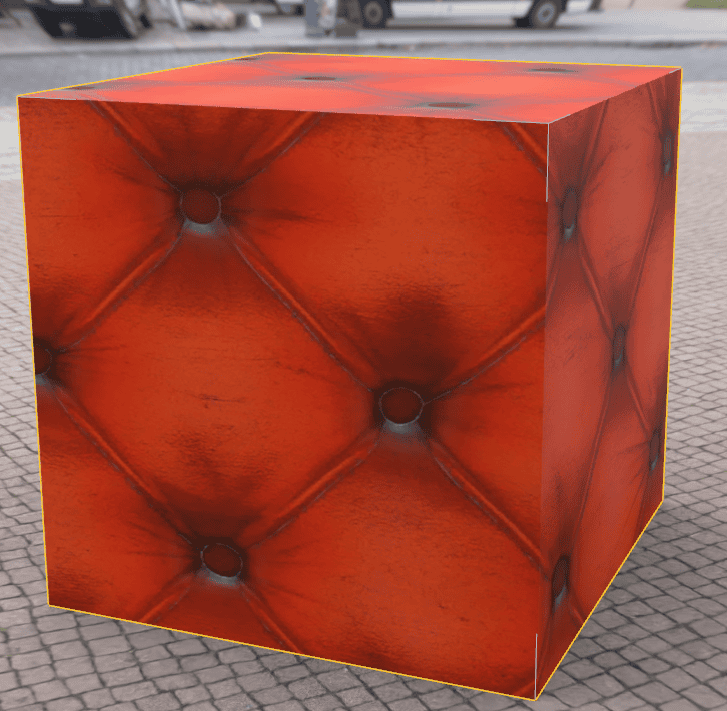
And that is the final result of the PBR material on the cube. You can also change other settings, such as “Horizontal Tiles” and “Vertical Tiles” to change the scale of a texture if you want:
There are more to PBR materials. For example metallic material can have a Metallic Map or material of a lamp – Emission Map. You will need to figure out yourself what goes where if you will see something new. But it is quite easy to understand after some time.
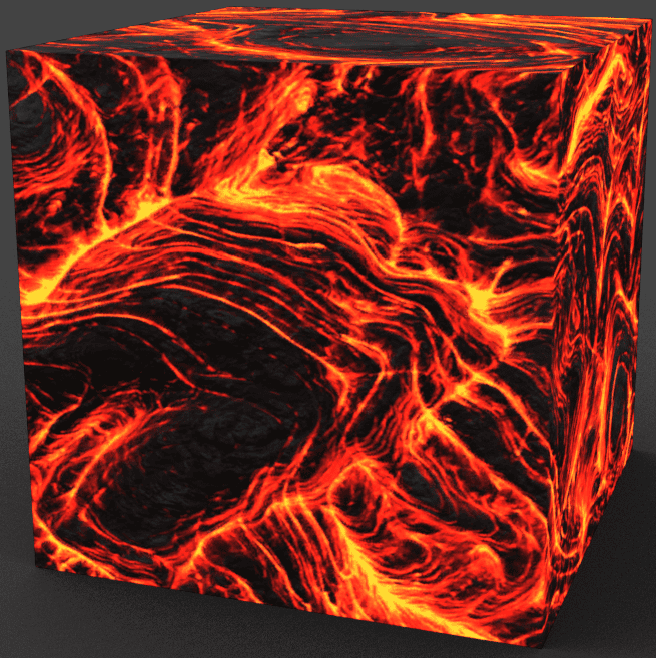
Lava PBR material with Emission Map
Same as with shaders, PBR materials can be found easily in a Daz3D shop. Materials that are made specifically with Daz Studio in mind. And maybe they are exactly for your set of clothes?
Take a look at the PBR Textures Pack 04 by dglidden that proposes a total of 49 materials of concrete, ivory, marble, wood and other. Author also has another three PBR texture packs in their profile.
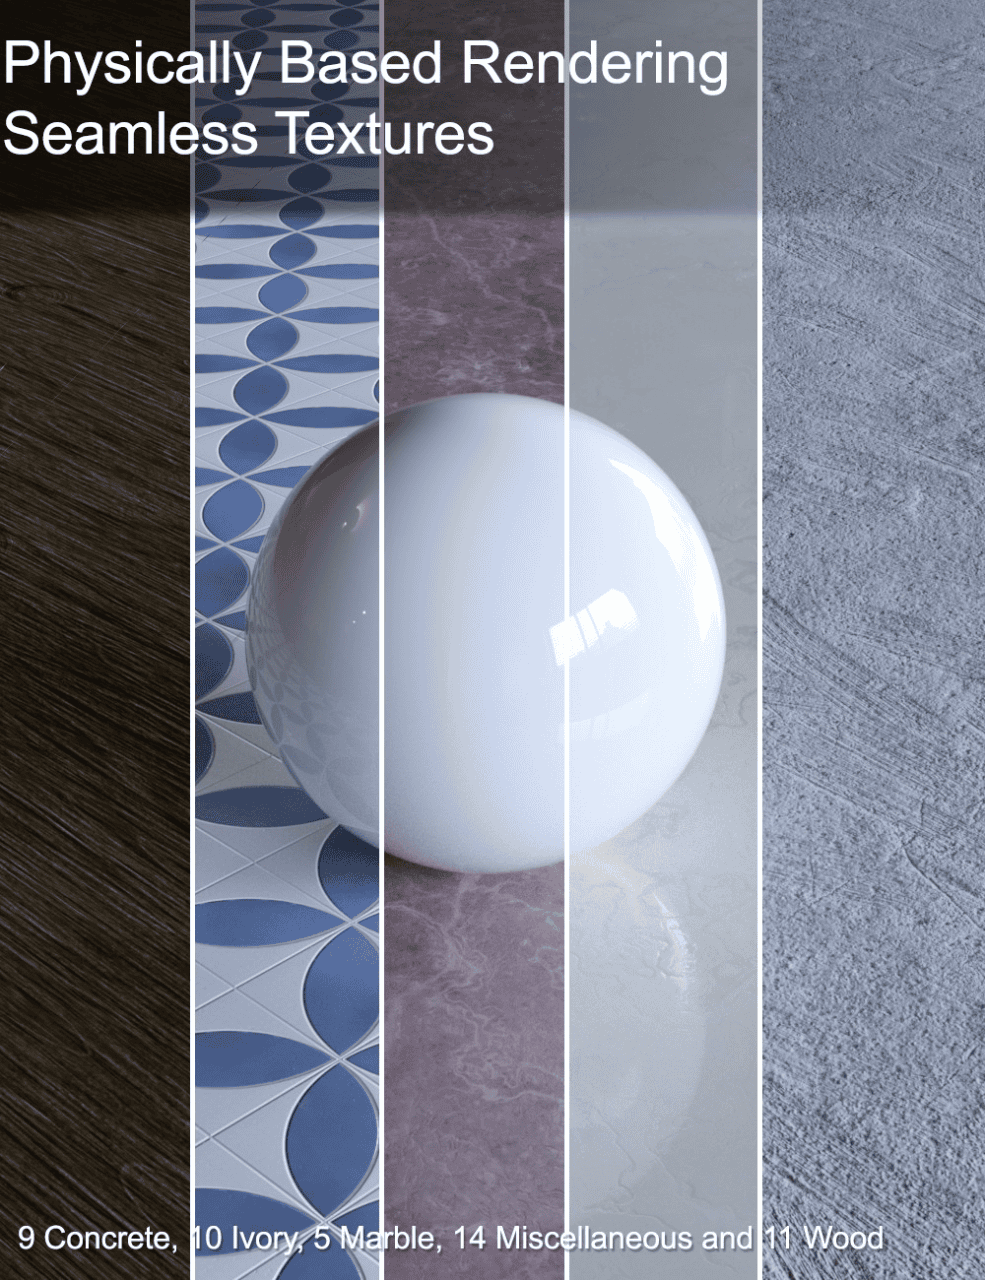
Source PBR Textures Pack 04
Or check out the Brick Collection Merchant Resource – Vol4 (PBR Textures) by iSourceTextures. A pack of quite interesting materials that are built around bricks and moss. There are a lot more great assets that we did not cover in our Daz3D texture tutorial but just browse the Daz Store.
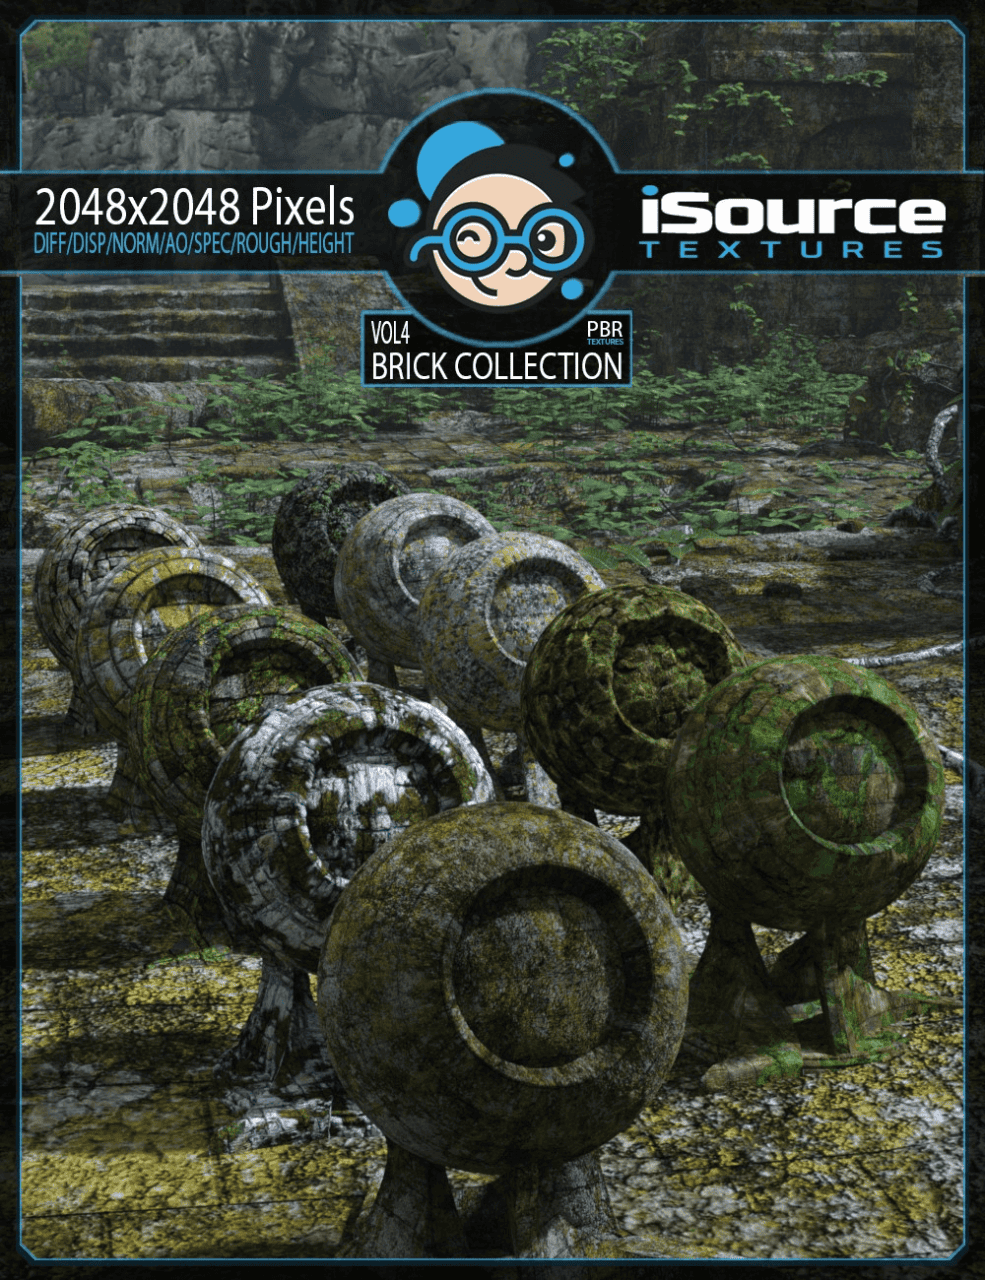
Source Brick Collection Merchant Resource – Vol4 (PBR Textures)
Conclusion
There you have it – a Daz3D texture tutorial. We went through three main types of how you can interact with surfaces of your object. Introduced Shaders, Textures and PBR Materials. Explained how to work with them and shown examples. Now it is up to you to choose which of the methods you are going to use.