This Daz3D Geometry Shells Tutorial explains what GeoShells are and shows you step by step how to apply Geometry Shells to a genesis figure in Daz Studio.
Daz3D Geometry Shells, also called GeoShells, are a way of adding unique and distinct features to your character and making them stand out. This is especially useful for creating fantasy characters, such as aliens, mutants, superheroes, etc. In this article, we will introduce GeoShells and teach you how to use them.
Adding Daz3D Geometry Shell
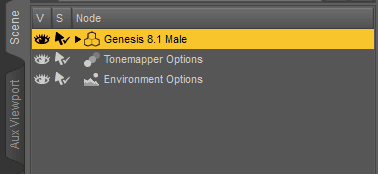
Adding a Geometry Shell to your scene is pretty easy. First of all, you need a character and to select it. An object is selected if it is highlighted with yellow in the Scene tab.
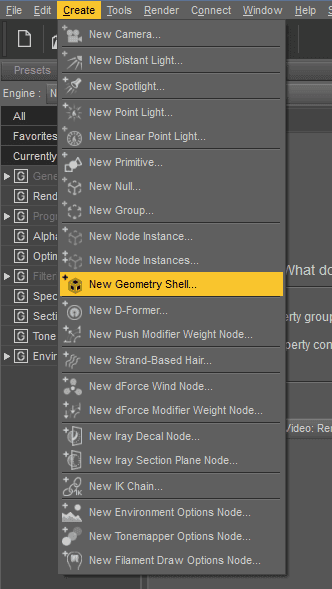
Then you just proceed to the Create > New Geometry Shell path.
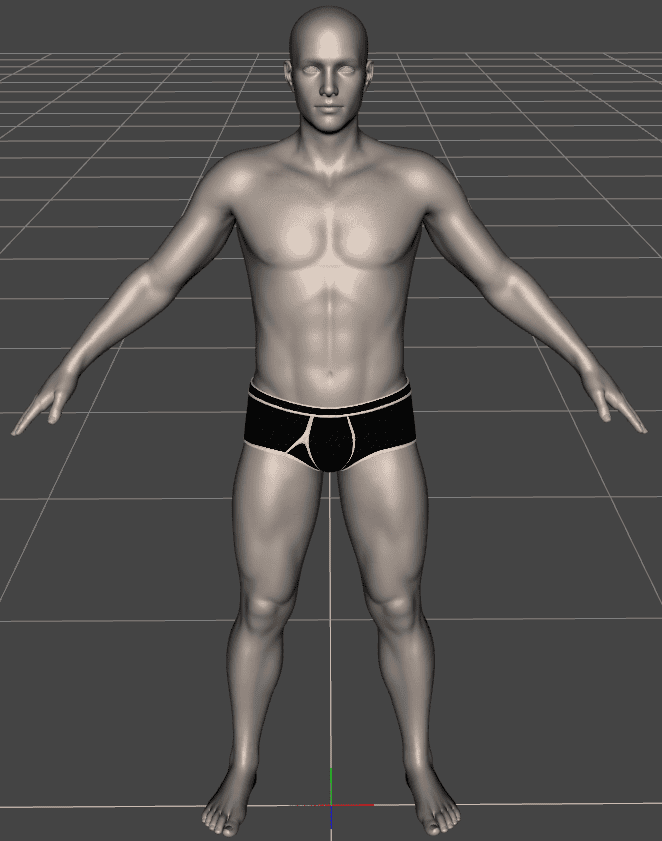
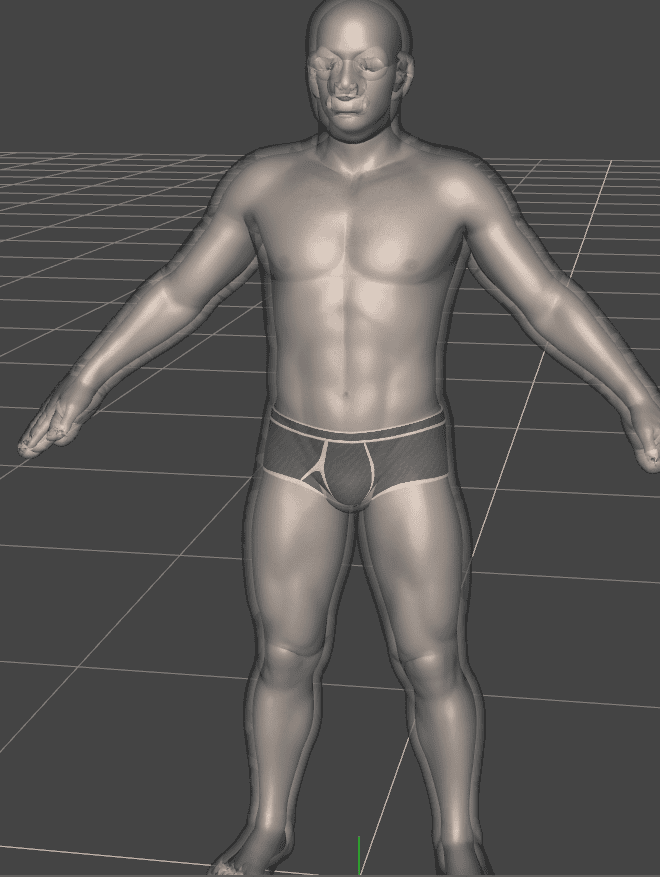
And after clicking Accept in the appeared window – the GeoShell will be added to the character. It will be easily noticeable because it will look weird. The character’s skin will appear grey.
And here is how it looks, when rendered with Iray:

Way too bright and white. That is because by default it comes with this weird full-white material applied.
Additionally, if you would open a Surfaces tab with the Geometry Shell selected – you will notice that settings here look kind of weird.

It is like this because the shader that is applied is not the usual one. I think that it is supposed to be a 3Delight shader that is meant to be used in another rendering engine. That is why it is important to change it if you plan to use an Iray for rendering, same as I do.
To change the shader, you need to select it and go to the Presets tab of the Surfaces window. Here find the “Iray Uber Base” among all shaders and apply it by double-clicking.

Uber Base is the basic Iray shader that just applies Iray rules without changing much. Because of this, the rendered character will still look quite terrible and white. Let’s look deeper into the geometry shells to try and fix that.
What is a Geometry Shell in Daz Studio
So what exactly is a Daz3D Geometry Shell? It is basically the second skiing for your character. Is applied to the character and is situated a little bit outward the character’s original skin itself.
In the Parameters menu, we can find all the same settings, as any other object would have. But GeoShells also have additional unique sections: Mesh Offset and Shell.

The Mesh Offset section only has an Offset Distance parameter in it.
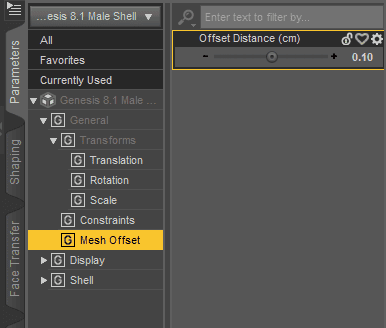
It changes how far GeoShell is located from the original character’s skin. The default value is 0.1 cm, which is not a lot at all. Usually, you don’t want to change it by much. Also, it should be higher than 0. Because if both skins would be on the same level – they will conflict and create a tearing effect.
When you increase Mesh Offset by a lot – it also makes a weird change. The shell becomes distorted and some parts overlap with themself and begin to look too thick. Also, you can notice that we see the original skin through the geometry shell. This happens because by default the shell is see-through and it is important to remember that.
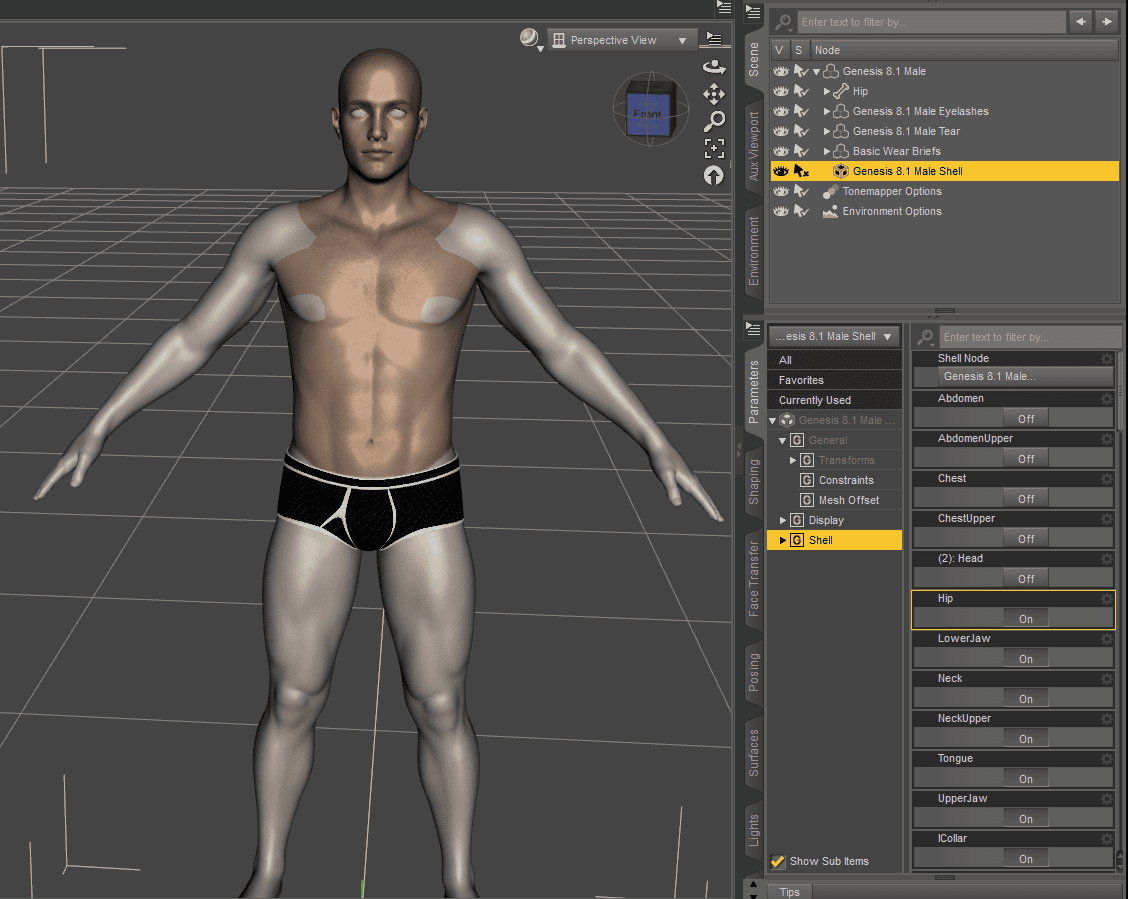
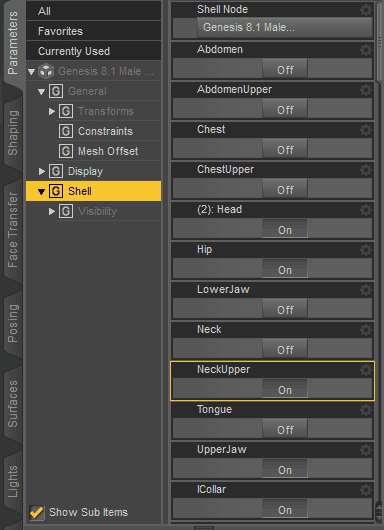
Another section that we have seen is “Shell”. This one is also very useful, as it allows you to hide any specific part of the shell. Here you can find the list of all the parts of this other skin and by changing the value – you can hide them.
Using Daz3D Geometry Shell in Daz Studio
One of the main things that you need to understand about Daz3D Geometry Shells is that they are supposed to be changed. Meaning that the materials are not supposed to be this white and unusable.
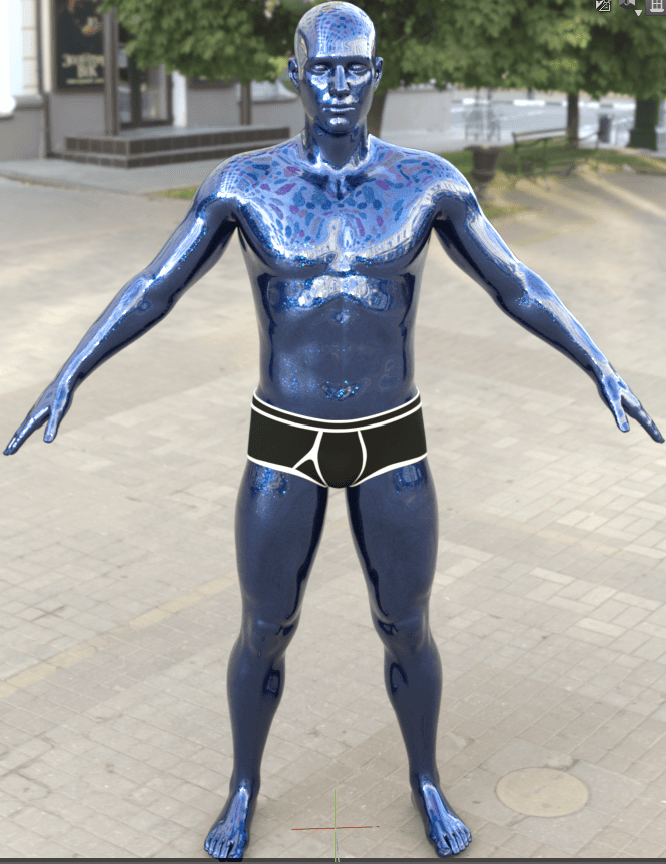
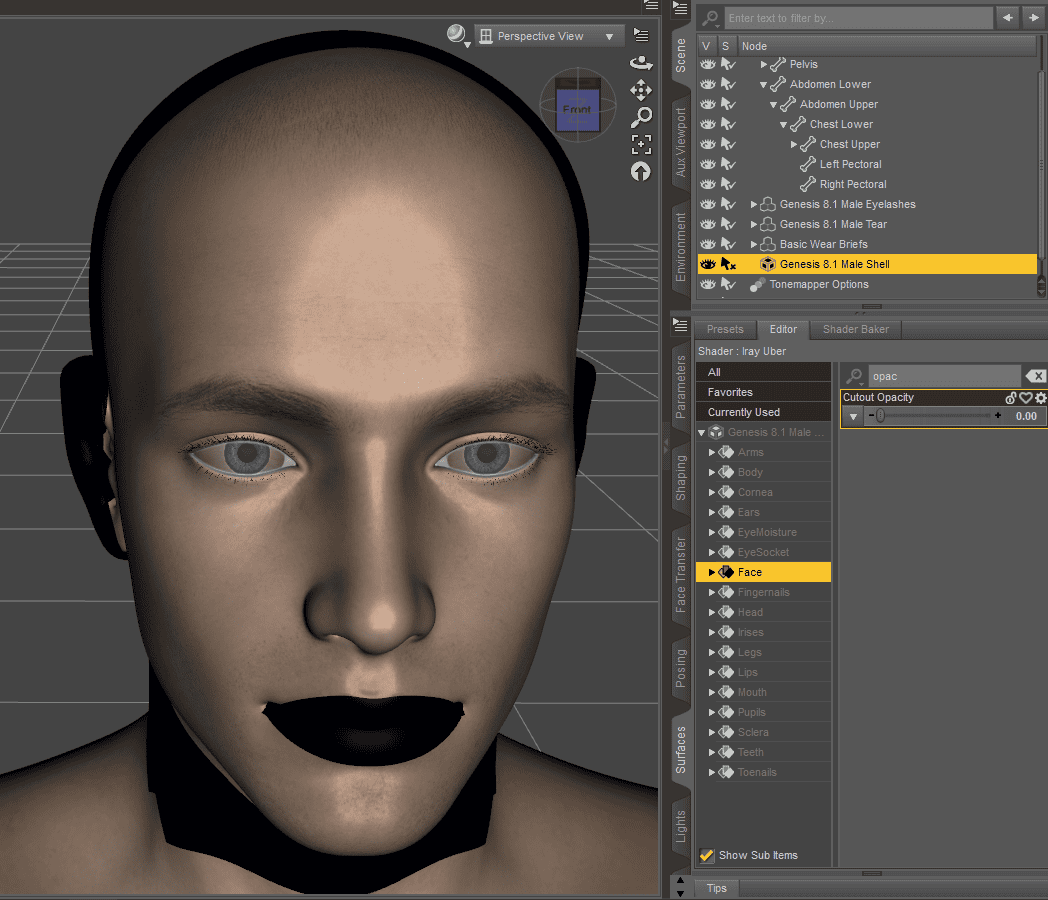
Using the Surfaces window, Presets tab, I can apply any of the presets that I want. I have applied a Midnight Blue paint preset and here is how it looks in rendered view:
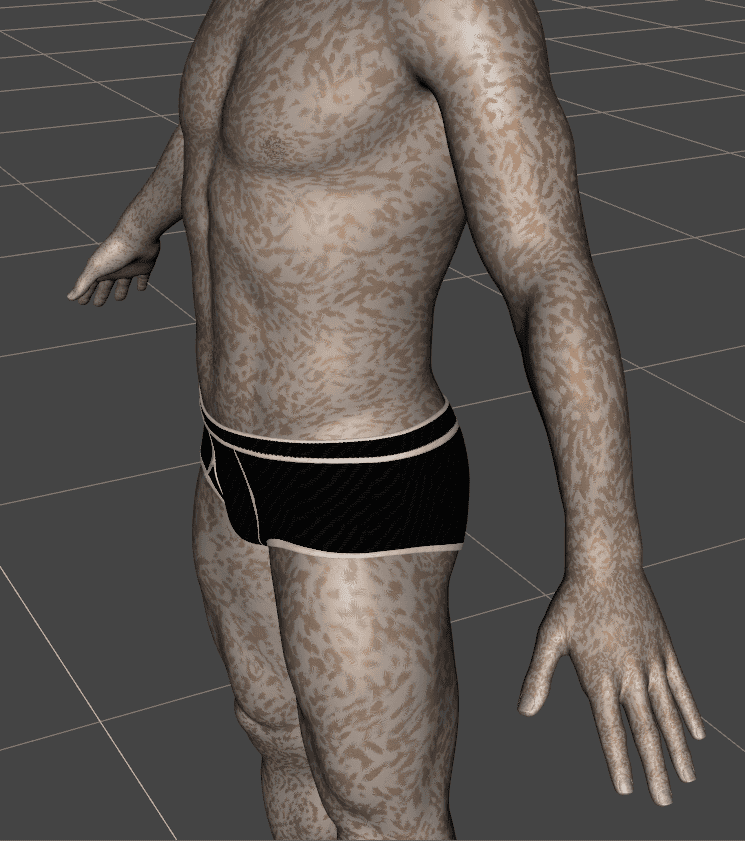
Already looks interesting. Using the Shell part of the Parameters tab, I can also now hide some parts of the shell to combine the original look with the painted one.
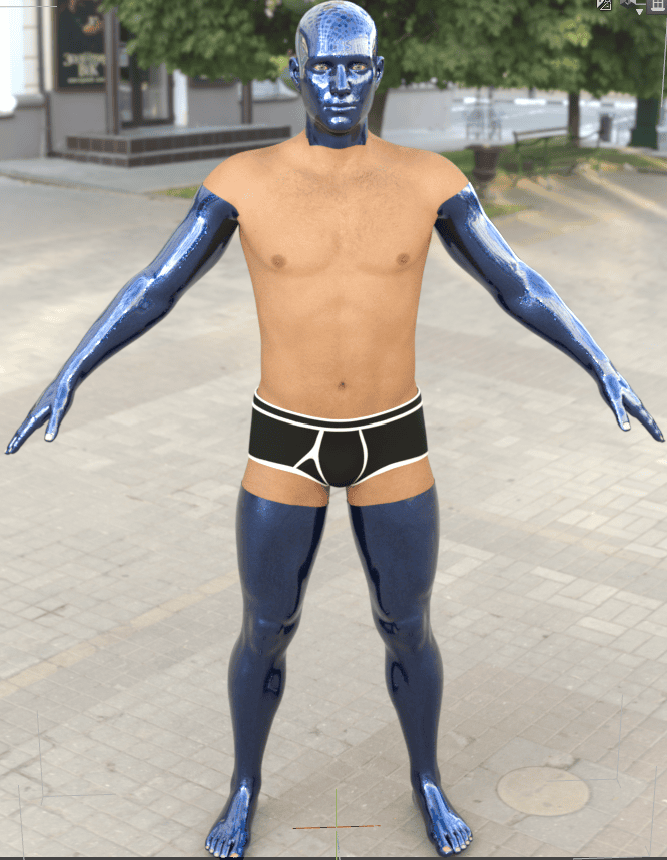
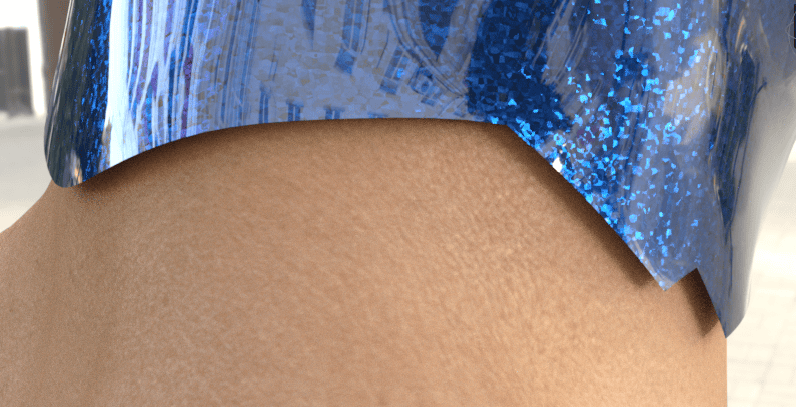
Adding some additional Mesh Offset to this can also make everything look more interesting by adding a shadow between the character and the shell. This may create a feeling as these are some pieces of clothing that they wear.
Hiding Parts of Daz3D Geometry Shell
As we already mentioned, hiding parts of the shell is done in the Shell section of the Parameters tab.
But to be honest, this is not a very convenient way of doing so. Mainly because you need to manually look for each part you want to hide and click on. And if it is the part that appears on both sides of the character, such as hands – you need to find the button both for the left and the right part. Very tedious.
An alternative that I propose is to use the Surfaces window instead. The main advantage here is that everything is already sorted here. You can find presets for both arms and legs, torso, head, mouth, and others here. A lot easier to use.
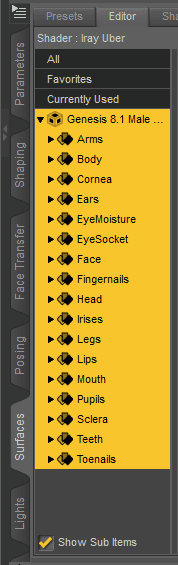
All you need to do to hide something is to select it here, first. And then find the Cutout Opacity setting in the Editor and lower it to the value of 0. This will hide this part in absolutely the same way, as the Shell section did.
Adding more GeoShells
One more interesting thing is that you can add more than one geometry shell to an object. So I can add another shell to this character and make it another material to create a mix of two different things.
Also, don’t forget to maybe change the Mesh Offset of one of the GeoShell in order to get rid of any tearing.
Adding Textures to Daz3D Geometry Shells
Besides applying regular materials from the Presets, you can also use textures. It is when you apply a special image to the material and make it look different. A lot better and realistic. We introduced this in much more detail in our Texture Tutorial article, “Using Ready Textures” part near the bottom.
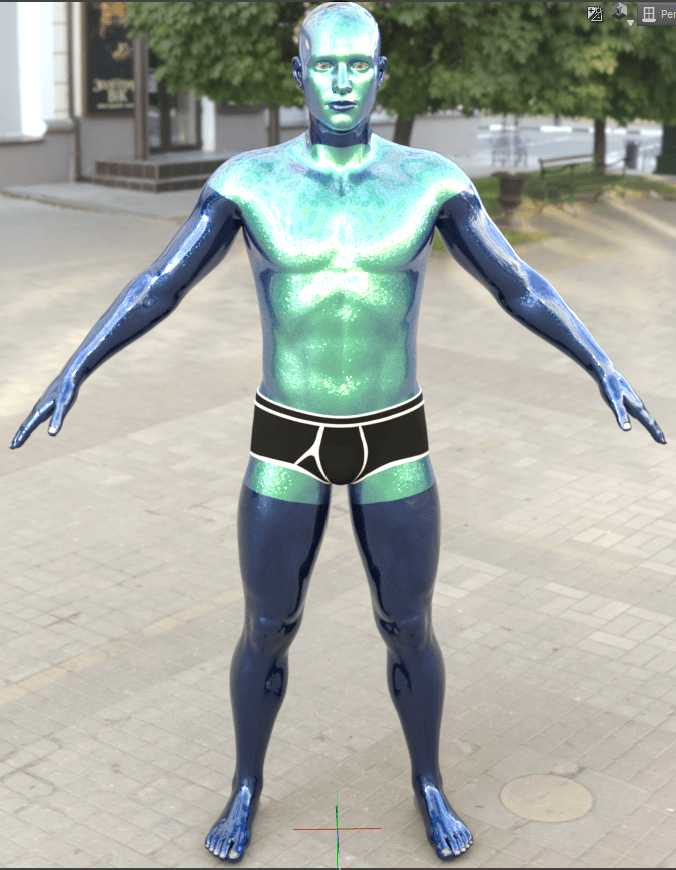
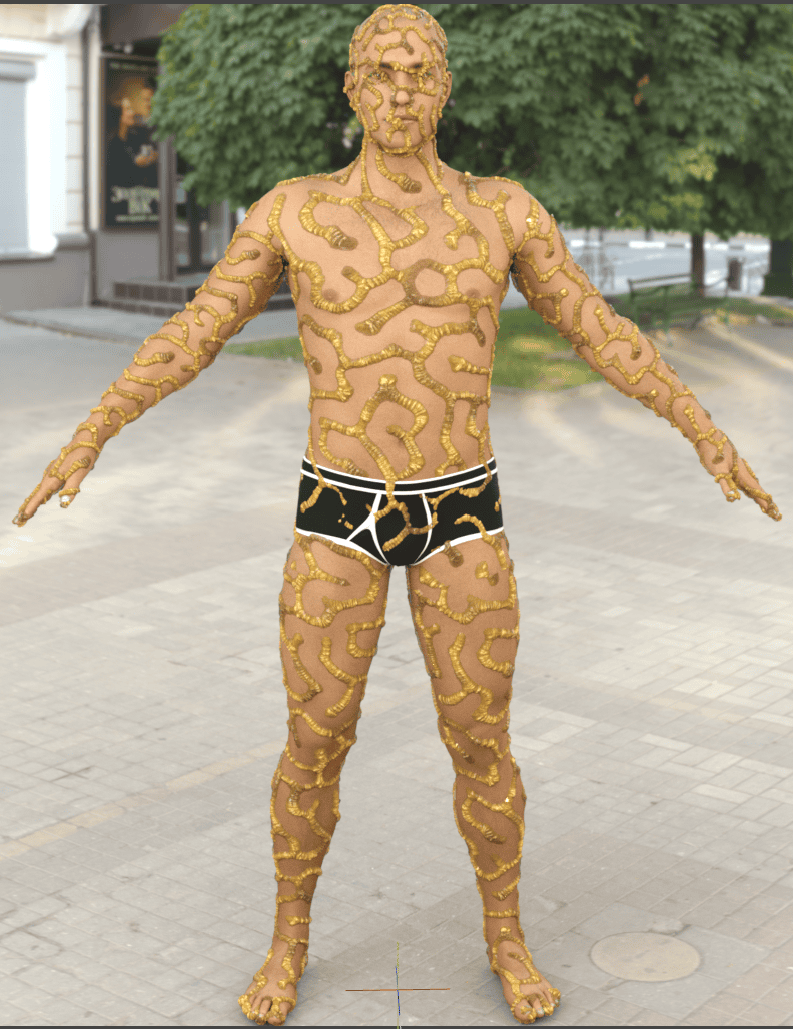
Using the Textures.com website I have found this really cool Coral PBR texture. It would be an interesting use for our GeoShell.
Source – CORAL PLATYGYRA DAEDALEA from Textures.Com
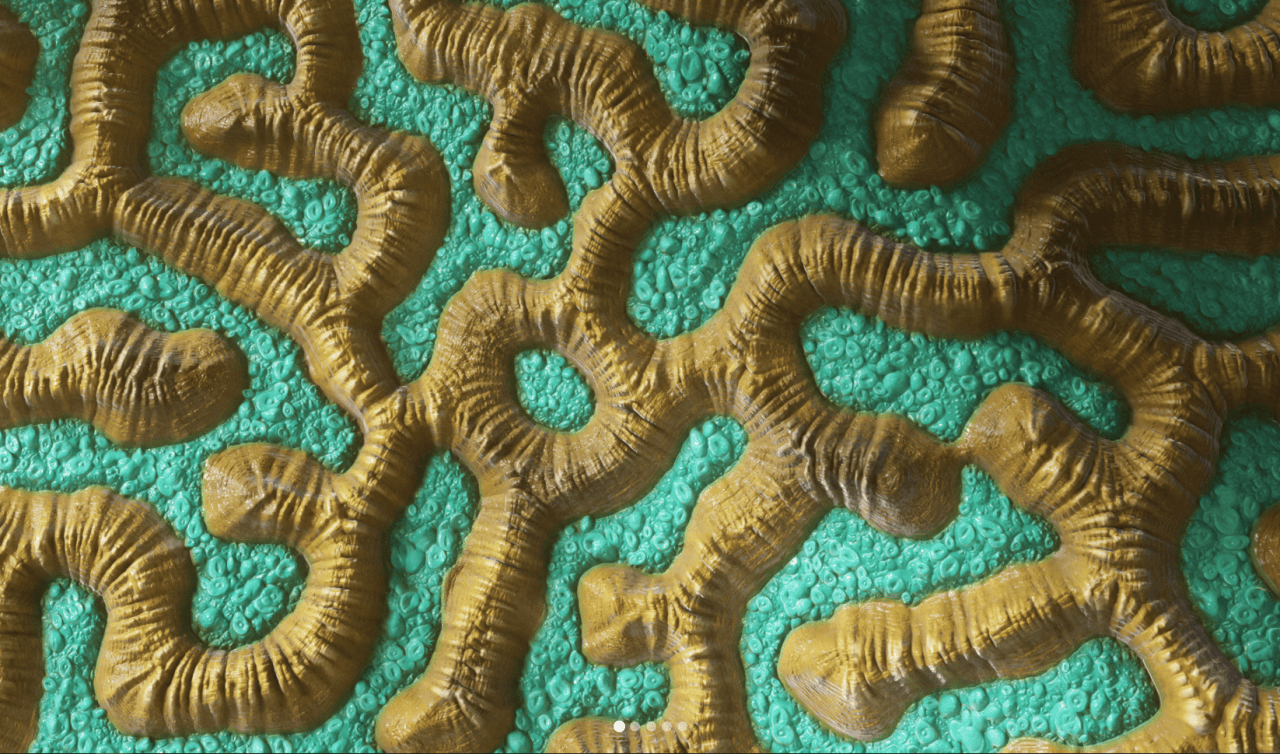
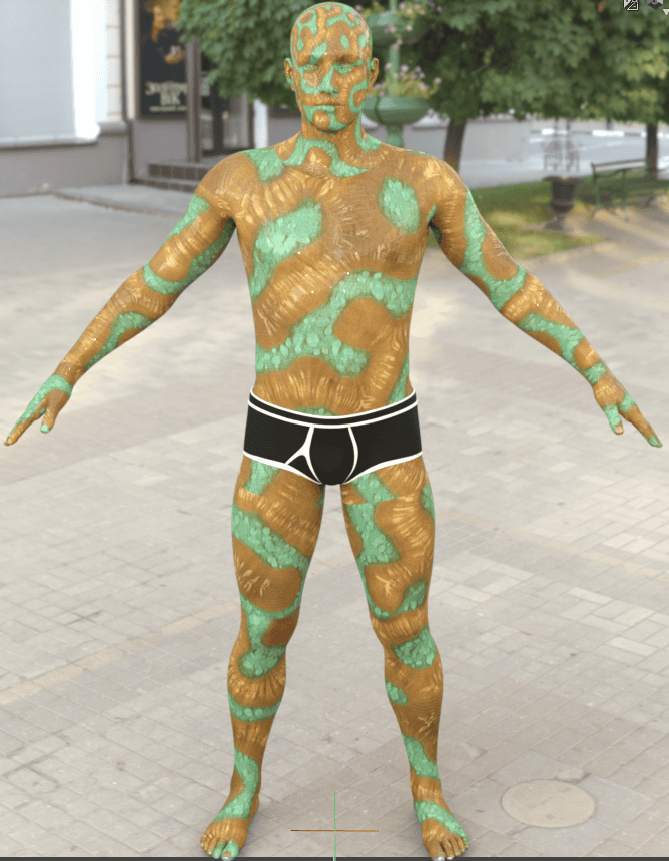
This particular material contains quite a lot of maps that we can apply. I will delete all GeoShells that I have right now and apply a fresh one. Then let’s see how it looks when I start applying these coral textures to this shell. Starting with the base color:
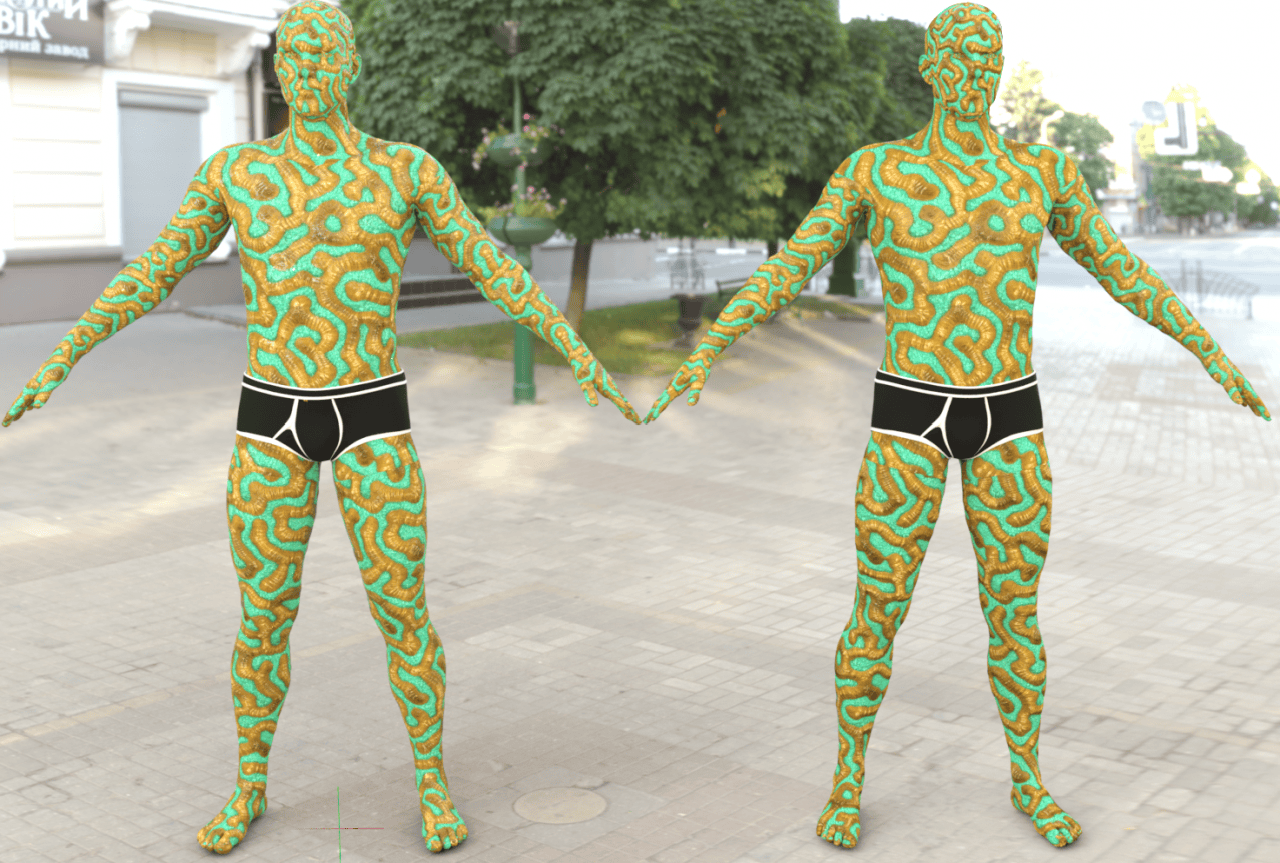
Already looks quite interesting. After that I have added all the other textures: Roughness map, Emissive map, Normal and Bump maps, and even a Displacement Map. Here is the result:
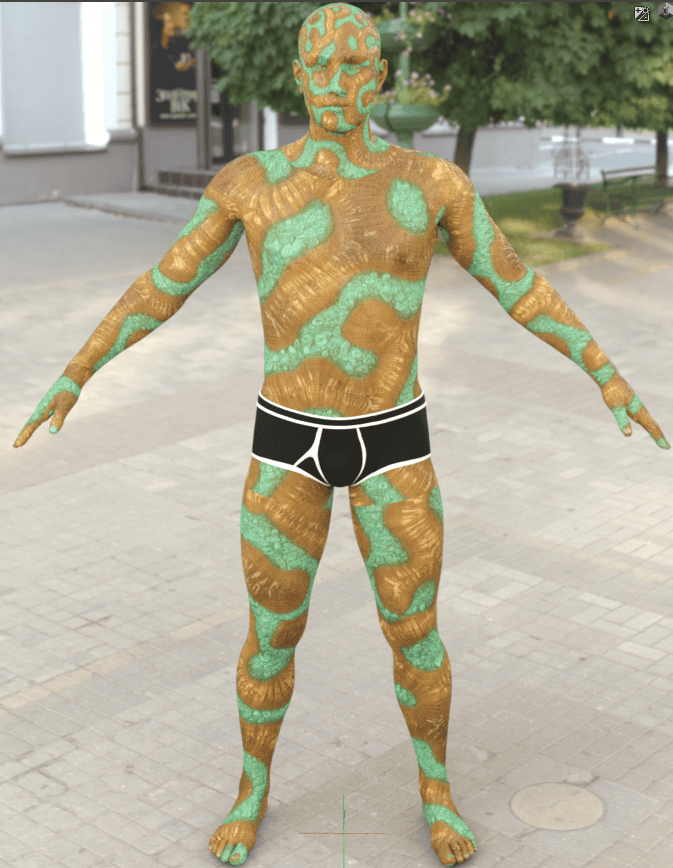
It is not easy to see, but the shell became even better. Mostly I am speaking about the small details that Normal Map and Bump map brought. As the last step, I have also changed the tiling on these textures, to make them smaller and thus more interesting and prominent. And also tried to match the scale across the body a bit better.
Why do you Need Geometry Shell?
From the first glance at the previous example – it seems that Geometry Shells are kind of obsolete. We added textures to it, but you can do the same thing to the character’s skin itself. So what is the point?
I have copied the same character to the side and applied all the same textures to him. But this time they are applied directly to the character and there is no Geometry Shell. Let’s see how this looks and compare.
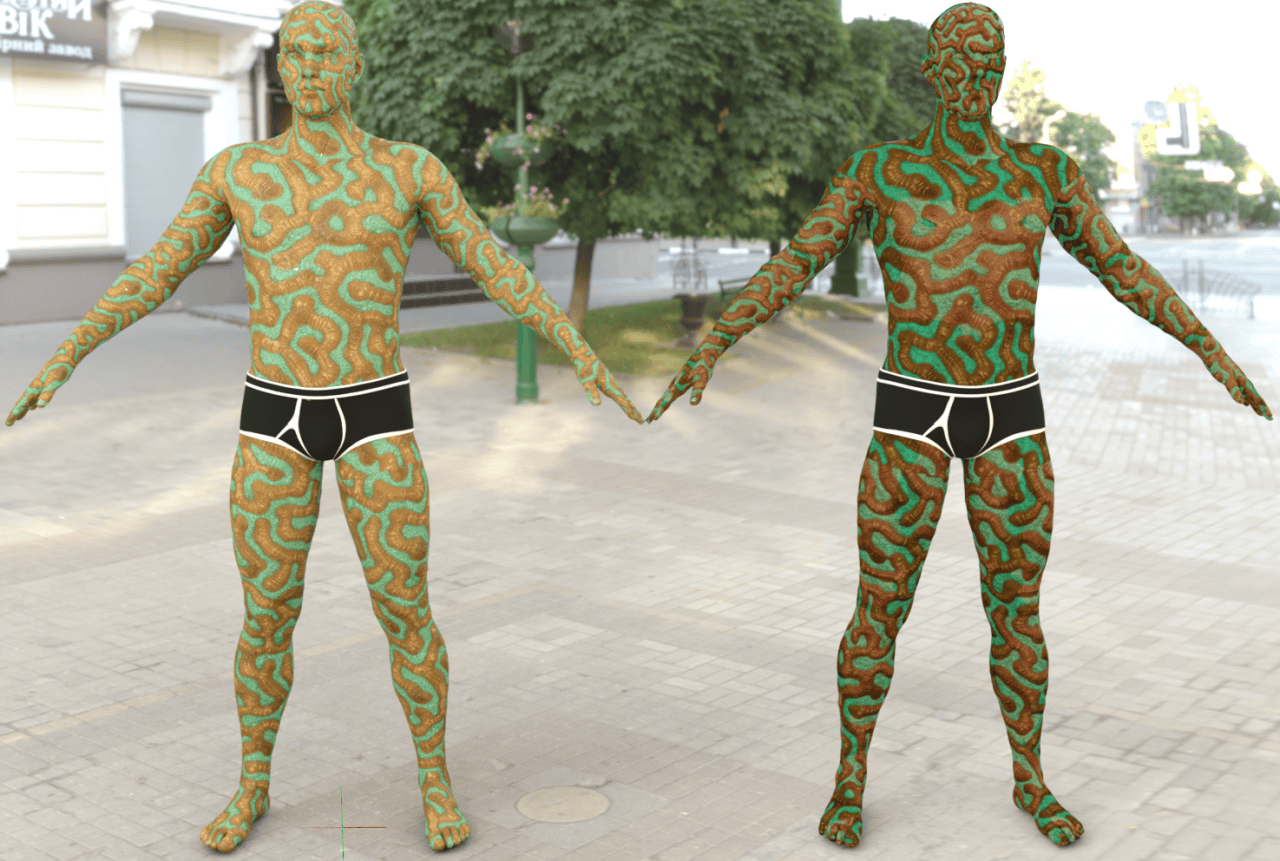
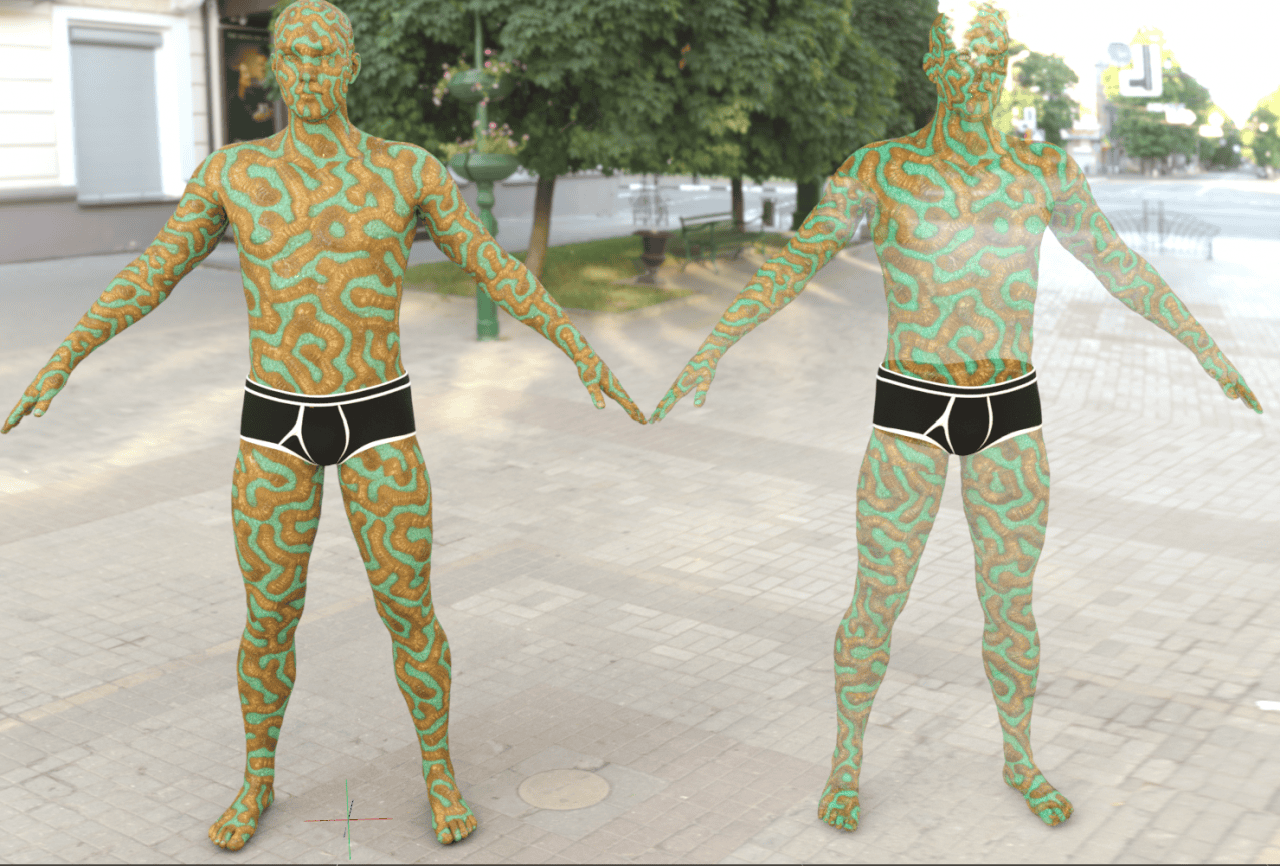
The result is drastically different between the two. The one on the right is where I have applied all the textures to the character itself. It looks this different because some of the settings that were applied to the skin – now applied to these textures. This mainly includes the Translucency Weight setting, so when I turn it off – it looks like this:

They look more alike, but still quite different. The main difference is that the one on the left is not as bright. But the one that is on the right is too much overall. You can’t see the details of the characters, there is almost no face. It looks just like a character shape to which the texture was applied. While the GeoShell character looks a lot more like a human with coral textures over him.
This happens because as was mentioned before, GeoShells are a bit translucent by default. So on the left, we can see an original character and its skin through the shell. But if we change the Cutout Opacity value to 0, they look almost identical.
It is important to understand that you can’t receive the effect that we had on the GeoShell without the shell. Because if we change the Cutout Opacity on the figure without the shell – the figure itself will become translucent. As it is its main skin and there is no second skin that can be translucent in this case.
So the Cutout Opacity is the main difference and advantage that GeoShell has over the regular skin. It allows adding another layer for you to work with, without overriding any existing textures and details. And we can go even further with this.
Cutout Opacity Maps on GeoShells
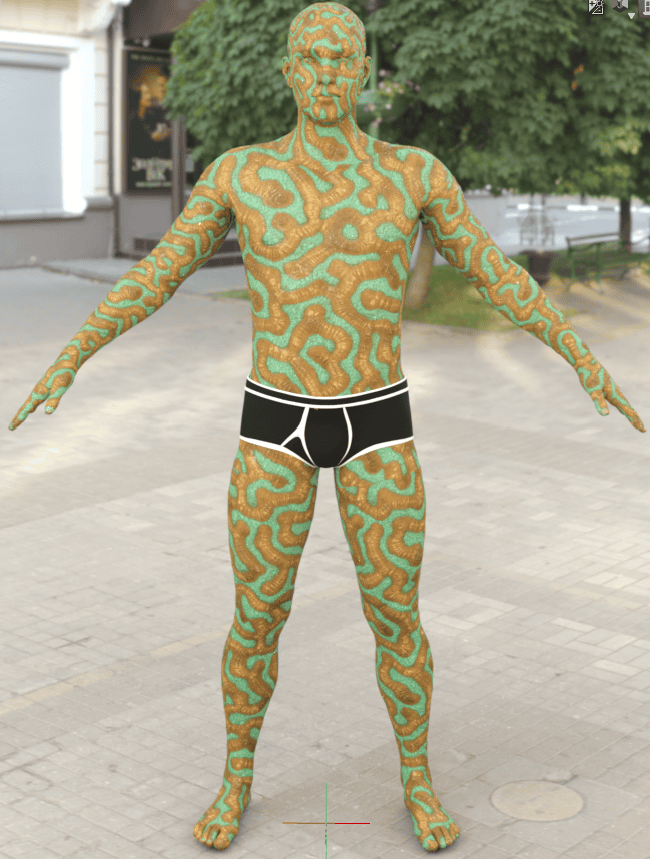
Cutout Opacity is one of the settings to which you can add a texture map. They are quite rare and you won’t see a lot of Cutout Opacity maps out there. But the thing is, that you don’t need exactly this map. In many cases, the Height Map would be close enough to what the Opacity map is, that you can replace it with one another. Which I did and here is the result:
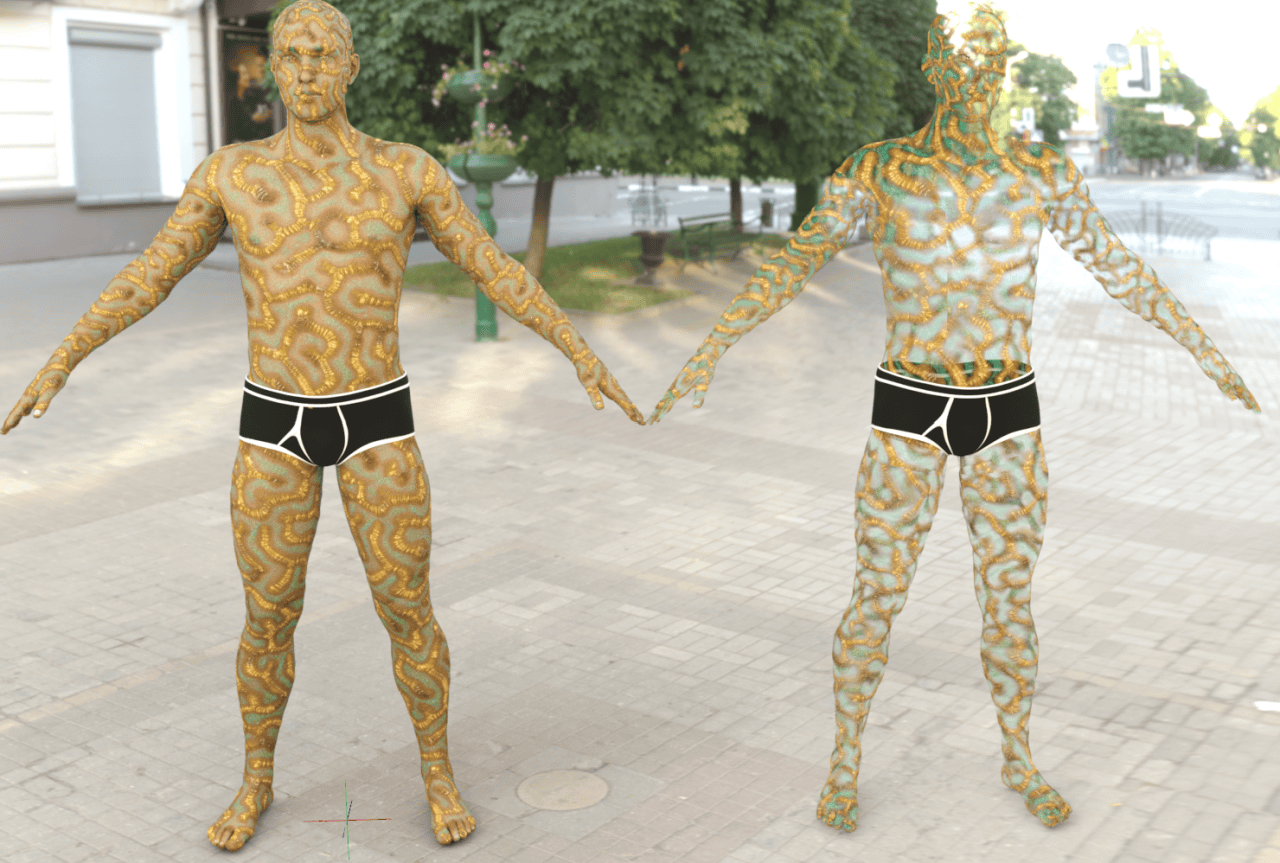
Again, the character without Geometry Shell simply does not work with this. Let’s just accept this fact and stick with the GeoShell one. So the look changed. Now instead of looking like a human-coral hybrid, it looks like a human with some interesting coral details. If you want to enhance this effect – you can increase Displacement Strength Setting in the Surfaces window.
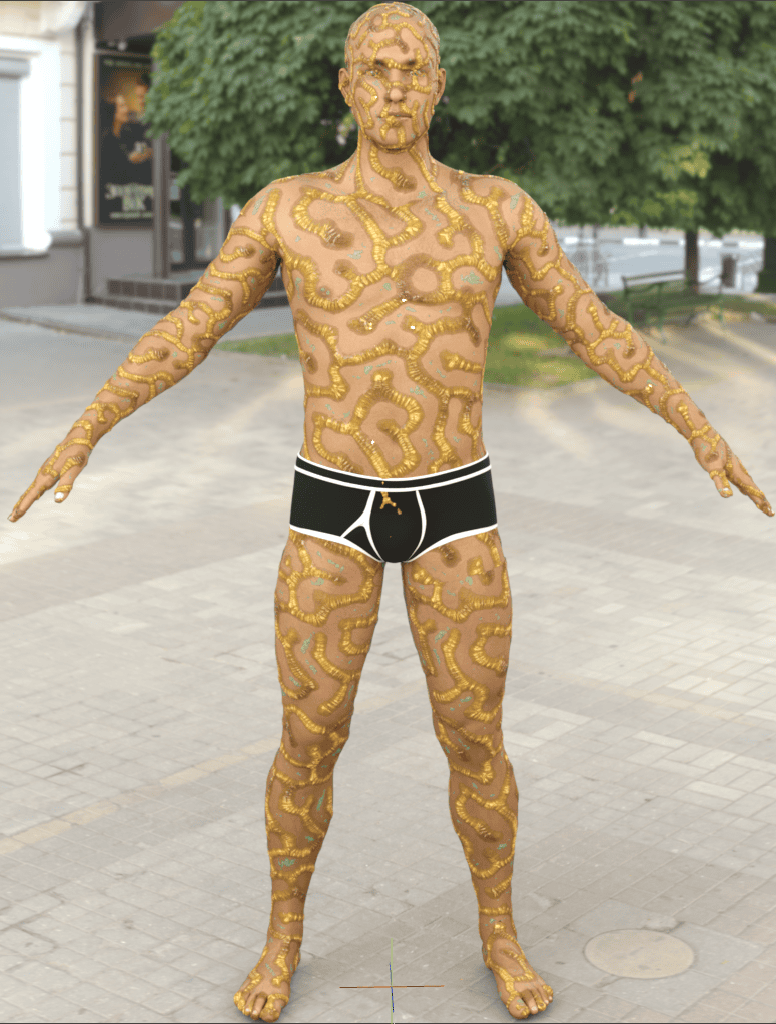
And for even more prominent results, I would recommend experimenting with the Displacement Map even more. Particularly with the Minimum and Maximum Displacement values. Using this, you can make these textures really stick out and make some truly unique scenes.
Saving Geometry Shells as Presets
One of the biggest positives that Geometry Shells have is their flexibility and that they can be applied to any figure as a preset. Meaning that even if you created a Geometry Shell for the male figure – you then can be applied to a totally different female figure.
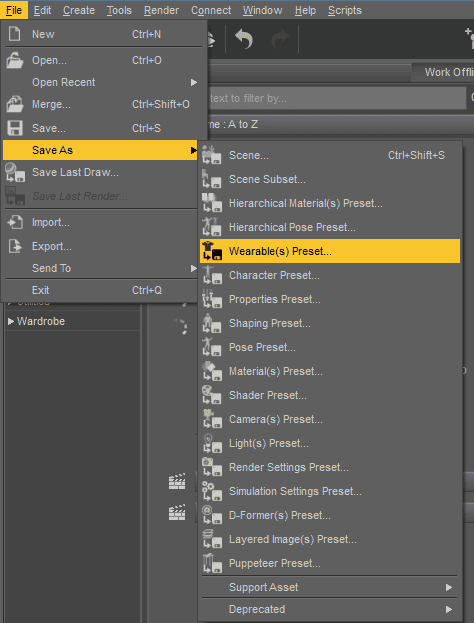
Firstly, let’s save a geometry shell that we have created. For this – select your character. It is important to select the character with the GeoShell and not the shell itself. Then proceed to the File > Save as > Wearable(s) Preset
Next, you can select a path on your OS to save this preset. Usually, it is not something that you want to change. And also here you can give a name to this preset, so you would remember what this is.
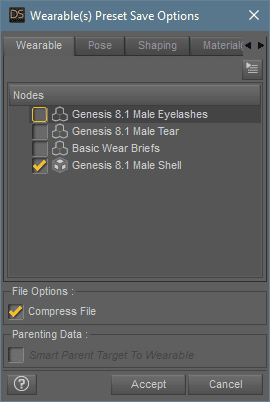
In the next window, it is important to deselect every node except the Geometry Shell. Because we only want to save it and only it.
And it is done. Now you can add any character to the scene and go to the Content Library window, where you should be able to find your preset.
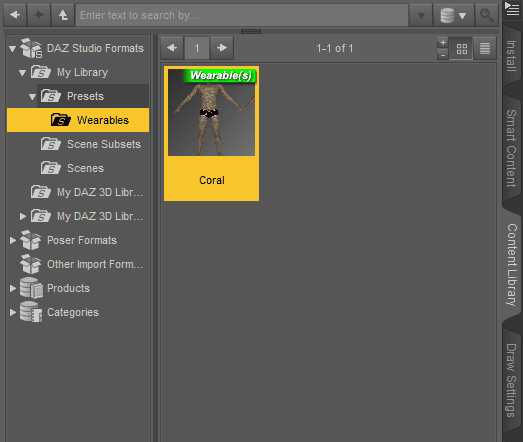
Apply this preset by double-clicking and it will automatically add a GeoShell to the selected character with all setting and texture maps already applied. For example, here I have used this Preset on the Victoria 8.1 figure, which is very different from the Male 8.1 that it was created on.
Daz GeoShell Products
As it is this easy to create something unique and interesting using Daz3D Geometry Shells – they are very popular on the Daz3D.com/shop. Other people create something special with GeoShells and share it on the internet and you can use their creations. A few examples:
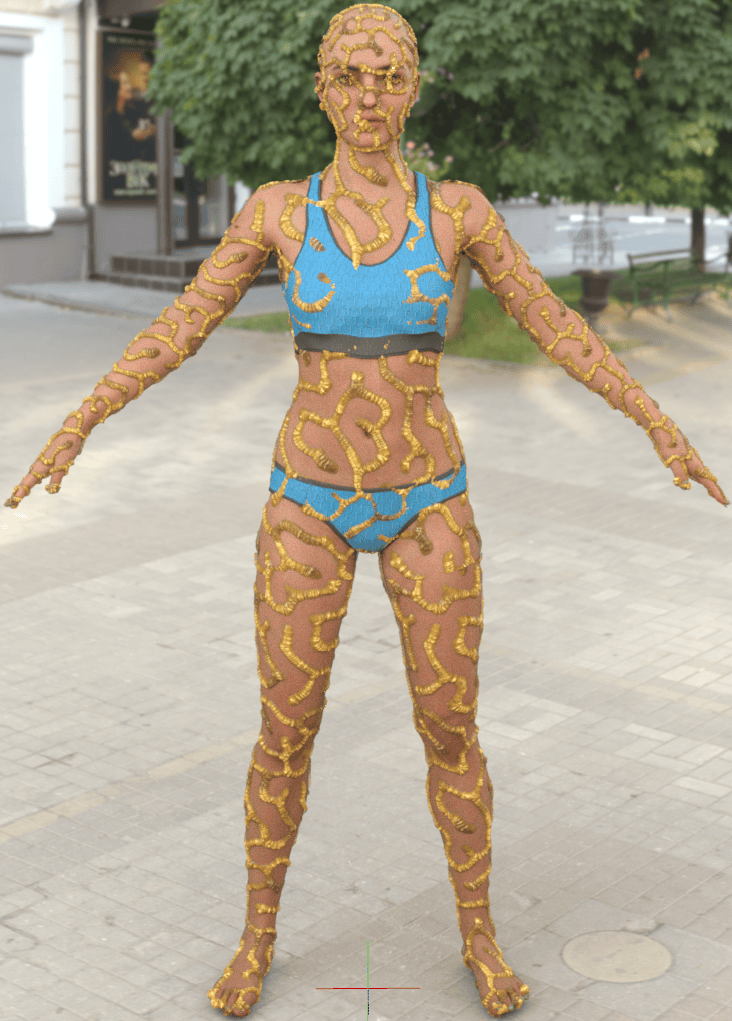
Sexy Skinz – Gemstone Adornments for Genesis 8 and 8.1 Females by vyktohria adds a layer of jewels that you can put on your models. This can look beautiful if combined with some open and free clothes.
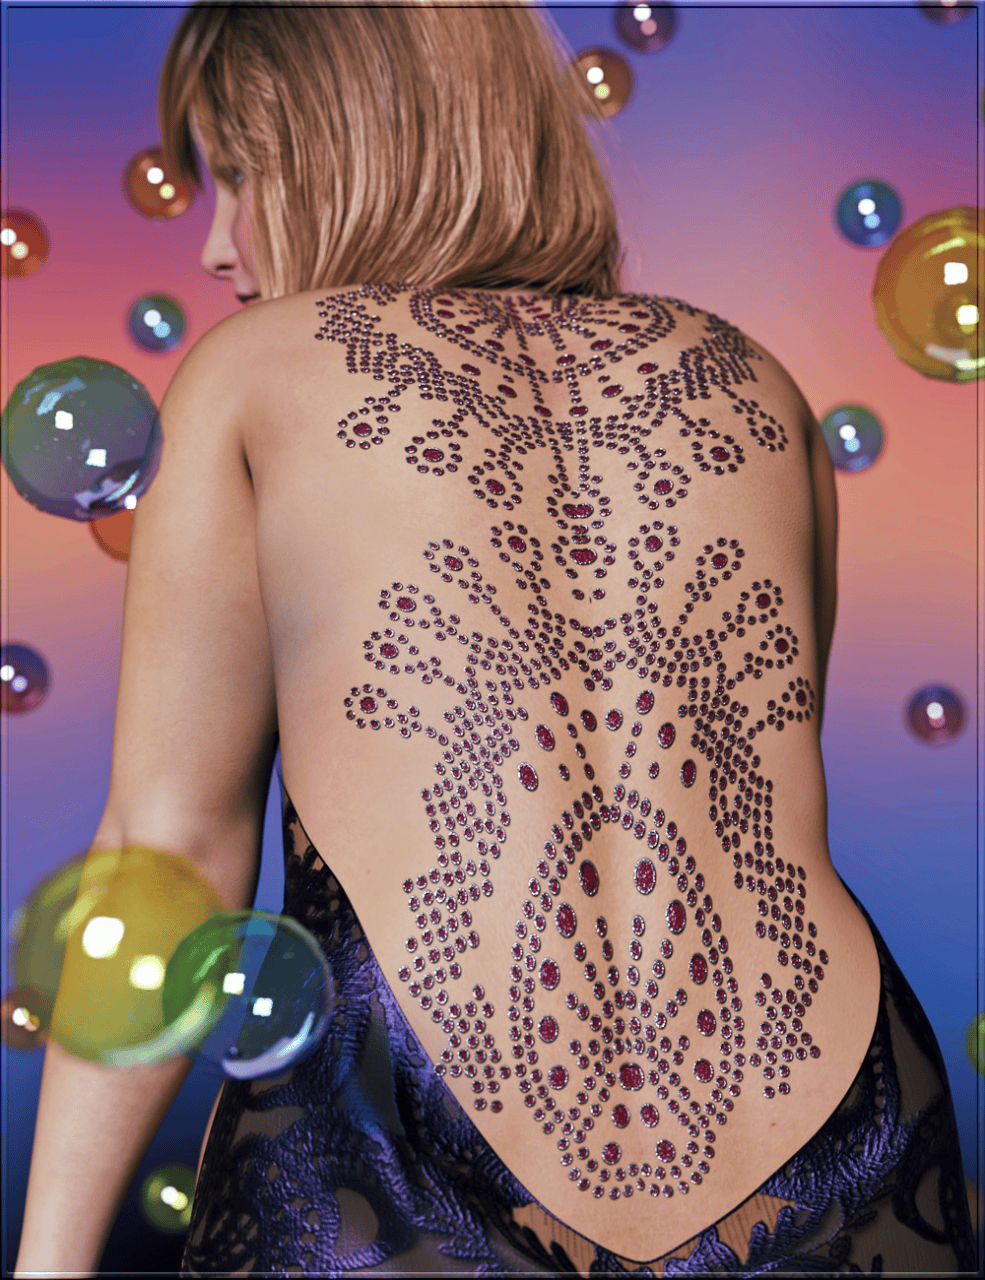
Source Sexy Skinz – Gemstone Adornments for Genesis 8 and 8.1 Females by vyktohria
The Wet Body Filament for Genesis 8 and 8.1 is an easy way to make your figures look wet. A perfect fit for some beach scenes. Besides, it is created to be used in Filament, which is another rendering engine.
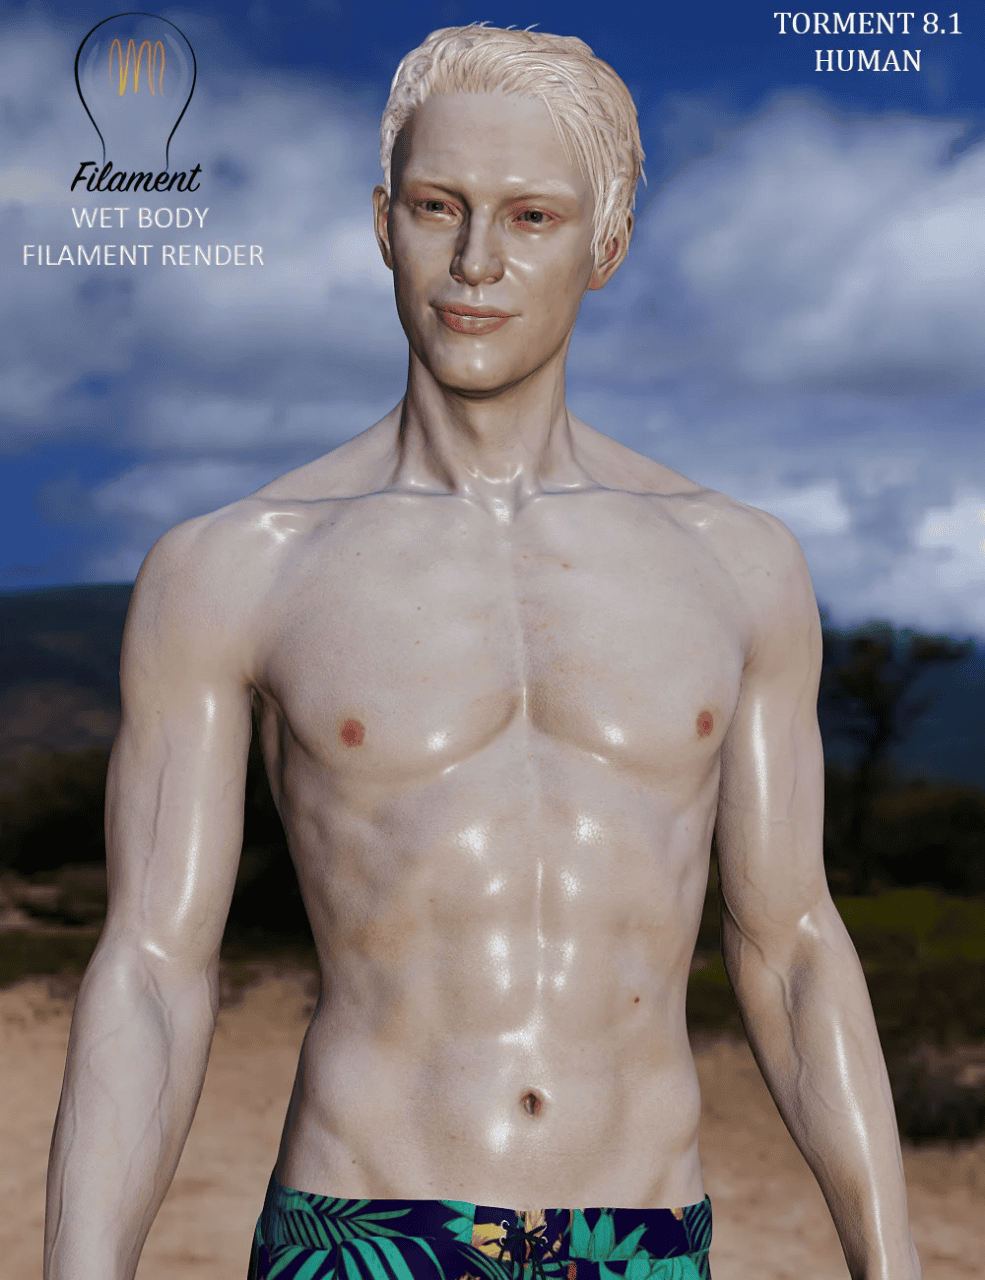
Source Wet Body Filament for Genesis 8 and 8.1 by SimonWM
Another use is to add some skin details that are not on the character itself. Such as scars, wounds. HD Body Burns for Genesis 8 and 8.1 Males is a perfect example of how you can add scars to a character that does not have them and never had without changing the character and its geometry at all.
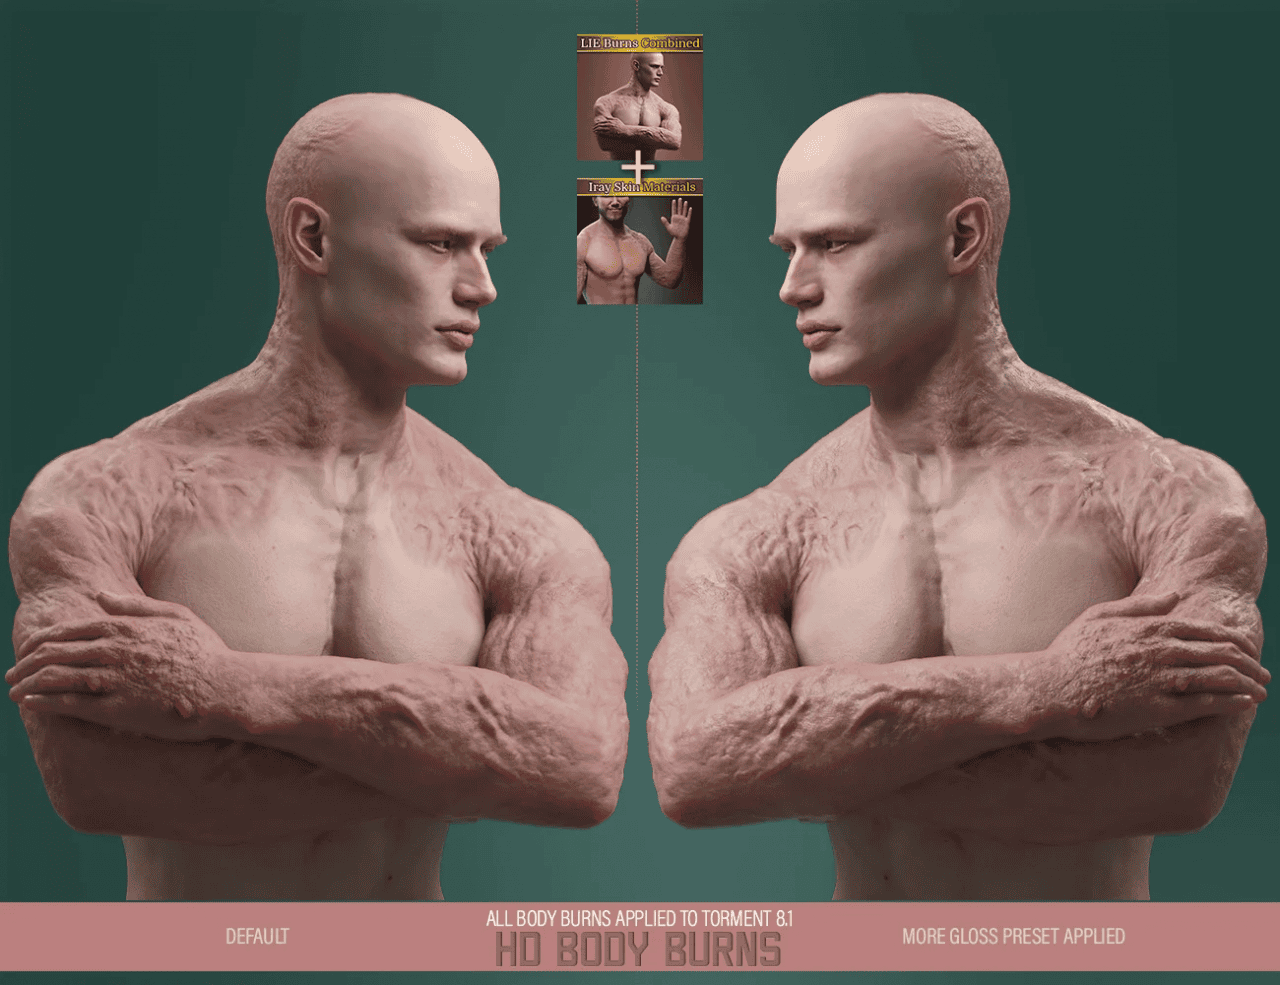
Source HD Body Burns for Genesis 8 and 8.1 Males by Esid & FenixPhoenix
To the same category, we can add HD Gunshot Wounds for Genesis 8 and 8.1 Females. A fresh wound is something that is definitely not present on the character itself. That is why adding it via GeoShell would be a very good idea. As creating it from geometry would take too much time and mess up the character.
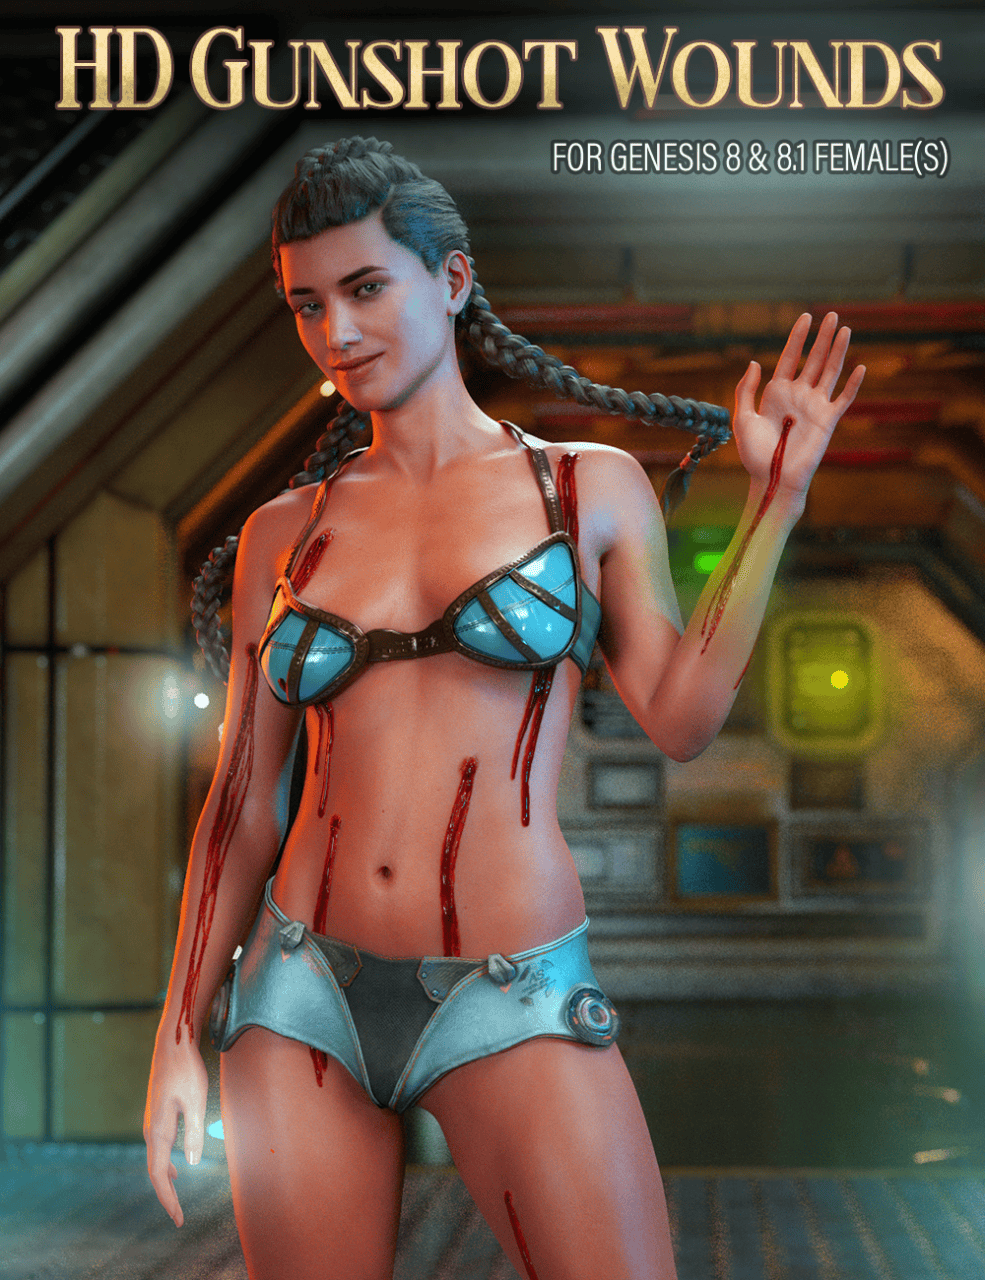
HD Gunshot Wounds for Genesis 8 and 8.1 Females by Esid & FenixPhoenix
But Daz3D Geometry Shells can also be used for something a lot more peaceful than wounds and scars. For example, on makeup, just like Extreme Closeup Cleo Style Geoshell Makeups for Genesis 8 Female. It adds a very detailed makeup to the character that you can control and manage however you want.
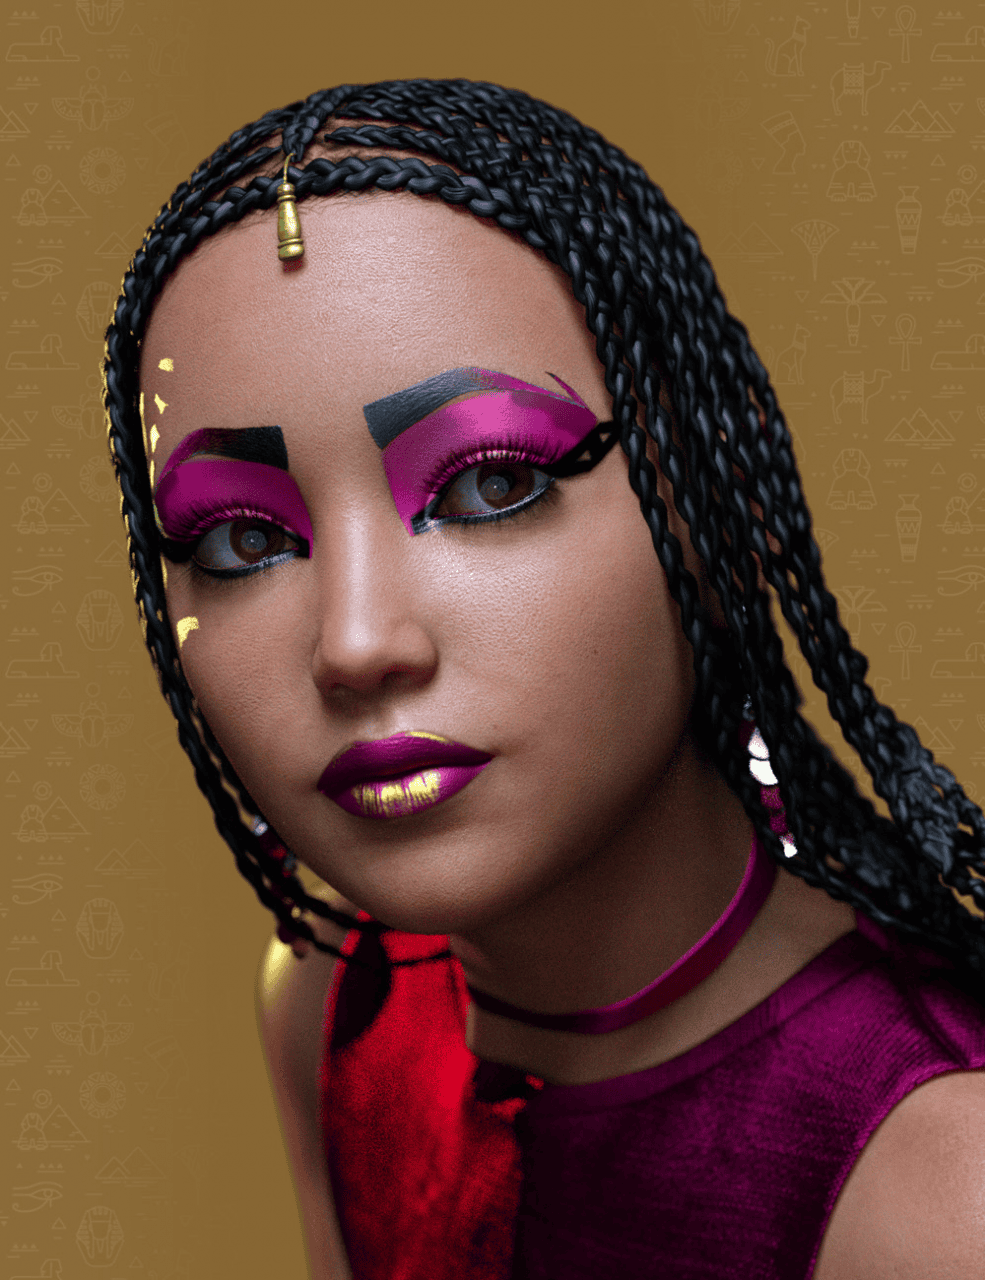
Source Extreme Closeup Cleo Style Geoshell Makeups for Genesis 8 Female by Daz Originals & ForbiddenWhispers
Conclusion – Daz3D Geometry Shells Tutorial
Daz3D Geometry Shells are a very underrated feature of Daz Studio. Mostly because from the first glance it seems obsolete and useless and people won’t look further. But upon looking deeper it turns out that with GeoShells it is possible to create unique things, that would not be possible otherwise. And that it is overall a great and useful tool. Also browse our other Daz Tutorials and 3D Models Reviews.