This Daz3D Filament Animation Tutorial explains everything in Daz Studio how to create an animation with the Filament Render Engine with some simple steps. Daz released its new PBR Renderer called Filament and in this article we will put it into test once again. In our past Daz3D Filament Tutorial, we have discussed its core characteristics and how it works. Now we will see its functionality for animation purposes. For those who want to try this new feature, remember to download, if you yet did not, the new 4.14 version. Filament is included in the update for free (Hooray!).
What is Daz3D Filament Animation good for?
This is in fact a good question because many users have reported to find the new render engine purposeless. Even though some of them consider this could speed up the process of previewing the final render, it does not do much justice to its native shaders and some lighting conditions. As a result, with its limitations, there is little left to preview. And they are partially right.
A brief example of Filament’s rendering power – Fire for Filament
In reality, Filament is a new option, and as far as it goes, it is still under development with new features and patches coming on the way (Or at least we hope). But It should not be compared to Eevee, or even Iray because they play different games. Filament is designed to fill the gap of low-performance computers that cannot handle well Iray. In such a way, we can consider Filament to be a hybrid of Iray and a texture shaded viewport with future potential.
For animation purposes, nonetheless, it works fine speeding up the process of previewing. As I mentioned, it fills the scene with some texture quality but let us test other elements that make up for a scene such as the movements, the flow, the timing, the gestures and so on.
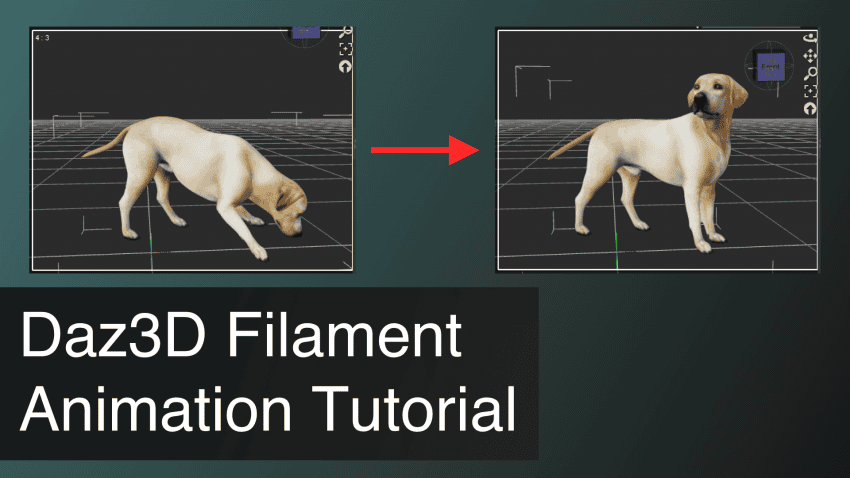
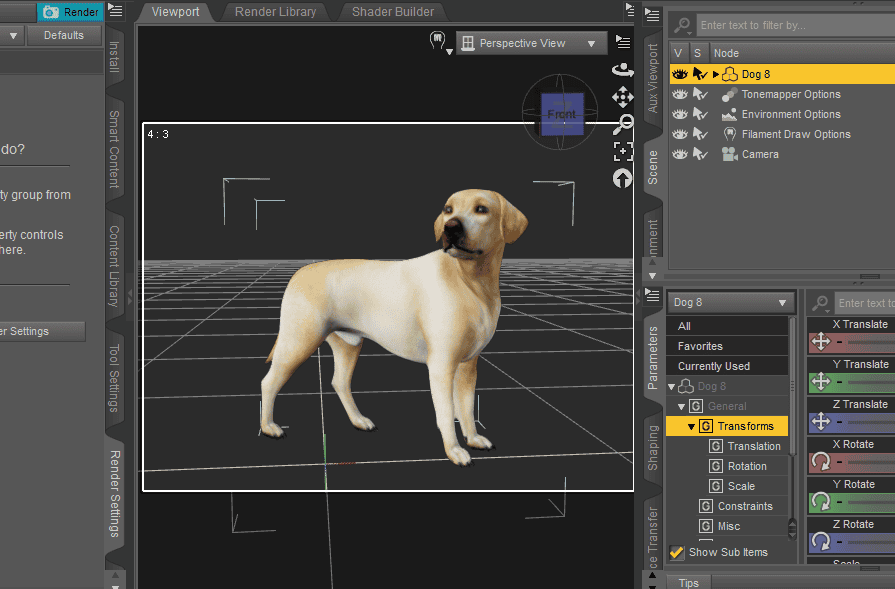
Daz3D Filament Animation Tutorial
For this short animation, we will use Labrador Daz 8 plus a poses’ package.
We will select and bring our beautiful dog to scene.
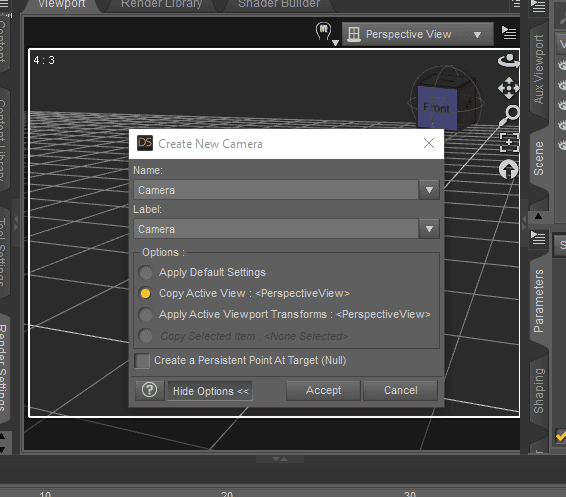
After that, I want to set a camera for my animation. I will use my Perspective View until I find a good spot. Then I go to the “Create a new camera” icon and I will select “Copy Active View” to match the view in the viewport preview.
Remember that whenever you move around the space having the camera selected, it will also change its position. To work comfortably, switch to perspective view each time to move around the scene without affecting the camera position.
Once done, open the package of dog poses and apply as desired. Make sure to go to the timeline and select the keyframe you want the pose to be applied to. Also, set total frames to 60 to be able to work with more flow.
So I decided to apply two poses. One at the beginning and another one closer to the end.
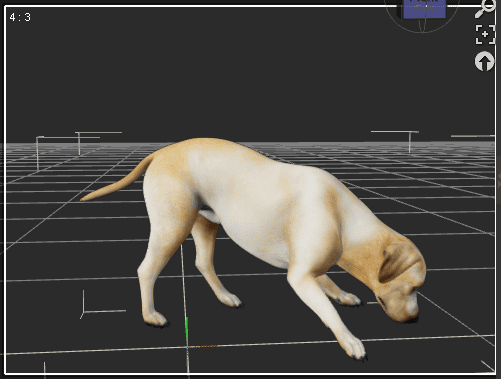
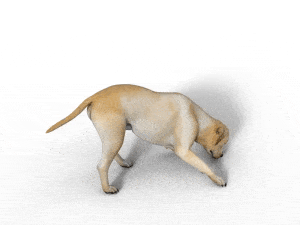
Start pose of the dog
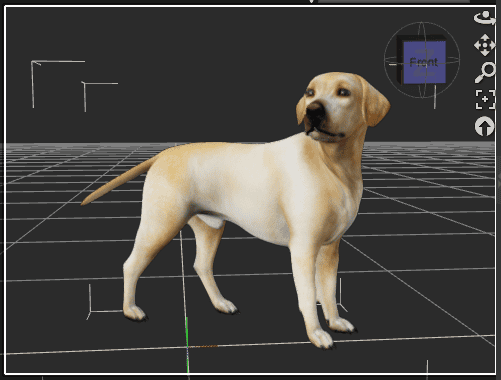
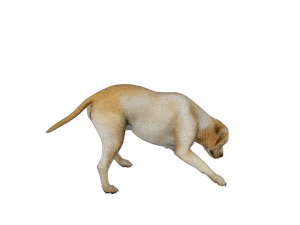
End pose of the dog
Whenever you have two different poses, Daz will create extra frames in between for a smooth transition. So no worries having to apply a pose to each frame.
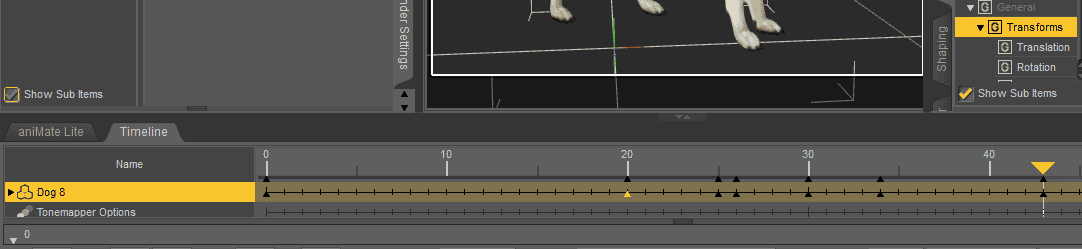
Now this is something very common, especially with dogs and the tail that moves independently. Daz will automatically create new keyframes, even when you did not ask for them. Do not worry if you happen to see them suddenly created. It is not a bug, but a default action.
On the other hand, remember to bring to the scene the Filament settings which can be found in the Create menu. These settings enable us to make changes to the environment, to the tone-mapping effect and to an extent to texture maps.
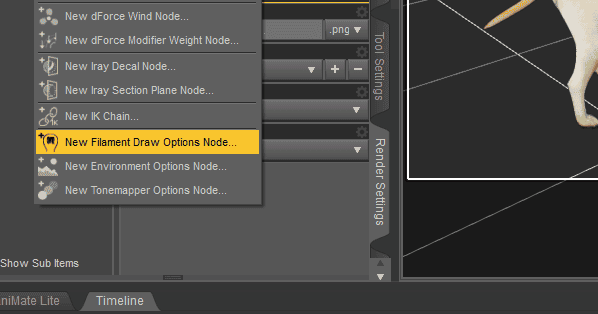
After you pick one, it will then appear in the scene pane. Personally, I want to reduce the intensity of my Environment light and that’s about it. Finally, to render with Filament go to Render Settings and pick Viewport as your output option.
Below you can find the comparison. By the way, the amount of time saved is significant.
Iray Preview
Filament Preview

Side by side: Filament vs Iray
Common Problems and Solutions for Filament Animation
Some key points to bear in mind:
- Filament lacks SSS / Translucency effects.
- You can preview your HDRI Maps in the viewport in low quality.
- Depth of field does not work with Filament
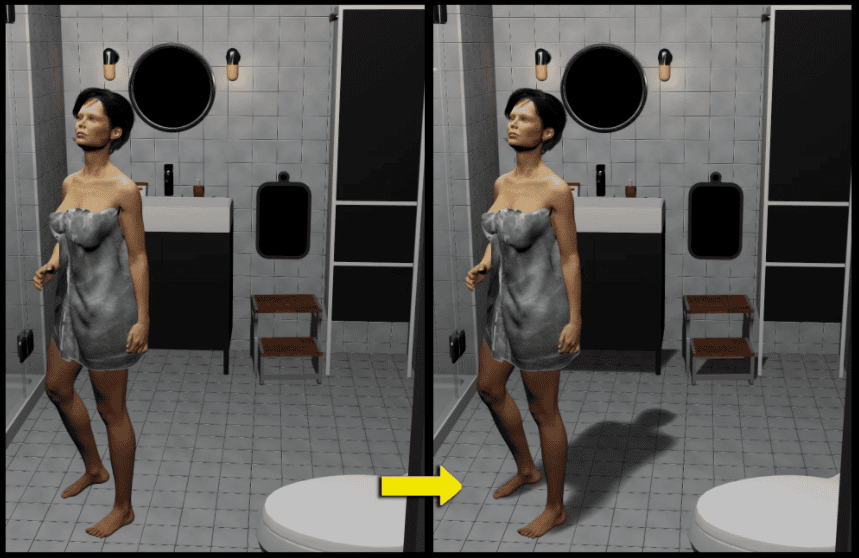
- In general, the lighting values are too high for filament scenes, so you will have to decrease the brightness of each light source as well as the environment intensity.
- To apply shadows, create a light source and go to its light parameters > Shadow > Raytraced.
- I highly recommend creating a separate project for Filament settings
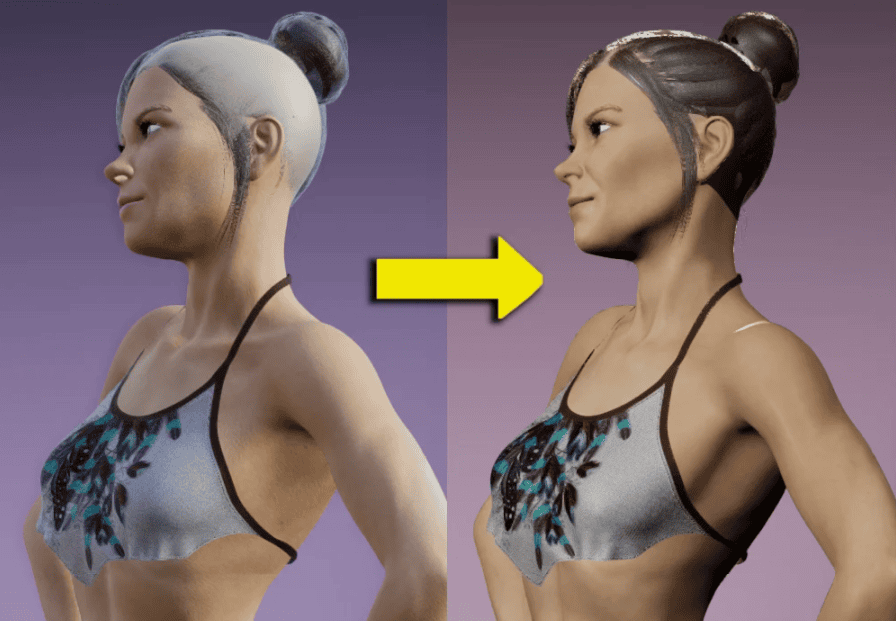
For the skin: To apply some extra texture quality to the skin, make sure to use distant lights and apply whenever possible complementary light colors to it. Also make sure to add the Filament Draw Node to the Scene and adjust as needed.
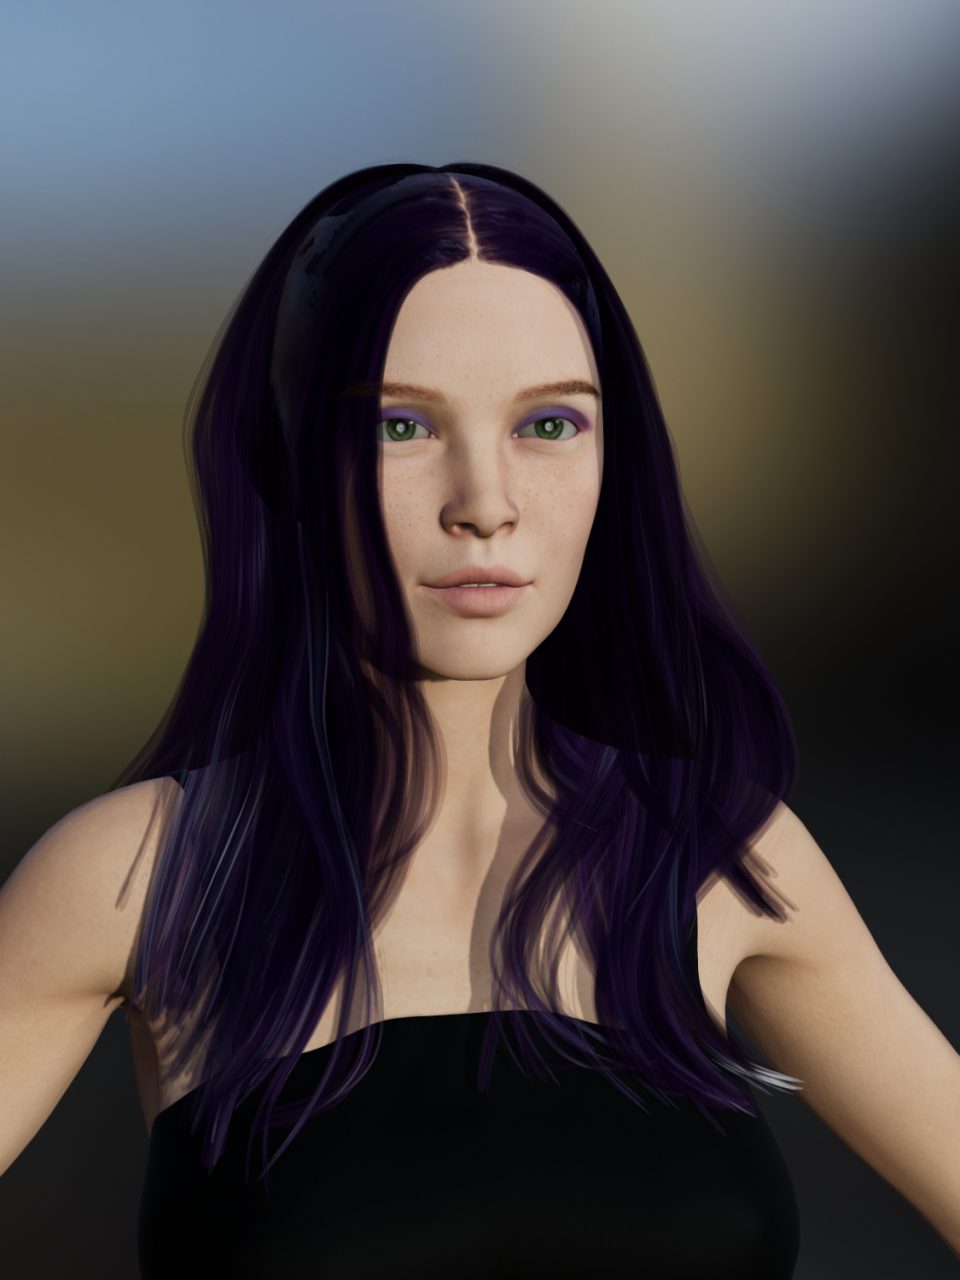
Filament has some issues with hair textures and I hope in the short run they will be able to provide a solution. If you have this problem of transparency, most likely you will need to lower the cutout opacity value found in the hair surface pane. Unfortunately, this method is nothing but a temporary patch and the real problem should be addressed.
Helpful Filament Products
Shadow Fix – Rigged Shadows for Filament
A quick fix for skin issues – SF Beautiful Skin Filament
And many more on the way!
Conclusion
That’s all about this Daz3D Filament Animation Tutorial. To sum up, I want to say that Filament looks promising, though at the moment it is not fully functional, especially when it comes to Genesis figures. The hair texture, the skin shader and other issues make it all more complicated, therefore the time you save rendering in fact you lose it arranging the scene. We hope that in some more time we will be able to render with similar quality as seen on the website but at least it is another option for artists that don’t have access to the latest hardware and still want to experiment with rendering. In case you want to learn more about Animations see our Daz Studio Animation Tutorial: Step by Step article.