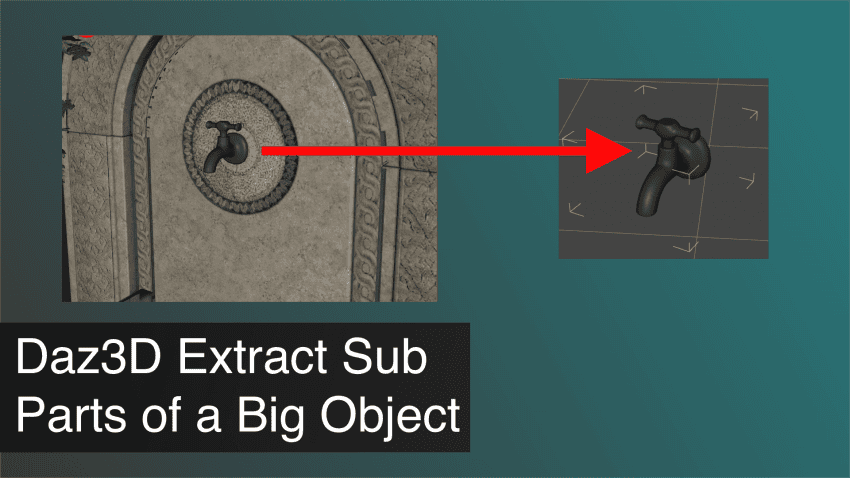
This Daz3D tutorial shows how you can extract sub parts of a big object to reuse Inside a new scene. We explain step by step how to use the geometry editor for that. Sometimes you add a product to your scene and it turns out that everything is connected. Even the parts of the object, that you expect to be independent. For example if the product is an environment of a room, the doors, chairs and other furniture – everything can be connected and basically be a one single object.
If in this situation you just want to hide the part that you can’t select – you can use our How to Hide Scene Parts That Are Not Selectable Daz Tutorial. But what if you want to not simply hide the part of a bigger object, but fully separate it and use it somewhere else, maybe even in another scene? That is what we are going to look into in this tutorial on an example of “Shaded Heaven”(Pergola) free environment available in the Daz Studio.
Daz3D Separating Geometry of Objects
Selecting Geometry
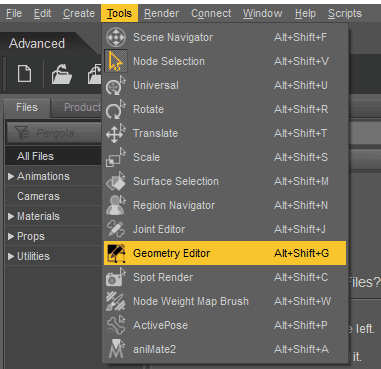
To separate part of the big object we need to use the geometry of said object. And to use geometry we need to utilize the “Geometry Editor” tool. It can be found in the top bar, amongst “Tools”.
When the tool is active – you will right away notice that now not the whole object selects after you click – but only the geometry that you clicked on. This includes faces, edges and vertices. By default you will select faces when you left click on something and it will be highlighted.
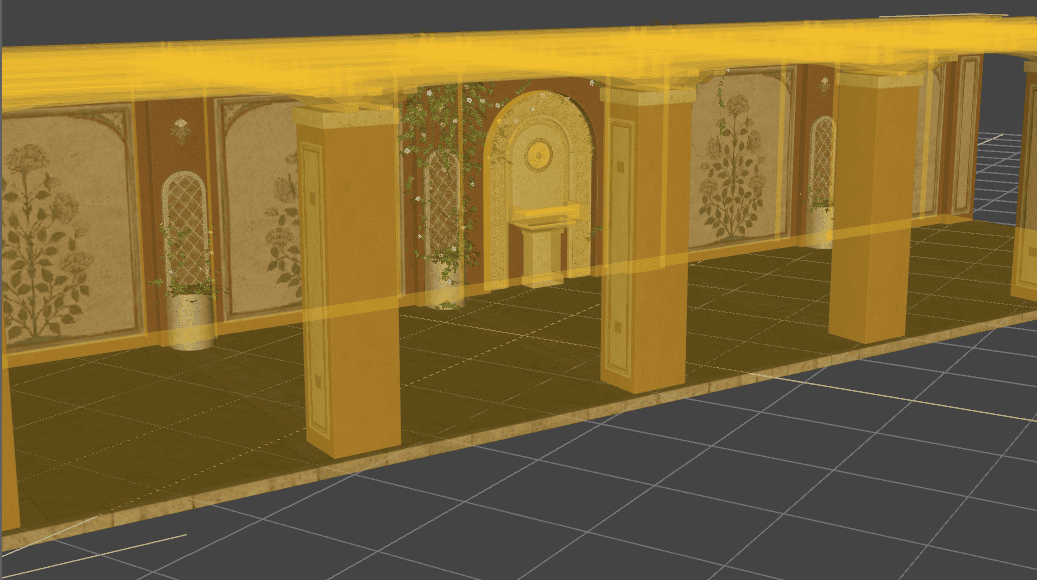
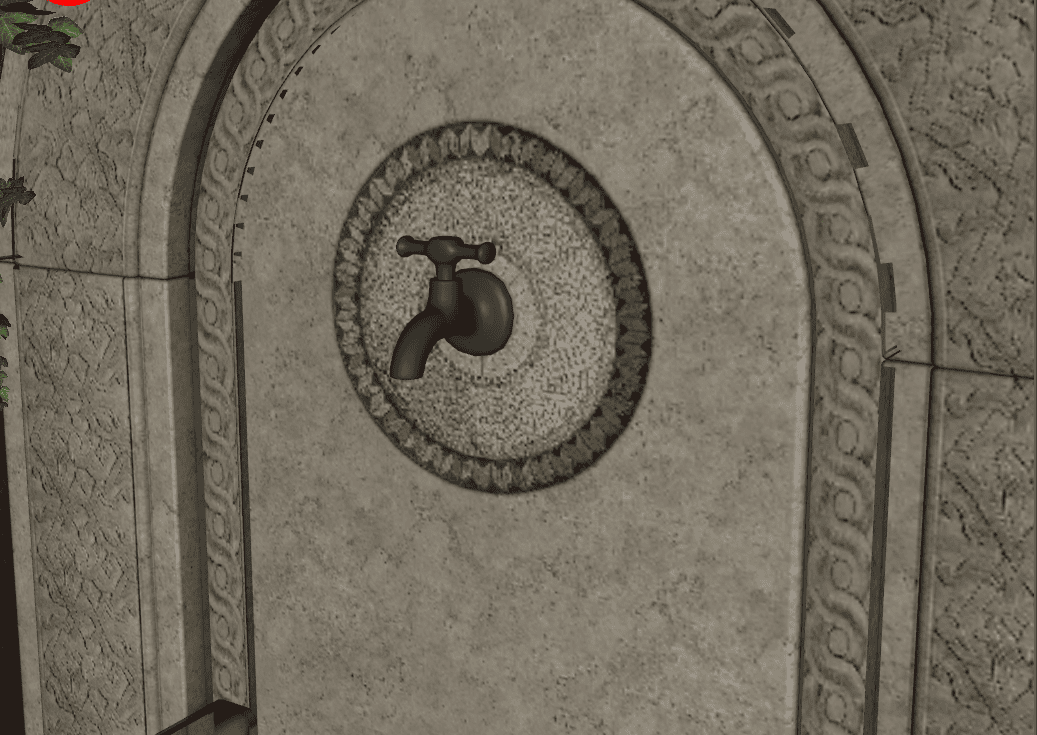
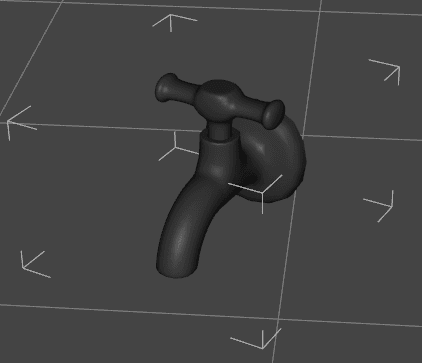
Now with the use of “Geometry Editor” we need to select the geometry that we want to separate from the whole object. For example I am interested in this tap that is located right at the center of the Pergola.
Now I need to select it. We already know that the left mouse button selects faces. So when I hold the button and move the mouse around – I can select a bunch of the faces at the same time.
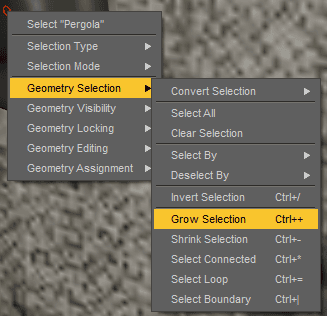
But it is not the best way of selecting geometry. It is not convenient at all and I need to select all the faces individually. Alternatively I can use “Grow Selection” [Ctrl+”+”] from the right click menu.
What this does is adds all the neighbouring faces of the selected ones. So if you have one face selected – it adds selection of all the other faces that are connected to this one.
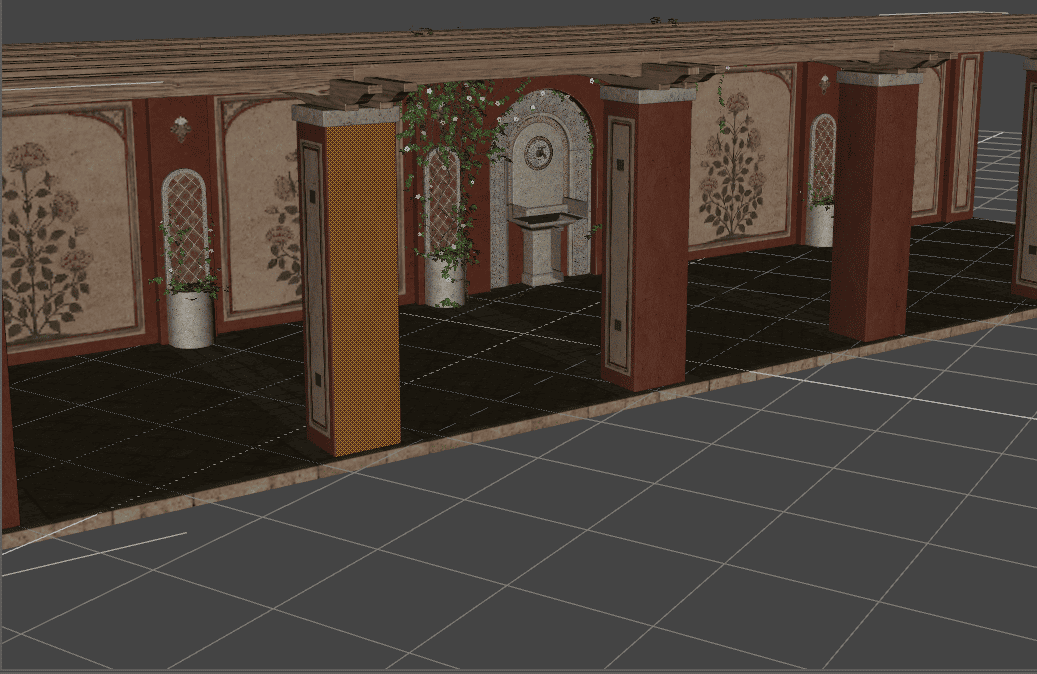
You can use this to select things easier. But for our purpose we have an even better solution. It is to use the “Select Connected” option that can be found if you right click on the object and go to the “Geometry Selection”[Ctrl+*].
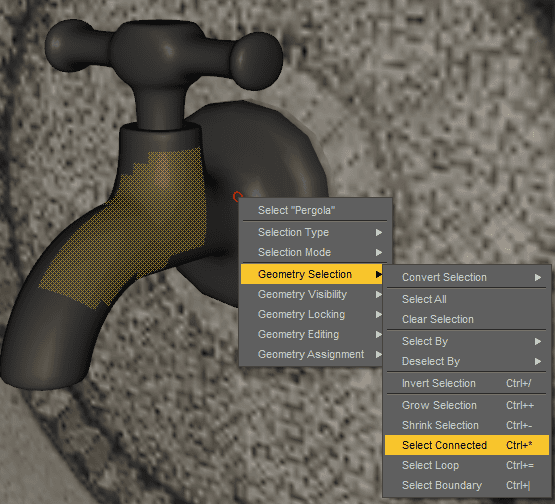
This option selects all the geometry that are connected here. Meaning that it will only stop at the location, where geometry abrupts and does not go further.
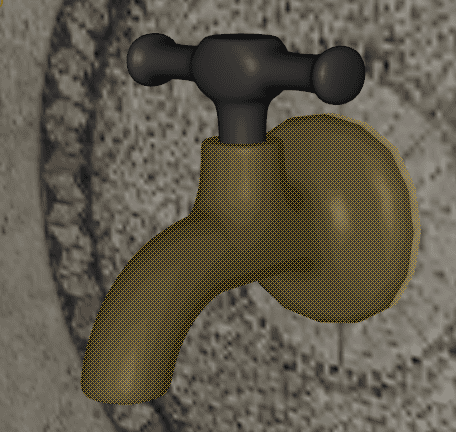
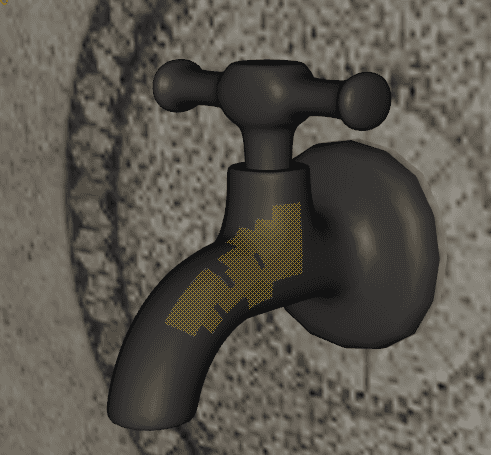
This is exactly what we needed. The tap is fully selected. Though the valve is still not selected. It seems that it is a separate object with independent geometry. But I still want it to be part of my separated object.
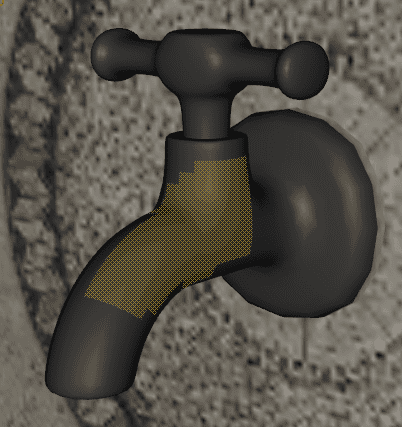
To add the valve to the selected geometry I need to hold [Ctrl] and select any of the faces on the valve. Then proceed to use “Geometry Selection”[Ctrl+*] and both the tap and the valve should be selected.
Separating Geometry
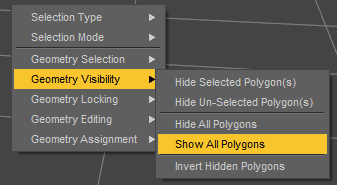
Now, when the object is fully selected is the time to finally separate it. For this we need to delete everything except the needed object. Firstly what we are going to do is to proceed to the “Geometry Visibility” and then “Hide Un-Selected Polygon(s)”
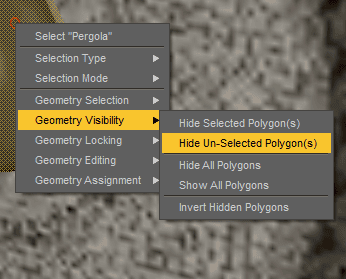
This will already separate our selected object from everything else. But for now it is just visual, because the Pergola is still there, we have just hidden it.

Now to extract it we need to delete everything except it. Sounds difficult, but it is done with the single button press. “Right click > Geometry Editing > Delete Hidden Polygon(s)”

You will be warned that you are about to delete all the polygons. Accept it and you should be done. Check if everything went right by clicking on the “Show All Polygons”.
If after that – nothing new appeared and you are still left with your single object – this means that everything went right and you can proceed.
Saving Separated Object
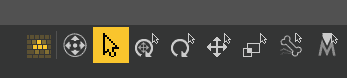
We are basically done. All that is left to do is to save our work, so it could be used later anytime. To do that, first of all you need to change to another tool. Regular “Node Selection” tool should be good. We just need to select the object and not its geometry.
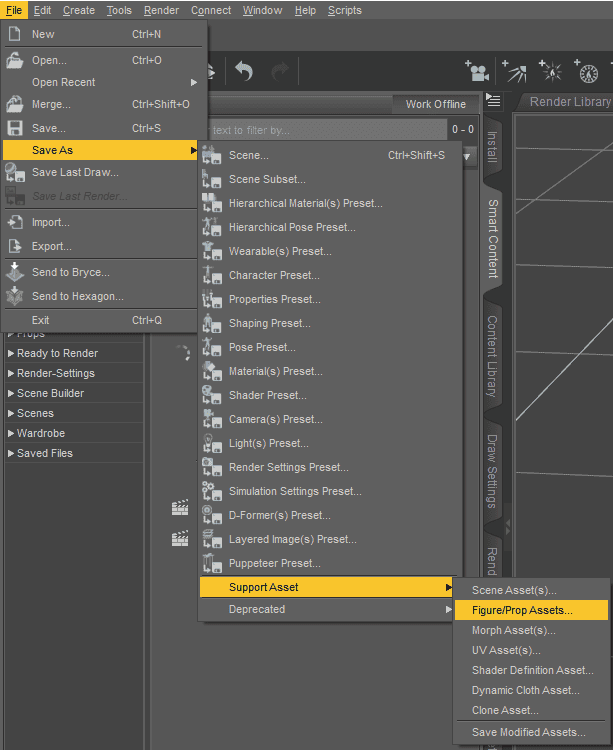
Then with the object selected proceed to the “File > Save As > Support Assets > Figure/Prop Assets…” as we are indeed saving a prop.
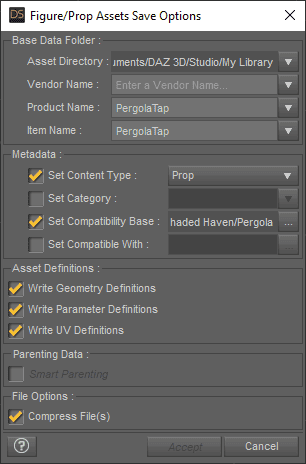
Leave the default file location and choose a name. A good name here would be something that indicates that this is a part of a bigger object and what exactly part it is. I am naming mine as “PergolaTap” because it is a Tap taken from the Pergola environment.
Then a new window appears. In this window match the “Product Name” with the “Item Name” and leave everything else as it is. Then press Accept.
And it is done. You now saved your object and can at any given moment add how many you want to any scene you want. This can be done in the “Content Library” tab along the “Daz Studio Formats > My Library > Figures” path if you did everything as explained above.
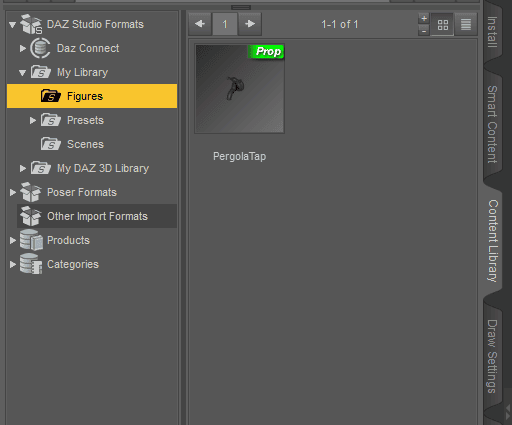
Now you can do with it anything you want. If you open a new scene and add it there – you will see that it is added as an absolutely independent object.
Conclusion Daz3D Extract Sub Parts of a Big Object to Reuse Inside a New Scene
Extracting parts of the big objects and environments seems like a really difficult thing. But in reality you can do this in a couple of minutes using all the tools that are available in the Daz Studio for free. Though it is important to remember that these products are not yours. Meaning that they still belong to those who made them and you can’t resell them. Read also our other Daz Tutorials and 3D Models Reviews.