This Blender to Daz3D Tutorial explains everything about how to create a Blender 3d Model and later import it into Daz Studio and configure a final render. If you are working across platforms such as Blender and Daz, you want to make sure how to handle correctly exporting and importing models. For such a case, we will go over a few recommendations and also show step by step how to successfully import your model from Blender to Daz Studio. If you are looking for the opposite direction have a look at our Daz3d to Blender Bridge Tutorial.
Getting Our Model Ready for Blender to Daz3D Import
For the purpose of this tutorial, I decided to download Bugatti Chiron 2017 Sports Car that you can also download for free.
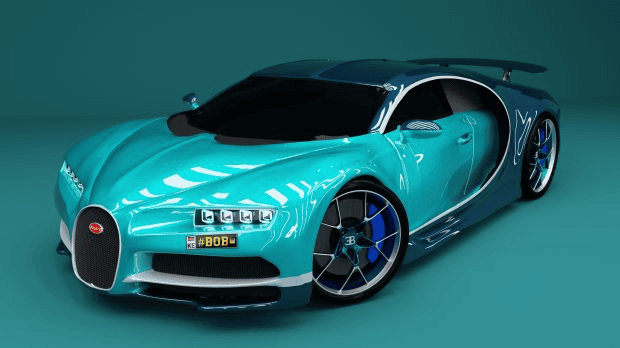
Bugatti Chiron 2017 by Kimzauto
As always, we want to locate our files easily so we will unzip the folder with content in a rather accessible location.
To start, I will open the.blend file in Blender. I will hide/remove unnecessary lighting and cameras since after migration they will not be exported. We will leave the car alone and already head to our final step within Blender.
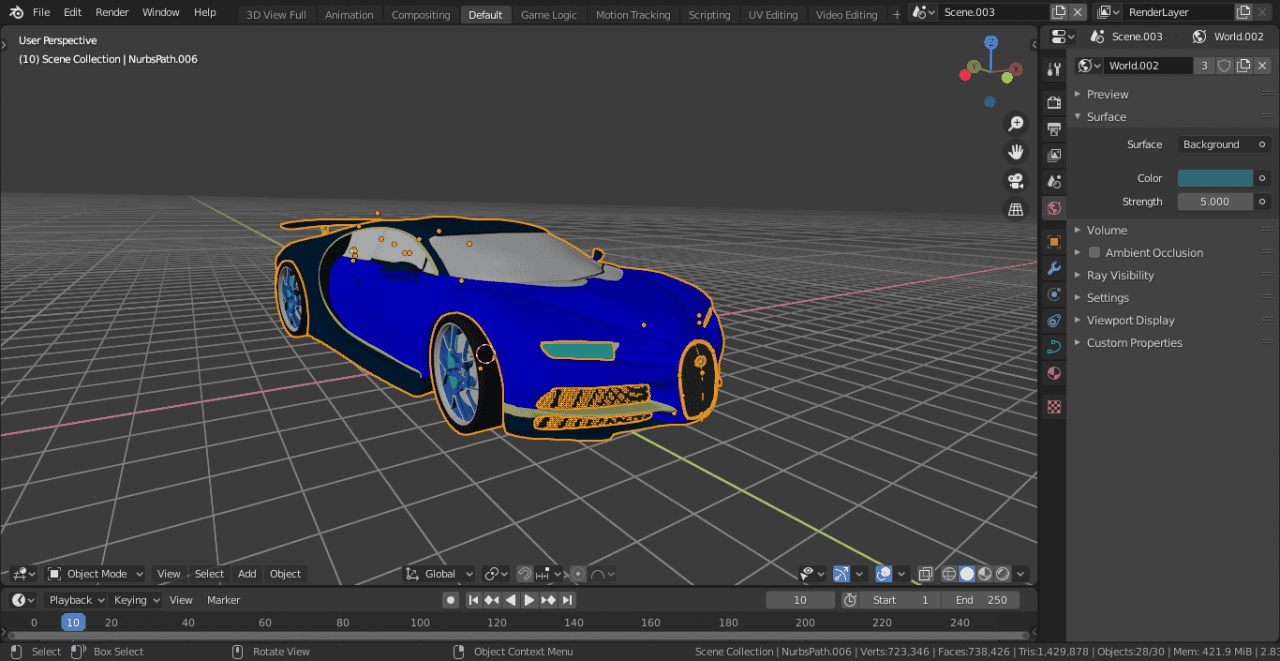
Press A to select all and go to File > Export > Wavefront (.obj)
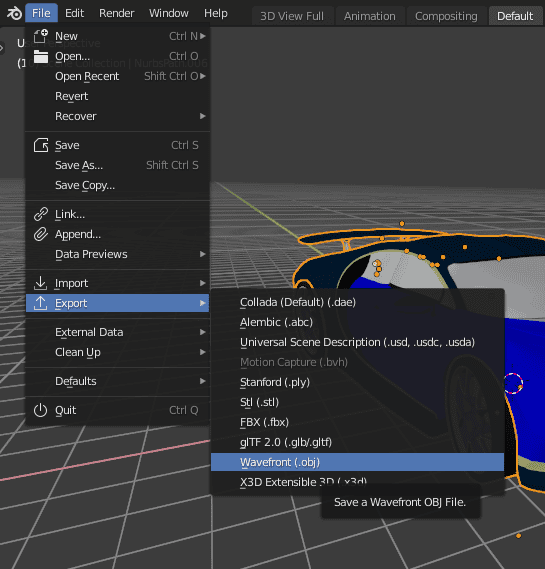
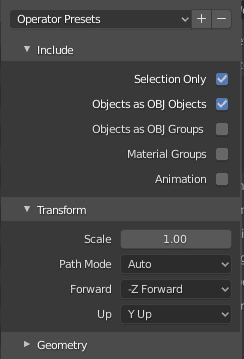
In the parameters panel, we will leave the presets as shown, only tick “Selection Only” in case we have multiple objects in the scene. Name your file and click on “Export OBJ”.
Recommendation:
For those who are exporting their own models, make sure to go over a few simple but always important steps.
- Check your model mesh: Make sure there is not any loose edge, face or vertex.
- Check the location, rotation and scale: In Object Mode > Ctrl + A and apply respectively to the model.
Importing Blender to Daz3D
We can now close our Blender file, save changes if needed. After that, we open Daz Studio and click on Import. Locate your file and click on “Open”.
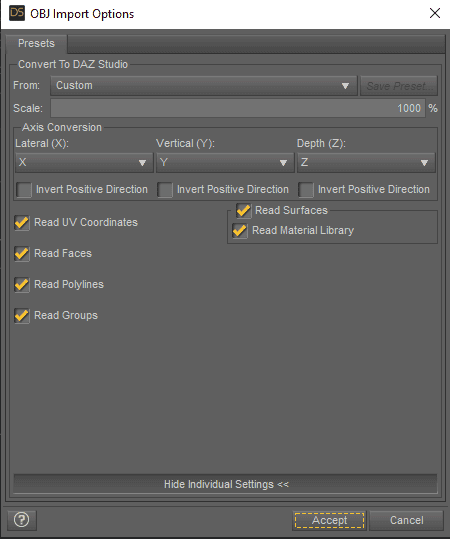
In the Import Options Panel, we want to make sure the scale is at 1000%, this is due to a difference in scale management between Blender and Daz, so we need to adjust. The rest can be left as default. Click on “Accept”. Our model is ready to use.
Reminder! Save your project
Applying Shader, Materials and Texture Maps
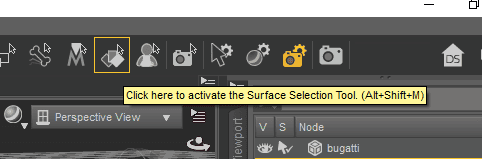
Before we start, we will activate the Surface Selection Tool. This will help us identify better each part of the object to edit its materials and shaders.
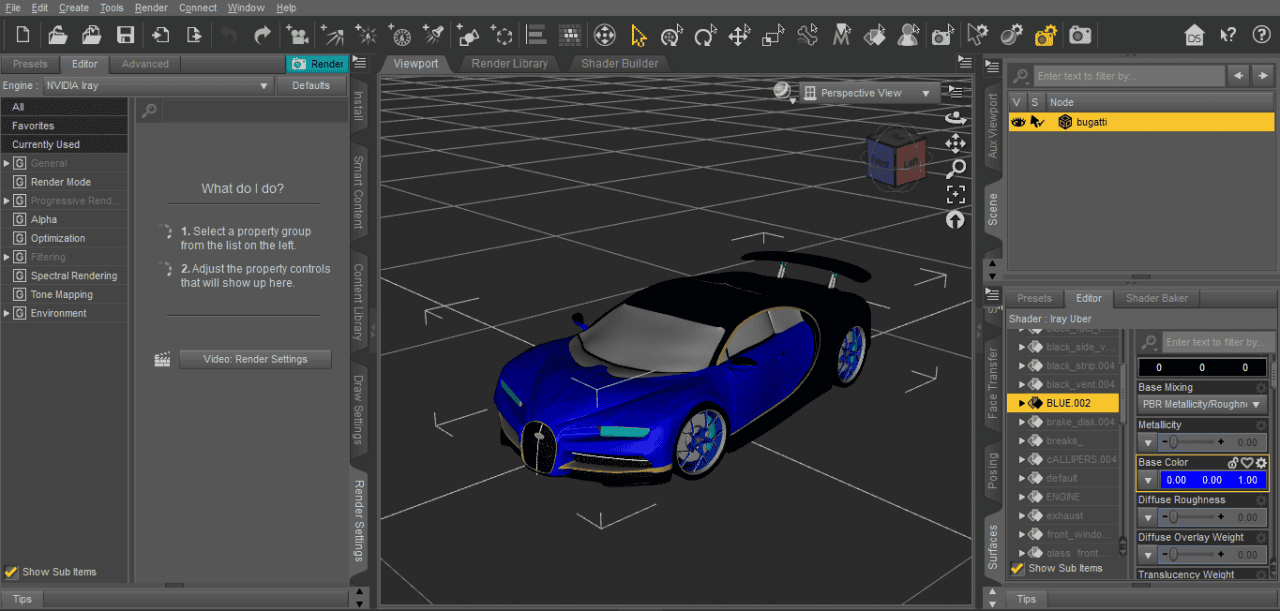
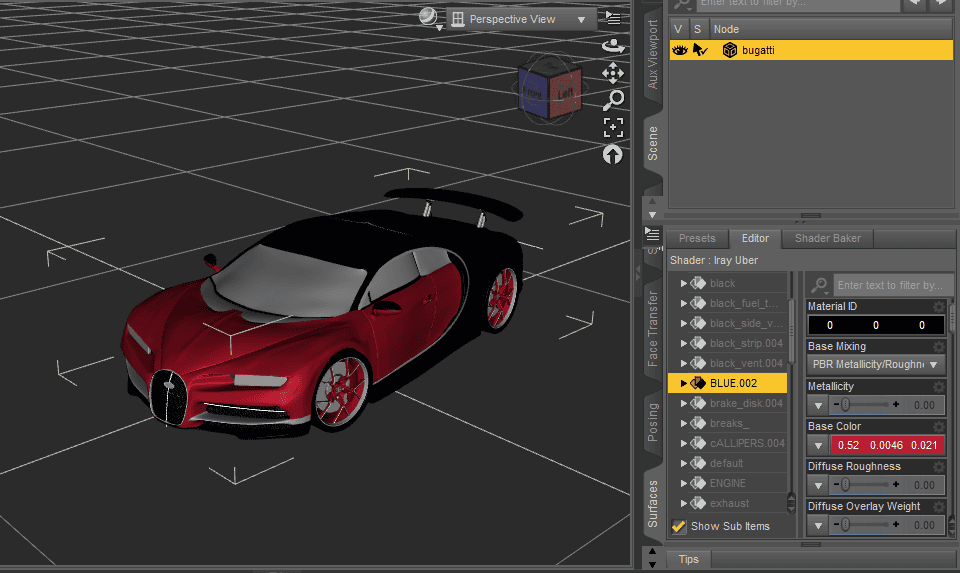
For the most fun part, we will change a few things in our scene. As you probably have noticed from the previous screenshot, I opened the Surface panel. We will click on the model, go to the Surface pane and click on the small arrow under our file name.
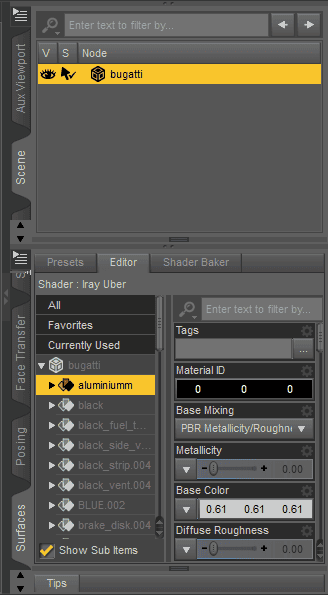
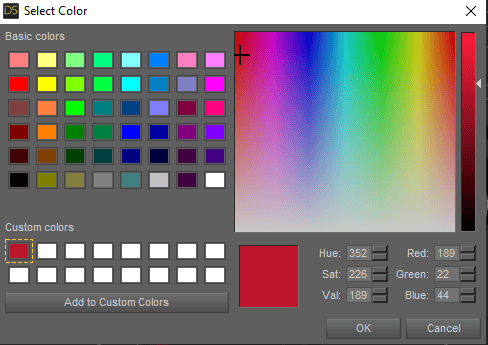
Here we can customize and edit every material applied to the model individually. I will change the color of the hood to a red one (R 189 G 22 B 44 Pantone Formula One). Identify the material and change the base color.
Remember always to save your color in case you will apply to different parts.
You can also apply texture maps previously baked in Blender as well, for more information you can check here to learn how to locate and link the files.
IRay Shaders
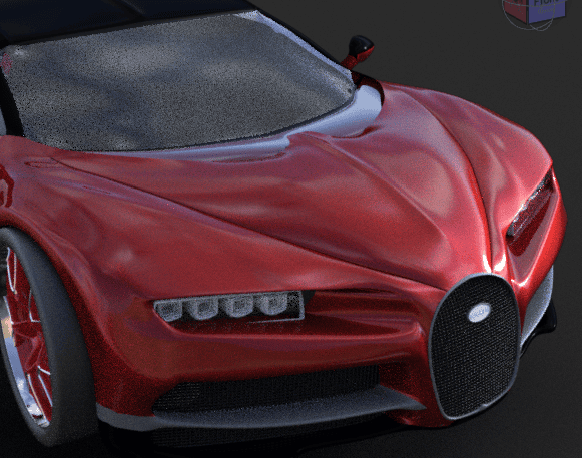
IRay Shaders are presets that come by default with Daz and help create realistic looking materials. For that reason, I will use them in my car to achieve more real metal and glass materials.
Select the car hood and go to Surface > Shaders > IRay > Car Paint > Car Paint – Cranberry and double click to apply. You can also go to the next tab “Editor” and continue customizing the material such as its base colors and its properties.

This is a sample of our shader applied, continue with each part.
Remember that you can always expand your library by purchasing a new set of shaders, take a look here.
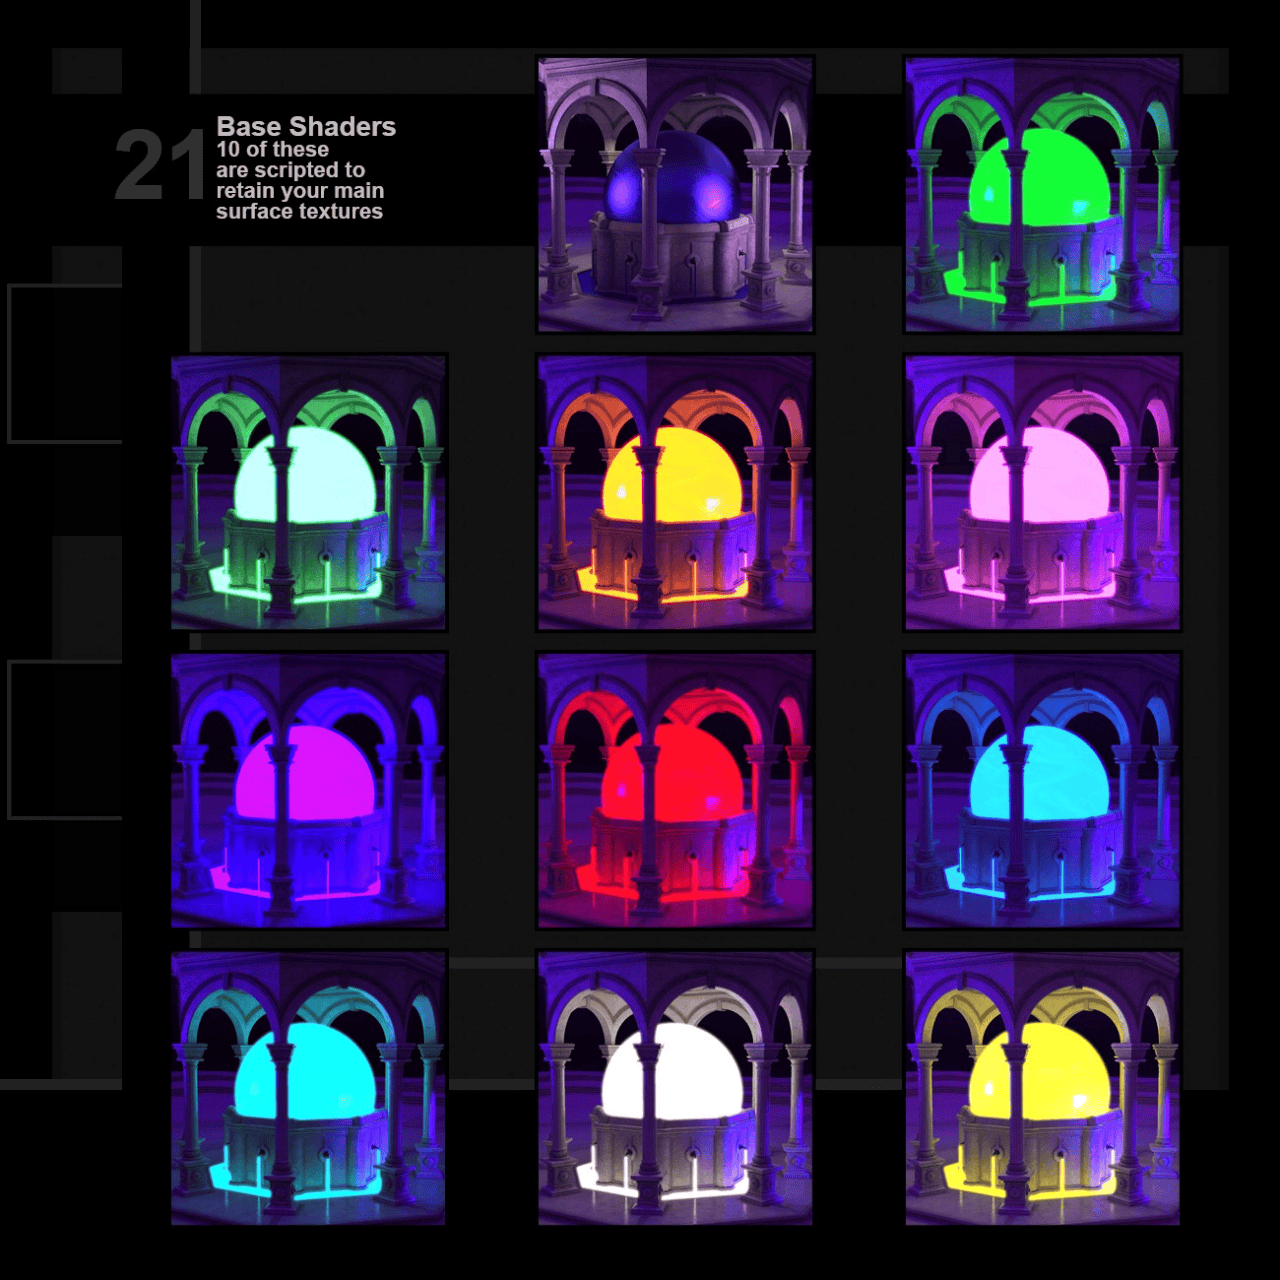
Ultraviolet Shaders, Lights, and Props by Marshian
Saving Your Asset as Props (.duf)
Now that we finished, we can save our model as a prop. Simply go to File > Save as > Support Asset > Figure/Prop Asset. Indicate your asset directory and leave other settings unchanged. Click “Accept”.
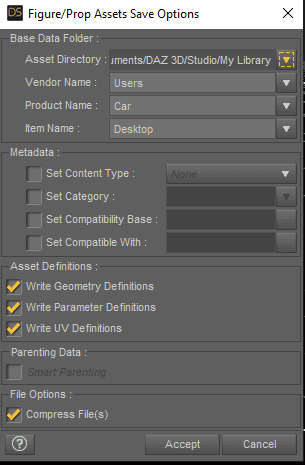
Your new prop is now available in your library.
Possible Issues and Problems
Exporting Multiple Objects
If you need to import multiple objects from Blender, you will have to do it separately. Always tick the option “Selection Only” when you export the .OBJ file.
Exporting Animations and Rigged Models
Daz Studio has little to none compatibility with FBX files although it accepts as a format to import. That is why it is highly recommended to work with static meshes when exporting files.
Before We Finish
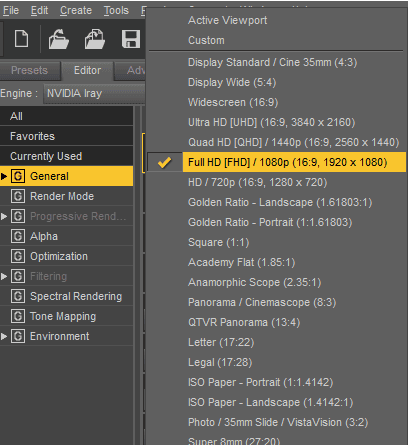
If you decide to render your scene, make sure to choose the right setting options from the Render Settings pane. In the General Tab, I picked Full HD resolution for my render, you can pick as desired.
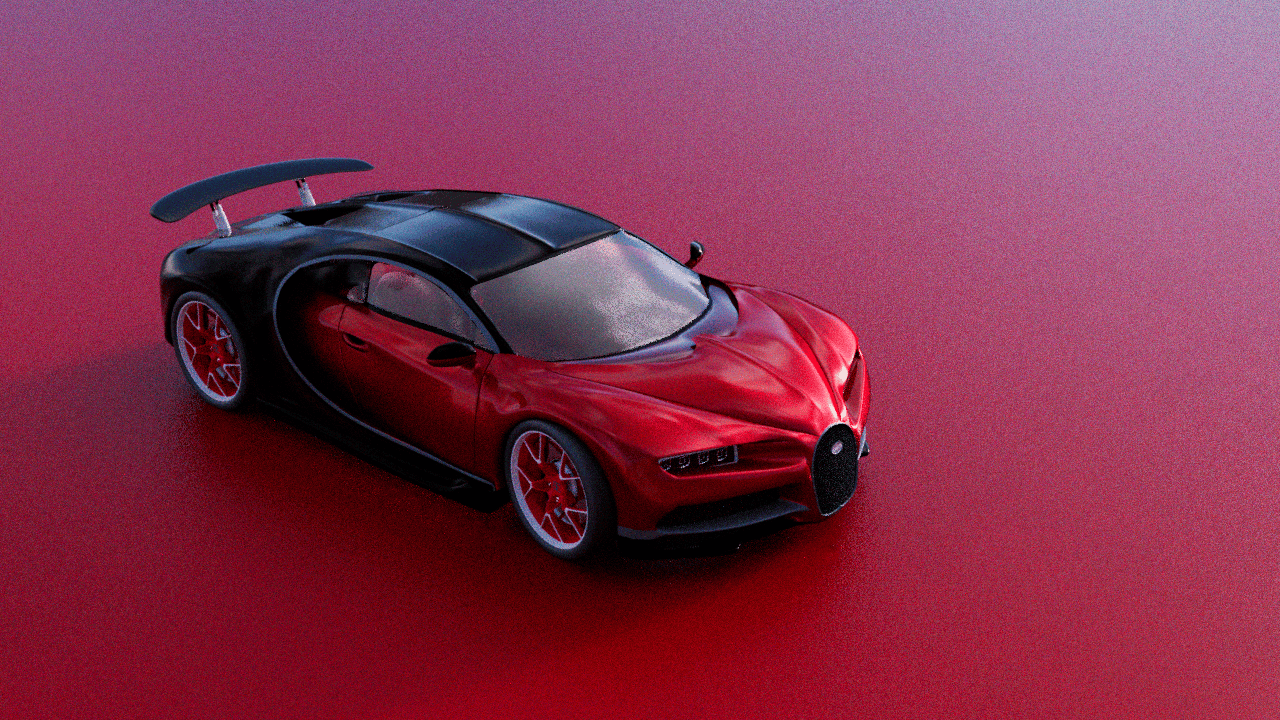
And here it is the final result:
Don’t forget to check out similar resources in the Daz Marketplace! Take a look here

Upper Class Car by Polish
Conclusion – Blender to Daz3D
This tutorial showed you how a Blender to Daz3D export can be done. For more tutorials see also our other Daz3d Tutorials and Blender Tutorials.