This Blender Object Constraints Tutorial explains how to constraint objects for example to either stay independent or move with other objects.
When you are creating a big scene, especially a large animated one – it may be very useful to constraint some objects. So they won’t leave their place, be always the same size, or be connected to some other object. Especially useful with animations, because it can make animation easier. Objects won’t go over the limits you set for them and so on. So how one can use this useful function of Blender?
How to Use Blender Object Constraints
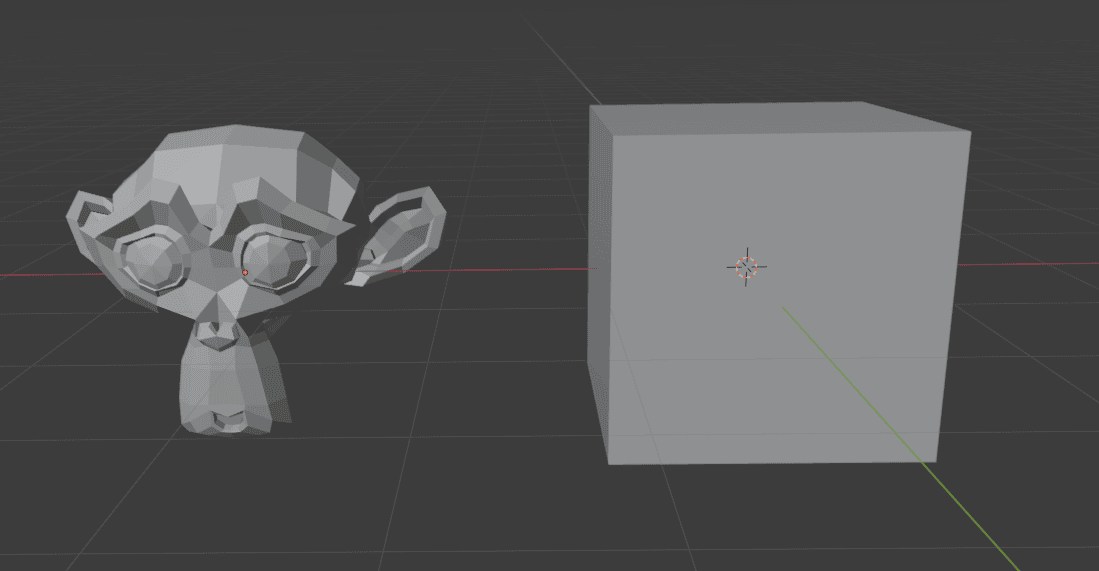
First of all, you need an object or even multiple. So I have added some simple objects to the scene, that I am going to work with.
And with any mesh selected, you can go to the Properties Editor, Object Constraint Properties tab. And here you can open a drop-down list with all the constraints available.

Let’s look at what can we do with these constraints and how do they work. Notice how all constraints are divided into four main categories.
Motion tracking Constraints
The first category is called Motion Tracking and it includes only three types of constraint. It is fully dedicated to bringing real-life footage into Blender to mess with it. Maybe to add more objects, some details, or anything else. It is a very big topic that we can’t put into this article because it needs a lot more explanation and preparation.
The Blender Foundation has released a video that shows how Motion Tracking works. Here you can see how a human was tracked and then different makeup was added to them digitally in Blender.
From Digital makeup test by Blender
So these three types of constraints will help you to bring objects and cameras from the real-life tracked video into Blender.
Transform Constraints
Next is the Transform section. This one as comes from its name, constraints different ways of transformation. For example, I can make Suzanne Copy the Location of the Cube on the Z-axis. Below you can see that the Cube is moved both on the Z and Y axis and that Suzanne is on the same level of the Z-axis. I have not moved the monkey, it just copied the Z location of the Cube.
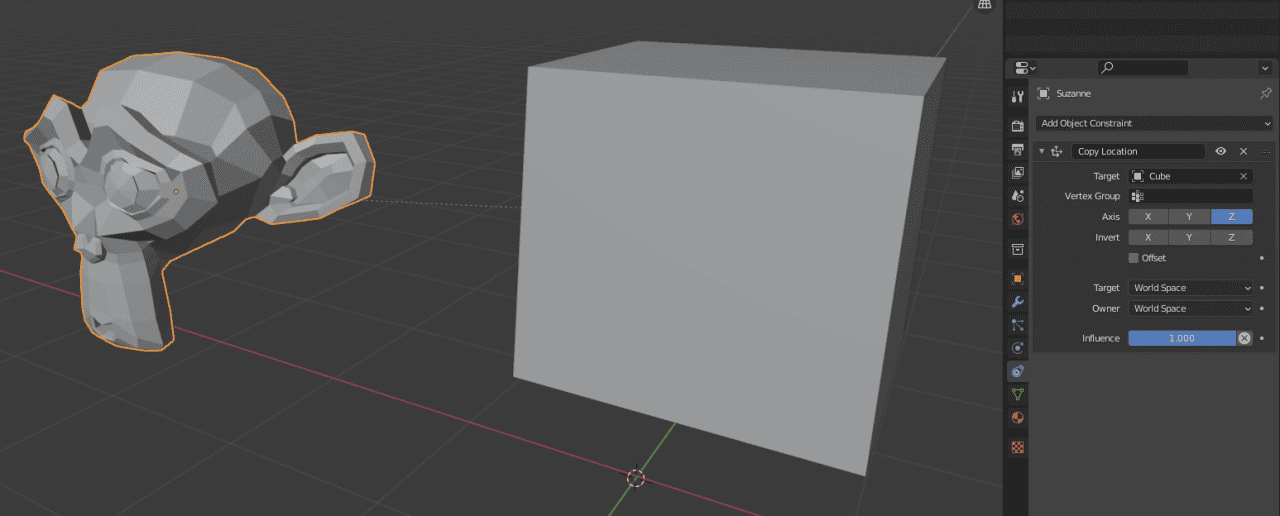
Copy Location
You can also invert and offset these transforms. All this is true for all kinds of transforms available here: Copy Location, Copy Rotation, Copy Scale, and Copy Transforms, which copies all kinds of transforms at the same time.

Copy Rotation
Next are the Limit Constraints. These constraints will limit changes done to the object in some scenarios. For example, on the screenshot below I have limited Suzannes Distance from the Cube and its scale.
This means that I cannot move Suzanne further than 4 meters away from the Cube. It is just impossible if I don’t change the Constraint. At the same time, I can’t make Suzanne smaller at all. And it is locked to be a maximum twice as big as how she is now, not bigger.
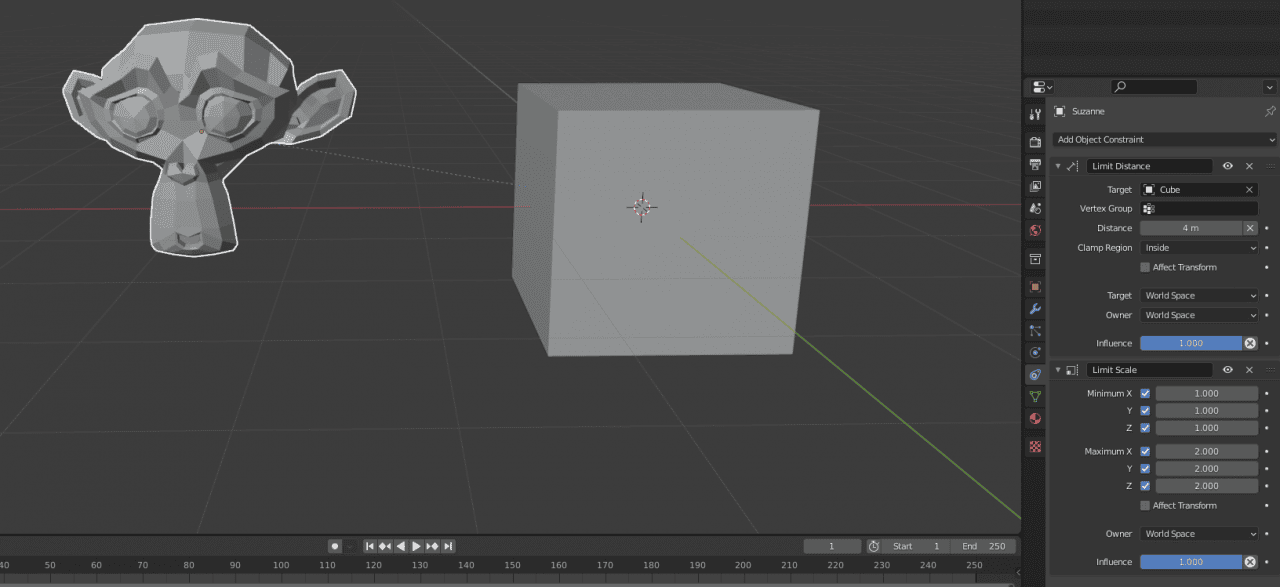
Limit Distance and Limit Scale
Maintain Volume constraints the volume of the object to a ratio that you can specify. Can be very similar to transforming an object only on a single axis.
Transformation Constraint is a much more advanced type of constraint than the previous ones, which basically combines most of the types. It allows you to map values from a single type of transformation from one object into another object. The main trick here is that you can even take values from one transform, such as location, and map them into another type of transform, like rotation.
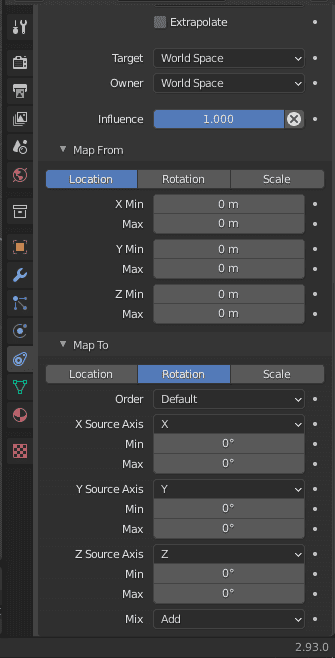
Transformation Constraint
And the last one here – the Transform Cache is very specific. It is only useful when importing an Alembic file. And it should stream animations from Alembic into Blender.
Tracking Constraints
The tracking section is made to make objects track other objects. These constraints can be especially useful for working with cameras.
The first kind of tracking is Clamp To. This one is designed to work with the Curves. So you constraint you object to a curve and it can only move along this curve.

Clamp to
Damped Track constraint may seem like the one that you would want to use when you want one object tracking another, as it rotates the first object to always looking at the second.
In reality, it is a bit more confusing than that and is usually used on bones and not on objects. The problem that you can meet with this one is that the first object can rotate upside down to track another object, which is not ideal.
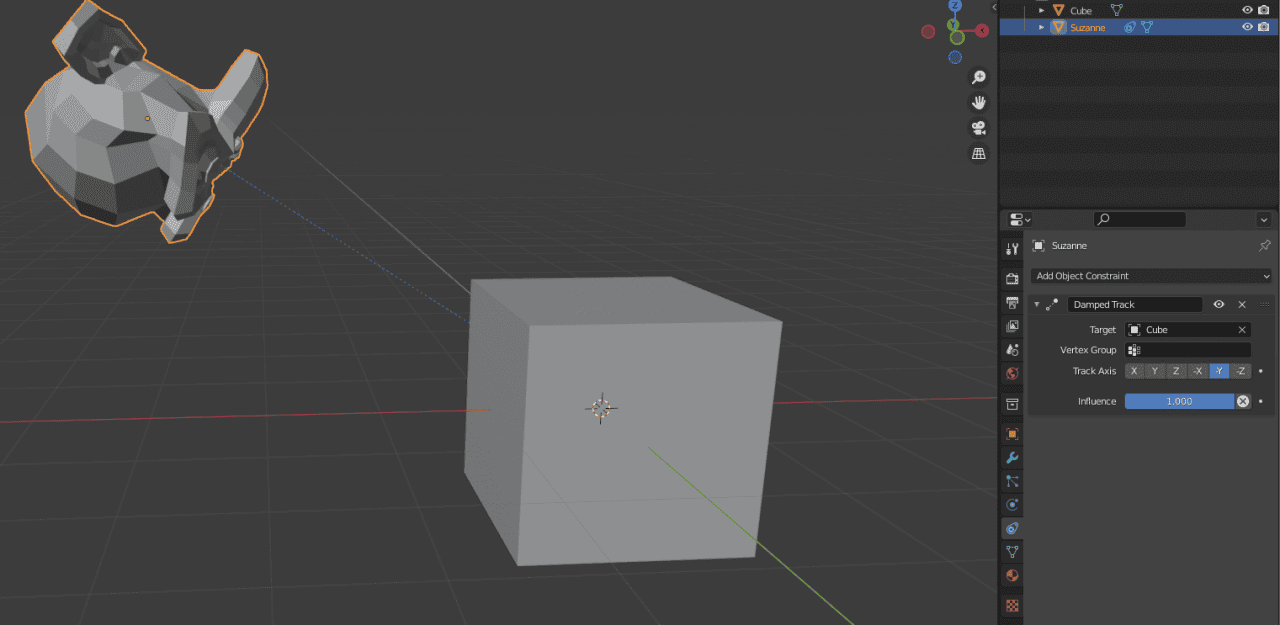
Damped Track
Locked Track will rotate an object to track another object but uses only two out of three axes. So here you can see that Suzanne rotated towards the cube on all axes except X, because it is the locked one.
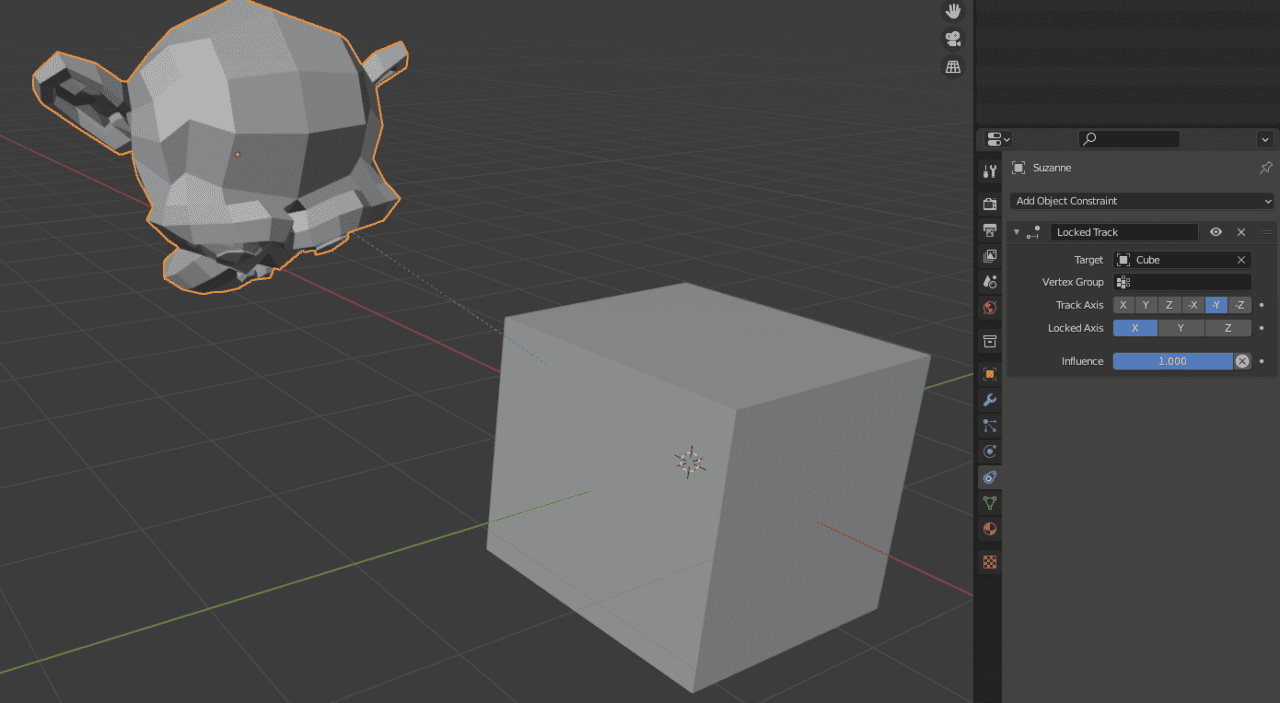
Locked Track
Stretch To is very interesting. Instead of just changing the rotation of the first object, it also changes the scale. The object will be stretched towards the other object that is being tracked.

Stretch To
Finally, the Track To option. It is the main option that you want to use when simply tracking an object. It is very similar to the Damped Track, but because you set the Up direction here, the object will not rotate upside down and instead will always look up.
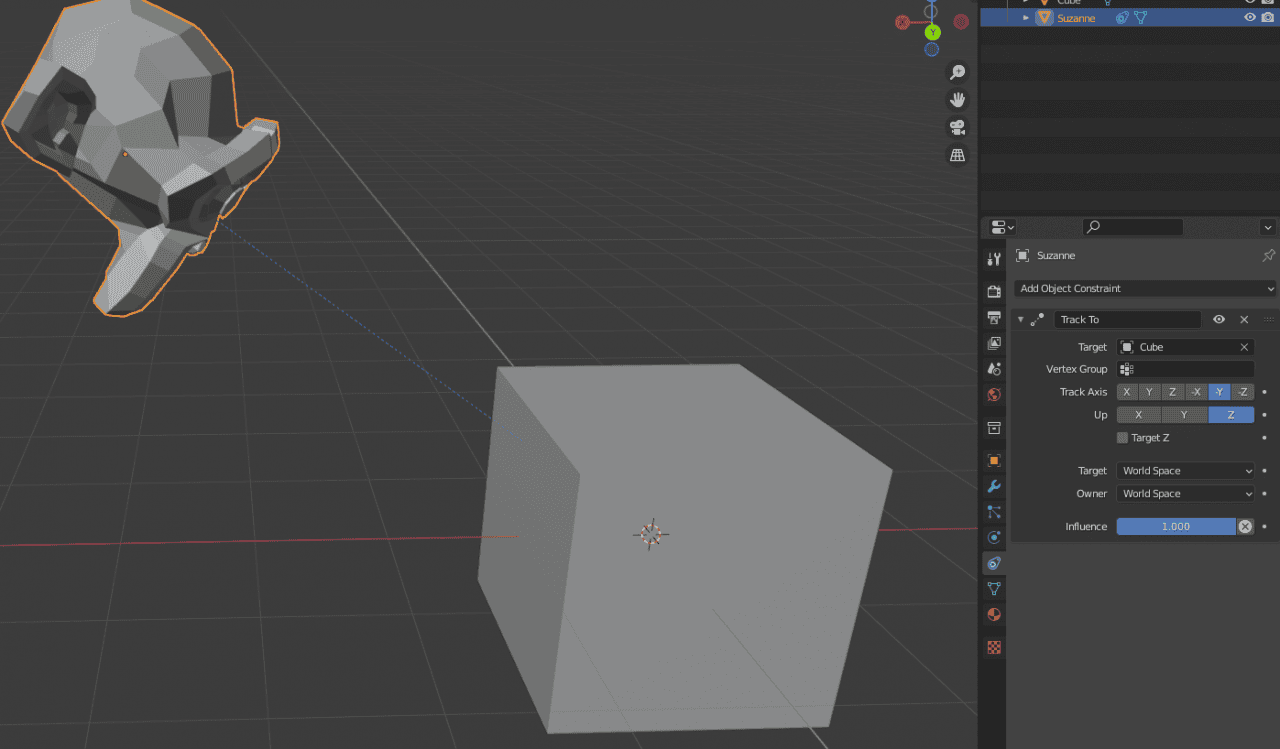
Track To
Using the Track To – you can easily point your camera towards an object. Besides, while animating, it can automatically animate your cameras or other objects to follow the moving mesh.
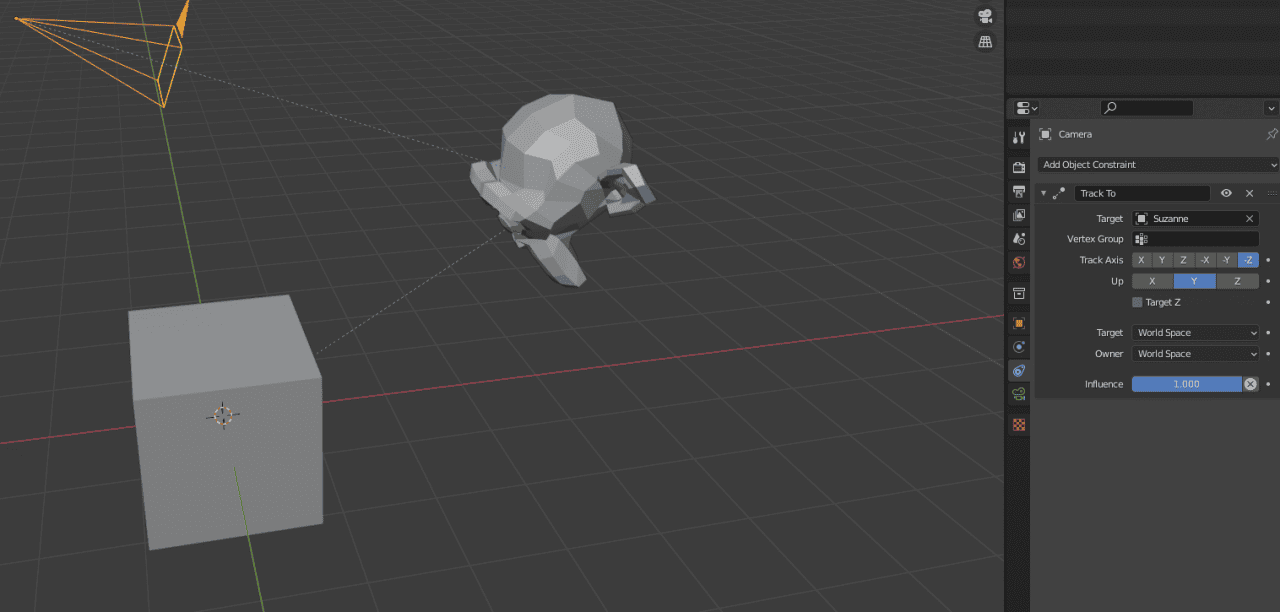
Using Track To to make the camera follow an object
Relationship Constraints
Relationship Constraints create a relationship between objects. For example, Action Constraint will trigger an animation of the second object, if the first object starts transforming. Even if animation for the second object is supposed to be later on the timeline.
Child Of constraint will parent two objects together. So when you transform a child object only it is affected, but when you move a parent object – it affects both the parent and child objects.

Child Of
Armature Constraint is very similar to the Child of, but it is applied to the armatures. So it is a tool to parent two separate armatures together.
Floor Constraint is a very interesting and useful one. It will make it so that the first object could not intersect with the second one. So it would create a feeling of the first object lying on the floor without the need to manually place it.

Floor Constraint
Follow Path is very similar to the Clamp To constraint. It also makes your object follow the path of the Bezier Curve. The main difference is that it will not be locked to move on this curve, it will just follow the same path when animating.
Pivot Constrain allows you to use the second object as the pivot point of the first one. On the screenshot, you can see that monkey rotates around the Cube, instead of its pivot point, because of this constraint.
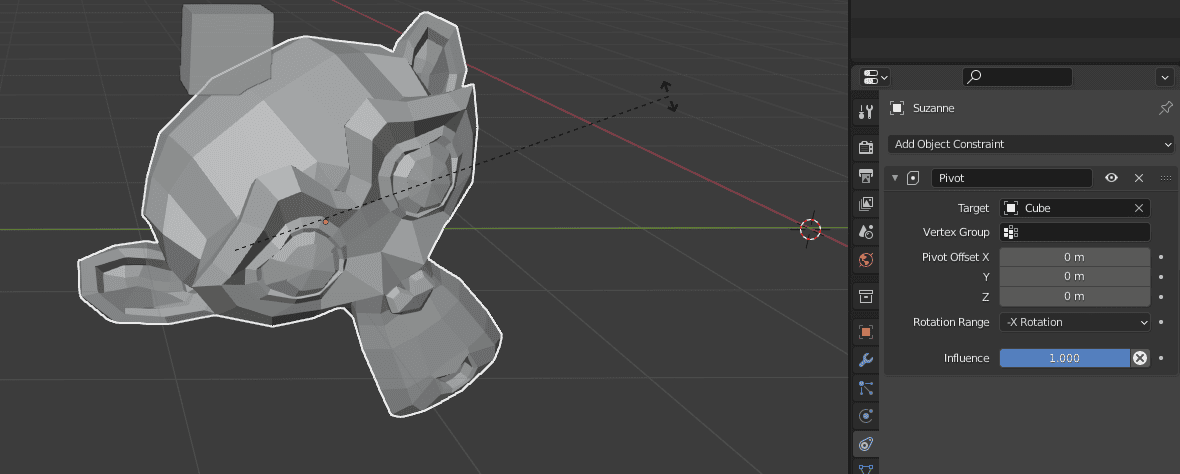
Pivot Constraint
Last but not least is the Shrinkwrap Constraint. This one is similar to the Floor constraint that we already used. But the main difference here is that the Floor constraint only works well on flat surfaces, as it uses the pivot point to decide where is the floor. But Shrinkwrap uses actual geometry for that, so if you have uneven ground – it should be useful.
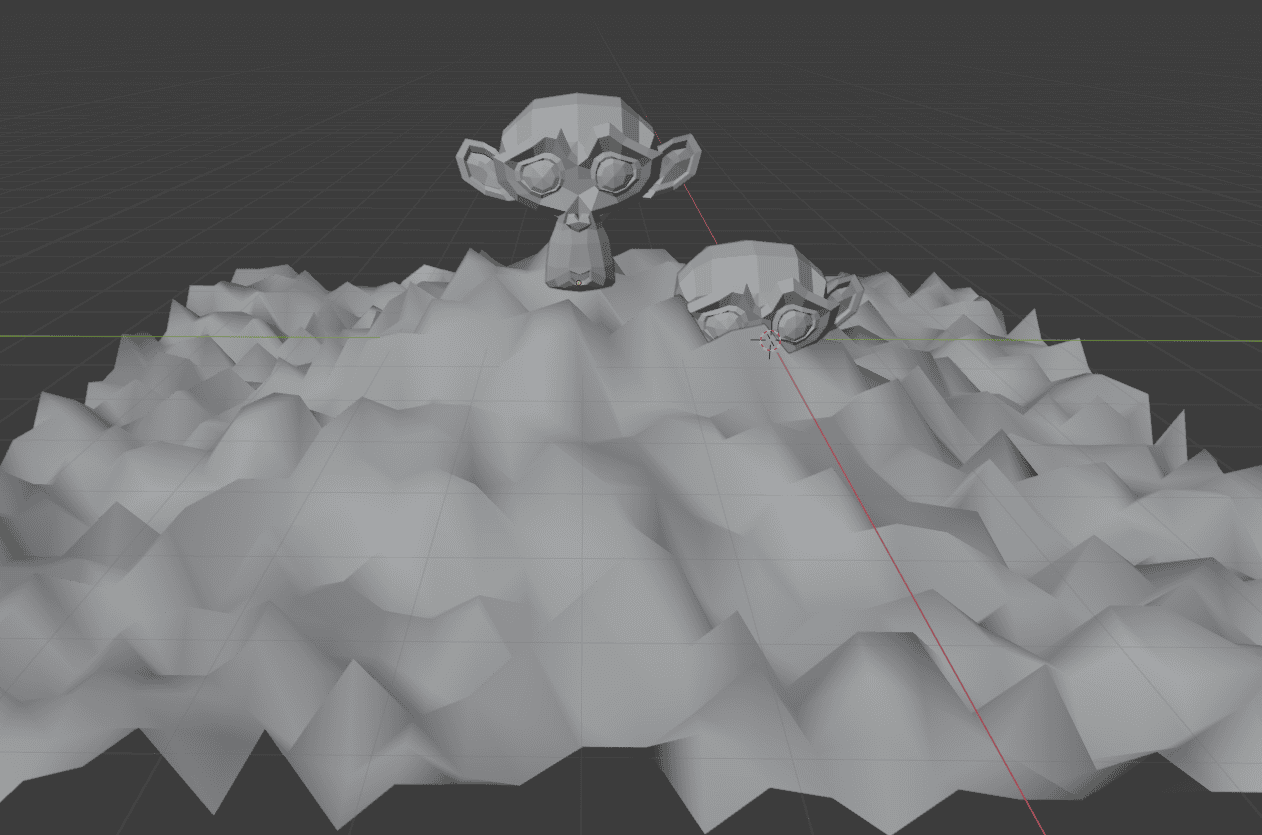
Shrinkwrap(left) and Floor(right) constraints on Suzanne
Conclusion – Blender Object Constraints
There are a lot of Blender Object Constraints available. Hope that this article helped you to learn more about them and it will make your experience with Blender better. On this website, you can find a lot more Blender tutorials like this one. Including the Blender Basics Tutorial.