This Blender Subdivision Surface Modifier Tutorial explains how to apply more details to your 3D models step by step. Subdivision is an easy way to add more geometry and details to your objects. This tool is widely used in 3D modeling of mane kinds. Especially you can find it useful when working with high-poly and even realistic scenes. Today we are looking at the SubSurf Modifier in Blender v2.92. It also should work with newer and older versions too.
What is Subdivision?
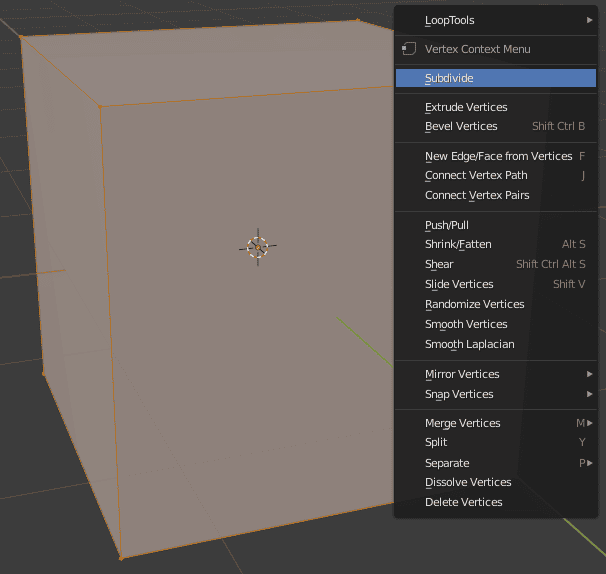
Subdivision lets you increase the geometry count of any object, so it can be used later. The simplest way to use subdivision is to select an object and go into the Edit mode. Then right-click on the object and select Subdivide.
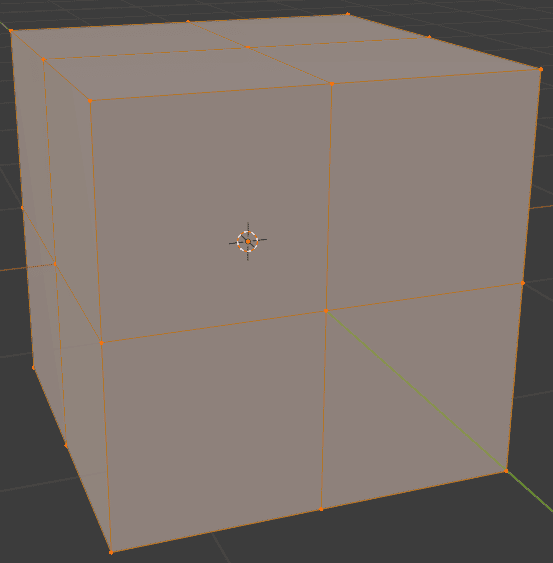
Right away you should see the change in the object – new geometry in the form of edge loops should appear.
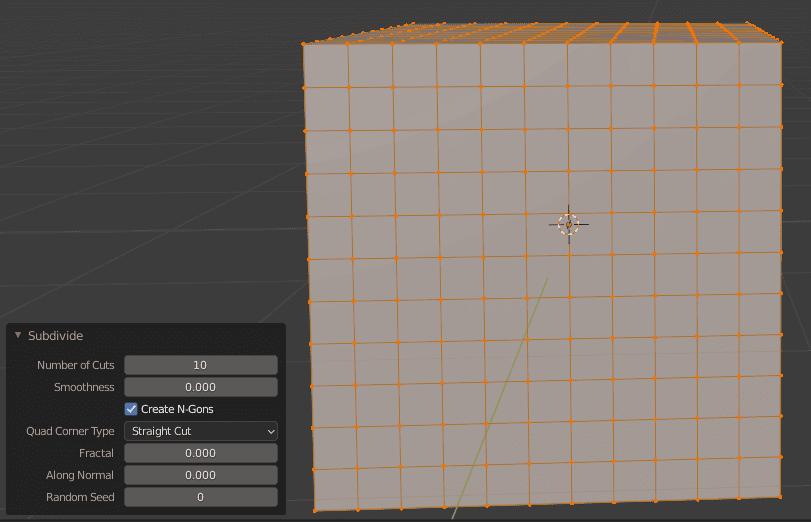
And you can also use the menu on the bottom left of the viewport to control the Subdivide function. Increase the number of cuts, their smoothness, and more here.
Just like this, you can add more geometry to the object. Now we can use all these new vertices to create something out of them.
Blender Subdivision Surface Modifier
Regular subdivision is good, but the main thing that we are going to talk about today is Subdivision Surface Modifier. As with any other modifier – it can be found in the Modifier Properties of the Properties Editor.
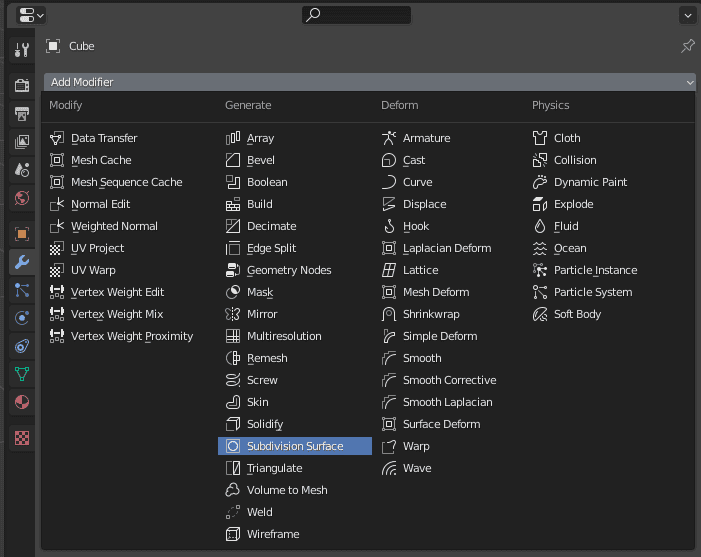
This modifier is supposed to subdivide the whole object and thus make it much smoother. Subdivision Surface is also called SubSurf modifier for short. Adding it to the default cube looks like this:
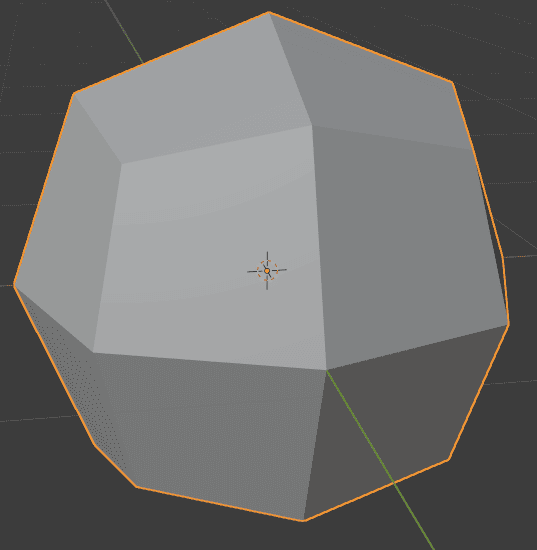
It definitely became smooth, but because of this it was distorted and does not even look like a cube any more. Let’s see if we can do something with this using the appeared modifier settings in the Properties Editor.
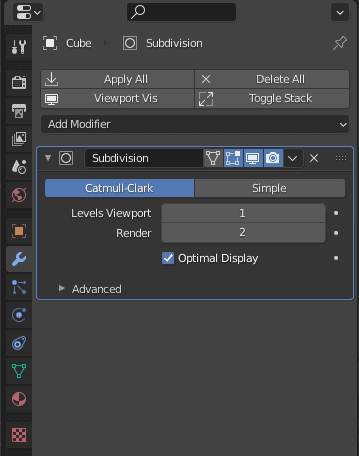
Blender Subdivision Levels
The Levels Viewport and Render control how much subdivision does the modifier add. Higher numbers mean that it will be even more smoothed out. Here is how our “cube” looks with higher levels:
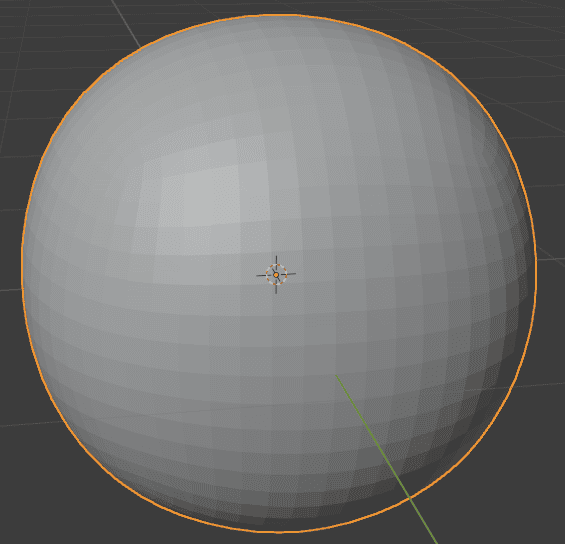
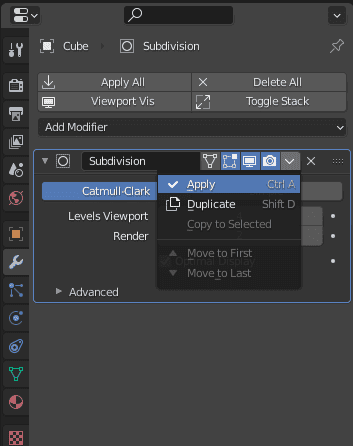
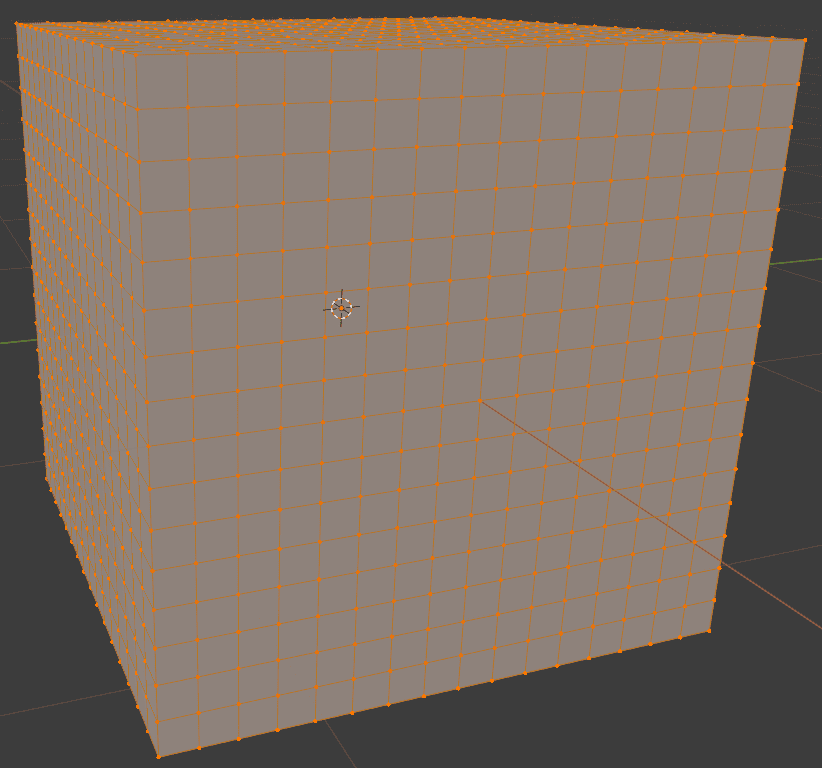
It is even less of a cube now, it is practically a sphere already. But if we apply the Subdivision modifier – we can see how exactly did geometry change. To do this – click on the arrow in the modifier settings and then “Apply”.
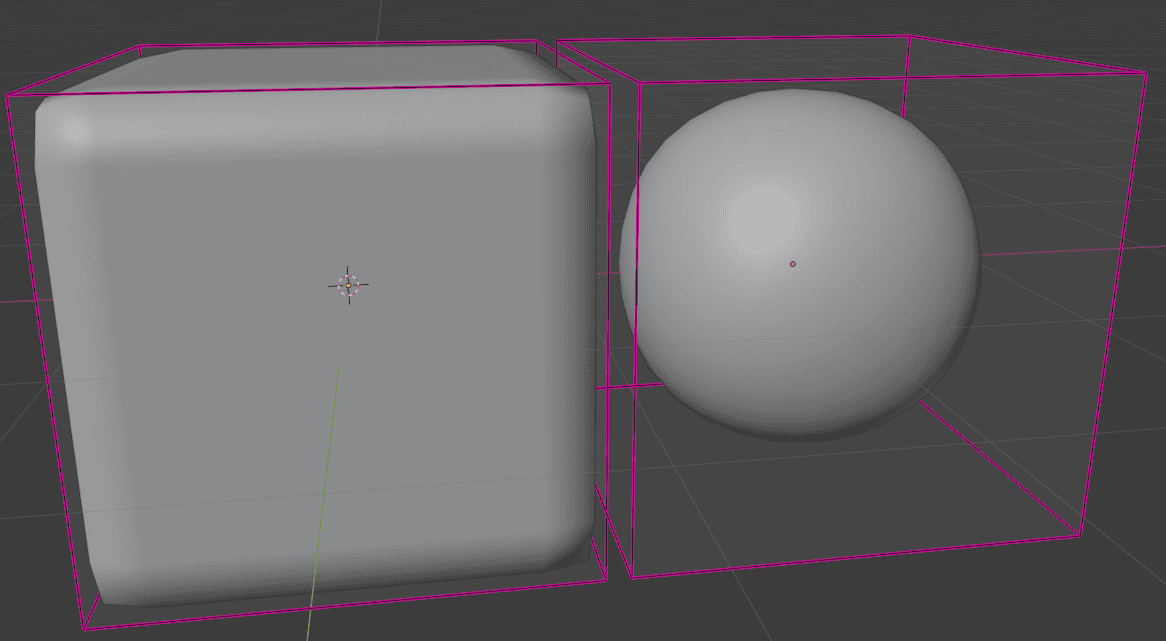
After that, we can go into the Edit Mode and look at the geometry. I have added a proper sphere object on the right, so we could compare them one to another.
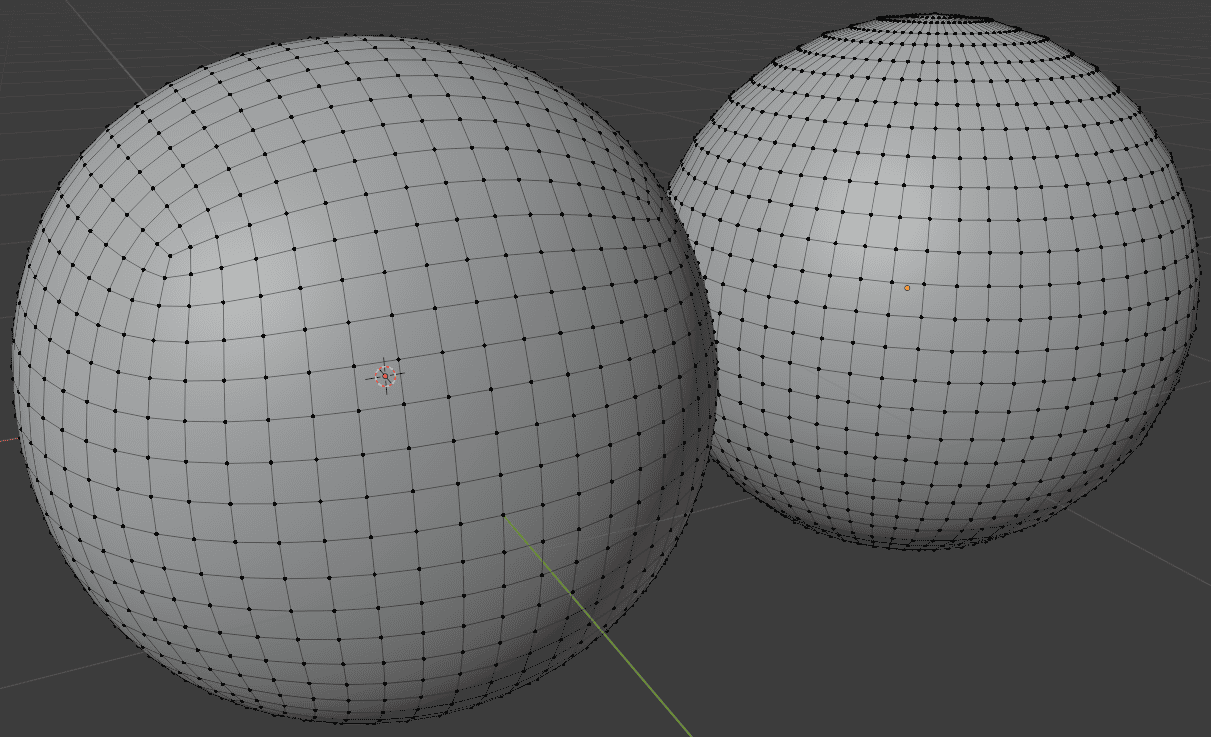
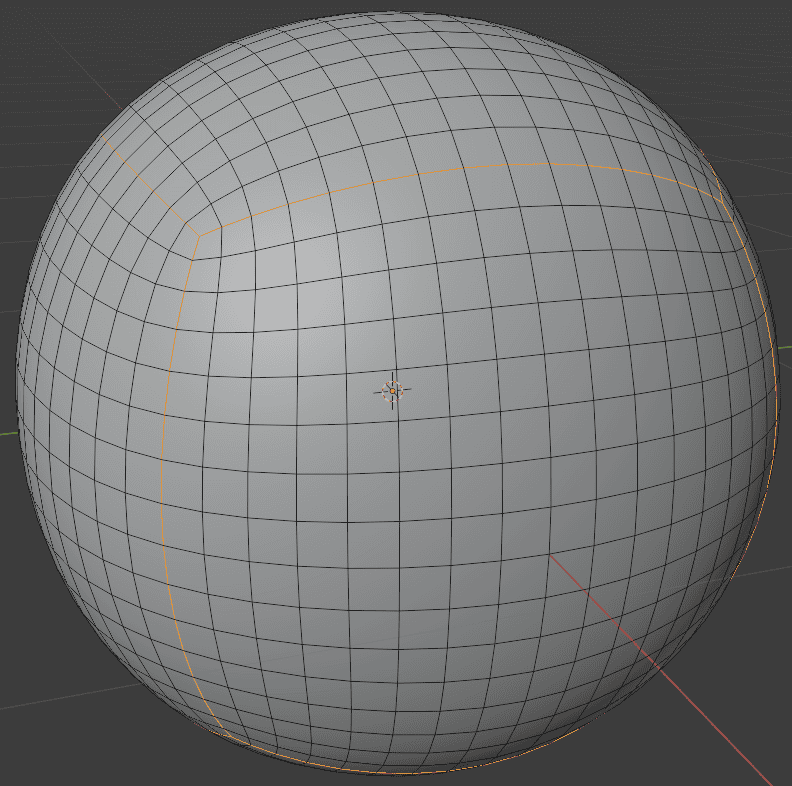
It is seen that they are very different, but it can’t be said that any of them are superior. Some people prefer to subdivide a cube a bunch of times to use it as a sphere. But the geometry is a bit uneven after doing it like this. Some places have more vertices, while others have less. These clusters are where original cube vertices have been. In fact, the original cube is still there. We can easily prove that by selecting original edges and see that they are there.
Subdivision Type
Returning to the settings and what could we do to make it better. Changing levels definitely was not the right move as it made things worse. Another thing that we can try is to change the Type of Subdivision. By default, it is set to Catmull-Clark and we can change it to only one another option – Simple.

Doing this changes the scene drastically. The cube is back and it looks exactly the same as it did before adding any modifiers to it.
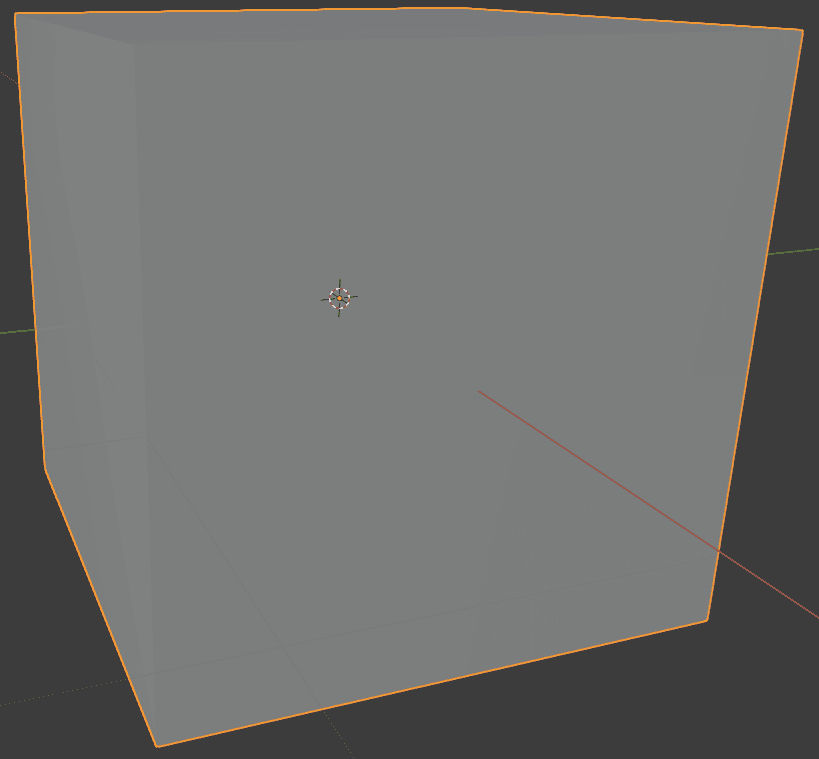
Though after applying the modifier it appears that it is not the same and has been subdivided.
The changes just not so drastic, the cube did not get smoothed out. Additional geometry just was added on top. In other words, a Simple type of SubSurf modifier is the same thing as manually subdividing an object. Just like we did at the beginning of the article.
How to Properly Use Blender Subdivision Surface Modifier
After the previous examples, you may think that the Subdivision Surface is not that great. After all, it distorted the cube and it became a sphere. Alternatively, we could use a simple subdivide, but this variant did not smooth the cube at all.
Worry not, because SubSurf is a much better modifier than it seems. It just requires some knowledge to properly handle it and use it on the right objects. Just look at the Suzanne monkey before and after applying Subdivision Surface to it. No additional changes made.
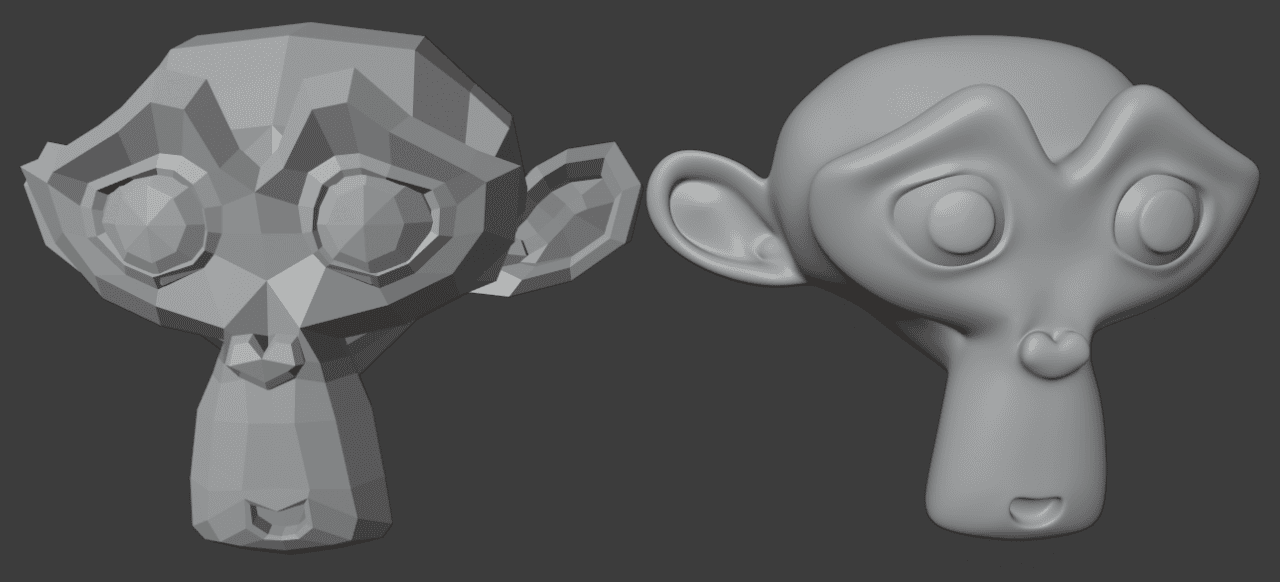
So some objects just work with the modifier flawlessly, while other examples don’t. But if we know how – we can work on the objects that can’t and fix the problems.
Ways to Fix Distorted Object
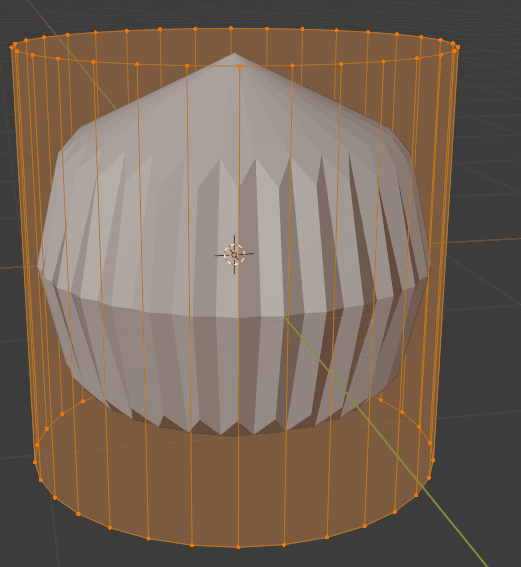
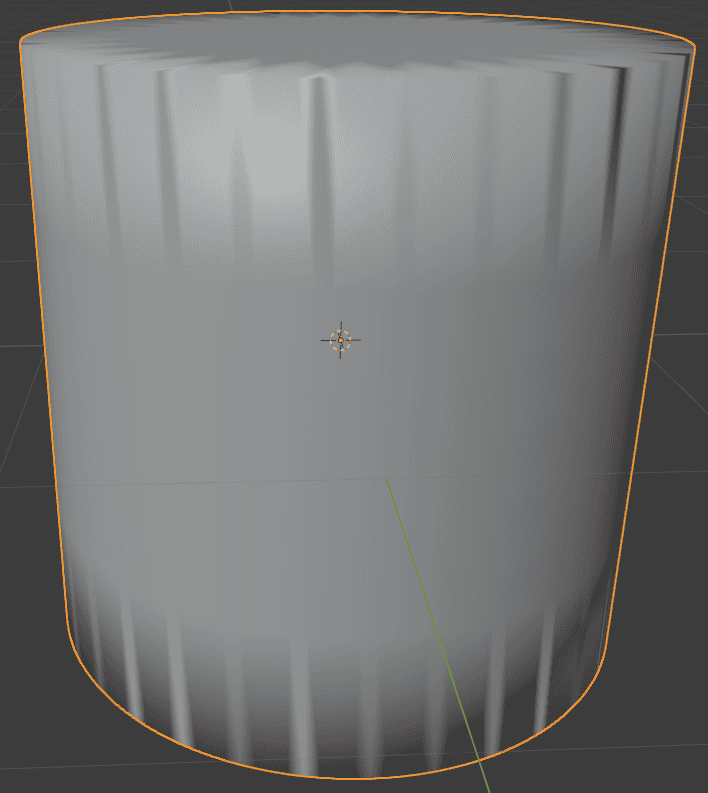
As an example – I have added a regular cylinder mesh to the scene and applied the Subsurface Modifier to it. This made the object really smoothed and distorted. We will look at what can be done to fix this problem and improve the mesh.
To fix this problem, we will change the geometry of the object a bit to “tighten” it, because it gets too smoothed out. There are multiple ways of doing so, but this does not mean that all of them work in every situation. It all depends on your scene, some will work in one situation, other methods will in another situation.
Loop Cuts
Probably the most famous and used method of tightening the geometry is adding loop cuts. This can be done in the Edge menu > Loop Cut and Slide.
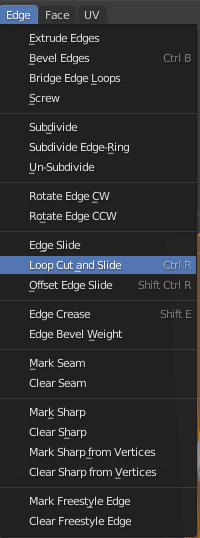
Alternatively, you can use the [Ctrl+R] keyboard shortcut. Add a loop-cut to the side of the object that you want to tighten and then move it very close to the already existing edge loop. You should see geometry changing in real-time.
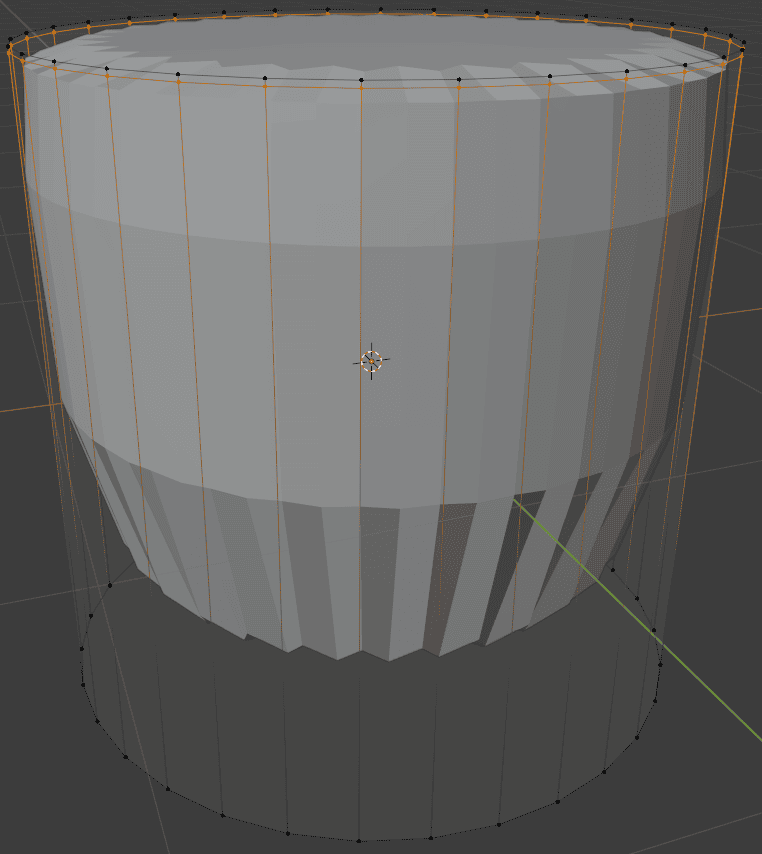
Though be careful not to overlap the added edge loop with the existing one. After that, I have done the same thing with the bottom part of the object
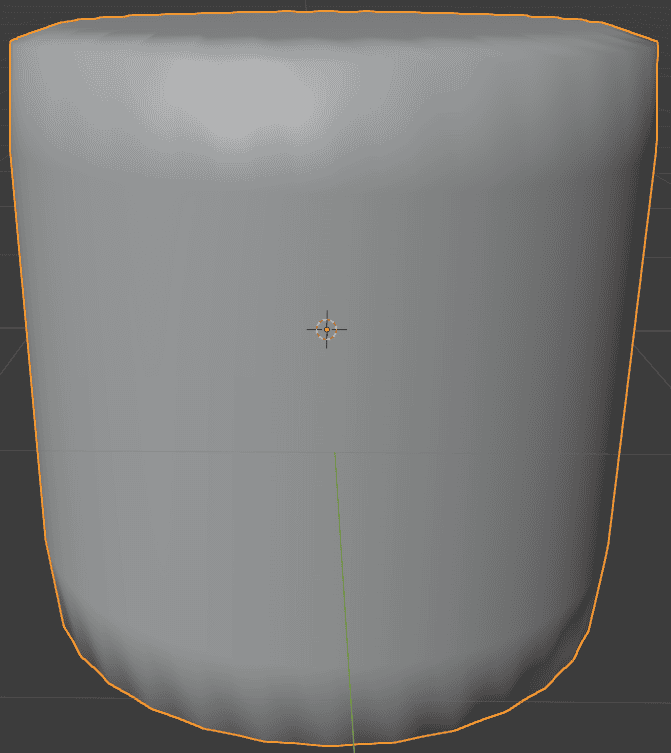
It already looks a lot better, but still not ideal. Seems that loop cuts are not the best variant for the cylinder object. Resetting everything and going to the next method.
Bevels
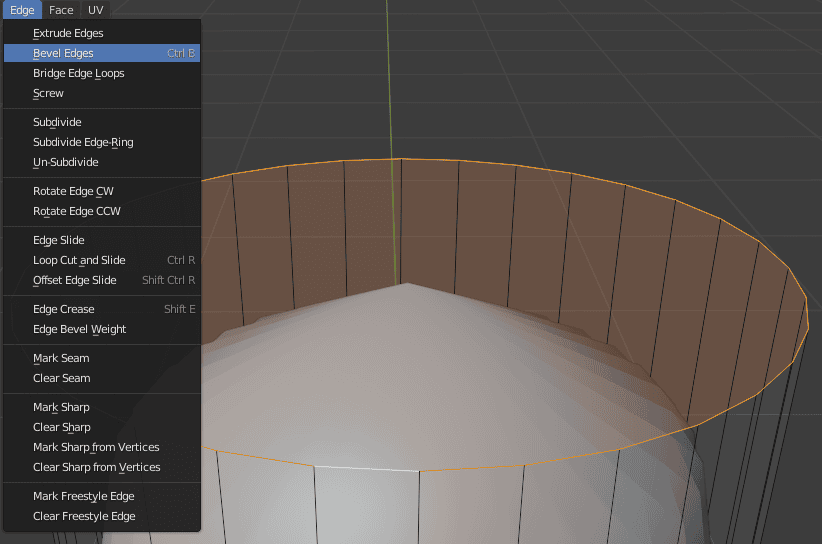
Adding bevels to an edge is very similar to adding loop cuts on both sides of it. But this method is a bit more convenient, than using two loop cuts. Though can’t be used if you need to “tighten” only one of the sides. To use it – select the needed edge loop and go to Edit > Bevel Edges or [Ctrl+B]
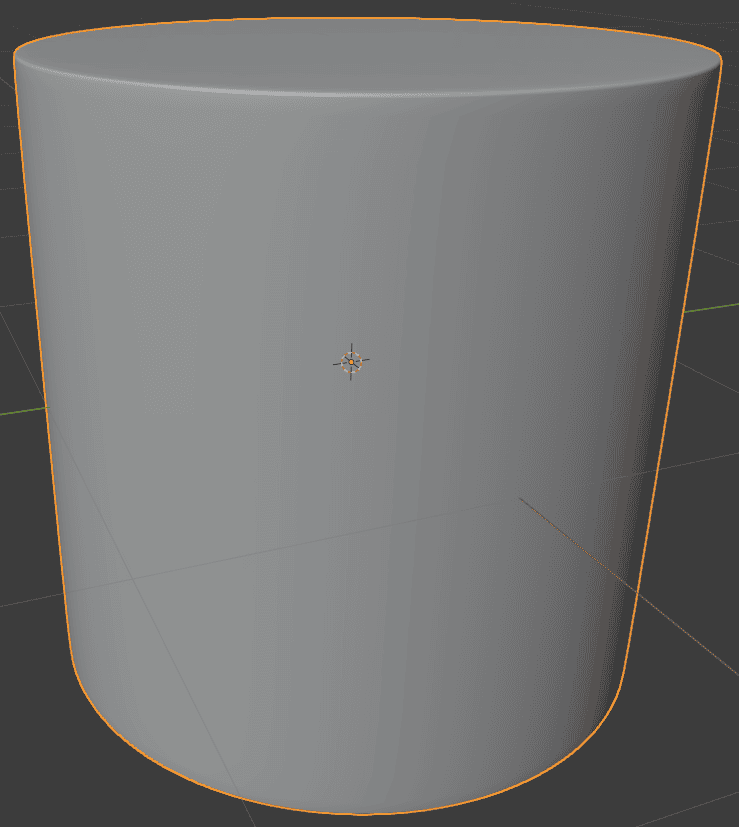
Then use Bevel Settings to set segments to 3 and set the suitable width:

Doing this to both the top and bottom sides yields a really good result. This looks exactly as you would want it to look – a bit smoothed-out cylinder.
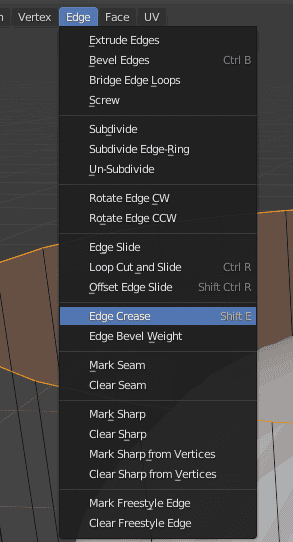
Edge Crease
Last but not least method for this article – Edge Crease. It is a very similar thing to adding a bevel to the object, but without really adding any new geometry. You just need to indicate which edges of the object should not be smoothed out by the SubSurf modifier.
Option to use this tool, same as for the last two, found in the Edge menu. The alternative is to use the [Shift+E] shortcut.
In the case of our cylinder – edge crease does not work that well. Mainly this happened because the top and bottom of this cylinder are n-gons. And it can be difficult to work with one.
Seems that in the case of this cylinder – it would be best to use the bevel method, as both edge crease and loop cut methods had some problems with them.
Blender Subdivision Surface Modifier Settings
We already looked at the main settings regarding the Subdivision Surface Modifier, but this time let’s take a deeper look at what we can do with each of the options here.
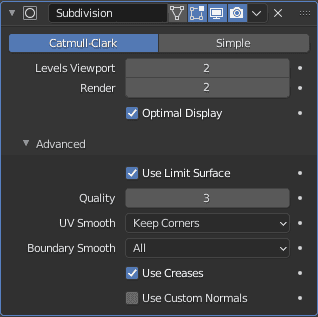
- Subdivision Type – Catmull-Clark option smoothes the whole object, including edges and vertices, and changes the shape. While the Simple option just adds more geometry in form of edge loops, without changing the initial shape of an object.
- Subdivision Levels – Control the level of subdivision. Higher levels subdivide the object more and make them even smoother. But also add a lot of geometry, so this can be very harsh on your computer. Also, you can срфту the levels shown in Viewport and Render separately for more control.
- Optimal Display – skips drawing the interior subdivision of the object. This setting should speed up your renders without changing anything on the render result, as the insides of the objects are not usually seen.
- Use Limit Surface – Makes the smoothest possible shape by placing vertices with the infinite level of subdivision.

Objects with and without Limist Surface turned on.
- Quality – controls the accuracy of the vertex placement. Higher values should be more accurate, while low values yield faster renders. Generally speaking, I don’t recommend changing this setting at all.
- UV Smooth – is for when you are working with UV Editing and Mapping. Helps you to control how UVs would be changed with the modifier in use.
- Boundary Smooth – Controls how to open boundaries are smoothed.
- Use Crease – Choose whether you want to use the edge creases that you placed on your mesh. If this is off – they would be ignored by the modifier.
The left object has Use Crease on, the right object is off
- Use Custom Normals – whether custom normals are interpolated into the resulting mesh or not.
Example of Blender Subdivision Surface Modifier in Use
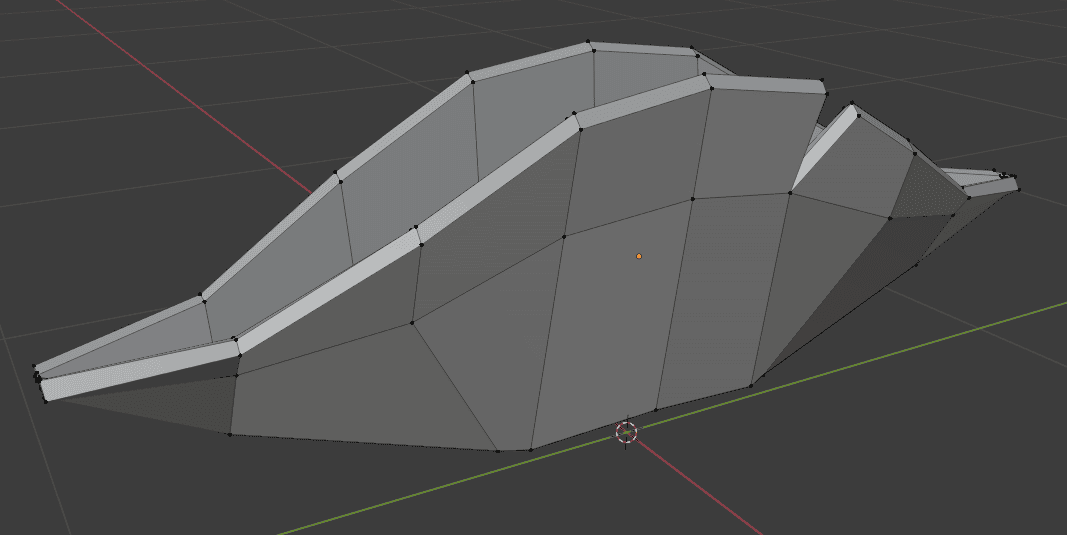
How about a small example to show you how the Subdivision Surface is used on real models? I have created this simple low-poly pirate hat.
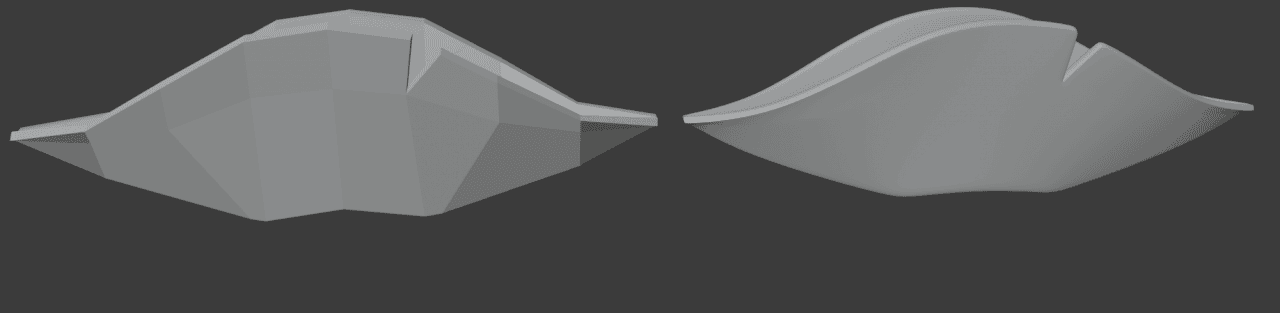
But what if I want to make it high-poly instead? For this, I will use a Subdivision Surface Modifier.
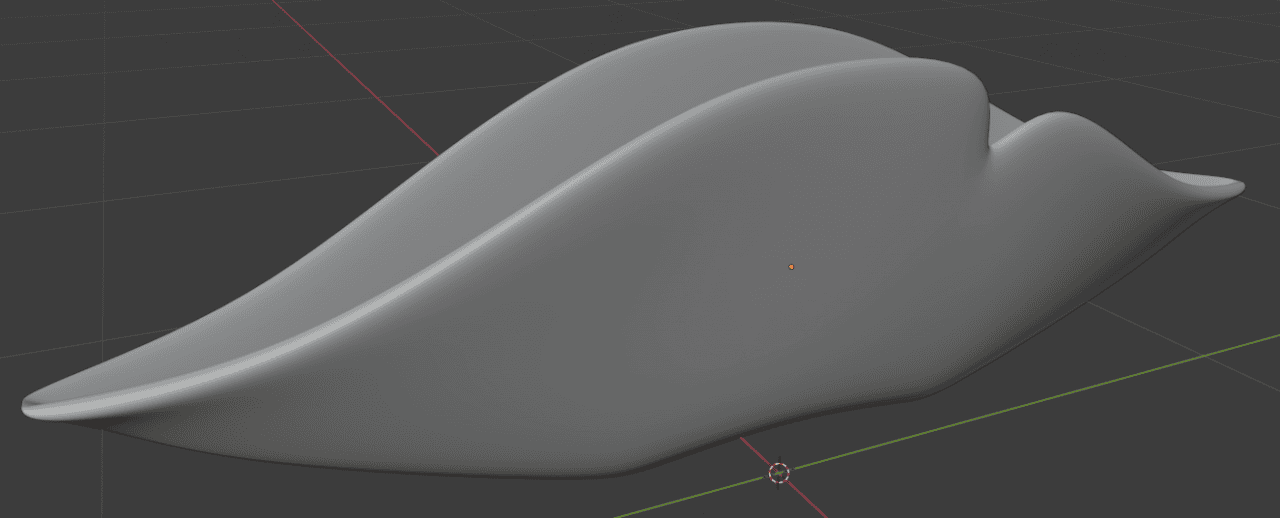
It definitely did smooth out the hat a lot. But now it is too smooth. All of the edges are now smooth and especially the place, where there was a crack now looks odd and weird.
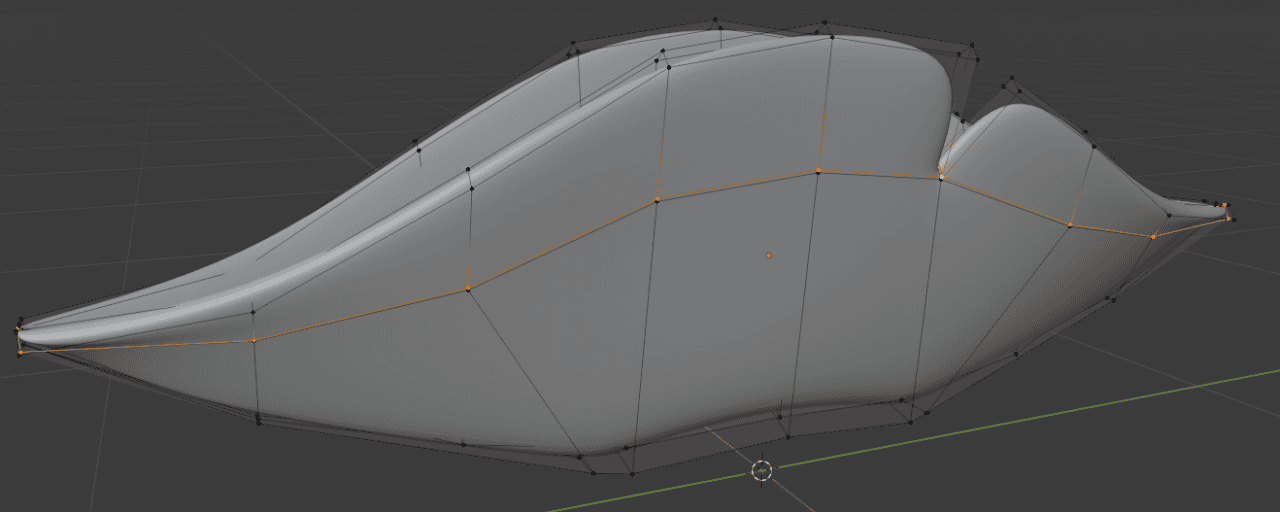
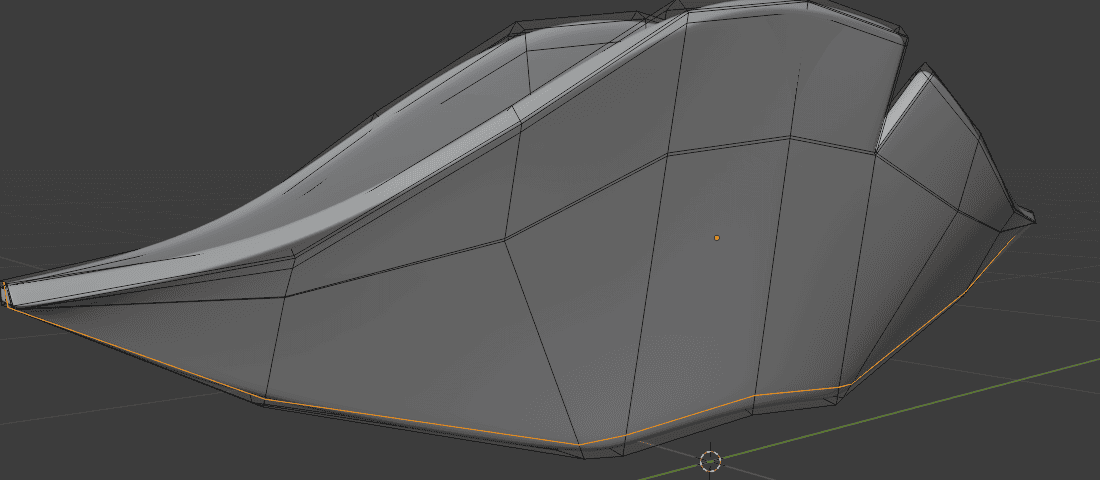
I will use the Loop Cut method on this object. As I said, usually it is the most used one and the most universal. Started by adding two loop cuts near the middle to fix the crack shape.
To improve the top part of the hat – also added some loop cuts there.
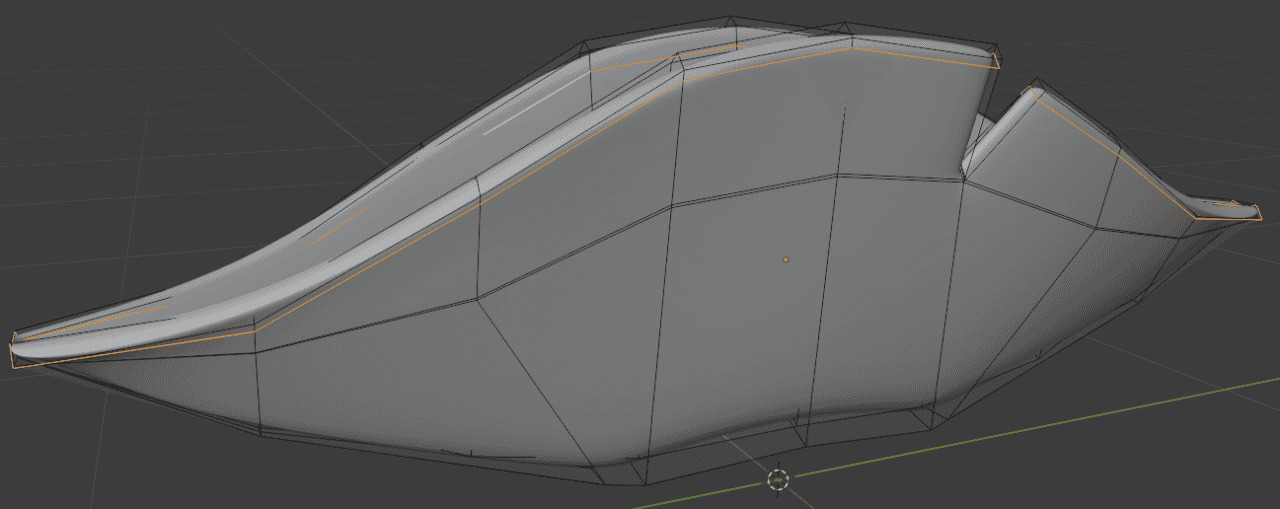
The ends of the hat still looked weird, they were very flat after being smoothed. So one more loop cut there, to help with the shape.
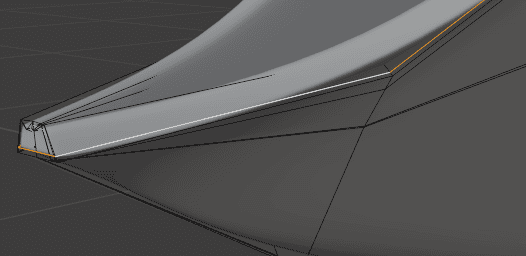
And finally added the last loop cut at the bottom of the object, to tighten it there.
After a little bit of work, we have a high-poly model of a pirate hat. Making it out of the low-poly one was a lot simpler, than trying to model something like this myself.
Conclusion – Blender Subdivision Surface Modifier Tutorial
Subdivision Surface Modifier is one of the strongest tools out there if you plan to create a high-poly model. Allows you to use a low-poly object as a foundation to create something realistic. Though sometimes using it can be confusing and difficult, it all comes with the experience and after some tries, you should be able to do everything yourself. Checkout also our other Blender Tutorials and Top 3D Model Reviews.