
This Blender Add-ons Overview explains everything about addons in Blender. How to install Blender addons, where to find them and recommended ones.
Add-on is a modifier that allows changing the software in some ways. So it can change the functionality of the Blender or even add something new. As Blender is a free, open-source program – it is relatively easy for people to create add-ons. Some of the add-ons can be very useful and maybe even essential, depending on what are you using Blender for and why.
How to Install Blender Add-ons
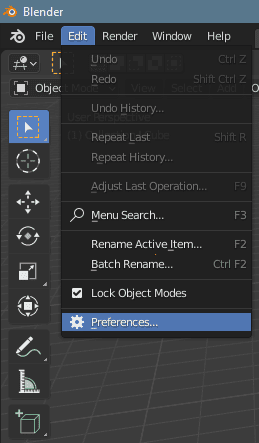
We should start with learning where you can access add-ons in Blender and how would you install them. Firstly, you will need to open the Preferences window. This window can be accessed from the top bar > Edit > Preferences.
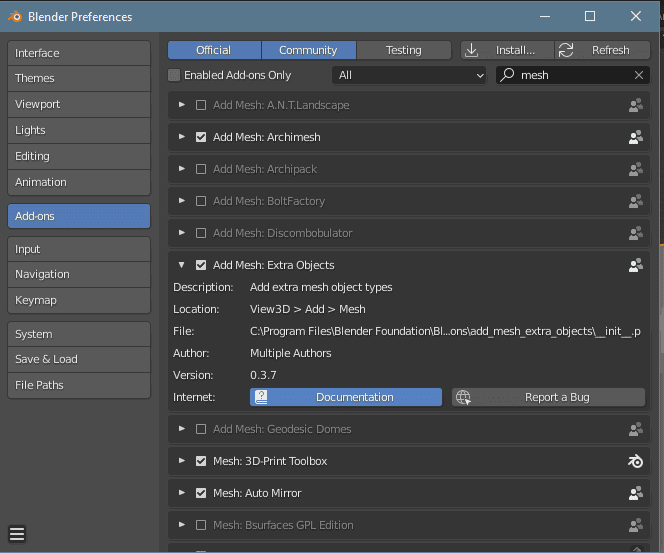
In the Preferences window, there are many tabs that you can see on the left. We will need the Add-ons tab here.
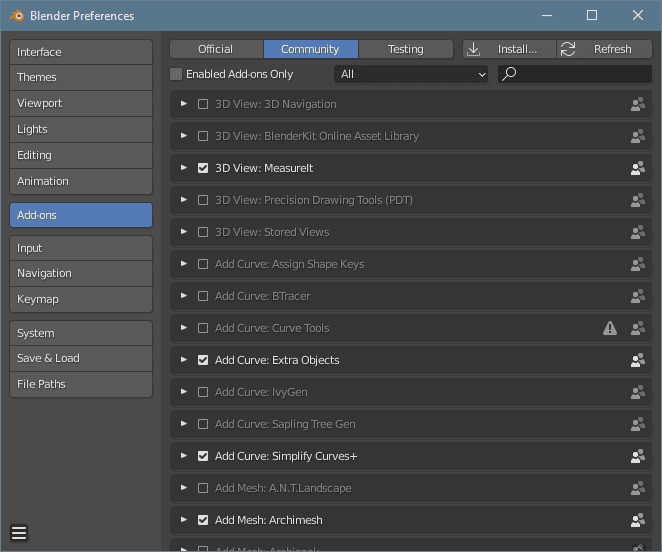
You will find here a lot of the add-ons that are included in Blender from the get-go. A bunch of these add-ons is even turned on by default.
To enable one of these add-ons, all you need to do is click on the checkbox and turn it on. This is it – it will be enabled now.
At the top of this window, you can see that there are Official and Community types of add-ons. So Official ones are made by the Blender team and it includes some very important additions, such as additional import and export options.
While Community add-ons are made by anyone else from the Blender Community. This means that anyone could have made them for any purpose. They can be out of date or just plain useless. But if they were included with the Blender itself – they are probably fine.
If you want to install any additional add-ons that are not included in Blender from the start – all you need to do is find these add-ons and download them on your computer. Then in Blender, in the Preferences window – click on the Install button on the top right and choose the path to the add-on on your computer.

Where to Get Addons
Now you know where you can find add-ons in Blender and how they are installed. But where do you get these add-ons? Well, as mentioned earlier – there are plenty of them that are just included in the Blender after you install it. All you need to do is open the Preferences window and enable them.
But there are far from all add-ons here from the start. And if you want to add any additional ones – you need to find them on the internet. There are plenty of places where you can get them. Examples of the sites, where you can get add-ons from are Blender Addons and Blender Market.
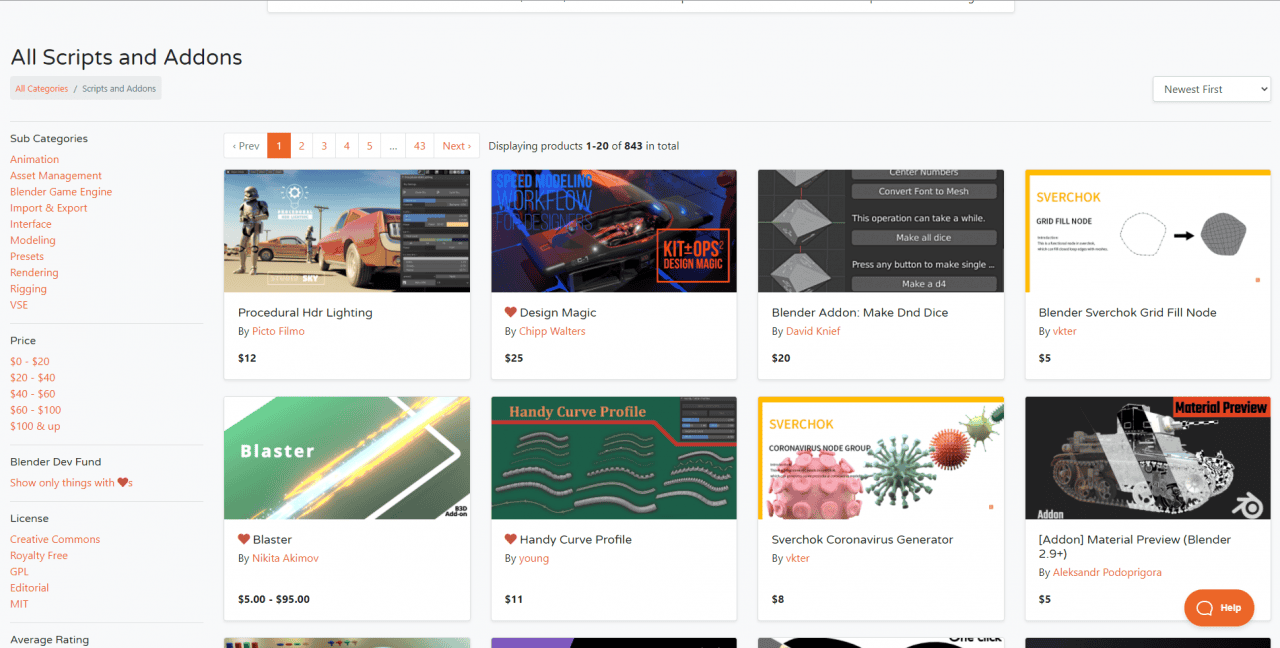
Scripts and Addons section of the Blender Market
How to Use Blender Add-ons
Quite an interesting question – how do you use the add-on that you have installed? And it has a tricky answer to it. It really depends on the add-on that you are using.
A lot of add-ons will add a specific section in the side panel of the viewport. It can be opened by dragging the arrow or by pressing the [N] key shortcut.
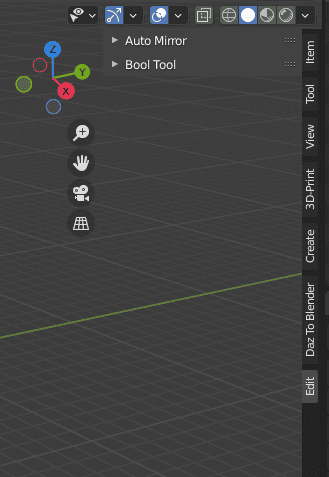
You can see that I have a couple of add-ons installed, so they have added a section in this menu. For example, here I see the Edit section with the Auto Mirror and Bool Tool in them. Both are add-ons that were not there by default. The same goes for the Daz to Blender, Create and 3D-Print tabs.
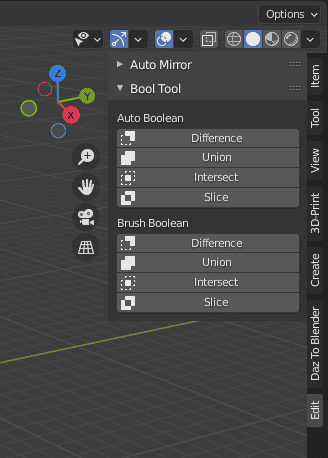
By accessing this tab – usually you can access the functionality of the added add-on. For example, Bool Tool adds a quick and easy way to use a Boolean modifier. So here I can choose between the type of Boolean that I want to use and whether it would be applied automatically or with a Brush.
Though not every add-on works like that. Some just add their new function in the Blender directly. For example, an “Extra Object” add-on adds more objects for you to add to the scene. So when I access the Add menu, they will simply appear there. You can see that I have some unusual options here, such as Rounded Cube and different Torus Objects.
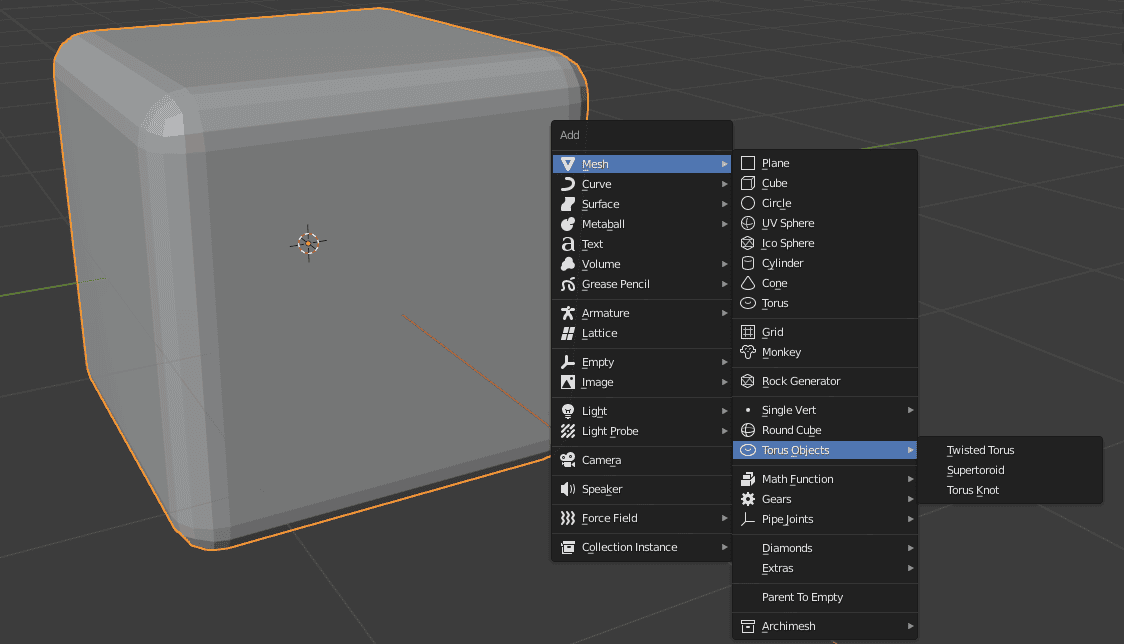
Extra Objects add-on
So you really need to know what exactly the add-on does to use it properly. Because if it will not appear in the side panel – it is possible that you will just don’t know what exactly you have added.
Gladly, most of the add-ons have some kind of documentation that you can read to learn more about them. Usually, you can find them by clicking on the Documentation button in the Preferences menu.
Add-ons recommendations
This article is not dedicated to creating a top best add-ons list or something. But we can’t leave you without any recommendations. So here are some add-ons that we found worth recommending:
- Extra Objects – adds more objects in the Add menu. So there is no need to manually create them.
- The Bool Tool – allows to quickly and easily use the Boolean modifier. Choose two objects and select which type of boolean to use on them and that is it.
- Auto Mirror – automatically mirrors an object on the selected axis and deletes all overlapping geometry. This allows to very easily create symmetrical objects
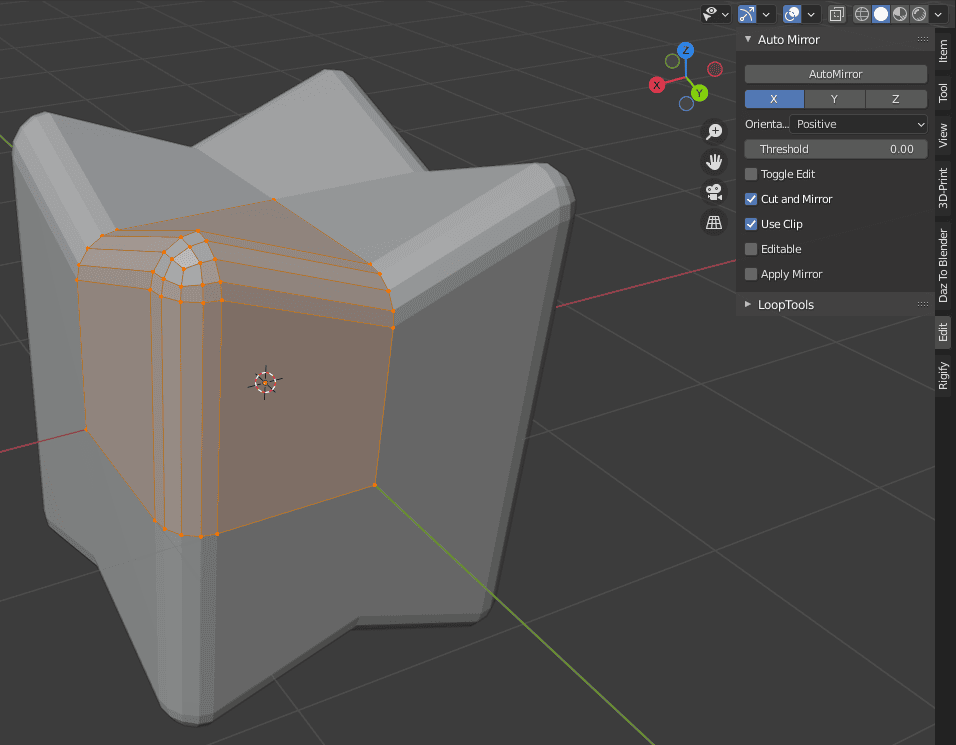
Auto Mirror add-on
- Daz to Blender Bridge – Quick and easy way to import high-poly Daz characters into Blender with the rig included.
- Edge Flow – adds two new operators to work with the edges. One adjusts edges according to the nearest geometry and its “flow”. Another one straightens the edge loop.
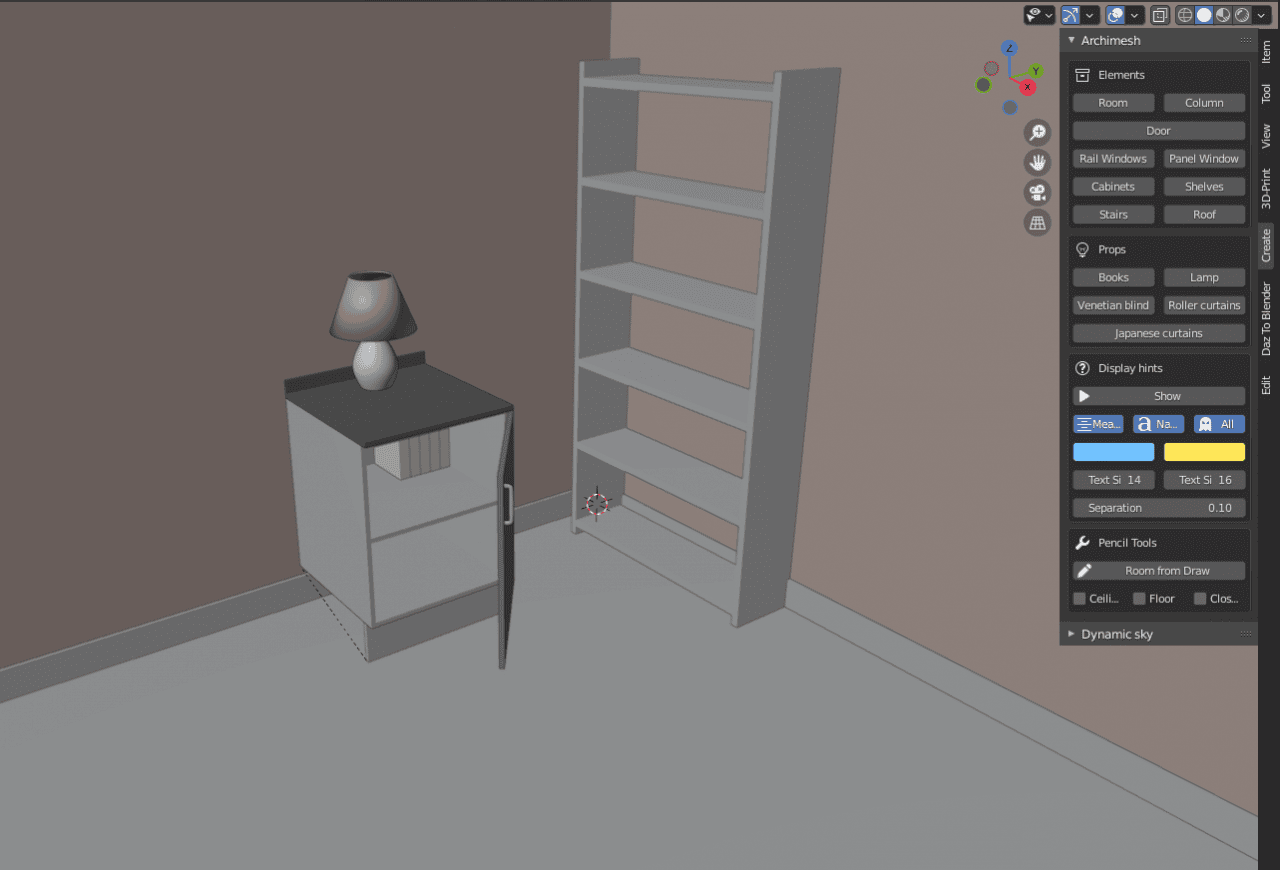
- Archimesh – adds a lot of elements and props that you can use to create a room or a house scene. Very convenient for the simple scenes, where you don’t want to model everything yourself.
- Smart Fill – fill is an existing tool in the blender, that creates a face out of edges. This add-on makes that tool a lot smarter and more useful. Adds such things, as grid fill.
- Node Wrangler – basically a must-have if you are working with nodes a lot. Adds a bunch of useful tools that help to deal with nodding in Blender.

Conclusion – Blender Add-ons
The add-on modifications are very useful. It is not something that you think that you need until you try it. After getting used to some of them, there is no turning back, as it would be very hard to imagine working in Blender without them making life easier. See also out other Blender tutorials.